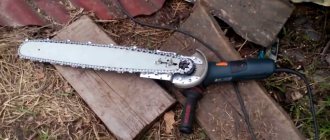
Let's see how to make a stand for an angle grinder with your own hands?
Since the sizes of grinders from different manufacturers vary within any limits and do not coincide with each other down to every millimeter, the number of racks for attaching the tool will be many and different in design. In this case, a personal approach to the design and adherence to the main principles of stand production is important.
- reliable tool fastening ;
- the presence of a counterweight;
- reliable stops and clamps;
- work in compliance with safety regulations, availability of protection.
Let's look at these points in more detail to decide what kind of rack we need.
Universal key for angle grinders
- Keyless chuck Matrix, 1/2, 2-13 mm
RUB 252.00/piece
- Keyless chuck Special 3/8-24 UNF, 0.8-10 mm
RUB 297.00/piece
- Matrix quick-release chuck, M12x1.25, 2-13 mm
RUB 255.00/pcs.
- Keyless chuck Special 1/2-20 UNF, 2.0-13 mm
RUB 322.00/piece
- Chuck with key and adapter Special 1.5-13 mm
RUB 378.00/pcs.
- Universal quick-extension wrench for angle grinders
RUB 323.00/piece
- Cartridge Special 1/2-20UNF, 1.5-13 mm
RUB 331.00/piece
‹ ›
leroymerlin.ru
Secure tool mounting
Many people, inspired by the idea of making a stand, look for drawings on the Internet, without thinking that there may not be any for their instrument, since each model is individual and the fastening to it must be done according to the situation.
I propose to look at different examples of how people made fastenings, and we will take the best from each. Here are a few photos of the location and fixation of the angle grinder based on the needs and desired functionality.
As you can see from the photographs, the mounting of the grinder is individual for each, but the most important thing is that the tool is securely fastened in each of them. In the first photo, the tool is inserted into the frame and secured with bolts at the handle attachment points.
The second example is similar to the first, only the frame has an individual design and a control handle has been added to it, in the form of a welded 20x20 pipe to control the cutting force and ease of operation.
The third option generally captivates with its simplicity and minimalism. Bulgarian
It is attached to a protective casing, in which holes are made for bolts and the entire machine consists of a minimum number of parts.
So, we decided on how to mount the tool. In our case, this is the third option - attaching the tool to the protective casing. It's extremely quick and easy to do.
You will need two 10mm bolts and two self-locking nuts, only the nuts must be attached to the outside of the casing. A couple of plates and a pipe on which everything is attached. I suppose it won't be difficult to find such parts.
Which way does the grinder unscrew?
News
How to remove and change a jammed disc from an angle grinder?
How to remove a disc from an angle grinder. An angle grinder (hereinafter referred to as an angle grinder), commonly called an angle grinder, is probably the most necessary equipment that is in the arsenal of virtually every craftsman, regardless of his qualifications.
This is a tool intensively used in abrasive processing: cutting, grinding, cleaning workpieces made of stone, metal and others. It is widely used in areas such as construction, woodworking and other similar works. Just like any other instrument, grinders are also divided into several classes.
There are the following reasons: household, semi-professional and pro-class tools. This systematization is determined by the power resource of the tool, its performance, the presence of certain additional options, material and build quality, etc.
Consumables for angle grinders, in addition to different types of cleaning brushes, are cutting wheels and various grinding discs. Types of equipment for an angle grinder: how to make the right choice?
Grinder discs differ from each other according to the following main characteristics:
- External diameter;
- Disc thickness;
- The material from which the disc itself is made;
- The line of the highest rotation speed;
- And, naturally, the area of proposed work.
For a better understanding, it is necessary to consider the main types of discs for an angle grinder and define their use:
- Cutting wheels. These are the most widely used consumables for grinders. Their main purpose is to work with metal, stone and wood. Diamond discs are a type of cutting wheels for grinders. This is heavy-duty equipment for processing materials of increased strength, such as reinforced concrete, tiles, porcelain stoneware, marble.
- Grinding and roughing wheels. As is clear from the name, this type of disc is used for grinding various materials, for example, polishing products made of stone, or for removing (scraping) the top layer, for example, eliminating a layer of rust or an old paint coating.
Cutting wheels for grinders, in turn, have their own subtypes, such as:
- Cutting wheels for metal work;
- Abrasive wheels for working with stone;
- Circles for woodworking;
- Diamond blades (the availability of which was mentioned above).
The purpose of each type of disk usually corresponds to its name.
Among grinding discs, there are four main subtypes - flap, wire, diamond and bakelite-based grinding discs (straight, profile T41 and disc, profile T27).
- The petal disc is made of sandpaper. Its main purpose. This is the elimination of an existing coating, such as ancient paint, primer or another layer of coating. Also, discs of this type are used for polishing wood products.
- Wire discs are used by craftsmen to remove rust. They also have the option of removing other types of stubborn stains.
- Diamond discs are used for polishing stone.
- Disc discs are made of plastic or rubber and are used for polishing metal.
Please note: when working with most discs, a special paste or lubricant is used, which contains finely ground abrasives. They are mainly used for grinding surfaces, such as, for example, auto body parts.
The main question: How to choose the right disc for an angle grinder?
When choosing accessories for an angle grinder, first, you should decide on the type of work you intend to do. For this reason, the choice of disk type directly depends. We would also like to mention that when choosing a consumable for yourself, be sure to take into account the power properties of each specific model. Study the labeling. Often, it is printed on the disk itself and contains a set of signs by which it is possible to find the relevance of a given consumable for performing the intended work.
Also, focus your attention on such a parameter as the diameter of the disk. It should not exceed the size of the protective cover on a specific tool model
The size range of disks is usually represented by the following diameters: 115, 125, 150, 180 and 230 mm. The most common diameters are 125 mm. and 230 mm. They are optimal for most types of work and the capabilities of the tool itself.
Presence of counterweight
It is up to you to decide whether the rack should have a counterweight, but its presence makes the work easier and serves as an indirect element of safety. In theory, if you let go of the tool, it should rise to a vertical position and stop cutting material.
I would advise you to turn off the end switch in the uppermost position so that when the angle grinder comes into it it will simply turn off; this measure will strengthen the security measures of your homemade device.
If you look at the photo above, you can see that two of them have counterweights, in the third case there is none. Which, in my opinion, is a drawback of this design. Here are some more examples of how you can make a counterweight. It is enough to install a spring, matching it to the weight of your tool, a simple and effective solution.
We figured out the counterweight, so as not to make the structure bulky, it is better to install a spring as in photo No. 5. The stand is easy to manufacture and allows you to tilt the angle grinder more than 90 degrees, unlike the one in photo No. 2, this property can be useful when working with large objects .
Advantages of installing a disc with a ring to an angle grinder
Cutting wheels do not have a programmed direction of rotation
Therefore, it does not matter which party will install them. But as mentioned above, installing the circle with the front side outward makes the process of replacing it easier (unscrewing the nut on the abrasive side is much more difficult). In addition, this installation provides several other advantages.
In addition, this installation provides several other advantages.
Guaranteed smooth installation on the shaft
The metal ring increases the support area. Therefore, when the disk is installed on the shaft and the nut begins to tighten it, the pressure is distributed evenly. This ensures that the cutting wheel fits evenly and reduces the chance of damage due to misalignment.
Ease of disk installation
Installing the abrasive wheel with the front side facing out provides another advantage - you will always visually see which attachment (for metal or stone) is currently installed on the grinder. They are not interchangeable and if there is a mistake there is a high probability of serious consequences. For example, when trying to use a metal cutting disc to cut through concrete, it may be destroyed and the master may be injured by the resulting pieces. Therefore, installing an abrasive wheel with the label facing out will ensure not only convenience, but also safety of work.
Prescription instructions
The instructions for many angle grinders, such as the Metabo WP 850, clearly state that “the metal flange of the abrasive cutting wheels must rest against the support flange.” It is not for nothing that manufacturers give such recommendations, since they ensure safe work with the tool and reduce the risk of serious injury to the technician.
Reliable stops and clamps
All five photographs show various devices for clamping a part, all of them are good and convenient in their own way and, nevertheless, from them you can choose the most correct solution. The most reliable and reliable fastening option is a vice.
- They securely fix the workpiece.
- You don't need to hold it with your hands.
- If the disk breaks during a cut, it is extremely difficult to hold the part in your hands, and if it is in a vice, the risk of injury is reduced.
- And if you purchase a rotary vice and make a longitudinal groove at the base of the stand to move the fasteners along the cutting line, then you will be able to make an oblique cut, which increases the functionality of your machine.
Read also: Manual jigsaw for figure cutting on plywood
Wood grinder circles
What types of wood cutting discs are there? Just because wood is a soft canvas, this does not mean that working with it is not dangerous. It is worth noting that this process should only be carried out by a professional, even if a high-quality and suitable circle is installed.
If you study the specifics of the equipment used, you can choose the right wheels for an angle grinder for safe and effective processing of natural wood.
A wood disc for an angle grinder can be:
- Whole;
- With high-carbon steel brazing, which is located along the peripheral part of the disk.
The first type of disk is considered not very durable compared to the second, since the circle on which there is soldering requires an additional cleaning procedure. They are more durable and strong.
The disc for the angle grinder has a different configuration, a diameter of 125 mm and a seat size of 22.2 mm. It is strictly not advisable to use a larger saw blade, as this can be extremely dangerous. To be more precise, during operation, the canvas will gradually heat up and expand, which will lead to the circle being pinched or bitten. The consequences include disinhibition of the disk and literally tearing of the equipment out of the hands of the master. Tragedy cannot be avoided here, and therefore you should not violate the recommendations of experts regarding the operation of the product. Each circle has certain dimensions, and all parameters of the product are indicated on its coating or packaging. These include: the grade of steel from which the teeth were soldered, for example, VK-15; the number of revolutions, which is indicated by the letter H; the diameter of the product and the size of the landing opening; number of teeth.
Summarize
What you need to
make a stand with your own hands .
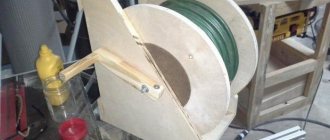
- 2 meters of profile pipe, provided that you don’t have the base for your stand lying around anywhere, an ordinary metal frame measuring 400x300.
- A spring for creating a counterweight can be bought in a store or taken from an expander.
- A couple of bolts and a few tubes to make some kind of bearing, if you don’t want to suffer with the rotation unit.
- Metal sheet 400x300x3 for a reliable base.
And in conclusion, several video examples of how to make a frame for an angle grinder in an hour with step-by-step instructions and a detailed description of the dimensions. Since everything is clearly explained in the video with explanations of the dimensions of the parts, you can do without a drawing.
Simple, quick, from improvised means and the rubbish that is in almost every garage. Remains of a profile pipe, a metal frame and several bolts. Yes, you can’t do without welding during manufacturing.
But this is not a hindrance either; you can cut the workpieces and ask a welder to weld everything for a small price. In any case, it will cost much less than an expensive stand from a store, and the quality is no worse.
What can be done to prevent this from happening again?
In order to avoid this situation again, you can place a plastic, paper or cardboard washer under the nut before clamping the new disk. And in such a case, the nut can always be unscrewed without any problems. Nowadays it is not always possible to find cutting stones or discs of the required quality and therefore their breaking becomes a frequent problem. Of course, the human factor of improper operation cannot be ruled out. But now, if you find yourself in a similar situation, you know what to do. See you again!
Work in compliance with safety regulations, availability of protection
In all the examples considered, the cable from , a must be secured to the moving part of the rack, and in the last case, photo No. 6, it generally stretches across the working area behind the operator’s back, which makes our rack extremely dangerous; avoid such omissions during design and operation.
I recommend that before starting work, you should secure the power cord with regular plastic clamps in several places to avoid it getting under the cutting tool and, in general, it will simply not get in the way.
If it is inconvenient to work with glasses, do as shown in the video below. An example of an excellent device for protecting against debris flying while cutting metal. Simple, easy to use and quick to remove.
Sorry for my French, but I can’t express myself differently. I screwed up the key for the grinder. Went shopping: Stroitel, K-rauta, 220 volts. Everywhere I was denied love and affection. And at 220 volts they recommended buying the cheapest grinder, because... Keys for angle grinders are supposedly not sold separately. In connection with this, the question is: is this the TRUTH.
and I almost never use such a key - only a gas key with a standard one constantly confuses your hands. If you want, I’ll see if there’s a couple lying around in the garage somewhere.
go to local markets and repair shops
I have the same 4 pieces, although I will be closer than FF Group by 700 kilometers
..that's right..
FF_Group wrote: key for grinder.
.. maybe buy a keyless nut and forget about the key forever.
super-krot wrote: at 220 volts they recommended buying the cheapest grinder, because... Keys for angle grinders are supposedly not sold separately
The key that comes with the cheapest angle grinder may turn out to be bad. Probably the best advice is from helmutivan:
helmutivan wrote: buy a keyless nut
They are for sale, I have seen them more than once, and even a universal one - with extendable “mustaches”. I twist it myself by hand and it tightens as I work. When I bite, I unscrew it with a gas valve.
2FF_Group Walk around the SC, it’s usually there.
I've seen keys like this on sale somewhere! So they sell. I could be wrong, but try it at "Metiz"
There is no shortage of them in Joburg; they often catch your eye.
What kind of ushm? Maybe I have such a key, I’ll send it if you don’t find it.
FTOPKU. Their prices are through the roof!
**** is generally inadequate.
super-krot wrote: And at 220 volts they recommended buying the cheapest grinder
hey, I guess your Hammer?? The maxidom had KWB keys for different nuts. rubles under 200 pcs. Another option is to do it yourself, because... For example, my Makita and Cress keys don't have very hard fingers. Option three is to ask at a flea market.
super-krot wrote: Everywhere I was denied love and affection
Stop by tomorrow at the Hilti Center on Fuchika, 4B, there is one thing there, article number 93932. Unless, of course, you don’t mind 148 rubles.
Hilti_Team Maybe the author has a 230th angle grinder.
And they have the same keys, both 125, and 180, and 230. At least, this is the case with Hilti. I think 35mm between pins.
Only Metab keys do not fit Bosch. you need to take the nut with you
I made it myself from an open-end wrench, drilled and welded hardened fingers (3 pieces). Hood. Dear such x.
Hilti_Team wrote: And they have the same keys
No reticence. The nuts are the same for all Hilti angle grinders. You can buy it there, M14, art. 93935, about 175 rubles.
Hilti_Team wrote: No reticence
I don’t know how to “unfold” pages, but there’s an extra. information marked: Characteristics Additional information 125mm/150mm and that's it. as if implying that the key is different for 180 and 230. Yes, God bless him, identical and good
FF_Group wrote: if you want, I’ll take a look, there’s a couple lying around in the garage.
Thank you, comrade, but honestly, our “villages” are too far from each other))
R8ven wrote: I have the same 4 pieces, although I will be closer than FF Group by 700 kilometers
I am ready to move to the specified coordinates at any time tomorrow!
helmutivan wrote: maybe buy a keyless nut and forget about the key forever.
What kind of thing is this? However, I’ll ask differently. It suits everyone's ears. Although, why ask, you have to go to the store.
sledoput wrote: hey, I suppose you have your own hammer??
Yes, h.z., land. I was simply speechless from such a “brilliant” proposal, and the thought of clarifying what was meant by “the cheapest earphone” did not occur to me.
Tundra wrote: I tighten it myself by hand, they tighten up when working.
Novosib
Read also: Angle at the top of a metric thread
2Hilti_Team
Hilti_Team wrote: Stop by tomorrow at the Hilti Center on Fuchika, 4B, there is one thing there, article number 93932. Unless, of course, you don’t mind 148 rubles.
Where does this “farsightedness” come from?
Suever wrote: What the hell? Maybe I have such a key, I’ll send it if you don’t find it.
In general, thanks to everyone, guys! For your responses. Here, as Shura Karetny said, the last hairs on my ass stood on end with frustration (the key went with those frairs - although the frair in this situation is more likely me. (( - who did my repairs, and this was just the last straw for me , control in the head :cool, and the fact that you reacted to my post clearly shows me that there are still more good people in the world than freaks of all stripes.
The nut is stuck - how to unscrew it?
Removing a disc on an angle grinder if it is bitten is not so easy, especially without damaging the cutting element or tool. We will also consider several options for action.
Replacing a counter-rotating disc
This method has several advantages - it can be done without a key and with a broken spindle lock. Beginners in working with angle grinders mistakenly believe that if the stopper breaks, it is almost impossible to unscrew the nut. However, this is not the case. You don't even need keys.
The point is that the abrasive wheel needs to be rotated in different directions. Wearing thick gloves, you need to hit the cutting edge of the circle several times. This is what will ensure variable movement in different directions. As a rule, a couple of sharp blows are enough so that the nut can be easily unscrewed.
Read also: The most powerful electric boat motor
Open-end wrench and socket head
In this case, you will have to slightly modify the existing standard tools - a 17 mm open-end wrench and a 24 mm socket. The thickness of the key is ground down to 4 mm. 4 protrusions are machined on the head and fit into the holes of the retaining nut.
After preparation, the key is placed in the space under the disk, and the head is put on the flange of the angle grinder and rotated in the direction opposite to the rotation of the wheel. After this, you can easily remove it and install a new one.
Heat
This is one way to remove a disc from an angle grinder without a key. The fixing nut is heated with an industrial hair dryer or a gas burner. After this, the flange will unscrew much easier. However, there is a risk of damage to the plastic parts of the angle grinder or gearbox.
With a nail
For these purposes, a 100 mm nail is best suited. It should be bent into a U-shape so that the ends fit freely into the holes of the clamping flange. The tip and cap are removed. By inserting a nail into the holes, the latch is unscrewed. If the manual effort is not enough, then add a nail or screwdriver in the form of a lever.
Using a gas wrench
The use of this tool is justified by an increase in the applied moment of force due to the increased arm. Using a gas wrench will make it much easier to unscrew a jammed connection.
However, when eliminating snagging, it is important to remember that by applying excessive force, there is a risk of damaging the spindle lock or clamping nut
Using a rotary hammer or drill in chiselling mode
You can unscrew the disc on an angle grinder without a key using a drill or hammer drill, having first switched it to jackhammer mode. A suitable drill, most often 6 millimeters, is used as a working attachment. Place the drill against the edge of the hole in the clamping nut, fix the movement of the spindle and briefly turn it on to move it from place. This method allows you to turn away even very complex snacks.
Tapping the nut
This method is similar to the previous one, only you can use a suitable metal rod or chisel. Having fixed the spindle head, tap along the edges of the clamp holes in the direction of movement of the wheel. By slightly moving the lock from its dead point, you can unscrew it by hand. However, the method is not the most harmless for the tool - the mounting holes for a standard key are damaged.
Cutting wheel destruction
You can unscrew a jammed nut by completely destroying the disk. If there is already damage, you can break it off with your hands, but most often this will not be possible. It’s better to take a hacksaw or metal blade and cut it. This will leave you with a center ring and hard-to-reach pieces. Having found a suitable plate, holding it in a vice, grind off the remaining abrasive on it to a metal ring. After this, it will be easily unscrewed with a standard key.
The most radical way to unscrew a jammed clamp nut is to cut it. It is advisable to resort to it only in extreme cases. Of course, you can find a new one, but you will have to spend your time and money. It is not uncommon for spare clamping elements to be included in the delivery set of an angle grinder.
How to make a key for an angle grinder
Tools sometimes get lost, especially for small items. So, today we will talk about how to make a key for an angle grinder.
- dense durable material of wood origin;
- drill;
- pencil;
- saw;
- Sander;
- two bolts.
As for the material of manufacture, we recommend using thick plywood.
First, drill holes in the workpiece you prepared. For marking, use the mounting part of the grinder.
Trim off the excess. You need to make a handle. You will need a jigsaw.
Round the product. As you can see, in our case the master has a large assortment of machines. We assure you that you don't need all this. A jigsaw and a grinding machine or an emery machine will be enough.
Mark the locations for drilling holes.
Drill them with a slightly smaller diameter drill, then cut the threads. Of course, you can do without cutting, this is not at all necessary.
Screw the bolts into place. If necessary, tighten the nuts on them if they are too long.
Perform final sanding.
As a result, you should get something like this key for an angle grinder.
In principle, everything is easy and simple. Once again, we note that it is best to use plywood.
Accessories for grinders and angle grinders
| All products Select store | Show: |
| Sort by: Popularity Rating Ascending price Descending price | Show by: 20 40 80 products |
Useful information
This section presents special accessories for angle grinders - wrenches for angle grinders, clamping nuts for angle grinders, support flanges, stands, protective covers, etc.
To protect the operator while working with an angle grinder, it is recommended to use a protective cover that prevents dust and small particles from getting into the eyes. The casings differ in the overall diameter of the discs for which this or that model of angle grinder is designed. Those craftsmen who often have to work with an angle grinder in different parts of the workshop and move it are recommended to purchase a support stand. Thanks to it, working with a grinding machine becomes much more convenient. They also differ in the diameter of the angle grinder disk for which they are suitable.
If it is necessary to change the disk, you can use special keys for angle grinders; their main difference is the diameter of the equipment for which they are suitable, and the support flange for the grinder and the clamping nut for the grinder will help to securely fix the disk. If you need to use a disk whose mounting hole is larger than that of an angle grinder, you will need adapters for grinding wheels - thanks to them, you can securely fasten the disk for further work.
For processing surfaces made of hard material - concrete, granite, etc. - the section presents other accessories for an angle grinder: diamond end mills of various diameters.
Reviews of accessories for angle grinders and angle grinders
Manufacturers
Top
Down
www.vseinstrumenti.ru
How to change a disc on an angle grinder: 4 unconventional methods
An angle grinder is a universal power tool. With its help, you can cut steel profiles and wood, process concrete and stones, perform grinding and roughing work, and sharpen hacksaws. And for each operation there is a specific circle. For example, you cannot grind surfaces with a thin cutting wheel for an angle grinder - it will quickly break. How to properly place a disc on a grinder when grinding and breaking a wheel or switching to another type of work?
According to the instruction manual, replacing the disc on an angle grinder should be done as follows.
- Unplug the power tool cord from the outlet.
- Press the spindle rotation lock button.
- While holding the grinder's stop button, use an open-end wrench to unscrew the flange nut. You need to turn the angle grinder wrench in the direction of rotation of the disk. If it is difficult to press a button with one hand and operate the key with the other, ask someone close to you to help.
- Remove the old disk from the spindle shaft.
- Install a new disk.
- Secure it with a nut manually or using the same universal wrench. At this moment, you need to hold the stopper with your other hand. Do not overtighten the nut.
- Plug in the grinder for 30 seconds at maximum speed. If the disk rotates freely, without beating, without touching the protective casing, you can start working.
The delivery set of the angle grinder must include an open-end wrench. Cheap grinders often come with a poor quality key. It can quickly break (however, this also happens with tools from leading manufacturers). In the end, the key can simply be lost. How to properly install a disc on an angle grinder in this case, without having a suitable tool at hand?
Read also: DIY tool organizer for the wall
The most reliable way is to simply buy a new key. You can take a standard one, for a specific flange for an angle grinder, or a sliding one, with the ability to adjust the jaws. But keys for angle grinders are not sold in all hardware stores, and finding the right tool can be difficult. We bring to your attention several tricks with which you can change the disc on an angle grinder without a universal key and save nerves and money.
How to change a disc on an angle grinder without a key?
Method 1. Use a gas wrench. Use an adjustable pipe wrench to grasp the nut and carefully unscrew it without applying much force. Disadvantage: you can crush the nut and break the rotation lock.
Method 2. Make a homemade key for the grinder. To do this you will need a long nail (at least 100 mm). You need to cut off the head, the point and give the nail a U-shape. It should be bent in such a way that the “tool” posts fit into the holes in the flange. If the nut is tightened tightly, insert any metal rod between the posts of the nail and, holding it with both hands, rotate the structure in the direction of movement of the circle. At this time, you need to press and hold the spindle lock button. The method is safe, but it requires time and additional tools - a hacksaw, a vice, a hammer.
Method 3. Tapping with a chisel. Before changing the disk, you can treat the spindle shaft with WD-40 and wait at least 15 minutes. Then place the tip of a thin chisel at an angle to the hole of the flange nut and gently tap over the entire surface of the hole with a plumber's hammer. Sooner or later, thanks to gentle tapping, the nut will move, and it will be possible to unscrew it manually. The disadvantage of this method is that the holes can be damaged and the flange can be damaged.
Method 4: Heat the nut. If it is difficult to unscrew the angle grinder nut by hand, you can heat it a little with a gas burner or autogen. You need to wear gloves when unscrewing the flange to avoid getting burned. This is the riskiest of the proposed methods. It is possible to overheat the bearings and oil in the gearbox of an angle grinder.
Finally, I would like to mention a few important points regarding replacing a disc on an angle grinder.
- You need to install wheels of the appropriate size on your angle grinder. It is necessary to strictly observe safety precautions and under no circumstances remove the protective casing to install a disc of a larger diameter. When choosing a disk, you need to take into account the model of the power tool, its power, and spindle speed.
- Due to the disk rotating at high speed, hardening forms on the protective casing of the angle grinder. Therefore, when changing a disk, remove and clean the casing.
- Some models of angle grinders are equipped with washers to prevent the disc from getting stuck between the flanges. At the very least, the support flange can be equipped with a rubber washer. Instead of factory fasteners, you can cut gaskets from cardboard, rubber or plastic. It is necessary to use 2 gaskets: between the support flange and the disk, between the disk and the nut.
- Do not forget: if the circle rotates clockwise, then the nut is also unscrewed clockwise and tightened counterclockwise.
- If you don’t want to buy a new key, install a Bosch quick-release nut on the angle grinder - you can easily unscrew it by hand.
The main thing is that when changing a disc on an angle grinder, do not violate safety precautions and perform all manipulations with the tool unplugged.
How to choose?
The key used during operation must provide quick and reliable clamping of the disk, so the tool is made of high-strength steel; only under this condition will it work for a long time.
- presence of a soft start function (prevention of jerks during startup);
- possibility of blocking brushes during power surges;
- option for automatic spindle balancing (reduction of runout during use);
- The ability to hold the start button is a very useful feature during long-term work.
Some craftsmen prefer to use a universal wrench to work with an angle grinder. This device can tighten and loosen threaded flanges not only on an angle grinder, but also on a wall chaser, and even on a circular saw.
The main part of the key is made of tool steel. It would be very good if the handle had a polymer coating. The universal device has a movable working part, the dimensions are very smoothly adjustable. Their range can vary quite widely.
- Judging by customer reviews, attempts to find such a tool in branded retail chains and large electrical goods stores are usually not successful. It is advisable to look for a key for an angle grinder at construction markets and in stores selling hardware.
- When choosing, please note that a device from one brand may not be suitable for grinders from other manufacturers. To minimize the risk, you should take the nut with you as a sample. You can make such a mechanism yourself using an open-end wrench: in this case, the workpiece is drilled and the hardened fingers are welded.
- The steel grade must be indicated on the handle of a high-quality adjustable wrench. If the manufacturer does not do this, then it cannot be trusted.
- It is undesirable to purchase a mechanism with even slight play.
- The diameter of the nuts (in millimeters) that the factory wrench can unscrew is indicated after the letters “KR”.
- Before purchasing, you should check the tool in your hand to see if it will slip out.
You should not buy goods from companies of dubious quality that offer too low a price.
You will learn how to make a universal key for an angle grinder in the video below.
A universal element for any builder is an angle grinder or, more simply put, an angle grinder. With the help of a grinder, you can cut steel, wood, or process stone or concrete, as well as carry out grinding work or sharpen workpieces. Each operation has its own nozzle and you cannot work on the material with a circle that is not intended for this. For example, you cannot grind surfaces with a thin cutting wheel. In order to replace the nozzle you need a special key, but how can you do this without the help of a key?
✨34. Pneumatic grinder
If you have a powerful compressor on your farm, then it doesn’t hurt to also have a pneumatic tool that runs on compressed air and at the same time has a number of advantages over its networked counterparts.
The most significant advantage is the ergonomics and size of the tool, the absence of a motor allows you to make the device small, which makes it possible to work in hard-to-reach places where electric analogues cannot reach.
Also, the weight of the product is of great importance for people who work with angle grinders for a long time; in this case, pneumatic tools will give odds to electric tools.
The proposed grinder has an aluminum alloy body, an inlet fitting for a quick-release coupling, an air supply valve and a gearbox.
A grinder, like its electric counterparts, is used for removing burrs, grinding welds, cutting materials, etc. The rotation speed is up to 10,000 rpm, and can be adjusted by the pressure supplied from the compressor.
What else can you do?
If the above methods do not work, then the nut will have to be heated with a gas burner. Under the influence of high temperature, the nut will expand and begin to rotate. You can also use a rather barbaric method, namely sawing the nut with a hacksaw. Then you will have to buy a new one. Some technicians use WD-40 penetrating lubricant. It is used for processing threaded connections. Judging by the reviews, after just a few minutes the nut can be turned.