Assortment of attachments
The most common products for processing automobile bodies are: sponge-like, abrasive with varying degrees of grain, felt, having a soft surface. They are conventionally classified according to the type of production into two types:
- petal (has high productivity and high price);
- surface grinding (made like a rubber disc with an additional coating for processing).
The material for these items is dense foam rubber or felt, which has different diameters. However, kits are sold that consist of several elements that have different purposes and manufacturing complexity.
Curved lines and profiles
Sanding difficult edges and profiles requires special flair and the right sanding tool. A boss with a sandpaper pad will not work here. It is often more convenient to work by simply taking the paper in your hand and holding its edges between your fingers so that they do not scratch the part.
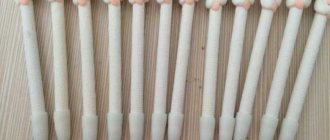
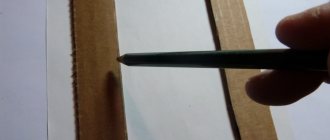
When processing parts of complex shapes, it is advisable to use homemade “files”. They are made as follows. Narrow strips of sandpaper are glued onto strips or round sticks. With such “files” you can cleanly process the smallest curves or the narrowest recesses on turned parts.
Sanding sponges, which are sold in hardware stores along with sandpaper, are well suited for sanding rounded surfaces. The sponges have an abrasive coating of coarse, medium or fine grain on both sides, and a thin soft spacer between the coatings gives the sponge special flexibility and elasticity. There are also sanding sponges that are thicker and quite rigid: they are designed for sanding smooth, defect-free surfaces.
Wood dust is removed from the sponge by squeezing it. You can also wash the sponge, but wait until it is completely dry before using it again.
Coarse, medium and fine grit sanding sponges are particularly suitable for sanding curves and profiles.
The sanding jaws are so flexible that they fit tightly around any curve and even multi-stage profiles.
sandpaper for wood
If you hold the sandpaper with your hand, be careful not to let the edges of the paper scratch the wood.
Sanding "files" can be made from strips of suitable sandpaper glued to strips or round sticks.
Making your own nozzles
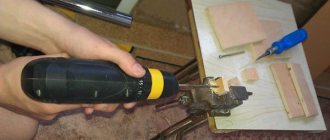
If there is no suitable option on sale, then for a disk with a high level of rigidity you can make a soft layer of great thickness and place it between Velcro and a plastic base. Using a utility knife, you need to cut off the Velcro where the soft layer will be glued. For the soft layer, a bath sponge is mainly used. It must be remembered that individual elements can shift, breaking the overall symmetry.
You can also use a felt disc, which is used in a polishing machine and machine. First, you should make a pin with a suitable diametrical size and apply a thread on one side. On this side you need to secure the disk, which is surrounded on both sides by a wide nut and a limit washer. This device is not difficult to manufacture and can be used to process various surfaces.
Sanding smooth surfaces
When sanding smooth surfaces, it is important to use sandpaper correctly: sandpaper that is too rough will scratch the wood, sandpaper without a boss will sand the surface unevenly. The boss ensures an even fit of the skin to the wood over a relatively large area. Usually a cork boss is used. But a small wooden block with even, smooth edges will do just fine. You can also use special holder pads made of hard rubber or plastic: they consist of two parts - upper and lower, between which sandpaper is placed.
Read also: Borax flux how to use
First rough, then fine
To clean rough cuts with a saw, use sandpaper with a coarse abrasive coating (100 grit). Planed surfaces are sanded with 120-grit sandpaper. For a fine, final sanding, use 180- or 240-grit sandpaper. Sand the wood all the time in the direction of grain growth and without excessive force. Experienced craftsmen avoid working surfaces with sandpaper for a long time, and their movements are very light, almost without pressure. As a result, the tiny ends of the fibers are only pressed against the surface, but are not cut off.
A special grinding device is the so-called “sand plates” of different sizes and grain sizes. Each is a steel plate with tiny “pins” protruding from the surface with sharp edges. When grinding with such a plate, due to the large distance between the pins, a lot of sawdust is formed, and their cutting edges remain sharp for a long time. In practice, “sand plates” are noticeably more “aggressive” than ordinary sandpaper.
If the surfaces of large parts are sanded by running a boss wrapped in sandpaper over them, then when processing small parts they proceed differently: a piece of sandpaper of a suitable size is secured on a workbench with strips of tape and the part is passed over the sandpaper. This avoids rounding of the edges. Before proceeding with further processing of the part, after grinding it should be thoroughly cleaned of dust.
sanding wood sandpaper
When sanding smooth surfaces, use a special pad so that the sandpaper is evenly pressed against the wood.
Small parts are best sanded by running sandpaper on a workbench.
Auxiliary devices made of cork and plastic for fixing sandpaper. “Sand plates” are glued to the handle plate.
Application nuances
A drill attachment for car polishing can be purchased at any store that sells car products. However, you should choose these devices carefully.
Body elements of new cars are made using modern technologies. An anti-corrosion compound and paint are applied to the metal, which are wear-resistant. They will last approximately 15 years. However, this coating is better preserved if it is properly cared for. The polishing device restores the original shine and removes defects from the surface. Together with a special product, such a product will cost less than services provided in a workshop.
How to choose sandpaper for working with wood?
There are quite a few characteristics by which sandpaper is classified. But the main and most significant parameter that you should focus on when choosing a sandpaper is the size of its abrasive grains - the so-called. graininess indicator. For specific tasks when working with wood, a certain type of grain size is selected.
TABLE: SELECTION OF ABRASIVE FOR WORKING WITH WOOD
| Cord brushes | |||||
| Moscow | from 70 to 900 | from 35 to 14900 | from 86 to 270 | from 33 to 430 | from 36 to 5400 |
| Saint Petersburg | from 95 to 800 | from 35 to 14900 | from 86 to 270 | from 33 to 430 | from 36 to 5400 |
| Chelyabinsk | from 262 to 820 | from 35 to 14900 | from 86 to 270 | from 33 to 430 | from 36 to 5400 |
| Novosibirsk | from 100 to 760 | from 35 to 9000 | from 86 to 270 | from 33 to 430 | from 36 to 5400 |
| Kaliningrad | from 57 to 660 | from 35 to 9000 | from 86 to 270 | from 33 to 430 | from 36 to 5400 |
| Type of work | Abrasive grit (according to ISO 6344) |
| Rough wood processing |
Practice shows that to perform basic tasks, a master needs a set of five types of abrasives:
- P150 ; P180 ; P240 (wood treatment before applying finishing);
- P280 ; P400 (interlayer and final sanding of finishing coatings).
You can read all about the intricacies of choosing sandpaper in this article.
Body polishing
The polishing process can correct only some defects. If there is corrosion, chips or damage on the body through which the steel frame is visible, then a major repair will be required.
Before starting the polishing process, you should carefully inspect the vehicle to ensure that any imperfections can be eliminated.
Treatment of the body with a special device will give a positive result if:
- slight difference in shades that resulted after partial coloring;
- the presence of roughness, scratches and cloudy stains;
- faded layer of paint;
- the appearance of graininess and streaks of enamel.
You need to know that you can’t overuse polishing, because when you do it, the paint layer becomes smaller by 5 micrometers. From the date of manufacture of the vehicle, no more than 20 polishing procedures can be performed. At this time, you need to use a thickness gauge, especially if the car is used.
see also
Comments 17
good video, everything is clear, accessible, nothing superfluous, thanks comrade
So the felt doesn’t stay on with Velcro?
What is the sandpaper attached to or glued to?
It clings with teeth, like Velcro on clothes.
The other day I was polishing the cylinders of the compressor, made it as written from felt boots, cut the round timber with a crown, the result is impressive 
... and then you will cut sausage for a snack with this knife! In such felt you can find all sorts of inclusions, and instead of polishing you can make very good scratches. In the army, we insulated cars with this kind of felt in the winter, it didn’t work out very well, and we simply called it “koshma.”
Don’t look at it on an empty stomach, I want condensed milk)))
Using a polishing wheel
By using a polishing wheel on a drill, you can update the appearance of your car. This procedure is most effective if you need to smooth out small chips or remove tarnishing of the surface.
The work is carried out in 2 stages:
- removing paint from the body surface;
- applying polishing compound.
Protective treatment is also carried out to reduce the negative effects of various types of precipitation and ultraviolet radiation. It is mainly done when preparing a car for sale. A protective layer (it contains wax or silicone) is distributed over the surface of the body to form a film that is invisible to the eye, repels moisture, and makes the body shiny. You can polish a used car with a soft pad if there is no paint damage. It can also be used with careful treatment with a protective agent.
Moistening the wood and applying primer
Whether you use scrapers or some other method, in any case, before sanding the surface of parts made of solid wood or lined with plywood or veneer, it needs to be moistened.
To do this, it is better to use warm water (you can even use hot water if the part is made of solid wood). Then you need to wait until the parts are completely dry. Small dents will disappear when exposed to water.
But the cut wood fibers, pressed to the surface of the part before they are moistened, swell and, having dried a little, stand upright. Therefore, the surface, which seemed impeccably smooth before moistening, often becomes rough and fleecy.
After sanding, the surface becomes smooth again.
Primer for quick sanding
The surface of a wooden part, regardless of whether it retains its natural appearance or is covered with stain or varnish, is primed.
The primer closes all the pores, as if sealing them.
As a result, the hygroscopicity of wood is reduced, and the paint applies better and more evenly than on an unprimed surface.
Make sure that the room you work in is dry, dust-free and not too cool. This way you will create ideal working conditions. It is more convenient to apply the primer with a soft flat brush.
The primer dries in about half an hour. But wait at least an hour before you start sanding the primed surface with the finest grit sandpaper (no. 240). Work only in the direction of the wood grain, change the sandpaper often and knock out the fine dust that forms during sanding.
The surface, which seemed impeccably smooth, became rough and fleecy after moistening.
Using a flat brush, carefully apply the diluted primer onto the prepared surface.

