| How to replace a compass | Description |
| If radius doesn't matter | In such cases, any round-shaped object at hand is suitable. It could be coins, a glass, a plate. Apply and trace them. |
| Protractor | First trace one semicircular side, then apply it to the other side and also trace it to make a circle. |
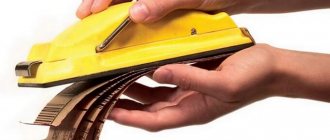
| Compass imitation | You can fasten two pencils together using rubber bands or plasticine and use them as a compass. In this case, it is possible to adjust the radius of the circle. You can also fasten 3 pencils in the shape of the letter “A” or a pencil with scissors. |
| Ruler | A straight ruler is another option for replacing compasses. Its length depends only on the required radius of the circle. One edge of the ruler needs to be fixed in the center, place a pencil on a suitable mark and rotate the ruler, drawing a circle. |
| Comb | Make a hole in one of the edges of the comb, insert a needle or pin there and secure it to paper. Insert a pencil into one of the slots between the notches and turn it to form a circle of the required size. |
| Clip | The size of the paperclip in this case depends only on the required circle size. Place a pencil in one of the inner edges of the paperclip and fix it in the center of the future circle. Insert a pencil/pen into the second one and turn it, drawing a circle. The main disadvantage of this analogue is that the radius is limited by the size of the paper clip. |
| Needle and rope | Tie a piece of thread to the needle (the length depends on the radius of the circle). Tie a pencil to the other end of the thread. Insert the needle into the paper, hold it with one hand, and rotate the pencil in a circle with the other. |
Everyone knows that a compass is a tool for drawing circles. Sometimes there are situations when it is not at hand and you have to look for something to replace the compass with.
There are many options for replacement at home. Let's look at the most popular analogues of compasses at hand.
Main stages of work
First of all, you will need to cut a block of suitable length from a piece of plywood. Then you need to make a longitudinal groove in the workpiece. An aluminum profile is installed in it.
Next, the master makes a semicircular groove at the end of the workpiece, and on the other side he drills a hole for a pencil.
The next step is to make a fixing bolt that will secure the pencil. By the way, the large hole also allows you to install a pen or marker.
The author drills a hole in the aluminum profile and cuts a thread in it. We screw a screw into this hole. The end of the hardware must be sharpened on an emery machine or using an angle grinder.
After this, all that remains is to assemble the tool, and you can test it in operation. For details on how to make a simple marking compass with your own hands, see the author's video.
Main stages of work
We cut four blanks from a steel plate. This can be done using a grinder, or on a band saw with a metal blade. In this case, using a jigsaw will not be very convenient.
After we have cut out all the workpieces, we process the parts on a belt grinder to remove burrs and give them the required shape.
At the last stage, we join the two “legs”, then attach the two “short ones” and scald them. Bringing beauty to the grind. Then all that remains is to drill a hole for the connecting bolt, and two holes in the ends of the “legs” for installing carbide tips.
For details on how to make a homemade compass with your own hands for drawing circles on metal blanks, watch the video on the website.
Source
How to fix a compass at home. Homemade calipers. Compass materials
It was evening, there was something to do...
One day I got tired of drawing circles using the well-known “compass” type “plank with two nails”...
I decided to buy a compass - in the office supplies there are school "goat's legs" that cannot draw a large circle, at least 50 cm, and are also so flimsy that they bend during the process of drawing a circle (as schoolchildren draw something with them)... I understand, that this is not an option.
I looked on the websites of tool stores in my city - there are no compasses (no compasses...). But I found a couple of Moscow online stores where they offered me to buy a good compass for 3500-4000 rubles. :wacko: Why is this necessary? - I thought.
And I decided to make a compass with my own hands. By the way, the manufacturing process took only one evening.
Possibility to make a tool with your own hands
A simple version of the dash is made from thick diameter wire. A similar solution is to drive two long nails into a suitable wooden handle. A mechanic's compass is also used to mark wood. The accuracy of drawing increases as the distance between the teeth of the tool decreases; skill and experience play an important role.
The scriber is a mechanical compass with a built-in level. The latter is intended for precise marking of lines horizontally and vertically. If everything is done correctly, then marking with your own hands will allow you to assemble the log house in such a way that it will not be possible to push a match between the logs. Scriber is an advanced carpentry trait that has been given two levels. This saved time for the carpenter. After all, now they don’t draw a rough line for marking, but immediately draw a finishing mark.
Source