Handle design
There are many ways to decorate a stationery, it all depends on the person’s imagination. If you want to create a designer item, you can wrap a narrow satin ribbon around the handle, and also glue a bow or flower.
They are made from paper or fabric, and it turns out quite original. Such stationery can be presented as a gift.
Most young girls love to decorate their handles with threads or beads. Stationery that is designed in this style looks chic. There are many ways to create a real masterpiece.
The following materials can be used:
- Rhinestones;
- Feathers;
- Elastic bands;
- Stickers;
- Beautiful decorative elements.
How to decorate a pencil with your own hands?
And girls will especially like the first option! We bring to your attention the most summer option for decorating pencils, which in such an amazingly beautiful form can easily become a gift for Mother's Day, March 8, Teacher's Day, Girlfriend's Birthday, etc.
Cut a narrow strip from corrugated paper. Cut it on one side along the entire length in the form of a fringe. Coat the edge of the paper tape with glue and wrap it around the top of the pencil where the wash is located.
Then cut out petals from corrugated paper of a different color and glue them to create a lush flower.
You can decorate a whole set of colored pencils in this way and present this summer stationery bouquet as a gift to a teacher, mother, grandmother or friend.
Paper pen
- To make a stationery pen from paper, you will need a white or colored A4 sheet, as well as a rod.
- You can use newspaper or gift paper, but you will need a little more of it than regular paper.
- From the sheet you need to express the main workpiece; you need a trapezoid shape, the base of which has a length of 15 cm.
- Glue is applied along its perimeter and pressed against the rod.
- You need to wait until it dries, then roll the sheet tightly. Finally, coat the edge with adhesive.
- Cones were formed on both sides; the geometric figure was left in the lower part, as it was needed for writing.
- And the upper cone can be trimmed with scissors to get an even cut.
- Next, the product is processed with acrylic paint, as it is resistant to water.
- Then you can decorate it with different materials - gift paper or a page from a fashion magazine.
A person uses a pen almost every day, so it is necessary to varnish it to maintain a presentable appearance.
Original stationery
We have collected the best ideas with master classes, with the help of which you can make original pens, pencils, notebook covers, notepads and other stationery with your own hands. Do you want to stand out at school, college or work? Do you have a child who loves bright stationery? This article will appeal to all lovers of cute, original little things!
Even a novice master can repeat the master classes. Even a school-age child can make an unusual pen or pencil. Step-by-step instructions and training videos will help you with this.
Brilliant office
The master class will be appreciated by lovers of bright and shiny things. With its help, you will make an original notebook with your own hands, from an ordinary pen - a very beautiful, amazing pencil in the shape of a rainbow. Very creative! It is unlikely that anyone else will have such unusual shiny school supplies.
For the notebook you will need:
- cardboard;
- wrapping paper.
For the handle:
- fluffy threads;
- cardboard;
- nail file;
- clear nail polish.
Rainbow pencil:
- plasticine;
- wax crayons.
For each master class you will need glitter and PVA glue. Watch this video in which the author talks in detail about how to assemble an unusual office. You will spend no more than 15 minutes on each master class. As a result, you will get a fantastically beautiful school set from a notebook, pen and colored pencils. By the way, they can be a great gift.
Paper decorations
The easiest way to decorate a school office with your own hands is to use paper or cardboard. All ideas can be easily repeated at home. The result will be bright, non-standard little things that will brighten up your school days.
Additionally, you will only need what every schoolchild or student always has on hand:
- cardboard;
- colored paper;
- felt;
- markers;
- glue gun
Check out this glue gun - a bestseller on AliExpress! High quality, reliable, easy to use. And it costs less than in regular stores.
In this master class you will learn how to make pencil tips in the shape of stars or cat paws, funny rulers in the shape of a cactus or flamingo, and an adorable bookmark with a unicorn. The author of the video gives step-by-step instructions for creating such an office.
You definitely won’t get bored with such things! And the most important thing is that you can come up with many more variations on the theme of similar paper crafts for school. Take any stencils for pencil attachments, come up with non-standard rulers, decorate bookmarks with any characters! The implementation of each idea will require a minimum of effort.
Stationery in Kawaii style
You can make a very beautiful stationery in Kawaii style from ordinary school supplies. A little imagination - and the simplest pencils, paper clips, bookmarks or anything else will become very cute. Of course, you can look for original “kawaii” stationery in stores, but making it yourself is much better - it’s unlikely that anyone else will have one. And it will take a little time.
For a homemade stationery in Kawaii style you will need:
- glitter;
- permanent markers;
- acrylic paints, clear varnish;
- decorative tape;
- colored paper;
- sponge;
- scotch.
You will find step-by-step instructions in the training video. The master offers to make beautiful versions of school supplies from the simplest materials and clearly shows the process. Complete these ideas with your own to create even more funky pencils, pens, clipboards, or bookmarks for school. It is enough to purchase a basic set for decoration, and everything else will come on its own.
Office for girls
These ideas will appeal to schoolgirls and students, as well as women who love beautiful stationery. Most of the crafts will look like cosmetics, but in reality they are pencils, folders, pens or something else. A great way to be fashionable in everything - even regular school supplies.
The video contains 11 master classes with instructions. We'll tell you what you'll need so you can figure out what you'll be doing in advance.
- Notebook in the form of an iPhone: any factory notebook with a hard cover, acrylic paints, self-adhesive, cutter.
- “Musical” pencil case: foamiran, fleece, double-sided tape, zipper.
- Container for paper clips: joystick, paper clips, superglue.
- Album in the form of a tablet: any sketchbook, self-adhesive, printout.
- Text highlighter: nail polish bottle, clear glue, glitter.
- Unusual ruler: wooden comb, acrylic paint.
- Original “hairspray” pencil case: tube, acrylic, labels from old hairspray.
- “Cosmetic” folder for notebooks: regular folder, double-sided tape, printouts.
- Non-standard putty: ready-made corrector-touch, empty eyeliner jar.
- Bright pencil: lip gloss bottle, superglue.
- Shadow eraser: eraser, cardboard, glue, permanent marker.
Check out this fun video for school stationery repurpose ideas. It will definitely inspire you.
You no longer need to throw away tubes or jars of cosmetics - as you can see, you may still need them. It will make not only a non-standard stationery, but also an excellent joke.
Kawaii office
Another great selection of master classes! With their help, you will make a stationery for school in a kawaii style with your own hands. This DIY is all about repurposing regular pencils, pens, rulers and other little things into cute accessories. Girls will especially like it.
We'll tell you what you need to prepare for each master class:
- Cat pen: regular pen, thread, scraps, hot glue.
- Donut pencil: isolon tube, acrylic paint, plastic cup.
- Cute pizza pencil case: colored felt, zipper, glue.
- Stickers in the form of a cloud: colored foamiran, mini-pompons, colored stickers.
- Non-standard buttons in the form of cacti: airy plasticine, button.
- Fun watermelon corrector: spool of white tape, acrylic.
- Soft notebook + squishies: a simple notebook, padding polyester, foamiran, terry towel, beads.
- The most unusual folder for papers: colored foamiran, plastic folder.
- Keychain “unicorn”: old watch, acrylic paint, hot glue, glitter, outline, ring for the keychain.
- Box for ice cream pencils: box, paints, colored paper, ruler.
- Pencil with a face: self-hardening plasticine, fluffy threads, a flower.
- Fluffy bookmark: colored wool, picture, satin ribbon, paints.
- Original paper clip “cupcake”: colored paper, clip, flowers, mini pompoms.
You will spend no more than 15 minutes on each craft. It is very easy to do the entire office. Watch this video tutorial in which the author shows everything in detail.
We hope you enjoyed these video tutorials. In total there are more than 30 different ideas that can easily be supplemented with something else. Even a child of primary school age can easily make almost all of this original stationery with his own hands. We wish you success!
See also: original homemade popsockets
Syringe pen
- Almost every home has a disposable syringe, so let’s take a closer look at how to make a pen from this material.
- The needle must be removed, the hole, if it does not correspond to the size of the rod, must be drilled.
- The internal space of the syringe is filled with a gel solution, and glitter or small ones are also added.
- The upper part is coated with glue, since it is necessary to fix the rod inside the flask.
How to decorate a pencil with your own hands?
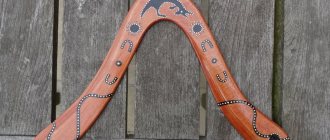
The following method of decorating a pencil is suitable for those who are interested in burning and who have a soldering iron in the house.
You can burn all kinds of patterns on a wooden pencil using all kinds of curly tips. Such pencils look very authentic, as if they were made by a miraculous master of some ancient tribe.
You can burn on both regular wooden pencils and colored ones. In any case, it looks interesting and unusual.
Pen 2 in 1
This option for stationery is very practical, since you often need not only a pen, but also a pencil.
Making it is not particularly difficult, the main thing is to follow the step-by-step instructions.
- A suitable pen is disassembled and the pencil is adjusted to the diameter of the body.
- To do this, a part is cut off from it, and then the excess wood is removed using a sharp knife.
- Finally, it needs to be sanded with sandpaper to ensure a smooth surface.
- The pencil is inserted into the body, and the junction is wrapped with adhesive tape.
- The rod is cut to the required length and the product is assembled.
It is worth noting that the part that was cut off from the pencil is not thrown away. You can leave it and then use it to create other crafts.
A fountain pen
A product made from poultry feathers looks presentable and noble. To make it, you will need to take a feather from a turkey or goose. If it is a solid color, you can paint it any shade you want.
- At the base you need to cut off the fluff and go over it with sandpaper.
- This is necessary so that the handle is comfortable to hold.
- Its very end is cut diagonally so that later it can be written.
- A metal tip from a fountain pen is inserted into the rod, but you can also use a ballpoint pen.
- The junction is masked with the help of decorative elements.
Such a product can serve a person for several years.
results
This was a very quick and easy way to make a Harry Potter pen. Believe me, if your children have read these books, they will be absolutely delighted! And if you haven’t read it, now, in quarantine, is the time to fix it.
However, even if you don’t have children, I must admit that even for an adult this is quite an interesting toy. I made this pen for myself and to this day I write with it, simply because I feel like a real sorceress who studies in the same faculty as Harry, Ron and Hermione. However, I don’t mind sharing the faculty with Draco Malfoy either...
In general, if you still have doubts, drive them away and start creating this magical pen. Bring the world of magic and wizardry closer to yourself at least in this way, why not? Now, during self-isolation, we all need a little bit of miracle and faith in the best more than ever, and going back to childhood is the best thing we can think of to plunge into the miracle again.
Found a violation? Report content
Gel pen
The main difference in the manufacture of such a product from a ballpoint pen is that the rod is inserted into the finished flask.
- For example, you can make an aquarium inside, it looks original. To do this you need to prepare a transparent tube that has a wooden stopper.
- In this case, the flask at one end must be completely closed. Such material can be easily found at a hardware store or pharmacy.
- A hole is made in a wooden cork using a drill; its diameter should correspond to the size of the rod.
- In addition, the product is sometimes painted with acrylic paint. Inside you need to pour a mixture that is prepared in advance from water and glycerin.
- If you want to make a thicker solution, you need to add more glycerin.
- You can also add decorative elements to the mixture, for example, foil fish, glitter, stars.
- When everything is ready, the body is closed with a stopper so that the mixture does not leak out, then you can coat the joint with glue that is resistant to water.
This is described in more detail in the video on making a pen at home; this will help you avoid mistakes when creating a craft.
Spy pen
Many people are interested in how to make an erasable pen at home. This is very easy to do, you will need a fountain pen or you can use a product that you have made yourself.
All that remains is to prepare the ink, but it is impossible to pour it into a regular refill, since the mixture is extremely liquid.
Invisible ink options:
- Milk - appears under a hot iron;
- Lemon juice - iron the paper or bring it to the lamp;
- A diluted mixture of copper sulfate - to read the text you need to hold the sheet over the ammonia.
Buying a pen is not a problem; it is sold in any store. However, a hand-made writing instrument is truly exclusive.
This pen can be an excellent designer gift for loved ones.