At a children's party in kindergarten or school, your child got the role of a kid, but you have absolutely no idea how and what to make him a carnival costume from, especially the horns? Our master class on how to make a baby goat costume with your own hands will help you cope with everything without unnecessary hassle.
Very soon, kindergartens and schools will celebrate March 8, which means children are already preparing in full for the festive matinee: learning poems about spring, songs about mother and the roles of their characters from productions. For several years now, the celebration of March 8 in a primary school or kindergarten has not been complete without a production of the fairy tale “The Wolf and the Seven Little Goats,” beloved by all children. And since there are as many as seven kids in the fairy tale, the image of a kid is therefore one of the most popular among boys and girls.
If you recently learned that your child got the role of a kid in a holiday performance, do not rush to look for a ready-made kid costume in online stores or carnival costume rental shops. Making a baby goat costume with your own hands is actually very simple, as are the baby goat’s horns, which are the most important detail of the image.
How to make a baby goat costume with your own hands: an image for a children's party
At a children's party in kindergarten or school, your child got the role of a kid, but you have absolutely no idea how and what to make him a carnival costume from, especially the horns?
Our master class on how to make a baby goat costume with your own hands will help you cope with everything without unnecessary hassle. Very soon, kindergartens and schools will celebrate March 8, which means children are already preparing in full for the festive matinee: learning poems about spring, songs about mother and the roles of their characters from productions. For several years now, the celebration of March 8 in a primary school or kindergarten has not been complete without a production of the fairy tale “The Wolf and the Seven Little Goats,” beloved by all children. And since there are as many as seven kids in the fairy tale, the image of a kid is therefore one of the most popular among boys and girls.
If you recently learned that your child got the role of a kid in a holiday performance, do not rush to look for a ready-made kid costume in online stores or carnival costume rental shops. Making a baby goat costume with your own hands is actually very simple, as are the baby goat’s horns, which are the most important detail of the image.
Making a white body
You will need: a white T-shirt, a vest, a sweatshirt (you will have to cut off the sleeves), possibly with a hood, a lot of cotton balls, a needle and white thread.
- Choose a suitable suit that will become the basis of your sheep's body, lay it out.
- Take cotton balls (you can buy them at a drug store or home improvement store) and start sewing them onto the base.
- Sew tightly so that the balls create a continuous surface. If you are working with clothes that are not too loose, periodically try on the resulting body - it should not begin to wrinkle or shrink.
- Shake the finished structure thoroughly to check how tightly the balls are sewn. Individual elements may need to be secured additionally.
A few useful sheep secrets:
If you don’t want to or don’t know how to sew, you can simply glue the balls - especially if you have a convenient glue gun:
The finished suit can be trimmed around the perimeter with faux fur, then the sheep will turn out to be the most touching:
As a base, you can use not only a wide vest, but also any other comfortable clothing. So, you can inexpensively buy white sports overalls or pajamas, and also sew a sheep costume with your own hands - especially when it comes to an outfit for a baby.
To go classic black and white, you can color some of the cotton balls black. Just do this ahead of time and let them dry before you start sewing or gluing. This will create a natural dividing line between dark and light coats. In addition, you can simply put black limbs under the white body using tight trousers and a turtleneck. To make the costume really fun, use... tights. Durable black tights, worn on your legs and arms, will turn you into a real graceful sheep!
Ears and horns
If you are lucky with a vest equipped with a hood, then you just need to not stop and continue gluing the balls - so the hood will turn into a sheep's head. The ears can be cut out of white or black felt. If desired, you can hem them in soft pink. The main thing is not to forget to make a black dot on the nose - you will immediately have a very sheepish look:
In addition, the headdress for your sheep costume can be a whole head - for this you can use a large toy sheep or sew it according to a pattern, gluing on expressive eyes:
Alternatively, you can use a curly round wig as a base - in this case, the ears should be attached to the inner mesh. Completely “sheep” wigs can be purchased, for example, from us. Remember that if you are a natural brunette or brown-haired, a large and light halo around your head will require you to give up too wide eyebrows and, possibly, lighten your skin so that your face will not appear too dark:
Very cute sheep masks can also be purchased, matching them in tone and style to the costume. This is what one of the soft fabric masks looks like:
And this is a version of a purchased cardboard mask:
A wonderful version of the mask can work out if you have... a disposable plate:
You will need a white plastic plate (the size depends on how large the head is for the mask), the same cotton balls, black and brown markers, glue, hairpins or an elastic band:
- Cut out the plate as shown in the picture - you should have the base of the mask, horns and ears.
- Glue the ears and horns onto the base of the mask.
- Bend the nose slightly and color it. Paint the horns brown or gold – it’s in fashion with sheep!
- Now stick cotton balls on the top, choosing a thickness of wool that suits you.
- Attach bobby pins or an elastic band to keep the sheep mask on your head. The mask is ready!
There are horns - now hooves!
Now all that remains is to make the hooves. Don’t forget that the sheep has four of them, so you’ll have to work with both hands and feet. The easiest option is to choose shoes and gloves (or mittens) to match. Alternatively, you can use black hoof-shaped foam bracelets. To make your sheep costume even more realistic, don't shy away from the idea of getting yourself a short, round tail. This could be a piece of fabric with several cotton balls or a cute voluminous tail stuffed with synthetic padding:
In addition, if you are sewing yourself a wonderful sheep's overalls, you can take care of the hooves (at least on the hind legs) in advance. Simply make your own soles from a very thick shiny fabric by gluing or sewing matching stripes on the instep. And if a sheep costume is made for the smallest lamb, the hooves can be made pink:
Feel free to decorate your costume. The sheep wear bells and bows! For example, like this:
See how easy it is to make a sheep costume! If your imagination requires something more, be bold. Maybe you can do something even more original while still maintaining its undeniable sheep-like quality. And yes! Don't forget to learn how to bleat well!
Children's riddle
about the sheep: Fashionistas are walking along the river - white curls in a ring. And in winter, grandmother knits socks from their curls. (Lamb)
How to make a baby goat costume for a boy or girl with your own hands
Any holiday clothing is perfect for a baby goat costume.
For girl:
- dress,
- skirt,
- turtleneck or blouse.
For boy:
You can wear knitted or sewn leggings over your shoes. If a girl's costume has a regular straight dress, it can be trimmed with vertical strips of fabric to create a "shaggy" effect. You can also take a plush and make a special cape for a small goat. It won’t be difficult for a handicraft mother to sew separate trousers and a vest for her little goat. But we repeat once again, any clothing can serve as an outfit for a suit, because the trick of a suit is something completely different.
Cotton ball suit
Another fun option that will require more time and perseverance, but in this case you do not need to know how to cut or sew. Choose suitable clothes for the base. A turtleneck, vest, T-shirt will do. The outfit is made both with and without sleeves. Buy cotton balls at the pharmacy and simply sew them tightly onto the product. If you don’t want to work with a needle and thread at all, glue them to the base. It's great if you have a heat gun.
Don't forget to shake the costume after decorating. If something falls off, you'll have to sew it on tighter. To make this outfit even more original, paint some of the balls black or brown. Use them for decoration. The pigment must be applied before sewing to the base. The paint must dry thoroughly. You can decorate a hat or knee socks with cotton balls. Instead of balls, you can use pompoms made from white or brown yarn. It will also be very original.
So, you have seen how different you can make a lamb costume with your own hands. The photos given in the article clearly show this. Choose an idea based on the amount of time you can spend making it and your sewing ability. Please your child with an original New Year's outfit. Even a beginner can make a beautiful thing.
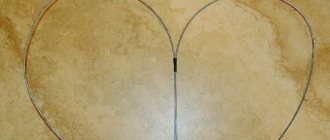
Baby goat horns on a felt rim
One of the simple ways to make baby goat horns with your own hands is to sew them from fabric. Felt is best suited for such horns - it is very pliable for work and holds its shape well. The horns can be flat, or they can be voluminous (in which case they should be stuffed with padding polyester).
To make felt horns with your own hands you need:
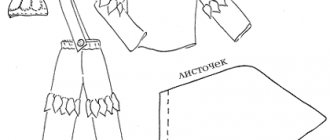
1. Take a hoop and a piece of fabric from which you will cut out the baby goat’s horns and ears. Draw a simple pattern of horns and ears on paper. Cut out the required number of parts according to it.
2. If the baby goat's horns and ears will be flat, simply secure the ends of the fabric to the hoop, sewing along the edges. Or make felt antlers by gluing them on with a glue gun.
3. If you want to make voluminous ears, sew two pieces of fabric for the ears and horns, stuff them with padding polyester and attach them to the headband. The felt ears on the reverse side can be decorated with fur, and the headband itself can be decorated with flowers (if you are making the horns for a girl). So that the baby goat's ears and horns can be well attached to the headband, first cover it with ribbon or thick thread, then the fabric can be easily sewn to the fabric.
The baby goat's horns made from felt, which you make with your own hands, can be attached not only to the headband, but also sewn to the hat. Sew a hat from fabric or crochet it, and then sew the baby goat's horns and ears to the hat.
Step-by-step instruction
The baby goat costume consists of a foam cap, which can be replaced with an easier-to-make face mask, vest and shorts.
Mask
Making a mask is the easiest way to designate a baby goat costume. The mask can be made from simple packaging cardboard or paper, but such a product will not last long and you will simply be sorry for the time spent on it. Therefore, the best way out is to make a mask from gray felt or thick cloth, using the instructions:
- Take measurements from the child’s head - the height and width of the face, the distance between the eyes,
- Draw the contours of the mask and eye slits on a piece of paper, according to the size, draw a muzzle, eyebrows, ears, cheeks inside the contour.
- Cut out the mask template and transfer it to a flat sheet of felt.
- Cut out a mask from felt.
- Cut out the details of the face from the mask template and transfer them to pieces of fabric of different colors.
- Cut out the details of the muzzle from fabrics and glue them onto the mask using a heat gun.
- Apply eyelashes to the mask with a marker or embroider eyelashes with black thread by hand.
- Attach the hat elastic with a stapler and try it on.
- Place the finished mask on sheet felt, trace along the outer contour and cut out the second layer of the mask.
- Glue the horns and ears of two layers together, glue the mask along the contour.
Robot suit
Transformer costume for the New Year's holiday. Can be done with your child
Instructions
More details
Snowflake costume
Two DIY snowflake costume ideas. Tutu dress without a single stitch and an outfit with a full skirt
Instructions
More details
Pinocchio
New Year's costume Pinocchio in two evenings
Instructions
More details
Pirate
A simple pirate costume for boys and girls. Manufacturing instructions
Instructions
More details
King's costume
New Year's costume of a fairy-tale king. Easy to sew based on the basic version
Instructions
More details
Witch costume
Children's costume of a charming witch for the New Year and themed holiday. Master class on sewing a dress with pleating
Instructions
More details
Gypsy costume
New Year's suit for a boy. We sew in a few evenings
Instructions
More details
Vest
The easiest way to sew a vest is from an existing vest or jacket in the child’s wardrobe, so as not to waste time creating a pattern and fitting parts. Gray or white plush is suitable for the suit; the lining should be chosen in accordance with the main fabric. Below are instructions for sewing a vest with lining.
Stage 1:
- Make patterns on paper according to the size of the vest, taking into account allowances.
- Iron the lining and main fabric.
- Transfer the patterns to the wrong side of the fabric and lining.
- Cut out the details.
Stage 2:
- Pin and stitch the trims and back of the fabric and vest lining along the side seams.
- Smooth out seams.
- Fold the resulting parts of the vest from the fabric and lining with the right sides inward, pin and stitch both parts along the side edges, armholes and neckline.
- Turn the shoulder sections of the shelves face-to-face, insert them into the shoulder sections of the backs face to face, pin and sew the shoulder seams of the fabric and lining separately.
- Press and press shoulder seams.
- Make cuts along the pattern lines of the armhole and neckline.
- Turn the vest onto the face, iron the seams, making a piping of the lining.
- Turn the vest inside out, pin and stitch the bottom edges of the fabric and lining, leaving a 10-centimeter gap in the middle of the seam for turning the vest right side out.
- Turn the vest onto the face, smooth the bottom, piping the main fabric.
- Hand sew the cutout at the bottom edge with a blind stitch.
Stage 3:
- Do a fitting.
- Glue or sew scraps of gray or white fur onto the edges of the finished product, depending on the color of the main fabric of the vest.
Equipment:
Overlock rating
The best overlockers for home and production according to customer reviews
Rating
More details
Sewing machine rating
The best sewing machines from budget to computerized
Rating
More details
Shorts
For shorts, plush is used, which was used when sewing a vest. Patterns of shorts of different sizes for boys are placed on 3 A4 sheets:
Left leaf
Medium leaf
Right leaf
Sewing instructions:
- Copy the images of the patterns, print the images on a printer, glue the individual parts together according to the lines with the scissors, select the desired size.
- Cut the pattern template along the lines of the desired size. For convenience, it is better to choose lines 2 sizes larger in order to immediately include allowances in the pattern.
- Apply the pattern to the wrong side of the fabric, turning the template over on one side and then the other, cut out two pieces of shorts from the fabric.
- Fold each piece inside out, aligning, chipping and stitching the short edges.
- Turn one half of the shorts onto the face, insert it into the other half, align the halves with the right sides along the back and front lines.
- Pin and stitch the shorts along the back and front edges.
- Turn the shorts face out and try them on.
- Fold the top of the shorts 1 centimeter and iron the fold.
- Fold the top of the shorts again by 3 centimeters and iron the fold.
- Apply a single stitch along the first fold, forming a drawstring for inserting the elastic.
- Insert the elastic band and sew the ends together.
- Finish the bottom of the shorts by folding, ironing and stitching the bottom edges.
Baby goat horns made of cardboard
The baby goat's horns, which are larger and stronger, as well as the horns of the mother goat, can be made from paper, or better yet, from cardboard. Cut the cardboard into strips of different lengths, make a circle out of each of them and glue the ends. Next, glue rings of different diameters sequentially, from largest to smallest. After the glue has dried, cover the horns with thin paper, giving the desired texture and making folds. And when the paper dries, paint the horns in the desired color.
Such horns can also be attached to a hairband, which can additionally be secured in the hair with hairpins and bobby pins.
Which color to choose
To make the goat's outfit harmonious, you need to choose the right color. You can dress up a mother goat in a national costume and just add a scarf with dark or light horns, but for a glamorous goat you can use a combination of pink and white. For example, pink horns, hooves, marigolds and the middle of the ears, white strands of hair, a delicate bow or flower on the ear, or a small tiara. A formidable goat can be made in shades of gray and black, and not only horns, but also a muzzle with a corresponding expression can be sewn onto the hat. In order for a hand-made New Year's goat costume to be interesting and effective, you need to carefully think through all the details of the image.
Baby goat horns made of polymer clay
If you are familiar with polymer clay, sculpting neat baby goat horns from it will not be difficult for you. Make small cones out of plastic (polymer clay), give them a slight bend and apply the necessary relief using a toothpick. Leave the polymer clay horns to dry for a while.
When the goat's horns are dry, paint them in a suitable color. Use silver or any color that matches the baby goat costume.
You can attach such horns using felt and hairpins, or use a wide rim, as in the case of felt horns.
Let's start cutting
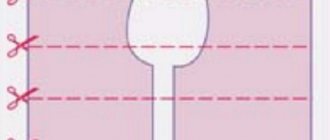
Choose the appropriate size for the lamb costume pattern and glue the paper parts of the cap and strings together, they should be one-piece.
From the main fabric you need to cut:
- 2 mirrored side parts of the cap with ties;
2 mirrored ear parts;
a rectangular piece in the middle of the cap measuring 9 x 29 cm (9 x 31; 9.5 x 34; 9.5 x 37; 10 x 39 cm for other sizes).
All parts also need to be cut from the lining fabric.
DIY baby goat horns from a plastic bottle
Another simple way to make baby goat horns with your own hands is to use a plastic bottle and pieces of fur from an old collar.
Cut a plastic bottle into two squares, twist the squares into cones and wrap each with tape to secure the plastic. Cut two pieces from an old fur collar - these will be the goat's ears.
Cover the horns from a plastic bottle with paper using PVA glue; the paper can also be pushed inside the cones for strength. Attach the baby goat's horns to the wide headband using double-sided tape or glue. Sew the fur ears to the hairband, but to do this, first wrap it with twine or woolen threads.
Instead of paper, you can also use tape to wrap the horns.
What to add to the suit?
Just a hat may not be enough to create a full-fledged image of a sheep. Choose a soft blouse or vest that matches the color of white plush.
If there is no ready-made one in the closet, then sew using the simplest pattern from the same material.
If you choose a dark hat, then according to the natural “sheep” colors, you need to choose a fluffy white blouse with short sleeves. Sleeves and tights should match the cap.
Do you want to sew a New Year's outfit for your baby? Don't know how and what to do? Make your own lamb costume. It's not difficult, but this thing looks very original.
Paper goat mask
The easiest and most straightforward way is to take a ready-made goat mask. All you need is paper, a printer and scissors.
- Download the selected template picture, print it on a color printer and cut it out.
- Also cut out a strip of paper from cardboard to make a headband for the child's head. Measure the circumference of the child's head and use this length as a guide.
- Glue the cut out goat mask onto the cardboard for density, and then glue the finished mask in the center onto a wide strip. You can also attach the mask to an elastic band.
- Secure the ends of the headband with a stapler or glue and leave the mask to dry.
- On the day of the matinee, simply take your homemade baby goat mask with you and put it on your child’s head before the performance.
Now you have several options on how to make your own baby goat costume and baby goat horns. Whatever option you choose, the image of the kid will turn out to be very funny, and your child will be the cutest kid at the children's party.
Basic outfit for a boy
For a boy, you can take ready-made products as a basis: shorts, trousers or tights in white and gray shades.
A gray knit overall will also work.
The top will be a shirt, T-shirt or turtleneck.
Plush vest
In addition, you can make a plush vest.
Materials:
- gray plush;
- sewing meter;
- pencil;
- scissors;
- sewing machine.
Using a meter, we take measurements of the chest circumference, shoulder width and length of the product. We make patterns and cut them out. We sew the resulting components together on a sewing machine. We place a couple of buttons in the chest area.
The vest for the baby goat costume is ready.
ADVICE . Plush knee-length leg warmers will also complement the shorts.
Last news:
Pregnancy and childbirth
From birth to one year
From 1 to 6 years
From 9 to 16 years
useful links
or login using:
or login using:
THANK YOU FOR REGISTERING!
An activation letter should be sent to the specified e-mail within a minute. Just follow the link provided and enjoy unlimited communication, convenient services and a pleasant atmosphere.
RULES FOR WORKING WITH THE SITE
I give my consent to the processing and use by the web portal UAUA.info (hereinafter referred to as the “Web Portal”) of my personal data, namely: first name, last name, specified dates of birth, country and city of residence, email address, IP address, cookies, information about registration on websites – social Internet networks (hereinafter referred to as “Personal Data”). I also give my consent to the processing and use by the Web portal of my Personal data taken from the websites I specified - social Internet networks (if indicated). The Personal Data provided by me can be used by the Web Portal solely for the purpose of my registration and identification on the Web Portal, as well as for the purpose of my use of the Web Portal’s services. I confirm that from the moment of my registration on the Web portal, I was notified of the purpose of collecting my Personal data and the inclusion of my Personal data in the personal database of users of the Web portal, with the rights provided for in Art. 8 of the Law of Ukraine “On the Protection of Personal Data”, read. I confirm that if it is necessary to receive this notification in written (documentary) form, I will send a corresponding letter to the address indicating my postal address.
A letter has been sent to the specified e-mail. To change your password, simply follow the link provided.
Wardrobe Sewing goat costume Plastic bottles Glue Fur Scotch Fabric
This is the little goat we had on March 8th at a matinee in the garden)))
and now I’ll tell you how I did it... cut out the base for future horns from a plastic bottle. so that they stand strong.
I folded it in half and wrapped it with thin tape to fix the shape.
stuffed it with toilet paper. I secured it to the hoop using double tape. To be safe, I wrapped it with simple tape again. children's costumes themselves are twisted and fluttered so that they should be super stable))) I wanted to leave it like that, but the horns did not naturally shine.
dilute pva and water 1:1
We cover the horns with torn pieces
still wet, but quite natural)))
I cut out ears from an old collar and trimmed them with a finished edge. I got carried away and forgot to take a photo)))
here's a bigger plan
the horns were the most difficult part for me. Then everything went more fun and faster. I made a vest and simple trousers from gabardine (not expensive and easy to work with for “seamstresses” like me))). I added an element of ribbons from the hem to the pant leg to freshen up the suit. There is also a bell made of cardboard, which was later replaced with a plastic one.
Lamb costume for little kids for a matinee
The simplest option is a combination of a white fur vest. You can take one that is already suitable, if not, then take a white T-shirt or T-shirt and attach medical cotton wool balls to it with glue. Put your child on a black golf shirt or sweater and tights or panties of the same color.
You can use terry overalls in white or black as a costume. To this base, sew ears onto the hood, and put mittens or scratches on the handles. When such actors are photographed, they get very nice photographs as a keepsake. The main thing is to make sure that the child in the room does not overheat in such a suit.
As for the ears, they are cut out according to a template in duplicate from thick felt and attached to a cap or hairband. Don't forget to attach a white ponytail to your pants. White woolen mittens and the same slippers will be useful for hooves. You can make your own slippers by decorating ordinary dance shoes with fur. Well, for those who have absolutely no time to create a costume at home, there are always stores that offer costumes for children of different ages, tastes and budgets.
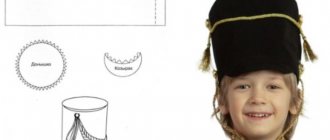
Master class: making a baby goat's hat
Tatiana Postolaki
Master class: making a baby goat's hat
How to make a baby goat's hat from fabric :
To do this you will need fleece fabric for the hat , brown fabric and a cardboard mold from egg packaging for the cones and lining fabric for the lining.
. Draw and cut out the pattern. Option for 4-7 years
. Cut out the front and back parts of the hat and ears from fleece - 4 parts (2 for each ear)
.Sew the ears on both sides and turn them inside out. Then we sew the front and back parts along the top, inserting ears with folded edges into the seam to create folds. Next, cut out the front and back pieces from the lining fabric and sew the lining. Insert the lining into the cap and sew the bottom
. For the horns, cut out a cap from an egg package approximately 3-3.5 cm high. You can make a cut on it and roll it so that the base of the cap becomes narrower and fasten it with a stapler. Cut 2 semicircles from brown fabric for the top of the horns
What you need
The main material of the costume cap is soft plush of white or milky color; faux fur for sheepskin is also suitable. You can get by with regular fleece. You will need about 45 cm of fabric.
The lining is a plain soft pink flannel, also about 45 cm.
You can make a sheep costume with your own hands in a different “sheep” color: use dark gray flannel for the top, and make the lining from white plush. It is desirable that the lining fabric be natural, cotton, so that the baby in the hat is comfortable.
Scale the pattern: the pink square measures 1 inch (2.54 cm) on a side.
DIY goat costume for a girl: kid goat costume for a boy
The symbol of the coming 2015 is the Goat or Sheep. And this character is present at many New Year's parties or carnivals . Goat costumes in stores or rental shops are mostly made of faux fur. It is hot and uncomfortable for the child. In addition, they are standard - a vest, pants and a voluminous hat. But I want something airy and tender. So, we create the image of a goat with our own hands.
We sew a hat for a Goat costume
The goat's cap will look like a lace cap . the cap from crepe satin . This is a rectangle with a height from the base of the head to the crown, a width of 10-12 cm. The upper corners are rounded. Take a stretch lace ribbon. Its length is equal to the length of the vertical coverage of the head from earlobe to earlobe + 5 cm. We manually sew the ribbon to the back of the hat, evenly making folds on the lace.
Through the holes we pull a narrow elastic band into the lace along the length. We try it on the child, measure the required length of the elastic band. Sew the edges of the elastic to the lace.
On paper we draw a blank for the ear. From crepe satin we cut out 2 parts for each ear.
We turn the ears out and stitch them around the perimeter. Fold the eyelet, bending one of the corners more.
We make the horns using a similar pattern, but half the size. Turn it inside out and stuff it with padding polyester.
We pick up the seam on the cap on the sides in two places and on the top of the head in two places. We sew in ears and horns. To ensure that the horns are bent in different directions, iron one of the side seams of the horns firmly with your fingers. Sew a satin ribbon along the bottom edge of the cap.
Do not cut off the excess parts of the ear parts (which will be under the hat), but baste them together.
This will allow the ears to stand up. To make the horns stand vertically, grab them pointwise with a thread to the lace.
Measure the hat for your child, fold the extra triangle onto the satin ribbon at the back and sew it closed.
When trying on, place the lace in folds around the perimeter of the back of the cap. Sew the lace to the hat. Fold the ends crosswise and sew.
Costume accessories
In order for a carnival goat costume, sewn by yourself, to look chic and the image to be complete, you must add accessories: beads with a bell, bracelets, flowers or a crown in the hair, a ponytail, white strands of hair in the hairstyle and even hooves and fur paws. These interesting elements will enliven and add zest to your outfit.
You can buy strands of hair at the market or make your own. You need to take a satin ribbon 5 cm wide and cut it into pieces of the required length. For each hairpin you will need two pieces. The ribbons are glued with hot glue to the hairpin and unraveled from below to the junction. The result is excellent curly locks, which can only be secured into the hairstyle under natural hair.
Such hairpins can also be made from curls from an ordinary wig, which is easy to purchase on the market.