Ultraviolet printing
A primer is applied to the degreased metal, paint for a UV plotter is applied, and the design is “fixed” under the influence of ultraviolet light, because The ink used is photopolymerized and hardens on the surface. Marking equipment - UV inkjet printer
Pros:
● The method is suitable for any type of metal, alloys;
● Fast marking cycle: direct printing from a computer to metal, a few minutes from the start of the operation to the finished product;
● High quality printing with resolution up to 1400 DPI.
● Resistant to moisture, fading.
Minuses:
● Consumables. Ink (6500-9000 rubles per 1 liter of paint of the same color, consumption 10-20 ml*m2), all components in contact with paint: pump, wipers, cartridges, seals;
● Ultraviolet printing has more of a decorative function; for industrial purposes, its disadvantage is that the design can be “scraped off”.
Making wooden badges
The badge is a piece of art and collectible. You can make badges that will be of interest to all ages, as well as representatives of different cultures. The main thing is to have a desire to make a high-quality, original, designer product. Each person is unique and has his own tastes and preferences in choosing badges, but, unfortunately, it is not always possible to find suitable badges in stores. There are several ways to make badges. They can be coated with acrylic paint, or printed on a laser printer.
Use of laser technology
The easiest way to make them is to buy wooden badge blanks and then paint them with acrylic paints, but there is another way. Creating an icon begins with a design template with a clear outline. Following the outline, the printer will cut out the shape of the badge from thin wooden plywood. After laser cutting technology, wood is completely processed by hand: cleaning, sanding, coating with a water-repellent layer, painting with environmentally friendly enamel, then waterproof varnish is applied in such a layer that even machine washing will not spoil the badge.
DIY leather embossing tools
- Of the main ones:
- sets of cliches (stamps) with which drawings and inscriptions are embossed;
- rotary knife for outlining contours - a special knife with a beveled blade, which is convenient to “turn” when drawing curves; it comes in different shapes and dimensions;
- a hammer made of nylon (or similar material) - it has a slight recoil when striking, which will not damage the prints;
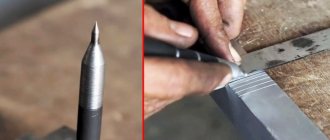
- styluses made of plastic or wood, with which you can extrude the contours of patterns;
- markers with wheels for marking leather; they can also be used to draw raised lines on leather;
- needle file sets - small files for cutting a very small amount of leather (for example, if you need to remove protrusions and irregularities on the edges of products);
- smooth wood base as a substrate;
- a soft sponge that can be used to wet and soften the skin right before starting work;
- bone smoother - for smoothing skin edges, kinks, for marking kinks, made from camel bone;
- artistic cutter (hair knife) - allows you to emboss bird feathers, animal hair and other components with small lines located in parallel;
- set of cardins - a tool similar to a stylus with a non-standard tip (spatula-shaped, spherical rectangular or any other), used when modeling different textures, contours, backgrounds, “raising” the picture.
Additional tools include devices for sharpening rotary knives, stencils with patterns of trees, birds, ornaments and symbols, and others.
Tools can be bought in specialized stores, ordered from a craftsman, or made yourself.
Cliche for embossing. Soldering iron stamp. Creating a vector drawing
Do-it-yourself hot stamping on leather, wood or paper or solving the problem of applying a logo at home using a replaceable stamp with a soldering iron
We produce replacement hot stamping stamps from brass or magnesium and come complete with a soldering iron so you can apply your logo at home or in a small production facility as part of your hobby or small business. The stamp is removable, and in its place, to the soldering iron, you can screw another one.
A brass or magnesium stamp with a soldering iron can be used to apply a logo or personal signature on leather, wood, some types of plastic, or thick paper manually without the use of expensive equipment.
And the brass cliche?
Both magnesium and brass cliches are perfect for a soldering iron, and you can choose the material based on their properties.
The main advantages of magnesium cliches are fast heating and an attractive price. However, when used under pressure, it is better to use brass cliches due to the greater strength of the material.
Basically, if you only use a soldering iron for embossing, you can get by with magnesium. If you have the prospect of using embossing machines, then it makes sense to take a brass cliche.
How to burn with a brand?
The stamp is heated with an open fire for 5-7 minutes, after which the imprint is placed. Advice: it is better to make the first print as a test print to see whether the product is overheated or underheated.
Important: you cannot cool the cliche by immersing it in water - this will lead to its failure.
| Square | Price |
| 2 CM | 50 rub |
| 3 CM | 55 rub. |
| 4 CM | 65 RUR |
| 5 CM | 70 rub |
| 6 CM | 75 RUR |
| 7 CM | 80 rub |
Methods for branding products made of precious metals
There are three modern methods of branding products made of precious metals:
The impact or mechanical method is one of the most ancient branding methods, but is still popular.
Branding is carried out using a hammer or special machines for mass branding. Sometimes special anvils are used that fit the shape of the product.
Advantages of the impact method: obtaining clear impressions that are highly resistant and durable.
Disadvantages of the impact method: if there is insufficient experience or a violation of the branding technology or manufacturing of the product, it may become deformed or cracks may form in the metal.
A distinctive feature of this method is the application of imprints using copper electrode stamps using electric spark equipment.
The brand is burned out with a spark, so this method allows you to apply even complex images.
It is very easy to determine that the mark was applied using the electric spark method: thin bridges are clearly visible between the contours of the nameplate and its signs. This is a unique distinctive feature of this branding method.
Advantages of the electro-spark method: the prints are very clear and durable.
Disadvantages of the electric spark method: the surface of the product on which the stamp will be applied must be ideally prepared - clean, smooth and even.
The most modern branding method, which uses a laser machine and special stamp masks. As with the electro-spark method, it is important that the surface of the product on which the mark will be applied is perfectly flat, clean and smooth.
Advantages of the laser method: clear impressions and the ability to brand products of any shape and with any surface - hollow, concave, convex.
Disadvantages of the laser method: this method has almost no disadvantages, except for the need to carefully prepare the surface of the product for subsequent branding. Perhaps the only drawback of such a mark is its fragility. During wear, scratches inevitably appear on the jewelry, and the mark becomes unclear. When polished, such marks completely disappear from the surface of the product.
- Shock
- Electro-spark
- Laser
Let's summarize
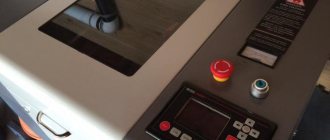
At the moment, 2021-2022, laser marking of metal products is considered the most effective both in terms of quality (accuracy of 5-7 microns) and economic component. Having bought a laser marker, you can forget about the constant additional costs for consumables (which, for example, for a jet inkjet machine per year reach 30% or more of the cost of the equipment), it does not affect the established speed of the conveyor belt, and the service life of 10 years is one of the longest of markers. The device can be installed in a 24-hour production facility and withstand loads 24/7. Technically, using it is no more difficult than other installations, even easier, since basically everything is done by the program. The operator’s task is to prepare a layout file and set parameters in the software. The reliability of the device (manual, stationary) as well as the applied markings is several times higher, which directly affects the final cost of ownership in the future for 3-6 years and beyond.
In addition to the laser, you can take a closer look at the needle impact device. Especially if you do not have large-scale production. The cost of ownership is higher than that of a laser (80,000-130,000 rubles/year). There are small consumables and needles, but they can make deeper markings, faster than with a laser (5 characters/s). Also, the impact point gun takes any metal, regardless of its hardness and shape. It requires less manual labor and indirect labor costs that are encountered when working with other equipment: choosing ink, solvent, cleaning after printing, monitoring the constant availability of ribbons, ink ribbons and thermal labels, and replacing them.
The choice of metal marking equipment is wide. We tried to honestly cover the most popular and advanced methods and technologies for the next 5 years. I sincerely hope the information was useful to you
Article prepared by: GrosseMARK Senior Engineer, Mikhail Tolmachev
Comments • 0
Otherwise, I didn’t watch the videos)
Tell me... can I order a stamp from you?
It is unlikely. It is a very labor-intensive process of creating a stamp by hand. The accuracy is low, the probability of error is high, and manual labor is not cheap. Yes, and it’s not mine. I made it for myself.
And it is advisable to understand the price
What is the best way to make a brand?
Brass or bronze (it seems to me) has good thermal conductivity and relative ease of processing.
As I understand it, easy paths are not for the author. My easy way would be this: draw what you need on paper, scan it, mirror it and print it on a laser print. Transfer to the workpiece according to LUT and etch in half an hour. So that is all!
@Vit Kh I’m on first-name terms with the computer. But isn’t it expensive to buy a scanner or a printer for one operation if I no longer need it? You would also suggest buying a CNC machine, with a metal cutter, for one operation. But it will engrave in general, with an accuracy of one micron, exactly.
living Wood, no power needed. 6-12 V 0.3-1A is enough
@living Wood Actually, they say that a mobile phone charger is enough. I haven't tried it myself, I don't know. By the way, when I get back from vacation, I’ll have to try making myself a stamp at work. I watched the videos on YouTube and they turned out great. And with an engraver you need perseverance and a steady hand. But you did it, well done. I am also like that by nature. My work colleagues are surprised by my hobbies.
@Vit Kh Fortunately, we have a very close relationship with the computer, but what if we need to do it, but we don’t have a laser printer or scanner at hand. Although I do not deny that etching will give a better result, it does require a fairly powerful power supply.
@living Wood why? It is more convenient to draw on paper. Yes, and on a larger scale it is possible. Converting a scanned drawing to any size on your computer is a matter of minutes. Well, this is, of course, if you are familiar with the computer. Iron onto the workpiece for a couple of minutes. Is this a lot of operations? And etching gives a better result. But these are all my thoughts and opinions. If you like the engraver, God will help you.
I do not understand. There is a lathe, but I sawed the blank with a hacksaw. Aren't you looking for easy ways?
