Every person is a child at heart. What do children like? That's right, everything flapping and sparkling! After all, no holiday can be imagined without fireworks, and some people manage to make them at home.
Fortunately, this rarely happens. Much more often we buy pyrotechnics on the eve of the New Year holidays. Unfortunately, the quality of their production often leaves much to be desired. This is especially true for cheap pyrotechnics, the wicks of which are sometimes indecently short.
How to make a wick from scrap materials? Is this even real? There is practically nothing complicated about this.
Wicks and fuses
When making a variety of pyrotechnic devices, you cannot do without a good fuse!
A low-quality wick can not only go out without ensuring the device (bomb, firecracker, etc.) works, but also burn out faster than planned, jeopardizing safety! Therefore, making a wick with your own hands should be approached with complete seriousness and responsibility. An ideal wick has a stable and uniform combustion; there are no lumbagoes or spontaneous extinction. It is highly desirable that the wick be easy to manufacture, but reliable and provide the required water resistance.
All wicks made at home can be roughly divided according to reliability into two main groups: unreliable and reliable. Let's take a closer look at these groups.
Alternative: wick made from bandage or braid
The medical bandage is made from natural threads, so it is suitable for making candle wicks. It is better to take a narrow bandage, which should be cut lengthwise. The length should match the height of the candle. The lower end of the bandage is tied in a knot, and the rest is twisted into a tourniquet. For wax candles, the flagellum is tightened slightly, for all others - tighter. After soaking in a flammable solution and drying completely, the wick can be installed in the center of the candle using a wire.
Braid is another material for the core of a homemade candle. For thin candles, it is also cut lengthwise; for thick ones, it is left as is (you should focus on the diameter of the candle). The lower end is either tied with a knot or attached to a wick holder.
Unreliable wicks
Everything here is clear right from the name. These wicks are as easy to make as they are unreliable. The main representatives of this group are sulfur strip and saltpeter paper.
Sulfur strip
The sulfur strip is made from match heads. Cut a piece of paper one and a half to two centimeters wide. Then carefully separate the match heads in the amount of two boxes. It is important to ensure that the sulfur does not crumble or fall off the match. And, one by one, we lay them out in a row on the prepared paper. At the end, where the sulfur strip will contact the pyrotechnic device, you need to put more match heads. We cover the top with the same strip of paper and seal it on both sides with narrow stationery tape. The disadvantage of the sulfur strip is that the tape melts when burned and can block the spread of fire. Experiments have shown that this happens in approximately 3 cases out of 10. 70% reliability... decide for yourself whether to use the sulfur strip or not, but for now we classify it as an unreliable wick.
Saltpeter paper
Perhaps one of the simplest wick options. Here we will not dwell on it in detail, because a separate article on our website is devoted to its description: Saltpeter paper. For now, let us point out the main disadvantage of saltpeter paper - it is very hygroscopic, in other words, it strongly absorbs moisture from the surrounding air, so it is very important, firstly, to store saltpeter paper correctly, and secondly, to use it only in dry weather. A saltpeter cord is made in a similar way. Take a saturated solution of potassium or sodium nitrate and soak the cord in it for about 10 seconds. Then it is dried and stored in the same way as saltpeter paper, but it has its own advantages: it bends easily and is almost unlimited in length, unlike paper.
How to avoid mistakes?
Let's look at the main mistakes that novice craftsmen make:
The candle doesn't burn. In this case, there are two answers to the question: “Why?”. Either you bought a low-quality wick or forgot about impregnation. To light a candle, soak the tip of the wick with wax and wait for the wax to harden.
The candle flares up and goes out. As a rule, the problem here again lies in the wick. You may have purchased a wick that is not suitable for your candle, but it is also possible that you have overdone the decoration and the candle is going out because decorative elements are preventing it from lighting.
Lots of soot when burning. If the candle smokes a lot, you may have added too much essential oil. In addition, the problem may be a poor-quality wick or dye.
The candle turned out not solid, but porous. The root of this problem may lie in your carelessness. When melting, water could get into the wax, which subsequently played a cruel joke on your candle.
The candle stuck to the mold. Before the wax is poured into the mold, the inside of the container is generously greased. Chances are you didn't. If you want to save the situation, lower the mold with the candle into boiling water, then the wax will begin to melt and you can remove the candle. True, after such a procedure, your creation will need to be modified.
Reliable wicks
The most suitable wicks for homemade pyrotechnics. All of them are almost equally good; which one to choose depends on the situation. Let's see how to make a reliable fuse.
Hunting or camping matches
Special matches differ from ordinary ones by having a larger head and are coated with a special flammable material that prevents the match from going out along its entire length. Such a match burns at a constant speed, does not go out, the combustion time is about 20 seconds. Perfect as a short but reliable wick.
Incendiary fuse
Incendiary pipe
Source
Poplar fluff as a wick
If it’s summer outside, then good material for the wick should be lying right under your feet - this is poplar fluff. Collect it, crumple it and wrap it in newspaper. Here's the wick!
In order to test your inventions from a safe distance, you really need a remote control. In this case, the wick is a cord, etc. To detonate pyrotechnic charges, you can use either a fuse cord or make a wick at home, for which you will need cheap and easily purchased components. Here are several options on how to make a wick at home.
How to make a kickford cord
Wire insulation, soda straws, or empty pen paste work well. We fill the shell with crushed (be careful! They can detonate when crushed) match heads. If desired, you can replace them with gunpowder or another well-burning mixture. The fuse cord we made will not extinguish the wind, and with proper insulation, it can even be used in water. The more the filling is compressed, the longer our fuse cord will burn.
When using match heads, in order to optimize the process, the sulfur (let’s be honest, there is no more than 10 percent sulfur in the matches, and the main components are phosphorus and Berthollet’s salt, KClO3) you can not scrape off, but immediately break off the head of the match, laying them out in a row, then wrap it all up with tape, although some craftsmen, for example, manage to remove sulfur from matches with one graceful movement of their fingers.
How to make a jute wick
An ordinary jute rope, previously soaked in sodium or potassium nitrate dissolved in water, will do.
The same jute rope, or even better if you take an old cotton rope, will be suitable for making this type of wick. We repeat the already familiar procedures of soaking in a solution of potassium nitrate and thoroughly drying. Next, the powder pulp and organic glue are mixed to form a viscous thick mass. A cotton rope soaked in potassium nitrate (potassium nitrate) stretched through this mixture is called stopin.
Hunting matches as a wick
Why aren't the wicks wonderful? One match burns for about 20 seconds without going out even in inclement weather. Just remember to make sure that the charge does not detonate earlier than necessary due to sparks flying in all directions.
It's summer outside, and good wicks are lying around in huge quantities right under our feet. Collect the fluff, crumple it, and then wrap it in newspaper.
Watch the video on how to make a homemade wick from potassium permanganate and glue:
To come in
- Homemade cars (7)
- Alternative energy (4)
- Arduinos (5)
- Online business (11)
- Things (14)
- Videos (53)
- For home (68)
- Toys (22)
- Inventions (28)
- Cooking (5)
- Flying (3)
- DIY furniture (6)
- Small business (7)
- News (32)
- From idleness (29)
- Pyrotechnics (6)
- PC (1)
- Gifts (19)
- Radio control (8)
- Handicrafts (1)
- Fishing and Hunting (12)
- Garden and vegetable garden (8)
- Websites (1)
- DIY (191)
- Agriculture (32)
- Construction and renovation (26)
- Transport (1)
- Jewelry (18)
- Electronics (30)
Every person is a child at heart. What do children like? That's right, everything flapping and sparkling! After all, no holiday can be imagined without fireworks, and some people manage to make them at home.
Fortunately, this rarely happens. Much more often we buy pyrotechnics on the eve of the New Year holidays. Unfortunately, the quality of their production often leaves much to be desired. This is especially true for cheap pyrotechnics, the wicks of which are sometimes indecently short.
How to make a wick from scrap materials? Is this even real? There is practically nothing complicated about this.
The simplest option
Despite their primitiveness, such wicks burn very stably, and with proper sealing they are practically not afraid of getting wet. An ideal option for the safe use of questionable pyrotechnics!
If possible, then before making a wick, try to get hunting matches. They burn excellently and can easily withstand even getting wet, so they can be used to make an excellent fuse cord!
Press down this entire structure on top with the same strip of tape. The resulting ignition cord can be used even in winter conditions, since it is slightly susceptible to moisture. Since it is extremely easy to make a firecracker wick this way, it can be recommended for fireworks enthusiasts of all ages.
Attention! Strictly follow all fire safety rules, otherwise you can easily start a fire.
How to properly set off fireworks?
Safety precautions when launching fireworks are an integral part of a happy holiday. We have already talked about how to choose them correctly. Proper storage is also important: away from heating devices, in a dry place, where children cannot reach. Store pyrotechnics in their original packaging and be sure to carefully check the expiration date.
Do not trust the launch to children or drunk people. Check the expiration date carefully. Don't forget to take fire extinguishing supplies, and when you're done starting, clean up after yourself.
Where can you set off fireworks?
For a safe launch, it is necessary to select, firstly, the right site, and secondly, good weather conditions. It is necessary to select a sufficiently large (at least 50 by 50 meters) open space where there are no objects that can catch fire (trees, haystacks, piles of branches, wooden buildings).
Fireworks should not be used in wind or rain. A gusty wind can carry it towards flammable objects, and a wet firework will not be able to rise high and will explode close to the audience.
Method for young chemists
To make a reliable wick according to this recipe, you will need ordinary potassium permanganate, Moment glue or similar, and matches. A small amount of potassium permanganate and glue are taken, and then these two components are mixed until a homogeneous mass is obtained.
There is no need to rush; it will take at least ten minutes to completely mix the components. Since the resulting mixture is too liquid, you should wait a few minutes until the hardening process takes place.
After this time, the resulting puddle must be carefully shaped, giving it a more compact appearance. When the composition acquires the consistency of plasticine, it needs to be rolled out, giving the appearance of a sausage. Thickness doesn't matter.
How to make a wick from matches and the composition we described? It's simple: if you need a wick that burns quickly and very reliably, then a certain amount of ground match nitrate should be added to the composition before it hardens.
From foil
To do this, prepare:
- Matchbox;
- aluminum foil;
- paper;
- thread;
- electrical tape.
When everything is ready, proceed:
- Take a piece of foil and fold it in half. Pour match wax into the fold.
- Fold the sides of the foil. The result will be a kind of container with an explosive mixture.
- Wrap the foil in paper and tie with thread.
- Glue a few matches to the package, and you can launch an explosive package.
A more serious way
The disadvantage of the method described above is the fact that a thin newspaper is in no way suitable for the role of a fuse cord. It can quickly go out, and then suddenly burn out right before your amazed eyes. The consequences can be very sad.
Therefore, it is advisable to get high-quality cotton rope. It is also soaked in the above-described aqueous solution of saltpeter and dried thoroughly. To make the structure as reliable as possible, you can lubricate it with a mixture of potassium permanganate and Moment glue. We have already given the recipe for the “hellish composition” above.
This ignition cord will withstand even significant moisture, which will not have any effect on its ability to burn. By the way, what can you make a wick from, if you do not take into account the above methods?
What properties should a candle wick have?
Wicks are made from different materials, each of them has certain requirements. The wick is the central element of the candle that makes it burn. It determines how long and efficiently the candle will burn and whether it will smoke. When choosing a wick, it is recommended to take into account the diameter of the candle. Thin (up to 3 cm) correspond to thin wicks, candles with a diameter of 3-7 cm - medium, and wide (from 7 cm) - thick. If we “translate” this into the number of threads, then 15 twisted floss threads are suitable for the smallest candles in diameter, 24 for medium ones, and more than 30 for large ones.
When creating wax candles, it is advisable to use loose-weave wicks made from cotton thread, which burns slowly. If the candle is made not from wax, but from some other material, the wick must be tightly woven, since the viscosity of the candle mass during melting will differ. Wax is the thickest material.
And again potassium nitrate
Unfortunately, it will not be possible to abandon this substance, since only with its help can one create fairly reliable wicks. So, we take about two parts of saltpeter and one part of regular granulated sugar.
Grind all this in a porcelain mortar until a fine and homogeneous powder is formed. The resulting composition can be hammered into juice tubes (as in the method with match saltpeter).
What can you use to make a homemade wick?
The easiest way is to buy a skein of ready-made wicks in a store or online. Cotton threads, wooden skewers, pieces of fabric and improvised means such as braid or medical bandage, gauze are suitable for making homemade wicks.
In order for a candle to burn, the wick must be soaked. To prepare the impregnating solution, use the following ingredients:
- 0.5 l of water;
- 5 g ammonium chloride;
- 5 g sodium nitrate;
- 5 g calcium chloride;
- 10 g borax.
All components are mixed, after which the prepared wicks are soaked for at least 15 minutes, then hung to dry (this takes about 5 days). The composition of the solution can be modified by making it from 700 ml of water mixed with ammonium chloride and sodium nitrate (1 g each). It is also possible to use a mixture of slaked lime (30 g), sodium nitrate (8 g) and water (0.5 l).
Some needlewomen prefer components that are more commonly used in everyday life. For 1.5 liters of filtered heated water take 2 tbsp. l. table salt without additives and 4 tbsp. l. Boers. Stir the ingredients well until a homogeneous mass is formed and begin soaking.
If you need to prepare wicks for future use, it is recommended to use regular newspaper to store them. You can also, after completely drying, dip each of them three times into molten wax, then dry again until the latter completely hardens.
Bickford cord at home. Wicks and fuses
There are several types of OSH - wick, stopin, visco, fuse cord.
It is a cotton or linen rope impregnated with saltpeter or strong alkali, which allows it to burn slowly and steadily without flame at a speed of 1 m in 1-3 minutes [2].
(Italian stoppino) - a bundle of cotton threads soaked in potassium nitrate and coated on the outside with a creamy mixture of gunpowder pulp and glue. Burning speed is about 4 cm/sec. Stopin was invented for quickly lighting chandeliers with a large number of candles at balls, theaters, etc.
- a sticky tape on one side, to which grains of gunpowder are glued in a thin path. It became widespread in the mid-1990s as a wick for launching fireworks. Mainly used for simultaneous or sequential launch of ground fire figures. The burning speed is from 1 to 3 meters per second, depending on the type of gunpowder used.
- powder stopin, enclosed in a paper tube. Serves for rapid transmission of fire since its burning speed is more than 1 meter per second.
All of the above types of cords are very vulnerable to moisture; in addition, they give a weak flame force.
How to choose the thickness?
Still, the main material for wicks for centuries has been cotton or linen thread. Selection of its parameters, as practice shows, is not as simple as it might seem at first glance.
- It is important to consider the thickness and structure of the thread. If it turns out to be too thin, the flame will be weak, and such a candle will give little light. A thread that is too thick will contribute to the formation of large soot and, in addition to light, will also create a lot of smoke, and the candle will burn out much faster.
- The density of the material also matters. During combustion, the space between the fibers must be filled with flammable vapors; they are the ones that support the flame. So, for a wax candle you need a thread that is thicker, but less dense, compared to the wick for a paraffin or stearin candle.
- The diameter of the candle can also be a significant parameter influencing the selection of the wick. It would seem that a thicker candle should be equipped with a thicker wick. However, this is not at all true. A strong flame will cause intense melting of the top layer of combustible material of the candle mass, the wick will be flooded with melt and the flame will go out.
It is, of course, possible to correctly maintain the ratio of the material and diameter of the candle with the indicators of the wick. In an industrial environment, where everything is standardized, errors are virtually eliminated. For various candles, specially prepared thread of various knitting, thickness and density is supplied. But in the case of self-production, you will have to go through the thorny path of trial and error.
Reliable wicks
The most suitable wicks for homemade pyrotechnics. All of them are almost equally good; which one to choose depends on the situation. Let's see how to make a reliable fuse.
Hunting or camping matches
Special matches differ from ordinary ones by having a larger head and are coated with a special flammable material that prevents the match from going out along its entire length. Such a match burns at a constant speed, does not go out, the combustion time is about 20 seconds. Perfect as a short but reliable wick.
Incendiary fuse
Incendiary pipe
Despite the abundance of electrical appliances, candles are still popular, and if you want to make a candle with your own hands, then you need to know how to make a candle wick. Candles add a special mood during the holidays, they can create a special atmosphere during a romantic dinner, and candles can also come in handy during a power outage, from which no one is immune. You can buy a candle in a store, or you can try to make it yourself - any shape and size, with various decorative elements or scented. But before you start making a candle, you need to make a wick.
The wick is a kind of capillary through which the molten candle mass enters the combustion zone. Each type of candle has its own wick. The texture and thickness of the wick may depend on the thickness of the candle, its material, coloring, its filling with decorative particles and much more. For example, there are candles in which only the middle burns out, while the walls remain intact, and for them their own types of wicks are used.
For each candle, the wick is selected by trial and error, and sometimes you need to try several options. It should be remembered that a wick that is too thin will constantly go out, and a thick wick will smoke and the candle will melt too much.
Usually the wick is woven from cotton threads. They can be twisted, braided and even crocheted; the optimal type of weaving is selected based on the characteristics of the candle. If the candle is made of wax, then thick, loose threads are used as the wick and they are not woven tightly, but for other candles, on the contrary, thin threads and tight weaving are used to avoid soot. This is due to the viscosity of the molten candle mass: more viscous wax requires wide capillaries, and lighter paraffin, stearin and various fats need thinner capillaries, otherwise, due to an excess of flammable material, the candle will become very smoky.
What is it and what is it for?
Traditionally, a wick is a piece of fabric or thread of varying thickness and weave density. Its material absorbs flammable liquid and helps it rise up. From the molten liquid, even more flammable vapors spread between the fibers of the wick fabric and around it. The wick is easy to set on fire, the vapors and flammable liquid burn, illuminating the area around. But setting fire to the mass (oil or fat) in which the wick is lowered can be difficult, and sometimes impossible.
Thanks to the special design of the wick, kerosene or other highly flammable liquid (for example, alcohol) does not ignite immediately, and their combustion in more advanced burners can be controlled.
In a candle, the wick is impregnated with wax or paraffin. Thanks to the correct wick (material, density, thickness), the flame is even and illuminates the room without soot or flares. Paraffin or wax gradually melts into a liquid state, is absorbed into the fabric and feeds the flame with flammable vapors. This way the candle gradually burns out, remaining stable enough not to completely melt.
Thanks to the correct selection of the diameter of the candle and the thickness of the wick, as well as its exact position in the middle of the candle, a device for long-term and reusable use is obtained.
History[ | ]
The invention of a new type of cord by the English engineer William Bickford made it possible to increase the reliability of impulse transmission. In a kickford cord
stopin, covered with powder pulp, is enclosed in a double textile braid, the top layer of which is impregnated with bitumen to protect against dampness. Stopin ensured the stability of the burning of the cord, the powder pulp provided sufficient flame power, the double braiding provided flexibility and integrity of the core, bitumen, in addition to protection from dampness, also allowed the powder gases to break out during combustion, and oxygen to enter the combustion zone [3]. The combustible composition did not have enough oxygen of its own, since it had a low content of nitrate, the main supplier of oxygen. However, the fuse cord
has a number of disadvantages that do not meet modern requirements for reliability and safety: it goes out in water, the burning rate is unstable, bitumen cracks at low temperatures and loses its qualities.
In a modern fire cord
Outer diameter OSH 4-6 mm. The burning rate is constant, always about 1 cm per second, which allows demolitionists to set the time before the explosion along the length of the cord. Transfer of combustion between touching sections of cords is impossible.
visco fire cord has become widespread in household pyrotechnics.
What is this - a fuse cord?
Another feature that the Bickford cord had was its elasticity. It can be rolled up, conveniently carried, and when preparing an explosion, it can be wrapped behind any obstacle, which allowed sappers to place charges at short distances, while they themselves could be located in cover.
The cord, the manufacture of which involved wrapping stopin with textiles, obtained such properties of the kickford cord thanks to its design. The fact is that the active substance was wrapped in a layer of cloth, which was impregnated with gunpowder. This ensured uniform combustion and prevented fading. Next, a second layer of textile was applied, which was lubricated with bitumen. It protected it from moisture, gave additional elasticity and, during the combustion process, supplied the fuse with oxygen, which was very important.
However, this fire cord also had its drawbacks. It did not tolerate negative temperatures well, which is why it broke and crumbled. It could also become damp, and in conditions of high humidity or in water it was practically useless. That is why today it is considered obsolete, and the cord is practically not used anywhere when carrying out blasting operations.
Thus, a fuse cord can be purchased at any specialized store or obtained from modern pyrotechnics. In this case, the resulting copy will be similar to the original of previous years only visually. In fact, this is a completely different device that meets modern needs and operating conditions.
Kinds
Today you can find lamps of completely different shapes, sizes, types and materials. Its components remain unchanged: an oil reservoir, a stand and a glass to protect the flame. If the lamp is pendant, then most likely it does not have a stand - it is replaced by a decorative element, and there must be three metal cords that hold the tank.
Types of vessels vary depending on the dimensions and methods of their use:
- Tabletop, wall and hanging (used only in churches).
- Extinguishable and inextinguishable (placed in front of relics and relics).
- For home use, temple and church processions.
- Ceramic and glass.
- Made from colored glass or painted.
Closed memorial lamps are lit at the cemetery
You can buy lamps of different shapes and types for home use, but the most convenient are glass table lamps, but you will definitely need to purchase a stand for them (it protects against ignition if the glass cracks). In this case, lamps can be simple or decorated with carvings and paintings.
Required impregnation
Creating a wick is not only about making a thread of the required density and thickness. In order for her to become a candle wick, she must be prepared for this. So that the wick does not burn out immediately, but performs its function, the thread must be soaked.
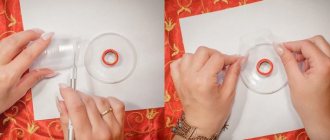
In the case of a wax candle, sometimes impregnation with the same molten wax is sufficient. The wax is melted over a fire in an enamel plate. The thread is placed in a plate and allowed to soak. The procedure must be repeated three to four times until air bubbles no longer appear in the liquid wax. Then it must be hung until the wax has completely hardened. The thread for storage can be loosely wound on a bobbin, laying layers of paper. It is better to store in a cool place so that the wax does not spread. When necessary, you can use scissors to cut the pieces to the required length. How to make candle wicks at home.
One of the most important tasks when creating a candle is choosing the right wick. If the wick is too thick, then the candle flame will be large and smoky, but if the wick is too thin, then it will burn faster than paraffin or wax, and the candle will “choke.” To make the wick, we use natural cotton thread, which does not smoke or crack when burning.
The ability to properly make a candle wick is a guarantee that the flame will be beautiful.
To make a braided or twisted wick, take 3 pieces of cotton cord or yarn. Mix 1 tbsp. l. salt, 2 tbsp. boric acid in a glass of water. Soak cords or yarn in the solution for 12 hours. Hang them to dry. When dry, twist or braid them together to form a wick. The wick is ready! Using scissors, cut to the desired length (candle length + 10-15cm).
To make a waxed wick, dip the already rolled wick into the melted wax until it is completely saturated. In order not to miss this moment, watch for bubbles; as soon as the wick starts to blow bubbles, you can pull it out. When removed, straighten the wick and place it in water. After that, lay it out on wax paper to dry. Ready-made wicks can be twisted into coils and stored until the right time.
First, take out the wick from another candle. To do this, you can buy household candles: they are very cheap and soft. The wick is very easy to get out of them - you just need to pull the tip of the wick.
Source
How to make a candle
The candles are over 2 thousand years old. The first mention of the device dates back to the 1st millennium BC. In ancient China and Japan, wax was extracted from sumac seeds. This is a shrub that bears fruit in the 5th year of life. Younger plants were not suitable for creating wax, because they did not yet produce seeds.
By the beginning of our era, candles based on animal fat were invented. They dipped the wick into it, covering it layer by layer. The wick itself was made from tow, cotton, timothy or milkweed stems. You can still make a candle yourself. How? More on this later.
Making a candle wick
To make a candle at home , you should start with a wick. They buy natural cotton thread for it. A striking example of this is “floss”. This embroidery material is available in any sewing store. For a candle with a diameter of 2-7 centimeters, about 15 single threads are required. For a product with a diameter of 10 centimeters, 24 threads are taken, and for a souvenir with a width of more than 10 centimeters, 30 threads are woven.
But, the diameter of a candle is not always an indicator of the thickness of the wick. There are models that burn through only partially. Such products only partially consist of flammable materials. The core burns out, leaving an untouched outline. The calculation of the power of the wick is made taking into account the paraffin, helium, or wax part. Wax does not require tight twisting of the wick threads, but paraffin and gel samples require tight twisting.
The wicks are crocheted, braided, or simply twisted. All options are valid. In order not to waste extra time, they even use ready-made parts from household candles. To make a candle with your own hands , you can soak the threads in advance, or you can do it simultaneously with pouring.
Determining the shape of the candle and installing the wick
In the matter of form, the author’s imagination plays a decisive role. Any container made of plastic, metal, or ceramic will suit it. Paraffin is poured into table cups, teapots, metal tubes, boxes, and yogurt cups. If there is a paper label, it is removed. During the process, the cellulose may catch fire.
It is most convenient to work with plastic containers. They are recommended for beginners. It's easy to make a hole in the bottom of a plastic container. A wick is inserted into it. The threads are tied in a knot on the outside of the glass. It will negate the flow of stearin or paraffin through the hole. The hole is made with a thick needle.
Place a toothpick, wire, or any crossbar on the top of the glass. The second end of the wick is tied to it. Thus, its position is fixed. The threads should stand straight in the middle of the container. Otherwise, the candle will burn and melt unevenly.
Coloring a candle
How to make a candle colored? A simple and affordable way is wax crayons for children. They are easily mixed with the lamp material, unlike gouache and watercolor. These dyes are created on a water-soluble base.
It is impossible to distribute them evenly in paraffin. Illuminating elements are required exclusively on a fat-soluble basis. Interestingly, lipsticks are one of these. Therefore, some craftsmen use old, unnecessary lip samples when making candles.
Among children's candle crayons, soft samples are ideal. Specialized stores and creative salons also sell tablet dyes. The granules were created specifically for those who are thinking about how to make candles with their own hands . Tablets have a much wider range of colors and shades than wax crayons. True, store-bought supplements are more expensive.
Pouring a candle
Typically, tin cans are used to melt wax. They are washed well and flattened a little. A trench is formed, from which the paraffin then flows in a thin stream into the mold for pouring. A canned food container is convenient, but, in principle, any container except glass will do.
In addition to a container for melting paraffin shavings, you will need a saucepan. Water is poured into it and brought to a boil. A jar of paraffin is placed in the seething solution. The scraps of unnecessary candles should be approximately the same in quality.
The molten material is poured into a pre-selected mold with a wick installed. First, the bottom is filled. If you pour everything at once, a lot of wax will flow out through the hole in the bottom. When pouring in layers, the “escaped” material is collected and again sent for remelting. This is the answer to the question of how to make a candle at home at minimal cost.
After pouring, the candle cools and hardens at room temperature. Placing it in the refrigerator can cause the material to harden unevenly.
If the candle comes out a little rough, place it under hot water for a few seconds. This way the contour is leveled and melted. But sometimes roughness is the author’s idea. When deciding how to make a candle yourself , many craftsmen deliberately choose shapes with a ribbed surface.
The most convenient way is to fill it upside down. That is, the head of the candle ultimately becomes the wick tied at the bottom of the container. The top of the fill becomes the base of the product. In this case, you do not have to separately fill the recess next to the wick at the top of the bowl. It almost always forms during the process of settling and hardening of the wax.
In addition to standard ones, scented candles are also poured. In this case, odorous mixtures and ethers are added to the melted material. They are thoroughly mixed with paraffin before forming the product. Regular coffee beans, cloves, or cinnamon from your home kitchen are suitable as a flavoring. Dried slices of lemons, oranges, and limes are also placed in paraffin.
Features of product functioning
During the combustion process, sulfur dioxide is released from the bomb; it is a poisonous gas that has a detrimental effect on all bacteria and microorganisms. During the combustion process, smoke penetrates into all cracks and cavities and allows for processing that is impossible using other means.
This is an ideal product for antibacterial treatment of premises; its effectiveness is higher than that of any other drug. They cope even in those places that cannot be treated in any other way.
Another important factor is that during processing the block warms up and dries the room, this helps to better preserve and protect the wood, because most diseases appear in it due to dampness.
The sulfur bomb for the cellar is very easy to use; each package comes with instructions that explain in detail all the nuances of use and the necessary precautions.
It has long been noted that the use of checkers is justified not only in cellars, but also in other buildings. This type of treatment is especially suitable for greenhouses; the smoke kills most soil pathogens, which has a very positive effect on yields.
Rules for using sulfur bombs
Despite the fact that smoke bombs for disinfecting premises are produced by many manufacturers, the principle of operation is absolutely the same for all. Therefore, we will consider the main points that are mandatory if you decide to use this type of processing.
Basic safety rules
The main thing to always remember is that a lit sulfur bomb is very dangerous to health. Moreover, violation of operating rules can even lead to death. Sulfur dioxide is an extremely toxic substance that irritates mucous membranes and causes poisoning.
To avoid harm to health, you should follow a few simple rules:
How to use a smoke bomb correctly
It is worth noting that the measures for preparing and using the product are quite simple, but, as noted above, due to the high danger of smoke, all recommendations should be followed strictly.
Before processing it is worth performing a number of preparatory operations:
Advice! Do not forget about the ventilation pipes - they must be plugged, and protruding surfaces should be generously lubricated with grease.
Advice! The process can be significantly accelerated by using a candle in the exhaust pipe - this will significantly increase air movement, and within a day the cellar can be used.
As you can see, there is nothing complicated in the process - everything is done by hand, and the restrictions are determined only by the danger of the substance. In addition, the price of checkers is very low, anyone can afford them.
Example of a gel candle
As an example, consider preparing an aquarium candle that will contain marine decorations.
— gel for candles (several colors are possible);
- several clean decorative items that will be inside the candle to decorate it. Since the theme is marine, you can use, for example, shells or marine-themed toys.
1.
Place the candle gel in a water bath;
2.
use low heat to heat the gel to 100C;
3.
strengthen the wick with the stem at the bottom of the mold with glue so that the wick is in the middle, which will ensure the best burning of the candle; you also need to secure the wick on top of the mold (you can use regular threads);
4.
it's time to use decorative items that you can arrange at the bottom of the mold as you wish - naturally, all of them should not be flammable; you can put several items at the initial stage, and others a little later;
5.
Decorative items inside the candle should not be placed closer than 6 millimeters to the wick, and preferably closer to the walls of the mold so that they are better visible;
6.
before you start pouring the gel, it is advisable to warm up the mold, and this can be done with a hairdryer - this way you can get rid of the bubbles;
7.
Monitor the temperature of the gel, and when you cool it to 80-90C, you can begin to slowly fill the candle;
* the best option would be to fill in layers, i.e. first, pour in a little gel and after a while, when the gel at the bottom of the mold hardens a little, you can fill in a new layer, and so on until the mold is filled;
* you shouldn’t wait long if you don’t want the boundaries of the layers to be visible;
* if you use several colors, you can make them shimmer smoothly in the form, but you also need to wait a little until the bottom layer hardens a little, otherwise the colors will mix;
8.
You can use the candle within a day.