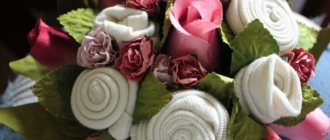
The article contains tips and master classes on making bouquets of tea, coffee and sweets.
Coffee and tea are standard gifts that are given on holidays, as well as as signs of attention or gratitude to family, friends and strangers. For a beautiful presentation, buy them in festive packaging or put them in a beautiful bag. But you can do it in a more original way - make your own beautiful gift bouquet with bags or small boxes of tea or coffee. On our website in the article “How to make a bouquet of sweets with your own hands for beginners step by step: master class, photo. A bouquet of sweets and corrugated paper, toys, flowers, in a basket with roses and tulips: compositions, photos” we have already told you how you can make a gift bouquet of sweets.
Perhaps you can get some ideas for decorating compositions with tea and coffee from there. If you want to give delicious favorite drinks and sweets (and are not afraid that they will melt in the heat), check out the master classes below.
Bouquets of tea and coffee: production, photo
A beautiful bouquet of tea and coffee bags.
The advantages of tea and coffee compositions are that you don’t need to spend money on various expensive materials to decorate them. You will only need to prepare:
- corrugated paper
- wrapping paper
- foil
- ribbons
- tape tapes
Materials and tools for making a bouquet of tea and coffee.
If you want to be completely original, you have experience in arranging floral bouquets and gift bouquets from sweets, money, soft toys, you can additionally use:
- floral mesh
- floral wire
- thin wooden sticks or knitting needles for flowers
- sisal
- half beads and beads on strings
- other floral accessories
It will probably not be difficult for you to get all the tools necessary for making tea and coffee compositions. You will need:
- scissors
- glue
- adhesive tape
- stapler
- wire cutters
- hole puncher
IMPORTANT: Take tea and coffee for an original presentation in small packages or jars. Individually wrapped tea bags and coffee sticks are also suitable.
To make the bouquet beautiful, it is advisable to select products in the same color scheme. But the tastes of the person to whom the gift is intended cannot be ignored. Therefore, tea and coffee may need additional wrapping.
For this tea you will need to make an additional wrapper of the desired color.
Paper tea bags.
The bags can be decorated with ribbon bows.
So, the basis of the bouquet will be a sisal basket. This is where tea and coffee are placed. This basket is made with a wire frame.
Bouquet based on a sisal basket.
- You can take different teas, with several flavors.
- The original multi-colored packaging is removed, the leaves of the drink remain in foil bags. Individual envelopes are made for them from matching colored wrapping paper.
- To make it even more beautiful, thread ribbons through the holes punched with a hole punch on the top of the bags and tie them into bows.
- Tea in new packaging and coffee are beautifully placed in a sisal basket. Empty spaces are filled with the same material. To create a feeling of volume, you can use anything, for example, candies, threads with beads, floral decor on the legs, etc.
- The composition is covered with a transparent film on top. Secure it with tape or staples.
- Wrap the basket with corrugated paper in several layers. You can take it in one, two or three colors.
- The bouquet is tied with a ribbon. Any decor can be used, as long as it does not burden the composition.
The bouquet is decorated with corrugated paper and any floral decor.
You can see variations on the theme of coffee and tea bouquets in the photo.
Bouquet with tea in boxes.
Elegant bouquet of tea and coffee.
Beautifully decorated bouquet of tea and coffee.
Bouquet with coffee beans.
Options for decorating gift bouquets of tea and coffee.
How to make a bouquet of fruits with your own hands?
Fruit bouquets are very relevant at any time of the year and will delight any woman not only with their beauty, but also with their original taste.
Suitable for creating a bouquet: pineapples, strawberries, grapes, kiwi, oranges. The main thing is that the fruits are not overripe and dense. Also, those fruits that tend to change color are not suitable. For example, apples or banana.
How to make a bouquet of fruits? How to make a bouquet of fruits?
You will also need forms for cutting out figures from fruits, skewers of different lengths, ribbons or chocolate, if necessary, polystyrene foam and a basket.
You can cut the strawberries in half lengthwise and place them on a skewer, dip them in melted chocolate and sprinkle with coconut flakes, place them in the cold to set and then decorate the skewer with a ribbon.
How to make a bouquet of fruits?
Cut the pineapples with a flower-shaped cutter and also string them onto the stems. Place it between the skewers with the strawberries.
How to make a bouquet of fruits?
String several berries in the form of blueberries or grapes like beads and dilute the composition with them. Place polystyrene foam into the basket, attaching it with glue to the bottom and insert all the sticks with fruit in turn to make a composition. You can add a ribbon bow or wrap it in transparent film for flowers.
Beautiful bouquets of sweets and tea
What could be better than drinking tea with chocolate? Probably, to receive all these goodies as a gift not just in a plastic bag, but in the form of a lush bouquet! If you decide to build such a bouquet yourself, prepare:
- corrugated paper
- wrapping paper
- foil
- film
- wire
- ribbons
- tape tapes
- any floral decor
- thick cardboard
- awl
- compass
- glue
- scissors
- stapler
- Double-sided tape
- tea bags in individual packaging
- any candies in individual packaging
A simple bouquet of tea and sweets step by step.
- Using a round object of the required diameter or a compass, draw a circle on thick cardboard. Cut it out. This will be the base of the bouquet.
- Punch a hole in the center of the circle with an awl. Pull the wire through it. You will get a blank for the bouquet handle.
- Glue tea bags along the edge of the circle with double-sided tape.
- Proceed to flower arrangement. Their cores will be candies. Look at the photo to see how you can wrap them beautifully.
- You can do it in two ways: make flower candies on legs, make holes for them in a cardboard blank, or do without legs, and also glue flower candies to the blank with double-sided tape.
- Additionally, decorate the bouquet at your discretion. Cover it with film on top.
- Decorate the bouquet with corrugated paper and tie its handle with ribbons.
Candy flowers: method 1.
Candy flowers: method 2.
Another option for making a bouquet from tea bags and sweets.
Edible flowers
We have already described in detail how to make edible roses and lollipop tulips with corrugated petals on our website.
We also learned step by step how to create entire bouquets of chocolate kinder surprises. We will continue to highlight new ideas in our publications. Read, dear sweet tooth, ask questions. What else would you like to know? Have wonderful holidays and the sweetest gifts.
Bouquets of loose tea. Bouquet of tea bags and sweets
Gift bouquets of sweets can be made with loose tea in small packages or individually sealed bags. Look at the photo how beautiful both options look.
Bouquet of loose tea and sweets: option 1.
Bouquet of loose tea and sweets: option 2.
Bouquet of loose tea and sweets: option 3.
Bouquet of loose tea and sweets: option 4.
Bouquet of tea bags and sweets: option 1.
Bouquet of tea bags and sweets: option 2.
The meaning of gifts
Gifts are given to loved ones, children, grandmother, mother and father, not only on special holidays and special occasions. The true meaning of gifts is to tell a person about love, about how dear he is to you. To lift his spirits when he is sad, sick, or separated from loved ones. Today it’s easy to use delivery. It is easy to order and pay online. If you send your parents a box of sweets, it will be a real first aid kit to lift their spirits. Which is very important during quarantine.
On the Internet you can order not only a box of chocolates with a bouquet of flowers, but also a bouquet of sweets, as well as a gummy bear weighing 1 kg. But it’s best to make a gift with your own hands and use a taxi for delivery. You call, give the taxi driver a gift and give the address.
In this case, you can add a homemade cake and a whole album with good wishes to the basket of sweets. Toys made from chocolates will reach the recipient safe and sound. The main thing is to contact a reliable, proven taxi service.
Making New Year's bouquets from sweets and tea
How beautiful bouquets of sweets and tea can turn out for the New Year! Here are some ideas for your creativity:
- Use tea, coffee, and candies in New Year's covers to make compositions.
- Decorate the bouquet with tinsel and Christmas tree beads.
- Instead of floral decoration, use small Christmas tree decorations, lacquered and glitter-sprinkled pine cones, figurines of Grandfather Frost and the Snow Maiden.
- A spruce branch can look very good in a bouquet.
- If you really want to, you can add an LED garland to the bouquet for a breathtaking effect.
Bouquet of sweets and tea for the New Year.
Composition of tea and sweets for the New Year.
Necessary materials. Master Class
To make a bouquet of tea with sweets, you need to decide on the color, content, decorations inside and outside, and also take into account the holiday for which you will be preparing the gift.
Holiday tips:
- For the New Year, it is better to use colors associated with the color of the Christmas tree, toys, and garlands.
- On Valentine's Day, presenting such a surprise in red, pink, white flowers will be very romantic.
- On February 23, a gift in military style is appropriate.
- On March 8, it will be interesting to use delicate colors and shades to show the lady that she can feel fragile and tender with a man.
- For a birthday, it is better to use colors that the recipient likes.
Materials you will need:
- crepe, craft and colored paper;
- frame;
- glue or any other fastening materials;
- scissors, stapler;
- decorations (ribbons, beads, flowers, leaves, lace, etc.);
- Tea coffee;
- candies, chocolate, cookies, muffins, small cakes;
- postcard (optional).
How to make a bouquet
- You need to decide on the color scheme. It’s better to do everything in the same shades. Although it is possible in different ways, it depends on the person’s preferences.
- You need to prepare all the materials so as not to be distracted from preparing the gift.
- Make paper bags for tea or coffee, you can also make holes in them for ribbons. Using these ribbons, tie the base of the bag with a bow or in any other way.
- It is better to write the type of tea or type of coffee on each bag.
- Make a frame from sisal. Add confetti, homemade flowers, ribbons, etc. to the filling.
- Make flowers out of paper and place candy inside the flower.
- Place paper flowers, tea or coffee bags, and other decor on the frame, cover with transparent film and secure with ribbons or staples.
- And now the bouquet is ready!
Bouquets and gifts of tea, coffee, sweets
Could there be a more banal gift than tea, coffee and sweets? But you will look at it completely differently if it looks like a beautiful box! To make this, take:
- cardboard and penoplex
- corrugated paper
- braid
- any floral decor
- scissors
- hot melt adhesive
- Double-sided tape
- sandpaper
- tea bags
- coffee in sticks or bags
- candies in individual packaging
Basket of tea bags and sweets.
- For the bottom and lid of the box, cut out two circles from cardboard.
- The walls of the box will be made of penoplex. Attach one of the cardboard circles to it and circle it. Inside, draw another circle of smaller diameter. Cut out the walls. If they are rough, sand them down.
- Cover cardboard and foam blanks with wrapping or corrugated paper.
- Assemble the bottom and sides of the box. Cover the joints with braid or decorative cord.
- Glue tea bags on the outside along the entire circumference of the box with double-sided tape.
- Decorate them with ribbons, braid, lace at your discretion.
- Start decorating the lid of the box. Decorate it with fresh flowers, any decor, or flowers made from candies.
- Fill the box with tea, coffee, sweets, small souvenirs and soft toys.
- Wrap the box in film and tie it with ribbon.
You can put whatever you want inside this box.
How to do
Now I’ll tell you step by step how to put it all together.
First you need to prepare flowers with sweets. I have 3 dahlias and 6 roses. You can create any other flowers at your discretion.
And in addition, I prepared buds from Autumn Waltz candies. It seemed to me that with their simple appearance they would add a special mood to the composition.
So, look below for special photos for beginners.
It is necessary to cut a part from the penoplex that will be inserted into our basket to the size of the bottom of the coffee jar.
How to do it? Just draw a pencil around the jar in the place where it will stand and cut out everything unnecessary with a stationery knife.
Check if the coffee is inserted well into the base. Everything is fine?
Then cover the penoplex with simple corrugated paper using hot glue.
Then arrange the flowers throughout the basket next to the coffee jar.
By the way, if you plan to add small boxes of sweets to your gift, like mine, for example, I recommend leaving a small space for them at the back of the basket.
Just step back about 2.5-3 cm from the edge. This will be the place for the boxes.
So, the flowers are arranged. If everything is satisfactory, then we secure them with hot glue for reliability.
To do this, take out each flower, coat the end of its stem with glue and insert it back.
To further decorate this gift set, I will use artificial berries. Like this.
And to hide everything that shouldn’t be seen on the bottom and at the same time create the effect of grass, I used green sisal fiber.
You can also change the satin bow at the basket to a brighter one if you are not satisfied with the one that was originally there.
In addition, decorate coffee and a box of sweets with the same bows.
And voila, the present is ready! You can go and feel free to give.
Here are some more examples of work for women.
Bouquets of tea and coffee: gift baskets
And now we will teach you how to arrange a composition of tea, coffee and sweets in a wicker gift basket. Prepare:
- small wicker basket
- corrugated paper 3 colors
- sisal
- satin ribbons
- artificial flowers and plants
- floral decor
- wire
- glue gun
- scissors
- lighter
- threads
- awl
- paint in a can
- polyurethane foam
- tea and coffee bags
- small round candies in individual wrapper
Basket of tea and sweets.
- Using candy, corrugated paper, wire, and other necessary materials and tools, make flowers on legs. Make them in the quantity you need.
- Blow foam into the finished wicker basket and then place your flower candies into it.
- Paint the foam in the color you want using paint from a can.
- Finish the sides of the basket with tea or coffee bags, placing them on double-sided tape or hot glue.
- Decorate the outside of the basket at your discretion.
Making flowers from candy.
Preparing the basket.
Basket decor.
How to make a bouquet of money with your own hands?
Many people prefer to give money for the holiday. But to add originality to such a gift, you can make a bouquet of fake banknotes and put in it the amount you intend to give. Although if you are ready, you can make the same bouquet from real banknotes.
For the creative process you will need:
- Certain banknotes
- You can use a stem from an artificial flower, a wooden skewer or a cardboard tube as the base of the flower.
- Scotch
- Rubber bands
- Glue gun
- Scissors
- A piece of foam
- Colored ribbon
- Oganza, feathers
how to make a bouquet of banknotes?
To make petals, twist the ends of the bills onto a skewer.
how to make a bouquet of banknotes?
Next, bend the bill in half and thread a rubber band through so that the curled corners are at the top.
how to make a bouquet of banknotes?
We wrap a paper tube that we prepared earlier or a wooden stick with a bent banknote and secure it with an elastic band.
how to make a bouquet of banknotes?
Other money is attached in the same way to make the flower as magnificent as possible.
how to make a bouquet of banknotes?
Now you can start forming buds on the stem:
how to make a bouquet of banknotes?
We take a skewer, wire or base from another artificial flower. We wrap a piece of foam rubber around the end of our leg and dab it with glue so that it is securely attached to it. The inside of the flower blank also needs to be greased with glue without touching the money. While the glue is not dry, you need to put the tube with the flower on the leg and let it dry.
how to make a bouquet of banknotes?
how to make a bouquet of banknotes?
To form the shape of the bouquet, you can use polystyrene foam, insert sticks there and decorate with organza, beads, feathers and ribbons, or decorate a basket with them.
Greenfield tea bouquet
For bouquets with coffee and sweets, Greenfield tea in bags is most often used. But you can look for another one, in which each bag will also be placed in individual packaging. It's good if it's monochromatic.
Greenfield tea bouquets.
Bouquet of tea Ahmad.
Tank of sweets
Crafts made from sweets for men are a separate topic.
Every man with a sweet tooth will appreciate such a gift. Required:
- cardboard;
- stationery glue;
- corrugated paper;
- sweets;
- scissors and measuring ruler.
At the very beginning of assembling the tank, you need to choose a base. It can be any medium-sized box.
Tank base
In order to create a tank turret, it is necessary to form a trapezoidal figure from cardboard strips. Then cut out the side parts and glue everything together using a glue gun. The result will be a tower base.
Using multi-colored paper, the tank turret and its base are glued separately.
Cut long cardboard strips into tracks. Glue the ends together.
Oval figures are cut out of cardboard. It is important that they are slightly smaller than the diameter of the caterpillar. Then the ovals and manufactured tracks are covered with corrugated paper.An oval is carefully inserted inside the tracks. The parts are glued together on the reverse side.
The finished caterpillar is outlined with a pencil, and two additional ovals are cut out along the diameter of the caterpillar. The oval is covered with paper and glued to the inside. All parts must be glued together.
To make a barrel for a tank, you should cut a piece of corrugated cardboard of the required size and free it from one side of the top layer. This is necessary to make it easier to give it the shape of a tube.
A hole is evenly cut out in the tower, the barrel is glued and decorated with paper to hide certain blots in the work.
Decoration with candies. Chocolate bars are ideal for decorating caterpillars. If the wrappers have tails, they should be secured with tape to the candy, then the chocolate tank will look better.
Square-shaped candies are perfect for decorating a tank. Each candy is glued individually. It would be appropriate to glue chocolate medals to the caterpillars. The tank is ready!
When presented with such delicious equipment as a gift, an enthusiastic look and joy will be guaranteed!
"Weight made from candy." DIY gift for a man on February 23
Necessary materials
1. Jelly candies (or other candies except chocolate, semicircular) – 700 grams. 2. Foil. 3. Hot-melt gun + glue sticks. 4. Plastic ball (for the base) – 1 piece. 5. Silver satin or crepe ribbon (1 cm wide) – 25 centimeters. 6. Chocolate medal (gold) – 1 piece. 7. Blank for an acrylic keychain (square) – 1 piece. 8. Postcards for a keychain with holiday symbols – 2 pieces. 9. If desired, you can prepare festive packaging and a bow.
Master class with step-by-step photographs
So, take some candy. Wrap the edges of the candy wrappers and use a gun to glue them to each other (not to the candy!!!!). We should get a round shape, as in the photo.
Cut the foil into squares. The size of each square is approximately 5*5 centimeters, it all depends on the volume of the candy. I needed about 50 of these squares. The number of candies and the number of foil squares also depends on the diameter of the plastic ball.
Wrap each candy in foil. We also wrap the ball itself in foil and fix the edges with a heat gun.
We start gluing the candies to the ball from the bottom, leaving practically no free space between them.
Cover the entire ball. If you accidentally have free space between the candies that needs to be filled, then simply roll a ball of foil.
Now take the cardboard. According to the size of the weight, cut out the handles. Glue them together.
Cover with foil.
Glue the handle to the top of the weight.
The kettlebell is almost ready. All that remains is to attach the medal to it. Measure 20 cm of tape.
Pass the ends of the ribbon through the handle of the weight and glue on the medal.
Cut out blanks for the keychain. Insert them into the keychain.
In the same way as the medal, thread it and fix it on the weight.
You can glue a sticker or postcard with “February 23” into the central part of the handle. Our candy weight is ready.
Another video: A stylish gift for a motorist - a steering wheel made of candies:
Beer mug made of sweets
Such a surprise will bring a smile to a lover of the foamy drink. And if he also has a sweet tooth, then his admiration will know no bounds.
You will need the following materials:
- oblong chocolate candies;
- stationery scissors;
- double-sided tape;
- tin jar;
- pearl-colored sisal;
- glue gun;
- thick cardboard;
- craft paper;
- congratulation card;
Preparation method:
You need to glue two pieces of tape along the edges of each of the candies and press the tails of the candy wrappers to it.
Secure a strip of double-sided tape to the jar, remove the protective tape and secure the previously prepared candies on it. It is important that the candies are placed close to each other in a vertical position.
Repeat the previous step until the entire mug is decorated with candies.
Glue adhesive tape on top of the jar lid and also glue the candies.
To make a handle for a craft made from sweets, you need to connect a couple of candies, and glue the free ends from the candy wrappers to the edges of the jar.Take a piece of pearl-colored sisal and fix it with glue along the top edge of the jar. The result is something like beer foam.
It would be nice to make a stand for the mug. It is made quite simply: a circle is cut out of thick cardboard, which needs to be decorated with craft paper. A beer mug is placed on the failed stand. The gift is ready!
This is how you can present familiar things in quite an interesting way.
