Periodicals in the form of newspapers and magazines very often do not have a specially designated place in our homes. It is clear that this mess does not decorate the home at all. A newspaper rack made with your own hands from scrap materials can help you deal with the problem.
This is not just an interior decoration, it will become an excellent assistant in cleaning and maintaining order. All newspapers will be located in a specific location.
Stores offer a huge selection of newspaper holders - for every taste, color and income, but this is exactly the case when a hand-made item is better than a purchased one. The advantages are obvious:
- you choose the design yourself, based on your own preferences;
- this option is much more economical;
- the creative process will bring joy and satisfaction from the result.
Types of newsstands
They are divided in several directions. By methods of application in the interior design of a room:
- Tabletop view.
- Floor.
- Suspension.
- Universal - this type is suitable for installation on both the floor and the table.
The floor newspaper rack is remarkable in that when placing it in the house there is no need to drill into the walls, and therefore the wallpaper and tiles do not deteriorate. There are many models. The sizes, decor, and design styles are different.
The second, no less common variety is the wall-mounted newspaper rack. They are more applicable in small apartments. The wall always has more free space for placement than the floor. They differ from floor ones in smaller dimensions. Mounted at any level on walls. Made from any material - metal, fabric, wood, plastic, etc.
Hanging “storages” are usually the lightest and are made of fabric or yarn.
The assortment is extremely wide, but in this article we will tell you how to make a newspaper rack with your own hands.
Let's create an organizer. Where to begin?
Even a person without experience can make such a space organizer. This will require available materials, inspiration, and a couple of hours of free time.
Creating a device for storing small items will not require much expense. In every home there are boxes, gift wrappings, scraps of materials. You can always purchase the missing parts for a craft.
You can come up with different options for storing small items. Check out some ideas. Perhaps they will inspire you to create your own work of art.
What may be needed for production
To create a newspaper rack with your own hands, you can choose any tools and materials:
- Wooden bars.
- Pieces of plywood.
- Metal rods.
- Willow stems are twigs.
- Matter.
- Yarn for knitting.
- Clothesline and scraps of twine.
Surface treatment methods are also varied. These include:
- Painting with any types of dyes.
- Varnishing or using stain.
- Techniques of decoupage, craquelure, patchwork, etc.
From disk and felt
If you have an old DVD lying around, you can make a useful thing out of it at home. Just add a piece of colored craft felt to it.
It won’t take much time to create, and the only tools you will need are:
- Multi-colored felt. It is advisable to take a couple of leaves so that the pocket differs from the background.
- Disk.
- Satin ribbon.
- Rhinestones on a self-adhesive basis.
- Thermal gun. In general, “Crystal” will do, but it takes much longer to dry.
- Scissors.
- Pencil or piece of wax for marking.
First you need to make blanks for the organizer. Place the disc on the felt and trace with a pencil. Carefully cut with scissors. Place the disk on a leaf of a different color and circle it. Find the center and draw a line - you get a pocket.
Now glue them together like this. If you use “Crystal”, then press it on top with a book. If you want more decoration, cut out a flower from felt of a different color.
Glue the loop and rhinestones. You can see a photo of the finished organizer. You can store markers, pens, pencils and notes in it. You can hang it above the table and your office will always be at hand.
DIY crafts from egg trays: original toy ideas for children and useful crafts for adults (115 photos)- How does an air source heat pump work?
DIY birch bark crafts - techniques and master class for making crafts for beginners (105 photos)
- How to make a stationery with your own hands if you don’t have felt? Here are the options: Kraft paper.
- Textile.
- Cardboard, preferably recycled.
Other options for organizers for office storage
DIY newspaper rack
The option, assembled from thin blocks of wood and leather strips, looks very interesting.
To work you need:
- A block of wood with a round cross-section, a diameter of 1.5 cm, and a length of 72 cm.
- Rectangular beam - 1.5x4 cm, length 164 cm.
- Leather straps or a rectangular piece of leather - for making a newspaper bag.
- Strong threads.
- Screws with a diameter of 2.5 mm and a length of 3 cm.
- Wire or ready-made rectangular rings.
Don't forget about the tools:
- Drill and hacksaw.
- Thick needle for stitching leather.
So, we make a newspaper rack with our own hands.
The procedure is not very complicated, just follow the algorithm:
- We divide the (round) block in half - 36 cm each, and the square block - into 4 parts of 41 cm each.
- In all square sections we drill holes to the middle (not through), retreating 2.5 cm from the edge.
- Next, we fasten 2 square blocks each with screws, placing them together on the wide side. Here we wrap it with wire or put on a ring.
- Spread these structures apart with a cross and connect them together with round bars.
- It remains to align the legs to give stability. You can finish it in any way - paint or treat it with a layer of varnish.
- We're done with the wooden frame, let's move on to the leather.
- We will need 6 belts, 62 cm long and about 4-5 cm wide. Make loops at the ends through which to pass round bars on both sides.
That's it, the design is ready.
Desktop organizer made of planks
This will require more tools, resources and time. You need to take three boards of the same size. The length should be from 15 to 20cm, width – 7-12cm.
The future design of the product must be drawn in advance on the top board. You should make a slot for a smartphone, holes for pencils and pens, and a compartment for small paper sheets, calendars or business cards.
All cuts are made before gluing the boards; holes for the handles must be made using a drill. Afterwards, the boards are glued together and painted in the desired colors.
Related article: How does the color of a crib affect a baby?
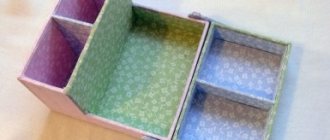
DIY newspaper rack made of cardboard
Sometimes, when buying something, we part with cardboard containers without regret. And we don’t even know how to use it. But it’s very easy to assemble an excellent newspaper rack with your own hands from corrugated cardboard.
Prepare the following materials and tools:
- A pack of white paper napkins.
- Cardboard box or corrugated cardboard sheets.
- Paint brush.
- Bowl for preparing the adhesive solution.
- Hot glue and gun.
- PVA.
- White paint - acrylic.
- Spray paint.
- Foam sponge.
- Colorless varnish.
At the very beginning of the work, mark the cutting location using a pencil and ruler. Cut off the unnecessary part. To make the internal compartments, the box is laid sideways on a sheet of cardboard and outlined. Then, reducing 2 mm along the entire perimeter, cut it out with sharp scissors.
Carefully coat the sides and bottom of the workpiece with glue and insert it into the desired place in the box. Almost everything, the newspaper rack is ready. All that remains is to decorate it.
To do this, take a napkin and tear it into pieces. In a bowl, dilute PVA with water (1 to 1). Now, with a brush dipped in the solution, coat a small area of cardboard and apply a napkin - loosely, forming folds. In this way we cover the entire surface.
To finish the job, you can either spray paint your newspaper rack or leave it white. Then apply varnish and dry. A wonderful container for periodicals is ready - use it with pleasure!
How to keep your home tidy: office
How else to use the A4 paper tray
1. If you attach several wooden paper trays, you will get convenient shelves for small items.
2. Another paper tray can be used to hide, for example, a modem and various wires and cables. It is better to use a wooden or cardboard tray, as they will not interfere with the Wi-Fi signal.
There is a catastrophic lack of space on the desktop; one storage box is somehow not enough for my papers. And like a first-grader, I have colored paper, PVA glue, scissors, and sheets of felt - and everything needs to be put somewhere. And I decided to make a box or tray for storing papers myself. It is done quickly - cut it out of cardboard and glue it together. However, first things first.
- Cardboard (I have thick corrugated cardboard from a packaging box)
- Super glue
- Pencil
- Ruler
- Masking tape
- Scissors
- Glue stick
- Stationery knife
- Napkins (for pasting our beauty)
Textile newspaper rack
This is probably the easiest way to create! Making a newspaper rack with your own hands from fabric is as easy as shelling pears!
You will need a piece of fabric measuring 27 by 62 cm. The denser it is, the better. If you don’t have one on your household, you can glue the soft fabric from the inside out with non-woven material.
You also need a block of wood - 31 cm, thread and needle, scissors, braid or cord (length 35 cm).
A rectangular piece of fabric must be processed along the edge using any convenient method - trimmed with bias tape or simply folded over the edges.
Now fold this piece in half with the wrong side inward and sew the free edges together. We insert the block inside and sew the seam, securing it. We tie the cord to the ends of the stick, thereby securing the fabric.
That's all, there are a huge number of options for decorating such a product.
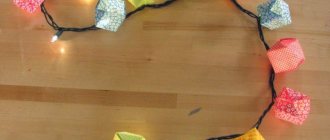
From paper tubes
It's time to use some little tricks around the house and grab some toilet paper and paper towel rolls. These are ready-made cups in which you can immediately put pens, but why not decorate them further.
A very simple homemade project that even children can do. To work you will need:- Decorative paper, self-adhesive, gift wrapping.
- PVA glue.
- Scissors or utility knife.
Now you can proceed to the assembly:
- To begin, cut the sleeve to the desired size. It is not necessary to make the glass full height. By the way, you can make such a slide. This will make it even more interesting.
- Now the parts need to be sealed with paper. Apply a thin layer of PVA to the sleeve and let it dry a little. After about 30-60 seconds, wrap it in paper. This will prevent bubbles from appearing and the wrapper will not become soggy.
- When the paper is dry, you can glue the sleeves together.
- Glue the sleeves onto a thick base, such as thick cardboard.
- If desired, you can decorate with beads and seed beads. It makes excellent tubes for stationery.
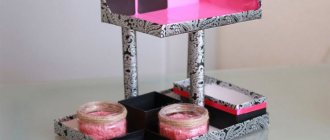
Desktop mirrored newspaper rack in high-tech style
And to create the next original thing you will have to work hard, but the result is worth it. Tools required for work:
- MDF panels (30x30 cm) - 4 pcs.
- Acrylic mirrors (30x30 cm) - 2 pcs.
- Screws.
- Glue "Liquid nails".
- Drill.
- Light gray acrylic paint.
- Screwdriver.
First, let's assemble the frame of our newspaper rack. To do this, the panels must be screwed to each other, forming a square.
Use acrylic paint to paint all wooden surfaces except the sides.
Coat the sides generously with glue and attach the mirrors. Leave to set and dry completely.
This is how - very quickly and simply - a wonderful “keeper” of newspapers and magazines is made! And the mirror surface will give it additional charm!
Organizer for the kitchen: a useful idea that never occurred to me
Sometimes things are not so smooth in the kitchen. Especially if the area is small and there is little space for organizing full-fledged amenities. In this case, you can create convenient accessories for storing dishes, napkins, useful items and towels. Let's look at the detailed instructions for making such a design.
Kitchen organizers can be placed on a loggia or balcony if they are combined with it
List of materials for work
The quality of materials has a huge impact on the result of the work. What you will need to produce a compact device for hanging towels and kitchen rags:
- a board from an old chair or bench, you can choose an aged one;
- unnecessary forks (just don’t use aluminum ones, as they bend too much);
- self-tapping screws or strong double-sided tape;
- varnish and paint.
Decorated cutlery will perfectly complement the interior when used in different organizers
Manufacturing instructions
Cutlery on the organizer, if they are made using the same technique, will look much more interesting.
Original towel hooks will not only focus attention, but also perform their function perfectly.
- We sand the selected board and paint it, if possible varnish it.
- Then let the surface dry. Meanwhile, take three forks and turn the tines in an interesting way. Bend the handle to form a hook.
- We attach a strip of double-sided tape, divided into three parts, to the board, then remove the protective film.
- We attach the forks to it one by one. If necessary, they can be additionally secured with self-tapping screws.
The role of a towel hanger can be played by ordinary clothespins, which can be attached to the door or the side of the kitchen cabinet using a glue gun.
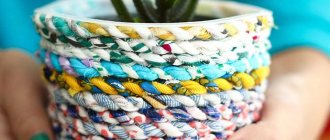
Hanging knitted newspaper rack
Yes, there are plenty of ways to make it. Here is another one of them - a wall-mounted newspaper rack, hand-knitted from yarn.
Remnants of thread from previous knitting are suitable for this. Hook, a wooden stick with a length equal to the width of the future product and 5 cm on top.
How should you proceed in this case? Knit a rectangle with any pattern you like, fold it in half and tie the free edges, connecting them together.
Then attach the stick and tie a string, which you then tie to its ends. Fringe, crocheted flowers, beads, etc. are suitable as decoration here.
This option is remarkable because you can independently choose the texture of the threads, the knitting pattern and the size of your product.
LEGO organizer
Many parents are familiar with the situation when construction kit parts are scattered throughout the house. Why not make a useful thing out of it?
The designer provides a lot of possibilities. The child himself can try to make a craft, developing his imagination at the same time.
Side edge milling
To form the profiles of the side edges of all parts, two cutters from the usual standard set for a milling machine are enough (photo 16).
The first cutter is for rounding. It allows you to make the edges rounded. The standard radius of curvature is approximately 10 mm.
Using the keys, install the cutter into the collet of the milling machine.
The offset of the cutter relative to the base of the router must be adjusted so that the rounding is not done completely, but does not reach the edge by 1.5-2 mm (photo 17).
To adjust the required overhang, we will make several test passes on unused trim. The profile of the side edges of all partitions should be the same and have the shape of a circle segment (photo 18).
We mill the partitions on both sides around the perimeter, including the perimeter of all internal elements.
The profiles at the base and rear wall can be made into more complex shapes - for example, using an S-shaped cutter. Since the volume of material removed in this case will be much greater than when working with a rounding cutter, we will form the profile in two or three passes, each time lowering the cutter by 2-3 mm (photo 19).
It should be remembered that only three edges need to be milled on the back wall - two side and the top. There is no need to mill the bottom edge, since this is where it is attached to the base.
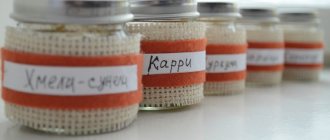
Spice jars on the bottom wall of the cabinet
I saw somewhere a jar that came with runners that can be attached to the bottom of the cabinet, and then simply insert the jar into the grooves. Then the can will slide out like a closet door. I can’t remember where I saw such a miracle, but it gave birth to an idea in my head: it may not be so easy to make a sliding mechanism, but using the bottom wall of the cabinet is quite easy. You just need to screw the lids on the jars, and voila - you can screw the jars themselves into them and store spices that way. I Googled it, and it turned out that such a cool idea was not only in my head.
Classic pencil holder
Any chaos can be structured, be it a noisy office or a first-grader’s desk. To achieve the desired result, it is important to decide on the number of organizers and their intended purpose .
To make such a popular item, you can use cardboard packaging for juices, kefir and other products.
It is not necessary to have a special tool or any unusual materials; it will be enough to take:
- scissors;
- stationery knife;
- stapler;
- glue;
- fabric or paper for decoration.
Attracting good luck and prosperity: 6 simple ideas for creating mice for the New Year
When everything you need is ready, you can start working. The organizer is made in a few simple steps:
- We cut empty packages to the same height. The most convenient way to do this is with a stationery knife. The cut boxes should be washed again and dried.
- We fold the blanks so that in combination they form the correct shape.
- Glue the sides of the packages together. The upper parts are additionally secured with a stapler.
- Decorating the outside. Wrapping paper, jeans or any other fabric is perfect for this.