In the preschool and school curriculum, along with autumn crafts, homemade cards for March 8 and Christmas tree decorations, there are unusual and original products from scrap materials for Cosmonautics Day - bright models of the Solar system, small space stations, stars and asteroids, rockets, spacesuits . Crafts for Cosmonautics Day for kindergarten and school, created with their own hands from paper, cardboard, plasticine, discs, bottles and even pasta, allow children to show their imagination, bring the distant and unattainable world of space closer, open the veil over dozens of secrets of the Universe, and literally touch hands to the mystery of the universe. Our page presents the best ideas and step-by-step master classes with photos and videos. Be sure to use them!
Simple DIY crafts for Cosmonautics Day in kindergarten
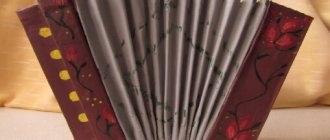
We invite the littlest dreamers to make a simple craft with their own hands for Cosmonautics Day in kindergarten - space stars. Unusual figured products with small colored crystals will decorate an exhibition of children's crafts and will certainly bring victory at the holiday competition.
Necessary materials for a simple craft for Cosmonautics Day in kindergarten
- chenille wire (fluffy sticks for needlework)
- sugar
- thin satin ribbon
- wooden skewer
- wide ribbon
- clear nail polish
- star cookie cutter
Step-by-step instructions for creating an interesting craft for kindergarten for Cosmonautics Day
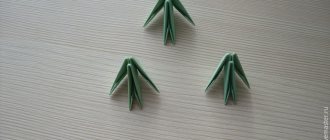
- Wrap the cookie cutter with red chenille wire. Wrap the ends of the stick, remove the mold and set the resulting figure aside. Do the same with sticks of other colors. The brighter the shades of the fluffy wire, the more impressive the finished craft will look.
- Tie a thin satin ribbon to each finished star. Fix the loop, hang the stars on a wooden skewer, as in the photo.
- Prepare any glass jar (or several if there are a lot of stars). Place a skewer on the neck. Make sure that the figures hang freely and do not touch the bottom or walls.
- Mix a glass of sugar with a glass of water and heat until completely dissolved. Pour another glass of sugar into the bowl with syrup and repeat the process.
- Pour clear, sweet liquid into jars with hanging stars.
- Leave the container in a warm, bright room for several days. Every day the crystals on the stars will form more and more noticeably.
- After 3-5 days, remove the stars from the water and place on parchment paper. Let the crystals dry. Generously coat the space stars with clear coat.
- Hang the dry figures by a thread on a long piece of wide colored ribbon. Now you have a ready-made simple DIY craft for Cosmonautics Day in kindergarten.
Interesting DIY crafts for Cosmonautics Day for school: step-by-step master class
Younger schoolchildren are in some ways smarter, more diligent and patient than kindergarten children. This means that for Cosmonautics Day they can easily prepare not just small space stars, but the entire solar system as an interesting thematic craft. And step-by-step master classes and tips from parents will help you complete the task much faster.
Necessary materials for an interesting craft for school on Cosmonautics Day
- flexible wire
- foam balls
- plasticine
- fishing line
- scissors
- gouache paints and brushes
- glass of water
A step-by-step master class on creating an interesting DIY craft for Cosmonautics Day at school
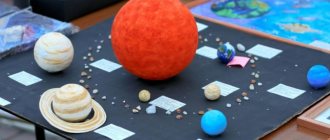
- To make the Sun and major planets of the solar system, paint several foam balls with gouache in suitable colors. To create small planets, mix several colors of plasticine and form balls of different shapes.
- Using strong flexible fishing line, twist the “system”. To do this, make several orbits in which the planets will be located. Secure the orbital rings together with fishing line.
- Make through holes in the foam and plasticine balls and place the planets on the wire in the desired order. In the center of the composition is the Sun, then Mercury, Venus, Earth, Mars, Jupiter, Saturn, Uranus, Neptune.
- Tie a loop of fishing line to the very last turn of the wire so that the homemade solar system can be hung.
- At this stage the master class is finished. Take an interesting craft to school for Cosmonautics Day and listen to admiring reviews from your classmates and teachers.
Fun crafts from pasta and cereals for Cosmonautics Day
By creating fun crafts from pasta and cereals for Cosmonautics Day with their child, parents can not only pass their leisure time together in a fun and useful way, but also teach their children important things. So, during the assembly of stars, you can tell your assistants in detail about these distant and magical space objects, about their types and origin.
Supplies needed for a fun pasta craft for Cosmonautics Day
- star shape for cookies
- gelatin and water
- grains and cereals
- pasta
- pan and spoon
- PVA glue
- gouache paint
- dry glitter
- parchment paper
- clear nail polish
- jute cord
Step-by-step instructions for creating fun star crafts from cereals and pasta for Cosmonautics Day
Bright crafts for Cosmonautics Day from paper, cardboard and foam: master class with photos and videos
Children just starting to explore the world will be very interested in studying the model of the solar system, hearing interesting facts about our galaxy, and getting to know our cosmonaut heroes. You can’t do this without the help of your parents. In your free time, make a bright craft from cardboard, paper and foam plastic for Cosmonautics Day and explain in detail to your child what’s what.
Necessary materials for crafts from paper, foam plastic and cardboard for Cosmonautics Day
- large cardboard box
- black and white acrylic paint
- wooden skewers
- foam balls
- foil paper
- paints and brushes
- plasticine
- fishing line
- sharp utility knife
- scotch
Master class with photos and videos on making bright crafts from paper and foam for Cosmonautics Day
Space flying saucer
You will need: disposable plates of different sizes, PVA glue, foil, acrylic paints and a brush, buttons for decoration, a small animal, CDs, halves of a Kinder Surprise egg, a small transparent glass.
Option #1
Take a standard size disposable paper plate and turn it upside down. Do the same with a small plate, which will be the control cabin. Glue them to each other. Let dry, then paint silver. Glue the buttons in a circle, they will act as light bulbs.
Option No. 2
Take 2 plates - one standard size, the other deep. Wrap with foil. Glue them together. Place a small animal at the top in the center, put a small transparent glass on top, and spread the base of it with PVA glue. Decorate with stars and lids.
Option #3
Take a CD, sit the manager down and glue half a Kinder Surprise egg to it. Decorate to your taste. I recommend watching this video.
flying saucer spinning top Cosmonautics Day!
Interesting crafts from plastic bottles and cardboard for Cosmonautics Day
Interesting crafts for Cosmonautics Day from cardboard and plastic bottles can be made even in the company of the smallest craftsmen. But before class, it is better to move actively in order to stock up on perseverance for the entire creative process.
Necessary materials for crafts from a plastic bottle for Cosmonautics Day
- small plastic bottle
- acrylic paint
- bottle caps
- colored cardboard
- glue gun
- scissors
Master class on interesting children's crafts made from bottles for Cosmonautics Day
To create a festive atmosphere at school and kindergarten, teachers often use interesting crafts for Cosmonautics Day from paper, cardboard, bottles, disks, pasta, etc. They are easy to make with your own hands at home and even easier to use in decorating children's rooms.
Fireworks to everyone!
How are you, dear readers and guests of my blog? Did you have time to take a break from? I think it’s not stressful to make something and do it with the kids. And now there is still one more holiday ahead - Cosmonautics Day. And it falls on April 12th. On the day when our Soviet cosmonaut Yuri Gagarin flew into space for the first time.
Usually this is a boyish theme - space. They really love inventing flying machines, saucers and rockets. But some girls are not far behind either. Still would! This is very exciting, and from waste and natural materials you can make such works that they will win any competition.
Let's look at a selection of interesting ideas. Most likely, they will give you interesting thoughts and create your own masterpieces. After all, there is room for imagination to run wild here. The work can include planets, satellites, flying vehicles, UFOs, rockets and much more.
I would like to note that I also get ideas from the Internet, from its publicly available sources. Basically, these are cool and original creations for kindergarten and elementary school children. Plus, I can recommend excellent options for paper airplanes in the note https://mognotak.ru/kak-sdelat-samoletik-iz-bumag.html
Well, here we go! As Yuri Gagarin once aptly said).
Birthday in a pirate style - a DIY cardboard chest
YO-HO-HO! Do you love pirates?
My son loves them very much and decided to celebrate his fourth birthday in this style.
We spend the summer at the dacha, but since it is not located on the seashore, it was decided to transform the site into a small pirate cove!
The morning began with turmoil, while the main pirate was sleeping, work was in full swing: the trampoline was turned into fishing nets, they were looking for a place to moor the ship, hanging flags, pulling the sails, and goodies were placed on the veranda - the hold.
When the entire pirate crew had gathered, they were given pirate accessories (hats, sabers, belts, bandanas)
Then the team members went in search of the treasure. They were faced with difficult trials, which the team coped with honor.
After completing the tasks and successfully finding the treasure, the pirate team went to celebrate their victory.
- We began to prepare much in advance to purchase everything we needed in Moscow.
- First of all, I started preparing the decorations and, I want to say, it took quite a bit of time. What we had:
- imitation of a pirate ship from a refrigerator box, painted with regular gouache
- Cardboard anchor + gold paint.
- Flag - cardboard primed with black paint + Jolly Roger cut out and glued on.
- A rope is a thick rope, folded in half and twisted.
- Cardboard steering wheel. The process of its creation
Interesting ideas on the theme of Space with your own hands
First, let's look at what can be made on this topic. For younger kids, it will be possible to make (with the help of their parents) such a layout from colored paper. All the planets of our Solar System are located on it. At the same time, of course, we teach the kids the names of the planets.
Application Solar System
You can make such applications from small plasticine balls. It’s better to draw such compositions first and even paint them with flowers. And then you can roll small balls and just stick them on.
After all, it’s really possible to submit it for a competition?
Squirrel in a rocket
We make figures of astronauts and a lunar rover from salt dough. Simple . This material is pleasant to work with for several reasons:
- it hardens quickly and can even be placed in the oven;
- it can then be easily painted in different colors with acrylic paints or gouache;
- environmentally friendly, you can even swallow it))).
Russian cosmonauts and lunar rover
Children 4-5 years old can make simple paper rockets. This turns out to be a simple form of origami. And you can glue them onto a dark blue background, which will represent outer space.
Rockets in the universe
Let's make these funny aliens from toys, jars, tubes and plasticine.
Funny aliens
Another option for the competition using the modular origami technique.
We turn on our imagination and use everything: polystyrene foam, tree branches, foil, wire. Bushings will even be useful for making rockets.
Gagarin in flight
Plasticine composition with Saturn, stars, rocket and our green planet.
Milky Way
And a little humor)
Cat in a hat from the planets of our solar system
I hope that we have already more or less chosen something for ourselves, that we will make it and move on.
Why did it happen this way?
The toy was created from what was at hand or easy to get. I would also like to say something about Arduino. It was chosen for several reasons:
- It has a suitable number of pins, and you need a lot of them (43): 6 for controlling motors;
- 8+4 for keyboard;
- 11 for LCD;
- 3 for DAC;
- 8 for ultrasonic sensors;
- 2 for speed sensors;
- 1 to measure the voltage on the battery.
- I'm familiar with this platform.
- It is stitched in one click.
- The microcontroller does not require any gigantic speeds or memory amounts.
- And special efficiency is also not required, because Motors consume 90% of the current.
Simple crafts for kids in kindergarten on Cosmonautics Day
I suggest making a rocket with the kids from a sleeve (you can even use toilet paper) and colored paper. It turns out such a long and stable little thing that can be placed on a blue background and next to an astronaut figurine.
Add some foil and you'll have a more realistic spacecraft.
Let's make a starship out of paper. You can do this simply according to the diagram below.
And here is the finished version. Color it as you wish.
Or we’ll make an unidentified flying machine out of thick paper. You can make several of these things and put them again on the blue sky.
Look how colorful and at the same time original UFOs we produce.
Let's use the baby's favorite toy - plasticine. It is pliable, soft and adheres well to almost any surface.
Here are some applications you can make with it in disposable plates.
Saucers - open space
Oh, and we parted ways! Let's sculpt a cute alien. It will look good next to a paper flying saucer.
Funny alien
Don't feel like folding paper? So let's blind her too, because there is a lot of plasticine!
When working with plasticine, the first thing you need to do is explain to children that this is an inedible material and should not be put into their mouth.
Alien and flying saucer made of plasticine
Tags
From paper from paper from paper what to make fromYou can make a paper flying saucer with your ownFlying saucer with your own paper saucer aliensOrigami UFO platespaper plate aliensdisposable plates.The flying saucer is ready with your own hands from with your own hands will bring with your own hands a UFO with your own hands will be with your own hands for with your own hands will be
masterbottomfoilalieninnloclassmozhetorigamiphotocreationmaterialsyearsimpleveryvoluminousbodymostreadyideasjustwhateverrocketnew
Space idea made of paper and cardboard for April 12
From components such as paper and cardboard, it is easiest to do work for kindergarten and school. Because they are always present in any home. And also scissors and glue. If all this is available, then I propose to build such a composition from a flying spaceship, the sun and Saturn on a black background.
To work you need:
- Cardboard with a black background about 30*25 cm;
- Toilet paper roll;
- Colored paper;
- Gold and silver foil;
- Semolina;
- Scissors;
- PVA glue;
- Pencil.
Manufacturing:
1. Cut the sleeve in half. At one end we cut off the edges to create the nose of the rocket.
2. From blue paper, cut out three blue cones, which we bend in the middle. These will be our rocket engines. We glue them to the uncut (back) part of the sleeve.
3. Glue the rocket onto a black background.
4. Cut out two petals from red and gold paper. This will be fire coming out from behind the ship.
5. Glue the flame and the cut out window.
6.Draw the sun on gold foil, and Saturn with a ring on silver foil. Cut out and glue both shapes onto black cardboard.
7. Apply glue to the background and sprinkle semolina on top. This is our milky way. Beautiful craft is ready!
Did you like the collage? If you have schoolchildren, you can make a flying luminous object below.
Templates
Let's first try to create a ship using templates. They are easier to work with. What you will need:
- thick cardboard (you can use an old box);
- scissors;
- pencil;
- ready-made template;
- glue or tape;
- colored paper and other decor.
First you need to print the template and transfer it to the main material. By the way, if you are using cardboard that is not too thick, you can print the template directly on it.
You should get something like this:
Next, you need to dilute a little PVA glue with water, cut plain paper into pieces and dip them in the solution and glue them to the base of the ship. Remember the papier-mâché technique. It is better to connect the ship parts themselves using tape.
All that remains now is to decorate the blank with the prepared decor. This can be colored paper, wrapping paper, fabric. The ship can also be painted with ordinary watercolors.
You also need to make a mast for the ship. You can use an ordinary twig and several round pieces of thick cardboard.
Every boat must have a flag. For it, use fabric and applique made of paper or material. The sail can also be made from cardboard; use toilet paper rolls.
Making a big ship
This option is suitable for young children who love exciting games. For such a ship you will need a large box. This could even be packaging from under a refrigerator or from a large TV.
First you need to connect the valves of the box and make a sharp bow of the vessel. On the sides you need to cut out several round timbers to make improvised portholes. Use a thick stick and fabric to make a flag. Use paints to decorate the ship.
Don't forget about details such as the anchor - it also needs to be made of thick material and decorated. A large do-it-yourself cardboard ship is ready to sail across the endless expanses of the apartment.
We use matchboxes
Let's call this modeling, because we will create a whole ship from several matchboxes. What you will need:
- cardboard;
- glue;
- matchboxes;
- wooden skewer or thick paper;
- colored paper;
- markers;
- scissors.
First you need to glue two matchboxes together with the short sides. Glue another box on top in the middle.
Now you need to cut out a rectangular piece of paper and glue it to the structure on top.
Now we need to cut out a strip from thick colored cardboard, with which we will form the bow of the ship.
Now you need to cut out a piece of cardboard that will correspond to the contours of the ship, look at the photo:
Now the bottom and top of the ship need to be fastened with glue. Next you need to make the mast. You can use a wooden skewer or roll up an A4 sheet very tightly and secure the tip to prevent the sheet from unwinding.
A hole needs to be made in the top matchbox of the ship so that the mast can be inserted. Don't forget to use glue.
Now all that remains is to cut out the sails from colored paper, paint them and attach them to the mast.
The matchbox ship is ready! It can be made wider and higher if you use more matchboxes. If you use very thick cardboard for the bottom of the ship, then it is quite possible to float it on the water and participate in competitions for the title of the fastest boat.
DIY cardboard spaceship
We suggest using a fairly simple option that will allow you to literally create a 3D model. To do this, you need to cut out several identical parts from cardboard, but of different sizes. The parts need to be fastened together, but either a thin piece of foam rubber or a small piece of thick paper must be placed between them. It will look something like this:
- Or like this:
- An entire space station can be made using cardboard rolls from toilet paper and tape.
- Use silver foil, a compass, a black marker and a pencil to give the spaceship a realistic look.
Tips for working with cardboard
Cardboard is a fairly convenient and easy-to-work material, but if you know a few nuances, the work will seem even simpler, and the product itself will turn out neat:
- When working with very dense material, use fairly sharp scissors, or even better, a stationery knife;
- before bending the cardboard parts, it is better to draw along the dotted lines with the non-sharp side of scissors or an old pen that does not write, then the material will bend neatly and evenly;
- Not in all cases you can use a glue gun. For example, if you are working with thin material, then it is better to use office glue or PVA;
- work in a room where the humidity is not too high, otherwise your products may delaminate or parts may not stick together;
- the room should be light, it is advisable to have a window that can be opened and ventilate the room;
- We also always advise you to work only in a good mood.
- How to make a ship out of cardboard with your own hands - a few more interesting options
- We would like to offer several more interesting and beautiful options for ships that you can make with your own hands.
- In this case, a milk carton, cardboard boxes and a sleeve are used.
- And this is a luxury boat made from an ordinary cardboard box.
With a little practice and imagination, you can create such a beautiful pirate ship made of cardboard with your own hands. We always advise you to involve children in creativity. They will be especially pleased to know that they are creating a boat just for themselves. At the same time, you can think about a pirate costume, and also make a spyglass, a hat and a cardboard knife out of cardboard.
Such participation of children in creativity helps to develop their imagination, attentiveness, perseverance, and the desire to create something with their own hands for themselves. Be sure to involve children in cleaning too.
Explain to them that after themselves they need to fold all the materials, put them in their places, and also need to clean the work area so that later they can get back to creating.
And as usual, we want to share with you an interesting video master class. This will be a DIY ship made of cardboard with a step-by-step story. Don’t be alarmed if you don’t know English, because the video shows all the stages of creating a beautiful vessel very clearly and in detail:
Source: https://zhenomaniya.ru/hobby/prochee-rukodelie/kak-sdelaty-korablik-iz-kartona-svoimi-rukami
How to make crafts from disks on a space theme?
CDs are already being thrown into the trash, but in vain. After all, this waste material is very suitable for souvenirs for Cosmonautics Day. Its shiny and round flat surface is very suitable for the production of unidentified flying objects.
Here is a second grader's masterpiece. She used the disk under a flying saucer with a very cute alien.
And this is the alien himself with antennas made of springs and foil.
Interplanetary taxi from the children from the preparatory group in kindergarten.
The cutest plate made of rhinestones and fluffy antennae.
ABOUT! And here is a whole group of funny humanoids with their own transport.)
And one more idea on how to use CDs.
Step-by-step 3D postcard in the form of a rocket
If you have never created three-dimensional postcards, here is a step-by-step method for you. Again, everything is as simple as two and two. Templates can be found at the end of my post.
We need:
- A blank sheet of paper A4;
- The pencil is simple;
- Scissors;
- Colored paper;
- Glue;
- Gouache paints.
Manufacturing:
1. Fold the A4 sheet in half. On the fold we draw half a rocket.
2. Part of the rocket in the photo below is marked with a dotted line. This means that we will not cut here. And we will cut out all the straight lines using scissors.
3. We try to do everything as carefully as possible.
4. We turn our spaceship inside. It will fold inward and the entire card will fold outward.
5. Draw the details of the ship: nozzles, porthole, nose and flame below.
6. Paint the background black with gouache. And the rocket itself in suitable colors.
Here you can get creative and make an astronaut’s face in the porthole window.
7. Draw beautiful flames.
8. Cut out different planets from colored paper. We glue them all over the background. You can also make stars from foil.
Voila! Our cool three-dimensional card is ready. We give it away for its intended purpose.
Making original works for a school competition
Let's be inspired by the ideas of the kids who won space-themed craft competitions. They all tried, working out every detail in their masterpieces.
Any available materials were used in the work. These are twine, foam balls as planets, glass pebbles, felt and much more.
International station
Composition of planet Earth, a rocket and two astronauts in outer space.
Russian cosmonauts
Solar System with satellite and planets.
And here is a magnificent model made from plastic bottles.
We use felt for voluminous applique.
Intergalactic travelers.
Beautiful applique made from napkin balls.
To make it, you need to roll out many, many balls from colored paper napkins. But the work seems to be worth it!
The squirrel and the salt dough arrow are waving their paws at you).
A little imagination on the theme of the galaxy, starships and UFOs - and a wonderful work is ready for the competition!
Space dish and aliens made of waste material and polyurethane foam
Here everything you have at hand comes into play. Let's think together about what cosmic masterpieces can be created from. That's right, from anything. Look, they made a race out of ordinary shampoo, or rather bottle packaging.
And nearby are aliens, oh aliens. Paper plates are also used, but you can also use plastic ones.
These are the people. It looks like some kind of alien station, here, as you can see, there are disks and even pasta instead of hands, and the hair is made of straw.
Here are more ideas from bottles and even a bow.
Uh, from an eggshell.
The foil work Belka and Strelka also looks original, ha))).
Or look at the composition out of the box and a bump instead of the device being launched.
I also liked this one, it’s made of fabric and buttons.
I also saw such a watch, super variant.
Have you ever tried making products from salt dough?
If not, then this moment has come, watch this video from the YouTube channel and you will also get such beauty.
You can certainly use more fabric, such as felt.
Cool crafts, they look amazingly attractive.
But a masterpiece made of polyurethane foam, it looks cool, an astronaut made of salt dough.
It’s generally fashionable to create a bunch of crafts from dough.
The souvenir came directly to order.
Just like paper, it resembles a tunnel.
Craft ideas for kindergarten
Now let's take a closer look at several crafts for young children, namely about preschoolers from kindergarten. Here you can build both rockets and beautiful pictures using applique. The simplest and most inexpensive thing is to sculpt Martians from plasticine.
You can also split the group into several creative cells.
Next is the rocket appliqué. You will need several sheets of colored paper, scissors and glue.
To assemble a flying saucer, take two plastic or paper plates and glue them together with the convex side out. Color them in any shape you like. Here, of course, every child can show their imagination. Next, we’ll make a passenger from plasticine. And we place it in a cabin made of a plastic cup. Which we attach with glue.
Now we’ll make a rocket where you can make a child as an astronaut. You will need colored paper or felt.
We glue the blanks onto a sheet of cardboard to make a rocket, and paste a photo of the child into the porthole. This is how beautiful it turns out. You can even make a group flight into space.
But this rocket was made using the quilling technique. This is when objects are assembled from strips of paper twisted into a spiral.
You can also print out the outlines of the rockets and give them to the children so they can color them as they wish. The result of all the crafts is, of course, an exhibition of works. Here is an example of newspaper walls made from rockets that the kids made in kindergarten.
Crafts made from foil and wire
The wire has a high level of strength and flexibility. This attracts attention. Old disks, jar lids, door hinges, nails, and foil are also handy. They were created in the era of scientific and technological progress and look good due to their shine.
Three-dimensional painting made of nails
With the help of nails and threads it is incredibly easy to create a three-dimensional picture on the theme of space:
- The outline of the design is drawn on a wooden base.
- Apply double-sided tape.
- A third of the time, nails are driven in at a short distance.
- Bolts, washers, screws of the appropriate color and dimensions are poured into the gap between them.
- Nails driven along the contour are tied with yarn in a chaotic manner to create a strong mesh.
Alien robots
Computer disks are like the rings of Saturn or the side of an alien ship. The door hinges are for rocket wings, and the foil is for super strong, fantastic metal, solar energy storage. It’s easy to make alien technology from nails, screws and an old cornice in the style of “The War of the Worlds” by H. Wells, the stories of R. Zelazny, A. Belyaev.
An interesting creative topic awakens the imagination. The complexity of the artistic techniques used can nevertheless cause internal protest. The work should not be tiring, and if nothing works out, there is no need to be upset. After purchasing a home telescope, your child may become interested in astronomy.
Making beautiful crafts for school
For school, of course, you need something more complicated. Therefore, for Cosmonautics Day, this time we will build not a rocket, not a plate, but an alien made of foil.
You can also make a homemade earth satellite for school using improvised materials. How to do this, watch a video that describes the assembly process in detail.
There is a great idea for a composition on a space theme. To do this, take a small cardboard box and prepare it by painting it with a suitable background. Cut out the stars from tar paper and paste them on. Let's find something semicircular and wrap it in foil. This will be a small space flying object. Next, using plasticine, we will attach improvised antennas and solar panels to it. Let's build a rocket out of cardboard and colored paper. We will make 1-2 astronauts from foil. And then we place all the made objects on our cosmic surface.
Or you can mold astronauts from the Barboskins series entirely out of plasticine.
But these characters can be made from cardboard and ordinary tin cans.
Make a space applique and decorate it with a beautiful macaroni frame.
Try making planets from plasticine by placing them on a beautiful stand.
Or this picture might come out of the same plasticine.
Alien costume for boy with overalls
To make a beautiful alien mirror suit, follow these instructions:
- Dress your child in form-fitting clothes. It's better to use those things that you don't mind using as a base.
- Glue or sew CDs onto it. First break them into small pieces.
- Complete the costume with designs made from silver paint.
- Write “UFO” on the suit with paint or draw a flying saucer.
Gloves should be worn on the child's hands. If he doesn't mind, you can paint the exposed parts of the body with green paint. To prevent it from getting dirty, paint only the back of your hand.
- You can make a jumpsuit from scrap materials. First, construct a frame from cardboard boxes. Cover it with foil and secure it carefully.
- You will get an original metal suit. It can be supplemented with wires, light bulbs and other technical parts. Use a glue gun or paper clips to secure the parts.
Silver
Cool works from the land of masters
I suggest looking at pictures on crafts for Cosmonautics Day. Pictures taken from the website Country of Masters. Perhaps they will encourage you to create something similar.
In our material you will find the most interesting ideas for crafts on the theme “Space” that a child can make with his own hands for projects at school or for independent study of the Universe.
The mysterious cosmos and everything connected with it have always fascinated both adults and children. Is there life on Mars, why do stars glow, how to get to the Moon - . If your child enjoys this topic, encourage him to explore space in more detail. They will be a wonderful start. And so that studying your favorite topic does not turn into boredom, invite your child to make interesting crafts about space with his own hands for school.
Such DIY children's crafts about space not only have an educational effect, but are also perfect for concentrating a student's attention. With their help, you will be able to act out stories from them well, your child will learn more about the solar system and will be able to prepare well for thematic lessons at school. Just imagine the joy of a child when his craft about space at school receives a lot of praise!
How the Solar System works: a cheat sheet for children's crafts for school on the theme of Space
Tell your child how the solar system works: what planets are included in it, how far the Earth is from the Sun. Let the child gradually remember the names of all the planets. Don't rush it - it will take time.