Number cake is an absolute trend at the beginning of the year! Today this is the most popular cake among confectioners all over the world! Try it too! With our proven recipe and step-by-step instructions, it's very simple and fast! Excellent results guaranteed! Simple in design and decoration, a cake in the shape of a number will be a great table decoration!
Hello! Anita Vlasova is with you, and today I have an incredibly cool recipe for you! A recipe that many of you were probably looking forward to appearing on Pteat.ru! I will tell and show you how to bake a cake that became an absolute trend at the beginning of this year! Number cake ! This is truly the most popular (as of February 2022 for sure) cake, if not the entire Internet, then at least the Instagram network) There are many variations of this cake, I will show you one, but I will tell you what, what and at what point can be replaced so that you You've got your own number cake!
We are all already dreaming of warm, bright spring days! The cherished day is getting closer - March 8th. That’s why I chose the number for the cake in the super-current design, not just any number, but precisely - 8!
This number-shaped cake is made much faster than a regular sponge or mousse cake, and it looks simply amazing. It can look bright, can be decorated in pastel colors, and if you use chocolate cream and decor, this cake will turn out to be brutal in a masculine way (though this option is not suitable for us now, we are making a cake for Women’s Day)!
A number cake will not only be a wonderful decoration for the holiday table on March 8, but also an excellent gift for mothers, girlfriends, sisters and all representatives of the fair sex.
A cake in the form of a number is also good because you can use anything to decorate it: meringues, chocolate, cookies, berries, marshmallows, flowers, etc. - in general, almost anything edible you can find (just kidding! Of course, you should be thoughtful when choosing decor, choose colors and not go overboard with quantity!). I decided to decorate my cake with macarons, flowers, pistachio greens and fresh strawberries, but you - I repeat! - you can take something else.
So, let's go!
Cakes!
The original recipe calls for shortbread cakes (almond sablé), but now everyone bakes whatever they want, whatever they want) I wanted to make a cake with a honey tint - we’ll bake honey cakes!
We will weigh out all the necessary products at once, so as not to be distracted!
We will need:
- flour - 200 g (sifted)
- butter - 60 g
- sugar - 30 g,
- honey - 60 g
- 1 egg
- soda - 6 g
- lemon juice - 6 g
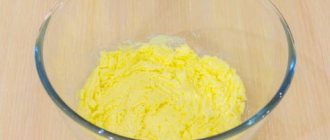
Let's continue!
We wait until the butter melts and the sugar and honey dissolve.
Add soda and citric acid, stir. The mixture begins to increase in volume, continue stirring (for a minute or two). As a result, the volume will increase approximately 2-2.5 times. Then add the egg and quickly mix until smooth.
Add flour and mix.
Which chocolate to choose for work
It’s not enough to know how to make chocolate letters at home; you need to choose good material and prepare it correctly. To make letters easily, it is advisable to take into account the following nuances:
- It is advisable to choose ready-made chocolate, which will be easier to work with. Homemade product is not always suitable for making dessert decorations.
- If you use dessert chocolate, you should prepare for the fact that the figures will turn out matte - without a mirror shine.
- It is not advisable to make letters from white chocolate, since this type of product melts quickly.
- Dark chocolate is the most difficult to work with because its melting point is 55 degrees.
- It’s easy to work with drops - they melt quickly and without problems, harden efficiently and quickly. But the taste of the product is inferior to its tiled counterparts.
The principle of choice can be based on experience and taste preference. It is worth considering the difficulties and advantages of working with a particular material option.
Let's put it away to cool!
The finished dough is smooth and almost does not stick to your hands, but you may find it a little runny. I strongly do not recommend adding more flour. After the dough rests, it will become denser and easier to work with. Wrap it in cling film and put it in the refrigerator for about an hour. At this time, you can prepare the cream, decor, and clean the workplace.
Now it’s time for the cream!
For the cream we need cottage cheese (400 g), powdered sugar (30-40 g (to taste)), cream 33-38% (40 g) and white chocolate (70 g). We take the cottage cheese out of the refrigerator in advance: we will need it at room temperature.
In a bowl, mix the cream and chocolate and melt them in a water bath until completely dissolved, then stir until combined. Make sure that water does not get into the container with chocolate!
After the cream and chocolate have combined, remove from the water bath and let them cool slightly. In a mixer at low speed, mix the cheese with powdered sugar (using a hook attachment). Then, continuing to stir slowly, pour in the chocolate in a thin stream. Stir until completely combined, at the end you can increase the speed. The cream is ready, leave it aside (do not put it in the refrigerator).
ATTENTION!
You can use any cream that is moist enough to saturate the cakes, and at the same time stable. It can be cream cheese with cream, mascarpone cream, ice cream and even chocolate ganache. Or any other cream that can hold its shape at room temperature. But I cannot recommend pure butter or protein cream: although they are stable, they will not soak your cakes.
How to decorate a cake for a boy with fondant (based on the cartoon “Cars”)
The child will be absolutely delighted with such a gift, because in addition to a delicious dessert, he will receive three cars from the cartoon “Cars”. However, you will need to tinker, especially if you have no experience working with sugar paste. I hope a detailed recipe with photos of the entire cooking process will help you in this exciting task.
Source -
To decorate the cake you will need:
Products:
- Confectionery mastic: blue, black, white, red, yellow, green
- A piece of cookie (to imitate sand)
- Edible glue
Tools, materials:
- Leveling iron
- Brush
- Stencil with the required number (paper)
- Two rulers
- Two machine wheels (small and larger) for making prints
- Plastic disposable knife (as a convenient sculpting tool)
- Latex disposable gloves
How to paint white mastic different colors
For this you will need gel food coloring. Add 2-3 drops of dye onto a piece of white paste. Using gloved hands, knead it thoroughly until the color is even.
How to make food glue
Add a pinch of citric acid and powdered sugar to the whites whipped to stiff peaks. Stir with a whisk until thick. Cover the finished mixture with film and place in the refrigerator for 4-5 hours.
1. Assemble the cake from the cake layers, lining the top and sides with cream. It should not spread; it is best to use cream or oil. All cracks and uneven areas must be filled. Then put it in the refrigerator to harden. Then it will be easy to work with him.
2. Roll out the blue mastic into a thin layer. For this:
- Knead the paste well in your hands until it warms up and becomes pliable;
- Constantly rotating the layer, gradually roll it out with a rolling pin in different directions to a thickness of 3-4 mm. Try not to leave fingerprints on the surface;
- cover cooled cake. To avoid stretching the thin layer, wrap it around a rolling pin and then unroll it onto the surface of the cake;
- iron the top part;
- Using your hands, carefully begin to smooth the surface on the sides. To do this, straighten each fold to the sides and press it against the cakes with smooth movements.
Important! This needs to be done quickly, as the mastic loses its plasticity when the cake is cold. In this case, you need to act very carefully so as not to tear the layer;
- again use the iron on the sides with stroking movements up and down;
- if small cracks have formed on the surface, smooth them out with a warm palm;
- cut off excess mass with a knife.
3. To decorate the side part you will need two thin layers - black and white. Using a knife and a ruler, cut them into 2x2 cm squares. Using a brush, apply a thin layer of edible glue to the side surface and glue the cubes in a checkerboard pattern. Make sure the stripes are even. Correct them with the blunt side of a knife.
4. From black fondant, cut out a number slightly smaller than the circumference of the cake. Place it on top in the center.
5. Take a piece of red paste and roll it into a thin flagellum. To make it even, roll it not with your hands, but with a ruler.
6. Lubricate the edges of the number with food glue and tie it with a rope.
7. Then glue the road markings in the form of stripes and a triangle using white paste.
8. Now the most difficult part is making the figures. You need to make three cars, four large wheels, and a cactus with a hat. Step-by-step photographs will help you cope with this task. Imagine that you are working with ordinary plasticine. To prevent fingerprints from leaving on the figures, work with latex gloves.
Cars
Form a machine from a piece of mastic. Use a plastic knife to draw all the details - windows, doors, hood and trunk.
Using a round metal notch, make four recesses for the wheels. Then form thick circles and attach a wheel from a toy car to them. Roll between two rulers - this will give them the same size. Insert the finished circles into the holes, having previously coated them with glue.
Use food coloring to paint the eyes and headlights, as well as the lettering on the hood and doors.
In the same way, form two more cars of different colors.
Tires
Take a wheel from a toy car and attach it to a circle of mastic. Roll between rulers to create the ideal shape, using a knife to give relief.
Cactus + hat
9. Place the finished decor on the top of the cake as follows:
Don't forget to coat the surface with food glue.
10. Roll a very thin long flagellum from green mastic and cut it into small pieces. Fasten them together to imitate grass. Glue the bushes to the surface in several places.
11. To imitate sand, grate the cookies on a fine grater. Sprinkle it in piles around the grass after applying a thin layer of glue.
Your masterpiece is completely ready! Do not put it in the refrigerator, otherwise the mastic will absorb excess moisture and float. It is better to decorate dessert on the birthday of the birthday person.
Cut out the numbers!
I pre-printed and cut out the number 8 templates from A4 paper. You can draw them by hand.
Take the dough out of the refrigerator. We divide it into 3 parts. Take a piece of dough, roll it out thinly (on a mat or baking paper) and put a stencil with a number on top, trace it with a thin sharp knife.
How to make a chocolate mold with your own hands
If there is no suitable form for creating a letter, then you can try to make a template yourself. There are several different solutions.
The simplest solution would be to make a base from cardboard. Cut a strip of cardboard from the main part. Make markings along the cut, each part of which is responsible for a specific part of the letter. Make folds on the marks that will help prepare the shape of the letter. To further secure each bend, you can glue thin strips of tape on the outside. Cover the inner side of the cardboard part with cling film.
If you can’t make chocolate letters with a cardboard base, then you can try making a mold from a plastic bottle. The manufacturing principle is identical to the cardboard counterpart. The only difference is that cling film is definitely not needed here.
Let's bake cake layers for a number cake!
We remove the paper and everything unnecessary, prick the cake with a fork and put it in an oven preheated to 175-180C (use yours!).
As soon as the cake becomes golden, we take it out, but under no circumstances remove it from the paper. Leave on a flat surface until it cools COMPLETELY! When warm, the cake is very tender, soft, and may break. We bake 2 more cakes in the same way. You can use the leftovers to make small cookies using cutouts. And, by the way, they can be an additional decorative element)
Special and interpreted shapes for chocolate letters
The answer to the question of how to make chocolate letters for a cake can be easily found if you use molds to make such decorations. You can purchase special products made of silicone, plastic or polycarbonate. Each type of form has its own characteristics regarding the principle of use.
If special equipment is not at hand, then you can use other basic options. The simplest solution would be molds for squeezing out cookies or shortcakes - often they are metal or plastic. You can make the required form yourself from scrap materials.
Let's assemble our cake!
When all the cakes have cooled, we begin to assemble the cake.
Place the cream in a pastry bag with a tube attachment (the diameter of the outlet is 10-12 mm) and pipe the cream over the entire area of the cake. Attention! I made the cake without any toppings, but I’ll tell you what and how you can add, if desired. If you want a cake with filling, put it out at this moment! Between the “bumps” of the cream you will just get a small distance and there you can put, say, a berry - fresh or boiled with sugar and cooled. You can, for example, use spiced cherry sauce for this, which Tori Pteat wrote about here. In principle, you can pour the sauce over the cake between the “bumps” of cream. The main thing is that the sauce is not too liquid, and for this it must be boiled with starch or pectin!
After we have completely covered the cake with cream, put the second cake layer on it and pipe the cream again. Etc.
Preparing flowers for decoration!
I used fresh flowers to decorate the cake. The attitude towards fresh flowers as decoration among confectioners is ambiguous. But if you are careful, the flowers are not poisonous, of course! - you can use it (or even better, take flowers grown specifically for food, there are such ones. Well, or grown by you personally in your garden without any chemicals, those that you are confident in!). Flowers need to be washed in running water, dried and carefully isolated from contact with the cream! To do this, I tore off all the sepals on the back side and covered the ENTIRE back surface of the roses with melted cocoa butter! After processing all the flowers, I put them in the refrigerator for a while so that the oil hardened well. If you don't have cocoa butter, you can use chocolate.
Some tips:
- It is better to assemble the cake immediately on the base and the box in which you will transport it.
- If you use meringues when decorating, they need to be well dried, otherwise they may become soft from the cream.
- When decorating with fresh flowers, do not forget to insulate the stems so that they do not come into contact with the product. This can be done using chocolate or a special tape.
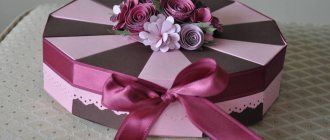
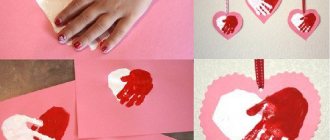
Such cakes can be not only in the form of numbers, but also letters, for example, the initials of the birthday person or even his name. In addition, these heart-shaped desserts are sure to be popular during the upcoming holidays.
We remind you that you can download templates for such cakes for free using the links at the beginning of the article, and watch the video on assembling such a cake on our Instagram profile - @ellecraftstore.
Good luck!
When preparing and publishing the article, materials from open sources were used: the website sugargeekshow.com, as well as Instagram profiles @adikosh123, @yuliya_small and @ilzi_
Let's decorate!
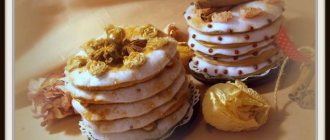
So, our number cake is almost ready!
If you plan to eat it right away, then start decorating. If you want to let it brew, you can decorate it before serving. You can see I used macarons, strawberries, flowers and pistachio greens. I also baked cookies from the leftover dough and filled the voids with them. You can take whatever you want, that's the beauty of it! But be careful: it’s bad when the entire surface of the cake turns into one big pile of different-sized sweets, without an idea or color unity! Everything should be harmonious, and I personally like it when islands of light cream peek out here and there between the bright decorative elements.
How to do without a special form
There is a way to make chocolate letters without a shape. More precisely, a shape will be needed, but only one – a rectangle. By filling in several elements, you can create any letters, adjusting the shapes of each part.
Using a hot spoon, you can smooth out any sharp corners and give it the desired shape. The remaining bevels and differences can be cleaned with a knife. To glue the parts, you need to lean the chocolate part against a hot cup and quickly “glue” it to another part of the cube. Seams can be smoothed with a hot spoon or knife.
Such letters usually require additional decoration. It is advisable to use massive edible decorations that can cover unsightly joints and clumsy transitions.
You can eat!
Brew your favorite type of tea or brew aromatic coffee, cut off a piece of cake and ENJOY!
A small note: the cake can be cut almost immediately and then the cakes will be crispy. But if you let the cake sit, the cream will soak it in and the cakes will become soft. I prefer it crunchy! But if you like delicate textures and soft, rich fillings, leave your number cake in the refrigerator overnight or longer. Before eating, take it out and keep it at room temperature for at least an hour. Bon appetit!
And happy spring holiday, our dear readers!