- June 3, 2019
- Weapons and ammunition
- Alexey Emelyanov
A weapon that is tailored to the shooter gives him confidence in hitting the target. Also, after firing, the recoil is significantly reduced. The shooter receives only pleasure when using a firearm.
Individual measurements are made only when purchasing a very expensive gun. Skilled gunsmiths can measure all the parameters required for this with high accuracy. Self-fitting of weapons is also possible. After reading this article, any novice shooter can modify the stock in such a way that it is convenient and safe to use a personal weapon.
What is the butt made of?
Many novice shooters ask the question of how to customize a gun for themselves. The gun is adjusted to suit you by modifying the butt. In order to correctly perform such an operation, you need to know what parameters should be measured first:
- length;
- died;
- tap;
- pitch.
Changing the above parameters can have a significant impact on the rate of fire, accuracy and comfort of the shooter.
Butt length
In order to answer the question of how to adjust the butt of a gun, you need to know the length of the butt. This parameter means the distance between the trigger and the middle of the butt plate. If the weapon has a stock that is too long, the shooter will have difficulty aiming. To select its optimal size, you should conduct a series of test throws of hand-held small arms.
If the stock is too short, you will need to purchase and attach one or more spacers. If the wood product turns out to be too long, then it needs to be cut down. Only people who have experience in such matters can accurately and correctly shorten the butt. Therefore, if you want your gun to look decent, it is better to seek help from gunsmiths.
Fitting the butt of a hunting rifle
An important procedure for a hunter is adjusting the butt of a hunting rifle, which, first of all, allows a novice shooter to improve his hunting results. This article will be useful to both hunters and novice shooters who are to some extent dissatisfied with their shooting results at moving targets.
Fitting the stock consists of the following steps:
- Adjustment of the aiming bar relative to the eye;
- Target shooting;
- Elimination of vertical corrections;
- Elimination of lateral corrections.
The first stage is adjusting the aiming bar relative to the eyes
The bar should be below the pupil, i.e. There should be a small gap between the pupil and the bar. You can shoot when the bar touches the pupil, but this gives a worse result. If the bar covers the pupil, in this case you cannot shoot, because your right eye is covered by the bar and in fact you are shooting with your left eye, that is, at the cross, and as a result you miss.
Vertical butt adjustment
It is necessary to adjust the butt so that when the gun is inserted into the shoulder, the aiming bar is below the pupil with a small gap. How to find out where your bar is? To do this, stand in front of the mirror and make a shotgun, in the reflection of the mirror you will see at what level relative to the eye the aiming bar is located.
The bar is adjusted using the butt comb; it is either raised or lowered. If the bar is at or above the pupil (in most cases), you will need to raise the height of the ridge - the bar will go down. To do this, place a thin layer of foam rubber 1 - 2 mm thick on top of the comb.
If the eye is too open, it is necessary to grind down the butt comb, thereby increasing the height of the bar. But such cases are rare. There are stocks with an adjustable comb - the best option for a novice shooter; there is no need to sharpen or extend anything.
Conclusion:
raising or lowering the aiming bar relative to the eye is carried out by raising or lowering the comb.
You need to take a sheet of A2 size paper, draw a target on it, place it 20 - 30 meters from the shooter and make several shots at the target without aiming, at a glance. Invested - shot, invested - shot.
You need to make from 8 to 12 such shots at one target. This is necessary to understand where the center of the scree is forming. Since the target flies from different directions when hunting, it is better to shoot the combination of shots shown in the figure.
Wiring from bottom to top shot, wiring from left to right shot, etc. A scree will form on which the center of the scree will be formed. It can be centered, top, bottom, right, left, or other combinations. After we have found out where the center of the scree is, we can move on to adjusting the butt to the shooter. If the center of the scree is centered, there is no need to adjust the stock.
The third stage is adjusting the butt vertically
In this case, the center of the scree is either above the target or below the target.
If the scree is below the target, then most likely we do not see the bar, but only see part of the block and a small part of the front sight, perhaps we don’t even see the front sight. Therefore, the shot occurs below eye level and, as a result, the shot falls under the target. The bar is closed.
Adjusting the butt plate - pitch
In this case, it is necessary to open the bar slightly so that the center of the scree goes higher. To do this, you need to place a gasket under the lower part of the butt plate, thereby opening the bar above eye level.
If the center scree forms above the target, then the bar is too open. In this case, it is necessary to close the bar. Place a spacer under the top of the buttplate, thereby lowering the aiming bar. The center of the scree will move down.
Conclusion:
opening or closing the strap is carried out by changing the angle of the butt plate, i.e. pitch change.
When the center of the scree has formed to the right or left of the target.
What flies to the left of the target must be straightened to the right, and what is flying to the right must be shifted to the left. To understand why this happens, look at the picture.
- The scree goes to the left (Figure A), the ridge must be moved to the right.
- The scree goes to the right (Figure B), the ridge must be moved to the left.
How to do it? If the comb is not adjustable, in case “A” it is necessary to grind off the butt comb on the left side, and in case “B”, on the contrary, stick something on: double-sided tape, foam rubber, electrical tape. If the stock comb is adjustable, then move the comb in the direction you need.
Conclusion:
To adjust the center of the scree left or right, you need to adjust the comb either left or right.
There are also combinations of adjustments up to the right, down to the left, etc. In this case, it is necessary to combine the third and fourth stages of adjusting the stock.
So, we looked at the four stages of adjusting the butt of a gun to suit you (the shooter). This technique allows the hunter to make do-it-yourself stock adjustments, which will ultimately improve your hunting results.
Pitch
Pitch is the angle of inclination of the buttplate relative to the sight rail. If the tilt is slight, the gun may slide down from the shoulder. This parameter can affect the firing of the gun and the uniformity of the impact force on the shoulder.
The stock, made by American craftsmen, most often has a length of about 37 centimeters. It does not have a side outlet. The flex is about 37 millimeters at the front of the ridge and about 63 millimeters at the heel. This design is suitable for hunting and shooting at a round target.
Do-it-yourself adjustment of the butt of a hunting rifle: general tips
As a shooter and instructor, nothing frustrates me more than seeing how a gun handles its shooter. Except maybe getting hit by your own gun. Why? First of all, it shouldn't be like this. Second, it will negatively impact the shooter's training and performance. And thirdly, for this reason, the owner of the gun may simply stop shooting.
The main reason for this situation is a poorly fitted gun, this especially often happens with shooters of thin build and short stature.
And by such shooters I mean everyone whose physique differs from the average size of a male shooter: height about 1.77 cm, weight 84 kg. It's not their fault, but it's not our fault either.
Gun manufacturers need some kind of standard to operate - and luckily for us little guys, some of them have taken notice of our concerns and released smaller versions of various gun models.
But there are a large number of guns designed for a “normal adult man”, as a result of which they are not suitable for people who do not reach the criterion of 1.77 cm, weight 84 kg. (I would like to point out that it is always easier to shoot with a long rifle or a shotgun that is too short to the shooter. But it is very difficult, and sometimes painful, to shoot with one that is too long).
Keep in mind that there are two main categories: moving target shooting (skeet shooting or hunting) and self-defense shooting, which use very different techniques, stances and upper body positions.
Also remember that gun fitting is a mixture of theory and practice, and gun fitters spend years learning and perfecting their skills.
If you are going to focus on just one discipline, I advise you to find a professional gunsmith who has a good understanding of your chosen form of shooting, and therefore knows the specifics of the placement of various body parts when inserting.
The sizes of guns are not standardized, it all depends on the fit of a particular sample. And every manufacturer wants to stand out in some way - so you should begin to understand why fitting a gun requires so much knowledge!
The main dimensions of your gun are as follows:
1) LOP - the distance between the center of the butt plate and the front surface of the trigger.
2) Pitch – the angle between the butt and the barrel.
3) Shift - the distance between the line of the barrel (or rib) and various points of the butt (comb, butt plate, etc.).
4) Retraction - the angle or bend of the butt (right or left) in relation to the rail or barrels.
5)
Barrel Length - This dimension is not usually considered when fitting a weapon, although barrel length is very important for compact shooters.
It affects balance, leash comfort and, in many cases, aim.
This feature is often overlooked because it is easier to shorten the stock than the barrel, but it affects the shooter's ability to manipulate the gun more than most people realize.
Despite the complexity and variety of elements of fitting a gun, here are those that will show us the overall correctness of the fit:
Length
The butt of the gun should lie so that the butt plate can be placed in the “notch” of the shoulder - on the upper chest muscle, located deep in the shoulder joint.
The chest and shoulders should form a square, that is, be perpendicular to the gun. To fix the butt plate, it is allowed to rotate the shoulder of the shooting hand slightly forward.
If this does not work and/or the butt plate slides to the end of the shoulder, the length of the butt is too long.
Hands
With the stock positioned correctly, the shooter's hand should rest comfortably on the neck/pistol grip of the gun, gripping it tightly.
The shooter should also place the index finger on the trigger between the front pad and the crease of the knuckle.
If you cannot place your index finger on the trigger in this manner, even with the buttstock positioned correctly at your shoulder, the cause may be that the neck is too large or the diameter of the pistol grip is too large.
Meanwhile, the shooter's supporting (non-shooting) hand should reach the fore-end of the gun, while maintaining a natural curve in the hand. The more extended the arm is, the weaker the grip will be, and since the supporting arm bears the brunt of the gun's weight, it is important to provide strength.
When the gun is adjusted, both hands should act organically, and the load on them should be distributed evenly. The result is a comfortable, stable insert that is essential for proper casting and aiming.
Face/Head
When properly fitted, the head should be in a relatively neutral position, without much arching of the neck. It is recommended to slightly stretch your neck forward when aiming, but you should not bend it so that your face tilts down.
This causes unnecessary tension in the eye muscles and interferes with aiming, and can also cause instability of the eyepiece.
The nose should be a couple of inches from the hand, and for most people this will mean the cheek resting slightly in front of the middle of the buttstock comb (measured from the buttplate to where the ridge drops and the pistol grip begins).
Customizable stock
Some people who have recently purchased a rifle are wondering how to adjust the stock to fit themselves if it is customizable? Modern stocks on hunting and sporting rifles have special adjustments for some parameters. Such properties make it possible to correctly adjust the stock to the shooter’s needs without special tools. The main rule when fine-tuning such an improved stock is that there is no need to make changes to the design until you are sure that the amendments made are not suitable.
Fitting the gun to the shooter's needs is especially important in sport shooting, where even the slightest deviation from the target determines the winner. Experienced athletes adjust the butt of their weapons in such a way as to achieve the highest accuracy.
How to fit a stock
A shot from the gun that is most suitable for a particular hunter will be able to accurately hit the target.
By bringing the butt of this weapon to your face at eye level and then pressing the trigger, the projectile will fly towards the desired object, and the likelihood of its trajectory deviating becomes negligible.
All this will significantly increase not only the effectiveness of hunting, but also the ease of handling the gun itself. Before you buy a stock, you should fit it exactly to your hunting tool.
Check fit
Gunsmiths use 91cm or 121cm square steel plates coated with paint or lubricant to show the shot grain when checking the fit of a gun. If you don't have a plate, you can use a sheet or plastic tablecloth.
Hang it with a 5 cm reticle in the center. Use a choke with a strong constriction and stand at a distance of 14 meters. Use the gun unlocked first and gently lift it toward your cheek. Focus on the target and fire as soon as the gun touches your shoulder.
Don't try to aim and don't look at the front sight. Repeat until a hole appears in the target. If the hole is located strictly above or below the mark, you need to change the bend (bend) of the butt. If it is strictly to the left or to the right, you need to change the tap.
Each cm of displacement at a distance of 14 meters corresponds to 1.58 millimeters of change in the size of the butt.
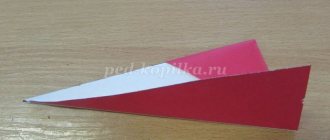
: How to make an airplane: let’s look at it in detail
What should you pay attention to in this situation?
We will be talking about compliance with several parameters at once:
- Checking the fit. For these purposes, square-shaped steel plates are used, the size of which is usually 91 or 121 cm. They are coated with a special lubricant or paint, which facilitates the assessment of shot debris during the inspection of the results of the shot. In the absence of plates, it is allowed to use plastic tablecloths or sheets.
- Butt bend adjustment. It can be compared to changes in the height of sighting devices. The bend is the gap between the top of the sighting rib or barrel and the top edge of the butt, which is measured to the front ridge or the top level of the butt plate.
- Fitting the outlet. In this case we are talking about adjusting the gun in the horizontal plane. This point is one of the most important when choosing a suitable butt, since the bend is the same longitudinal bend that is used to position the person’s leading eye in the center of the aiming bar. Right-handers are forced to increase this value, while left-handers are forced to decrease it. However, many thin-built hunters may not need a tap at all.
All these parameters are best assessed with an experienced instructor who will give specific recommendations on a particular issue.
Otbib (died)
Adjusting the bend of the butt is equivalent to adjusting the height of the sights on the gun. The setback is the distance from the top of the barrel or the top of the rib to the top of the buttstock, measured to the front of the buttstock comb and to the top of the buttplate.
To raise the stock comb, you can use Dr. Self-Adhesive Moleskin. Scholl and stick layers until the required height is reached.
One way to easily increase the drop and lower the point of impact is to lengthen the stock.
Although increasing the length of the stock does not change the drop, it does place your cheek further towards the buttplate at a lower point, which increases the drop.
On a pump-action shotgun or semi-automatic, you can temporarily increase the drop by loosening the stock bolt and placing a thin shim between the stock head and the rear of the receiver, then tightening the stock bolt. Use a very thin spacer, as even a match-thick spacer will change the bend by half a centimeter, which is much more than necessary.
When hunting, some people prefer to have their gun hit slightly above the aiming point, say 60 percent of the scree above the aiming point and 40 percent below.
Others prefer an even distribution of scree so that it completely covers the target.
The gunsmith can lower the comb by removing excess wood from the stock, or increase the height of the comb by extending it or adding a height-adjustable comb.
Create an account
Register for an account. It's simple!
Register an account
Stock length
Length of stock (LOP) is the distance from the front trigger to the middle of the buttplate. To determine your stock length, cock the gun and measure the distance between your nose and your thumb knuckle. This distance should be about 2.5-4 cm.
The stock should be short enough that you can swing the gun without getting caught in your belt, but long enough so that you don't have to drag the gun to your shoulder for a long time, throwing off your sights. You can lengthen the buttstock using a sticker on the buttplate or spacers; to shorten the buttstock, use a thinner buttplate.
If you need to trim it, maintain the butt angle (butt angle).
Butt angle and camber
Now let's figure out how to adjust the butt to suit you. Stock angle and camber are often overlooked. And adjusting these parameters can make the gun more comfortable when shooting. The butt angle is the angle of the buttplate to the barrels.
To distribute the recoil over the largest possible area, the butt pad should fit completely into the shoulder socket, and not dig in from below or jump out and hit you in the face. You can experiment with adjusting the angle by loosening the top and bottom buttplate mounting screws and using coins as spacers to change the buttplate angle.
A smaller angle (spacers on top) prevents the butt from jumping up; a larger angle (gaskets at the bottom) will stop the gun from digging into the toe of the butt.
Camber is the angle at which the bottom of the buttplate tilts outward and is needed by shooters who have problems tilting the gun. Often a camber stock is more comfortable for women. You can experiment with the camber angle by removing the lower buttplate mounting screw and turning it outward.
: How to make a star (video)
Measuring fit results
After fitting, either bring the gun with your temporary fixes and a sighting target to a gunsmith, or measure the gun yourself. Van will need a machine (in extreme cases, a cardboard box with cutouts will do), a metal ruler and a tape measure.
Having installed the gun on the machine, attach the ruler to the bar so that its end is located above the butt. Use a tape measure to measure from the bottom of the ruler to the comb of the stock to the top of the buttplate (or to the middle of the stock if you raised the comb with a moleskin).
To measure the tap, place a ruler on the bar and then measure the distance from the axis of the bar to the axis of the butt plate. To determine stock length, measure the distance from the trigger to the middle of the butt plate. The stock angle is measured from the center of the trigger to the top and bottom of the butt plate.
The distance from the middle of the butt plate at the bottom to the center of the stock will give you camber.
Measurements and calculations before fitting
Before you begin adjusting the butt of a hunting rifle with your own hands, you should take the basic dimensions of the person who will shoot the gun:
- First, you should measure the distance between the biceps and the first phalanx of the index finger. In this case, you need to bend your arm 90° at the elbow and then lift it up.
- Secondly, you should measure the width of the shooter's chest. This parameter can be measured by placing a ruler between the armpits.
- The third parameter is the distance between the pupil of the eye and the collarbone.
When adjusting the butt of a hunting rifle, you should know that its length must match the value of the first measured parameter. The size of the vertical bend and side bend can be determined from the table.
| Distance between pupil and collarbone, cm | Size from the vertical bend to the upper ridge of the butt, mm | Chest width, cm | Dimension between the side tap to the vertical aiming plane, mm | ||
| At the neck of the butt | At the butt plate | In the heel of the butt of the head | In the toe butt plate | ||
| 23 | 43 | 68 | 51 | 6 | 18 |
| 20 | 40 | 64 | 45 | 4,5 | 15 |
| 18 | 36 | 59 | 41 | 3,5 | 12 |
| 16 | 34 | 57 | 37 | 2,5 | 8 |
| 14 | 32 | 54 | 33 | 1,5 | 4 |
Hunters who are wondering how to customize a stock for themselves and where to start should know that the table above shows approximate parameters. They may differ from actual sizes depending on the shooter’s make, his physical characteristics, preferences, and other things. Table values in various manuals for adjusting the stock yourself also vary. In addition, the standard sizes of Russian, European and American-made stocks differ significantly.
Types of modern bandoliers
People who are quite far from the hobby of hunting know from feature films, paintings, and literary works the classic bandolier belt, or the cartridge belt from a Maxim machine gun, thrown over the shoulder of revolutionary sailors 100 years ago.
However, modern types of wearable clips for hunting cartridges represent a wide variety of solutions:
- bandolier for hand;
- the so-called “unloading”, which is a set of pouches;
- waist belt with ammunition compartments;
- a bandolier for the butt, which is gaining more and more popularity among hunters.
As for manufacturing materials, the most practical, durable and functional is traditionally considered to be a leather bandoleer, made from natural materials. However, recently, equipment of this type, made from modern innovative composite or synthetic materials, has become widely popular.
In addition, the design itself, which a device for storing cartridges may have, can be completely different:
- single-row, classic;
- double-row, providing faster removal of ammunition;
- closed, with special pocket covers that prevent the charge from getting damp;
- open, facilitating quick loading of weapons with cartridges that are not afraid of dampness.
Bandolier
The traditional version of hunting equipment is a wide bandolier belt with compartments for cartridges. Ammunition can be placed in one or two rows. Each belt is produced for a particular caliber, so the bandoleer for 12-gauge ammunition is significantly different from its “brother” for 16-gauge ammunition. The most popular manufacturing material is leather or leatherette; synthetics are less commonly used.
Typically, belt-mounted models hold 20 to 24 rounds. In addition, a belt with cartridges is often equipped with additional compartments, pockets and slots for various small items, knife mounts and other useful accessories.
However, experienced hunters treat belt structures with a certain degree of skepticism. The fact is that the bandoleer for 12-gauge cartridges placed on the belt practically does not protect the ammunition from moisture and they quickly get wet or damp.
Vest-unloading
Another popular solution for hunters is a bandolier vest or the so-called “unloading”. In the special pockets of such a vest you can store cartridges of various calibers, useful little things, a compass, a knife in a case, and even food supplies!
In addition, the bandolier vest is capable of performing another very important function - providing additional protection for the hunter’s body from moisture, cold and wind. Today in specialized stores you can buy a ready-made hunter’s vest with a bandoleer, designed for storing various types of ammunition. Or you can make such a bandoleer with your own hands. How to do this will be discussed below.
Bandolier for butt
A very popular solution recently that ensures the fastest possible removal of ammunition and reloading of weapons. Such a cartridge strip can be attached to either one or both sides of the butt.
A wide variety of materials are used for the manufacture of such models:
- leather or substitute;
- rubberized fabric;
- tarpaulin;
- neoprene;
- synthetic fabrics.
This type of ammunition storage equipment is very convenient because it allows you to load a weapon without losing sight of the target. But such a model, as a rule, holds no more than 10-12 rounds of ammunition and requires a certain habit. In addition, among experienced hunters there is an opinion that such a model is not entirely suitable as a bandoleer for rifled cartridges, but for smooth cartridges it is just right!
There is a wide variety of models of cartridge belts and bags, mounted in various ways directly on the butt of a hunting weapon. But you can make such a bandoleer for hunting on your own.
Preparation for revision
Some hunters are wondering how to adjust the butt to suit themselves? Before modifying the stock, you should circle on it with a pencil those places that need to be reduced or enlarged. Particular attention should be paid to the vertical bend, the distance between the middle of the butt plate and the trigger, as well as the length from the heel of the butt plate to the trigger. If it turns out that the butt needs to be cut down too much or the distance increased too much, then it is better not to modify it, but to purchase a new product.
Next, you should clamp the wooden part in a vice for finishing. In order not to spoil the appearance of the product, you need to wrap it in rags. When sawing off excess with a saw, you should take into account the direction of the fibers of the wooden product. It is better to saw the butt around the entire perimeter, otherwise chips and cracks may form during the work. It is quite difficult to get rid of them on a wooden surface.
To increase the buttstock, it is enough to purchase special rubber gaskets or special adjustable shock absorbers in the store, and then securely fix them in the right places with special screws. If necessary, holes should be made in the butt.
Criterias of choice
Choosing the type and appropriate model is much like choosing clothes. Much depends on the individual tastes and preferences of the hunter himself.
But still, there are a number of certain criteria that should be given priority attention:
- material;
- hunting conditions;
- way of wearing;
- style;
- capacity.
Material
There is no ideal material from which an ammo bag should be made. There is a common belief that a leather bandoleer is the most durable and practical. But today, for the manufacture of mobile storage for hunting ammunition, a wide variety of synthetic, composite and other materials are used, the properties of which are in no way inferior to leather or leatherette.
For example, rubberized fabric is not only very durable and practical, but also effectively protects cartridges from dampness. Perhaps the main advantages of a leather bandoleer are its authenticity and fidelity to tradition.
Hunting season and conditions
In summer and during the warm season, lightweight models or, for example, a bandolier for the butt, or a classic belt version are quite suitable. In cold seasons, when hunting in swamps and in conditions of high humidity, the greatest comfort is an unloading vest.
Method of carrying ammunition
All models, even a homemade bandoleer, can be divided into two large groups according to the method of carrying ammunition - open and closed. An enclosed 12-gauge ammo pouch, for example, is perfect for waterfowl hunting because it provides excellent protection from moisture. But it noticeably slows down the recharging process and requires certain skills. The open method allows you to remove ammunition much faster, but leaves the cartridges defenseless against moisture.
Capacity
The capacity of the cartridge strip largely depends on the model and appearance. If the bandolier on the butt is limited, as a rule, to 10-12 rounds, then the unloading vest can accommodate over 50 ammunition of various calibers.
Place of attachment
Traditional places of wearing are the hunter's belt, chest or shoulders. There is also such a convenient variety as a bandolier for the butt, which ensures quick reloading.
The main thing is that the hunter feels comfortable, convenient and safe. Many people prefer to make this essential piece of hunting equipment themselves. How to sew a bandoleer with your own hands will be discussed in detail below.
Weapon balancing
After successfully adjusting the stock, the gun should be balanced. To do this, you need to drill a hole in the wooden part of the butt, and then place a metal weight of suitable size into it.
Many shooters are interested in why it is so important not only to adjust the stock to suit themselves, but also to balance the firearm well? Good balance makes a hunting weapon maneuverable, and the shooter's accuracy increases. In addition, the well-balanced but fairly heavy gun feels much lighter when aiming and lofting.
Modern guns with elongated barrels are quite difficult to balance, especially if the product is equipped with an English stock.
DIY bandolier
There are several ways to make a bandoleer yourself.
It all depends on what variety is intended:
- belt;
- chest model;
- vest option;
- butt pad.
Belt
Any strong and wide belt will serve as a base, preferably a military-style one. Two strips 10-12 cm wide are cut out of dermantin, leather, tarpaulin or other durable material. The length of the smaller one should be 70-90 cm, and the larger one, which will serve as the outer one, should be 90-110 cm. Before you make the bandolier yourself , it is necessary to arrange the cartridges on a small strip, as close to each other as possible. Then cover them with a large strip, wrap each cartridge so that it sits tightly in the resulting pocket.
Then markings are applied to the strips at the places where they are fastened, the strips are stitched and stitched according to the markings. After that, the tapes fastened together are sewn directly to the belt.
Chest version
Speaking about how to make a bandoleer with your own hands, one cannot fail to mention the chest version of the equipment, worn over the shoulder. The technology of its manufacture is in many ways similar to that described above. The only difference is that there will be one pair of strips sewn together, and two, and they will be located on both sides of the belt buckle.
On the vest
In the same way, you can equip any vest that you don’t mind wearing while hunting. It is desirable that it be made of water-repellent fabric and be resistant to wind and cold. The space provided allows you to sew additional pockets, pouches and cells onto the vest for a variety of useful items.
On the butt
The most complex design that will require certain sewing skills. A piece of leather or dermantine is cut in such a way that the resulting cover fits tightly onto the butt of the weapon. Pairs of strips are sewn on one or both sides, fastened together in the same way as was done in the case of the waist belt.