Autumn generously provides natural materials for creativity. Acorn crafts can decorate your home and make great gifts.
Cute faces
To make this craft you will need:
- acorns with and without caps;
- thin markers;
- acrylic paints;
- thin twine or strong thread.
Manufacturing technique:
- The collected oak fruits must be cleaned of dirt, thoroughly washed and dried.
- Carefully remove the cap.
- Make 2 holes in it, pull a thread through them, carefully tie it and hide the knot under the hat.
- Apply acrylic paint of the desired color in 3 layers to each acorn and let it dry.
- Draw eyes and mouth with a thin marker, and cheeks with pink acrylic paint.
- Carefully glue the cap on.
- The craft can not be painted, but coated with colorless varnish.
There are many options for using funny faces. You can paint all the acorns yellow and make funny smiley faces, collect them together and attach them to your backpack. If you weave a long braid from twine or thread, then you can wear an autumn decoration made of acorns around your neck.
Beautiful dolls
To make baby dolls, you need to prepare:
- acorns with caps and short branches on which they grew (fruits should be selected as small, round and light-colored as possible);
- acorns are larger and have an elongated shape;
- black thin marker;
- matches;
- acrylic paints;
- scraps of colored material.
Manufacturing technique:
- Gently rinse the acorns and dry.
- Sort into small ones with branches on caps, which will become the head of the baby doll, and elongated ones without caps - the future body.
- Color each long fruit using 2 shades of the same color: the bottom is light green, the rest of the body is bright green, or vice versa. Color everything in one color or make the dolls multi-colored.
- After the paint has dried, carefully connect the body of the doll and the head tightly using matches.
- Draw eyes with a marker.
- Cut scarves from soft fabric and tie them around the necks of toys.
If the fruits are too dark, then some pupae’s faces are lightened using pastel-colored paints. By varying the shades, you can make an international set of baby dolls from autumn acorns, which will delight the kids.
For the head, you can use wooden beads, onto which a hat with a twig is glued.
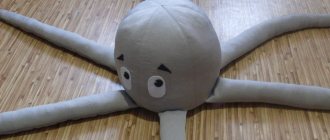
Master class: sewing a textile toy Snake-Gorynych
One of the main characters of Slavic fairy tales is the famous three-headed dragon Zmey-Gorynych.
I would like to share with you the process of creating a textile toy of the Snake-Gorynych with movable elements.
I built the pattern based on the sketch, developing the elements as I went along. You can easily create your own pattern, since the proportions of the dragon are purely individual, there are no hard and fast rules, and the principle is shown in detail in the photo. I omit simple operations such as stitching, turning and cutting, inserting and tightening cotter pins. This was mentioned many times in the master classes of other masters. I will highlight the key points that I used throughout this work.
You will also see the necessary materials and tools at each stage of work.
So, let's begin.
To begin with, I select inspiring photos and make my own sketch.
I choose fabrics and threads of the desired color scheme, red-orange, since the Serpent is, after all, fire-breathing.
I cut out the body - 2 parts for the back and 1 part for the tummy - and wings.
I sew the parts of the body. The seams of the tummy were ironed towards the back.
Scallop
- I mark the teeth on the fabric, stitch, cut, turn, stuff;
- I baste the comb onto one side of the back, sew it with a zipper foot;
- I chop off both parts of the back, sew with a zipper foot along the stitching line of the comb. So I see a line that should go inside. I leave unstitched space for turning, about 10 cm at the level of the shoulder blades.
Tail, palms, paws:
- I sew with a fine line (1.6-2mm);
- so that the sharp corners remain sharp when turning out, I make 1-2 stitches across the top of the corners;
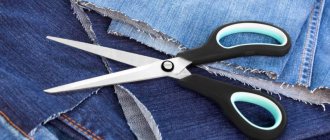
- I cut out the details with zigzag scissors;
- I cut off the outer corners and cut the inner ones.
Hind legs.
Rear "flippers"
- I stitch along the line of the membranes, turn it inside out, steam it, stitch along the line of the “fingers”;
- I insert the frame, stuff it, sew it to the hind legs, the seams go perpendicular to each other;
- I insert discs and cotter pins into the slits and sew them up.
Result: the fins can take different “toe” positions.
Brushes.
I fold the wire into the shape of a brush.
I line it with synthetic fluff. To stuff it, I screw in a toothpick with a wrapped padding polyester and turn it inside out to take it out.
Neck
- Since Gorynych is three-headed, I sew the parts together using the “chain” method;
- I stuff all three necks: I wrap the padding polyester on a wooden stick, push it into the neck and unwind the stuffing from the stick inside the part. Neck pattern depending on its bend;
- I insert a cotter pin with a disk into the upper part, put a metal wire on the cotter pin under the disk, and sew it up.
Body.
I glue the cotter pin joints for additional reinforcement.
I insert a wire frame along the entire length of the body so that the wire runs from the tip of the tail and through to the central neck.
I sew the neck to the body, insert the limbs into the attachment points.
For the “arms” I take wire longer than their length by the size of the brush. I strengthen the ends.
I sew on the wrists.
You get these movable handles.
Wings
- I sew, cut, turn, steam, mark the place of the flight bone;
- I'm preparing the frame. The wire is longer than the wing, the ends are wrapped with adhesive tape;
- I stuff it, sew up the hole for stuffing.
I insert the ends of the wire into the carcass, which is half stuffed.
I sew on the wings. In the same seam cut.
Attaching the connection between the neck and the head
- I sew up the lower hole in the turning part of the neck, insert a disk, glue on the reinforcement, tighten the cotter pins;
- To make it easier to attach the head, I stuff it, tighten the top hole, insert the disc, strengthen it, and take out the stuffing.
Head
- I sew the parts together depending on the desired shape of the lower jaw. In this case, I decided to make it with a closed mouth, so the upper right part will wait for the next dragon;
- I stuff my head with synthetic down, insert the fastener, sew it up, and strengthen it.
Drawstring
- I draw the eyebrows, the shape of the eyes and outline the nostrils;
- I pull along the marked lines, the upper and lower eyelids to the eyebrows, the nostrils - between each other and from top to bottom under the jaw.
Ears
Everything should be clear from the photo, I’ll just note that you can also insert a wire into the ears along the top edge. Then the dragon will be able to “flap its ears.”
I sew the finished ears on both sides of all three heads.
This is how the giraffe's face turned out.
- I fasten the head pin, stuff it, sew up the top seam;
- I sew on the lace where the neck turns.
Decor
- I embroider the ears with beads, decorate them with paint and sparkles - as much as my imagination desires and my hamster’s supplies allow;
- When sewing on beads, I use thread that matches the fabric, not the beads.
Lyrical digression: a guest came, a distant relative of dragons. If she had come earlier, I would have changed the pattern of the palms and feet.
We tint and shape the eyelids. For tinting I use pastel pencils and form the eyelids with a structural paste.
Eyelids close up
Nails, eyes
- I sculpt from baked plastic with a hole for sewing;
- I separate the nails in pairs for the hands and flippers and glue them in their places;
- I paint the eyes with acrylic paints
Horns
I sew the horns randomly, to the desired size. This is the middle, nasal horn, for example. I will repeat on the eversion technique; this was already mentioned at the Fair.
I sew the horns into place; you can also insert wire into the horns.
And now the final photos:
If you liked this master class, I will be very glad to hear your votes.
In case of full or partial copying, a direct link to this master class is required.
Birdie
You can make an adorable bird. To do this, you need to sculpt eyes, beak, wings from plasticine, and paint the craft with acrylic paints. Several birds with colorful wings can be glued to a tree branch. The result is a wonderful composition that will decorate the room.
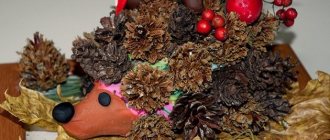
Crafts from pine cones and plasticine
It is quite difficult to fasten the cones together tightly. Ordinary plasticine copes best with this task. In addition, the flexible material can be used to decorate crafts or as the main element in a composition.
Turtle
Mold the torso, legs and walrus of a turtle from plasticine. Cones should only be used to create a beautiful shell.
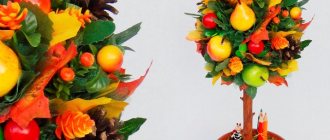
Table composition
This small craft made from acorns in the Japanese style will decorate any holiday table. It is made as follows:
- The collected acorns are washed and dried.
- Carefully remove the caps.
- The fruits are painted in different colors with acrylic paints or colored varnish.
- 2 holes are made in the caps and a thick thread is pulled through them, forming a loop of the required length, the knot is tied under the cap.
- Hats are glued on top.
- Place a ceramic vase and a napkin holder (salt shaker, sugar bowl, etc.) on a wicker or simple shallow tray. The rest of the space is covered with a layer of acorns.
- A tree branch is inserted into a vase, and painted acorns are hung on it.
Wall panel
To create an original panel with your own hands, you will need to cut a tree 1-1.5 cm thick, which can be shaped into a square, oval, or another shape. The size is chosen at your discretion. The manufacturing technique is simple:
- Twigs of different lengths and thicknesses are glued onto a wooden blank, and acorn caps are attached to them using glue.
- Cones of different heights are glued to the ends or along the branches.
- Acorns without caps are attached to the branches at the bottom of the composition, forming a seven-flowered flower from them.
- After the glue has dried, a hole for a nail is drilled behind the wooden base and the finished panel of acorns and cones is hung on the wall.
If you paint the acorns or cones before gluing, the panel will turn out colorful and will look good in a child’s room. For the living room, kitchen, hallway or bedroom, it is better to leave the composition in natural colors.
Mushrooms
If a child cannot yet make such complex crafts as Cheburashka or Zmey Gorynych, offer him a simpler craft option - mushrooms from chestnuts and acorns. The acorns will become the stem of the mushroom, and the chestnut will become the cap. Roll out the plasticine into a flat cake, attach it to the surface of the chestnut and place it on the acorn. Using plasticine, you can easily attach the elements of a craft. A child can easily make as many of these crafts as he wants, and mushrooms can be decorated by placing plasticine dots on the caps or by gluing a “skirt” of colored paper to the leg. [icon_text box_type='icon_in_a_box" box_border='yes' box_border_color='#e6d1d1′ box_background_color='#f2dcdc' icon='icon-link' icon_type='circle' icon_size='icon-2x' custom_icon_size=" image=" icon_position ='top' icon_border='yes' icon_border_color=» icon_color=» icon_background_color='#c7bbbb' title=» text=' Our children are a very restless people. They love outdoor games and begin to master vehicles early. How to choose the right children's helmet for outdoor activities and sports: types and characteristics. Curtains are the finishing touch that does not dictate the interior, but complements it. In this review, we have selected interesting ideas for decorating a children's room for you. How to teach a child letters using Zaitsev's educational cubes: https://tinymini.ru/poleznie-statii/razvitie-i-uhod-za-rebenkom/obuchayushhie-kubiki-zajceva.html' title_color='#000000′ text_color='# 000000'] When there are a lot of mushrooms, invite your child to “plant” them in a clearing, which you cut out of cardboard or colored cardboard paper. Original crafts are made from chestnut fruits and cones. It is difficult to combine these materials with each other, but they allow you to create a variety of compositions. For example, you and your child can make a clearing with mushrooms from chestnuts and acorns, and place several Christmas tree cones nearby. In order to make them look like a tree, the cones can be coated with green paint. Such a clearing is not just a craft: on it you can act out scenes with animals, also made from natural materials.
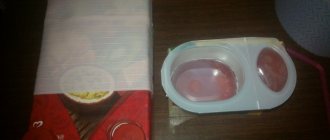
Nest with eggs
A very interesting craft that will come in handy for Easter is a nest. To make it you need to prepare:
- several acorns;
- acrylic paints or gouache;
- an old toothbrush;
- toothpicks;
- plasticine and twine.
Manufacturing technique:
- In each acorn, make a hole with an awl or a thick needle, insert a toothpick into it to make painting easier, and apply bright paint in 3 layers.
- Stick toothpicks into a piece of plasticine and leave until the paint dries completely.
- After the paint has dried, the fruits are sprayed with black color, slightly diluted with water, using a toothbrush.
- A nest is made from yarn, twine or rope, wrapped around the palm of your hand and placed in several layers on the bottom. You can add thin straws.
- After drying, the workpieces are placed in a nest.
Autumn crafts made from acorns are ready.
Cheerful bunny
You can make a beautiful bunny out of a pine cone, which you will take as a craft to kindergarten or school 1st grade. The bunny will be a great decoration in your home or a gift to loved ones. In order to make this craft with your own hands, you can watch the full description with step-by-step instructions or a video master class.
You will need:
- Cone
- Plasticine
- Toothpicks
Progress:
- We sculpt a head and ears from white plasticine.
- Next we make eyes, a nose and a mouth from plasticine.
- We insert toothpicks into place of the antennae.
- We attach the head to the bump.
- We make the paws from white plasticine and also attach them to the pine cone. Our simple and beautiful bunny is ready!
Videos bunny
bunches of grapes
For the autumn harvest festival or for a kitchen panel, you can make bunches of grapes using:
- acorns;
- wires;
- sewed;
- corrugated colored paper;
- varnish, paints and brushes.
Manufacturing technique:
- Remove the caps, wash and dry the acorns.
- Insert an awl into the hardest surface that was under the cap and carefully make a through hole. There is no need to sharply pierce the fruit, otherwise it will split.
- Insert the wire, bend the hook at one end, carefully pulling the long end of the wire, and push the hook into the workpiece.
- Corrugated light green paper is glued onto the wire, the acorns are covered with dark purple and green paint, and after drying, a colorless varnish is applied on top. You can make bunches of grapes from green unripe acorns.
- The finished “berries” are collected into a bunch using the technique of weaving a flower wreath.
- Leaves can be used dry from the herbarium or printed on a printer. Corrugated paper is glued onto them and the veins are pressed out. The leaves are varnished and fixed at the top of the grape bunch.
In a similar way, you can make an olive branch, which will also become a kind of decor for the kitchen.
Autumn is the most generous time of the year for collecting leaves, chestnuts, spruce and pine cones, twigs and acorns, from which you can make simple and charming crafts all year round.
Dragon
Autumn crafts made from acorns and chestnuts are interesting.
Here is one of them - the fabulous Serpent Gorynych. It’s not at all difficult to make; for this you will need:
- acorns;
- chestnut kernels;
- corrugated paper;
- toothpicks;
- plasticine and soft fabric.
Manufacturing technique:
- 3 toothpicks are inserted into the chestnut kernel, located horizontally, at the top and 2 at the bottom.
- Acorns without caps, also arranged transversely, are pricked onto each top toothpick.
- Half acorns are pricked onto the bottom toothpicks with the whole side up - these are Gorynych’s shoes.
- Eyes, a tail, a button nose, a crest and a tongue are made from colored plasticine (the tongue can be made from corrugated paper and then glued).
- To prevent Gorynych from freezing, a scarf made of soft fabric is tied around his neck.
Instead of a tuft, you can glue an acorn hat on your head, which will give the Snake a stylish look. If desired, you can combine the crest and the hat.
Crafts from cones and acorns
Another autumn masterpiece can be made from cones and acorns. If your own ideas are exhausted, look at ideas for original crafts for joint creativity between children and parents.
Squirrel
Squirrels are very beautiful and colorful animals. The fluffy tail is especially good. The craft is simple, both a child from the younger group and a first grade student can handle it. To create a squirrel figurine, take elongated, unopened cones and small acorns. Fasten the elements of the composition together with plasticine or glue.
Little dragon
This could be the three-headed Serpent Gorynych from the cartoon “About Three Heroes”.
Or a figurine that looks like a cute dinosaur with multi-colored spikes on the back.
On a note! To change the shape of a pine cone, dip it in hot water, shape it into the desired shape and tie it with twine. When the cone is dry, carefully remove the rope and start creating.
Deer
A noble animal or even a pair of deer can become an independent craft for an exhibition at school or an element of a large composition. Use cones for the body, branches for the legs, and acorns for the head. Fasten the elements of the figure together with plasticine. And don’t forget to attach a pair of branchy antlers made of gnarled twigs to the deer’s head.
It is best to make arms and legs for animals and people from dry willow branches. There are no knots on the shoots of this plant; they bend well.