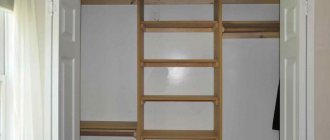
The process of creating shelves itself
Take your time to start sawing, planing and painting. First, take a sheet of paper, and, looking at the place on the wall where the honeycomb shelves will be located, sketch out a sketch. While doing this, calculate the size of the individual face. Next, count how many edges there will be, and multiply the resulting number by a separate size, you should get the total footage of the board. That's it, now you can definitely start sawing, planing and painting.
- At this stage you have two solutions:
- when going to the store to buy a board, you can cut it to size there, the main thing is not to forget to indicate to the craftsmen that you need side cuts of 30 degrees;
- you will have to cut the material yourself;
- Using sandpaper or a sander, sand the edges well.
- Having prepared the edges, we begin to assemble them using self-tapping screws, in accordance with your sketch. Don’t forget about the fastenings on which the structure will hang
Worth remembering! Before you start screwing in the screws, you should drill small holes. This will prevent the boards from cracking.
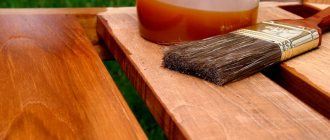
- Painting or varnishing. This process has several nuances:
- paints, varnishes, enamels must be safe, so the choice is only from the category “for interior work”;
- it is possible to make your own color scheme, but for this you will have to spend money and buy several cans of paint, then achieve the desired result by mixing;
- painting looks like this - the first layer is applied, then drying time is 2.5-4 hours, after which another layer of paint, varnish, enamel;
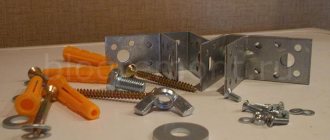
- The final touch. Placing the resulting masterpiece in its rightful place. Using a drill, drill holes in the wall, then drive plugs into them, then tighten the screws or drive in dowels. All you can do is hang your honeycomb shelves in place.
Carry out all work on creating shelves carefully. Make especially good quality cuts on the edges. Otherwise, when assembling, you will end up with unsightly cracks, and the whole structure will come out crooked and untidy.
Main stages of work
The first step is to cut the furniture panels into blanks of the required width. Then you will need to cut small pieces on a miter saw (the master files the edges at an angle of 45 degrees).
To make one honeycomb shelf you will need 6 pieces of furniture board. We connect all the parts together using nails and PVA glue.
At the last stage of work, all that remains is to sand the shelves and then paint. You can paint the outside with white paint and the inside with a different color paint. Or you can simply coat them with varnish.
For details on how to make honeycomb wall shelves for your home and garden with your own hands, watch the video on our website.
Source
The final stage
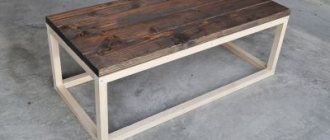
When our shelving was assembled, we sanded all the ends of the boards in the front plane and in the back. In this case, first they used coarse-grained sandpaper, and then fine-grained sandpaper.
Thus, we made the ends of our rack as smooth and beautiful as possible. In addition, after sanding, since we bought painted wood, the structure we assembled acquired a stylish, slightly “worn” look.
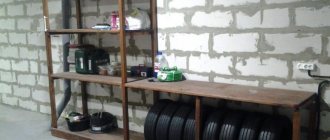
Installation in place using brackets
We hung the honeycombs of the rack on the wall using brackets. First, we securely secured the brackets themselves to the wall using anchors. We hung the composition of three hundred, assembled at the first stage, on two brackets. At the same time, the second honeycomb was hung on the first bracket, and the base of the first was attached to the second.
We also used two brackets for a couple of additional honeycombs and for a rack located separately. We attached the boards to the brackets using wood screws and a screwdriver.
Source
Whoosh, and you have new shelves! How to make a shelf with your own hands
Do you like the shelves from the design blog? We suggest not “waiting for Zhdun”, but making them yourself. Don't you know how? Yes, this gives a complete newbie a job for one evening! Now we'll tell you everything.
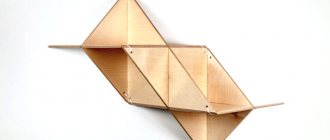
Designers love hexagons: no matter what community you look into, there are honeycomb-shaped ceramic tiles, hexagonal furniture, and even fashionable shelves on the walls. Of course, you can buy these for yourself in some online store, but why spend so much money? A board, a couple of screws, and the remains of wood glaze - “Whew!”, and before you know it, fashionable shelves will appear on the wall.
Assembling the rack
Having assembled the first honeycomb, we attached the second one to it. In this case, the top board of the first honeycomb became the base of the second. In the second honeycomb, we additionally secured a long board-shelf in the middle. My husband pre-cut the ends of this board at an angle of 30 degrees. Next, we inserted the shelf inside the honeycomb and secured it with glue and screws.
While securing the second pair of boards of the first honeycomb, we at the same time attached the base board of the third side honeycomb to the rack (photo 12). While assembling the second honeycomb, we immediately fixed the top board of the third. Therefore, in the third honeycomb, in the end we only needed to secure two side boards and one long cross.
Thus, we had a rack of three hundred ready. Later we attached 2 more honeycomb shelves to it, and hung another honeycomb a little to the side.
Hanging models
Before starting complex processes, professionals advise watching a video on how to make a shelf in order to understand all the small points and avoid mistakes.
The hanging type design requires the presence of ropes that will not only connect and maintain the distance between elements for placing things, but also fix the entire product to the ceiling.
It is better to purchase the most reliable thread; the tiers themselves are often made of plastic, to reduce the load, you can use plywood or chipboard; it is better to avoid heavy boards.
Similar models are suitable for placing small items of this type:
- Books.
- Newspapers.
- Magazines.
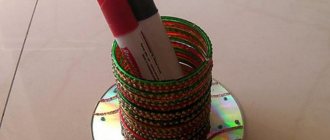
- Disks.
The design option is practical, because due to a special approach to fastening, there is space under the frame for a bedside table or TV.
Shelf for the room
When thinking about how to make shelves in a bathhouse, you should pay attention to this type of design, because its creation will require a minimum of materials, and the components can withstand increases in moisture and temperature changes.
The elements are attached to a rope; it should be fixed using one of the common methods, but experienced craftsmen advise resorting to the use of hooks so that the specimen can be removed and washed from essential oils or stains typical of bathhouses.
The base itself is selected from plastic of the required thickness; thin metal sheets are also suitable, but they must be covered with a protective rubber layer, otherwise during the procedures you can get burned on the element, because the temperature in such rooms rises quite high, especially during preparation and steam injection.