Sleigh rides are one of the favorite winter activities for adults and children. A sled is a safer option for snowboarding. Sitting in them, you can conquer snow-covered hills. Every child will be happy with such “extreme”, and parents will not worry about the child’s health, because it is almost impossible to fall out of the sled. To make sleds not only an exciting entertainment, but also a universal means of transportation for the baby, bags and covers for the sleds were invented. They are used to transport things of various sizes in sleds with a rigid handle . Thanks to the secure fastening and dense material from which the bag is made, it can be used in any weather conditions - things will remain dry. A sleigh cover will make your baby’s walk more comfortable and warm.
REFERENCE! The bag and cover for the sled are also convenient because taking them off, washing and drying them is very simple, quick and easy.
We sew a practical and warm cover for a sled
Materials: men's long, used jacket, preferably with a drawstring at the bottom and a zipper with two dogs, a mattress or any other insulation, ropes, synthetic down for stuffing the pillow, scissors, a needle, threads, pins.
A sewing machine is not necessary! Working time: maximum 1 hour, can be completed in 45 minutes.
So here are my supplies:
The beloved child is put to bed, no one bothers him, the action plan has been brewing all day), after buying a sled. And so I begin what I have planned.
22:00 I cut the mattress to fit the seat. The length of the mattress should not exceed the length of the jacket.
22:02 I try the jacket on the sled, turning it upside down. It is important that the zipper has two pawls, because... it will open from the bottom of the jacket up. I mark the cutting line for the sleeves and cut off the excess. Don’t put them off too long; they will be used to make a wonderful pillow for greater convenience.
22:07 I insert the mattress into the jacket and distribute it along the center of the back of the jacket, securing it temporarily with pins.
22:10 I turn the trigger inside out, pin the holes from the cut off sleeves and neckline, and then use them. Pull out all the pins and count them, leaving only those that hold the mattress inside the cover.
22:18 Now I turn inside out not the jacket, but the cover. Trying it on on a sled.
I outline the places for the ties that will attach the cover to the sled and hold the inner mattress. I sew the ties right through, grabbing the mattress inside the cover. Five ties were enough for me, three holding the back and two at the legs. I'm removing all the pins!
22:30 I sew a pillow from sleeves. I cut both sleeves along the seam (it takes a long time and there is no need), fold them facing each other, and cut the pillow in the form of a trapezoid, in other words, I cut off the bottom of the sleeves. The height of the pillow should be 10 centimeters higher than the height of the back of the sled, for the baby’s comfort. I sew it together, leaving a hole for turning and stuffing. I turn it inside out. I'm stuffing. That's it, the bear now sits more comfortably, and you can even take a nap on the way to grandma :)
22:45 Done! Warm! Comfortable! And most importantly, quickly!
Source
DIY sled bag
Sleigh rides are one of the favorite winter activities for adults and children. A sled is a safer option for snowboarding. Sitting in them, you can conquer snow-covered hills. Every child will be happy with such “extreme”, and parents will not worry about the child’s health, because it is almost impossible to fall out of the sled.
To make sleds not only an exciting entertainment, but also a universal means of transportation for the baby, bags and covers for the sleds were invented. They are used to transport things of various sizes in sleds with a rigid handle . Thanks to the secure fastening and dense material from which the bag is made, it can be used in any weather conditions - things will remain dry. A sleigh cover will make your baby’s walk more comfortable and warm.
REFERENCE! The bag and cover for the sled are also convenient because taking them off, washing and drying them is very simple, quick and easy.
Sled models
The model of the mattress (it doesn’t matter whether we are talking about purchasing a finished product or sewing it yourself) dictates the model of the sled. The range of children's sleds today has expanded significantly.
The seat and back of a light, compact folding sled, reminiscent of a chaise lounge, is a ready-made mattress - foam rubber, covered with waterproof fabric.
For longer walks, you should look for a model that comes with an envelope for insulating your feet, or consider an elevated option - a sled-wheelchair.
A sled with an aluminum frame, sheet steel runners and multi-colored planks is a classic version, known since the times of the USSR. Wooden, wicker and plastic models are also on sale - domestic and foreign brands, budget and high-tech. All these options require additional insulation with a mattress.
First, we take measurements from the sled and draw a pattern using these dimensions.
The lower part of the seat can be cut out of raincoat fabric - it will be more practical.
We cut the seat parts from fleece and padding polyester at the same time.
What you need to sew a bag
Resourceful mothers decided not to spend money on buying expensive sled bags and created a way to make this useful thing with their own hands.
We will look at two ways of creating: with and without a pattern .
For a bag with a pattern
We will need the following.
Simplified version
Sewing involves the use of such materials.
REFERENCE! The use of a sewing machine is not provided for this option; the work can be done manually.
How to sew a bag for a sled
Sewing a sleigh cover is a labor-intensive process, but the result is definitely worth the effort.
The first method is with a pattern
To create a bag you must follow these steps.
Seat
Velcro
The result of the work is in the photo.
The second method - without a pattern
IMPORTANT! From the sleeves of a down jacket you can sew a comfortable and soft pillow for your baby. Just sew them together, leaving room for stuffing. Then stuff tightly, stitch around the edges and that’s it!
Enjoy your sleigh ride with your baby and you with this wonderful and warm bag-cover.
Source
DIY sled bag patterns
The first seat was made for my child, I wanted to make something interesting and at the same time make it warmer and more comfortable than cheap store-bought ones made from calico (impractical on the street in winter clothes) and synthetic padding (rolls into a lump) or foam rubber (rots after 3 years). Some people are happy with this option (I have nothing against it).
The calico was replaced with FLEECE/POLARTEK (it is warm, soft, does not fade, does not shrink, bright colors). You can also use FURNITURE FABRIC or FUR.
I insert ISOLON (sports mat) INSIDE, it retains heat, while the child does not come into contact with the metal back of the sled and the seat.
Izolon has advantages over any other materials (it does not rot over time or from moisture like foam rubber, does not cool in the cold like any other materials, and is wear-resistant).
I sew sled seats of different types and complexity. The cost depends on the complexity (design) and the chosen material. If you want to buy a cheap sled seat, then it makes sense to buy ready-made seats in the store.
About FABRIC as a BASIS for a sled SEAT
I sew sled seats of different types and complexity. The cost depends on the complexity (design) and the chosen material.
Seats for sleds using the technology I developed, I sew individually to order for 5 years, the most CONVENIENT and WEAR-RESISTANT materials for winter are
1 FLEECE / Polartek, 2 FUR, 3 FURNITURE FABRIC.
WHY DO I NOT sew seats for sleds from calico? 1. such seats can be bought in a store 2. they are impractical for winter clothes
WHY DO I NOT sew sled seats entirely from JACKET FABRIC 1. Such covers for sleds are sold in stores 2. It will be inconvenient for you to use, since the jacket fabric slips. 3. The jacket fabric is quickly wiped clean on the sled. And since store-bought covers for sleds are made from the thinnest fabric to reduce the cost, they are wiped not only on the outside, but also on the inside (then they bring me such covers for sleds and sleds and strollers to alter and replace the fabric).
All internal parts come out when washing.
I insert ISOLON (a sports mat) INSIDE the seat of the sled, it retains heat, while the child does not come into contact with the metal back of the sled and the seat. THICKNESS 1CM in the back and 2CM in the seat.
Izolon has advantages over any other materials (it does not rot over time or from moisture like foam rubber, does not cool in the cold like any other materials, and is wear-resistant).
WHY DO NOT I put FOAM inside? 1. foam rubber absorbs moisture (why do you think tourists take isolon mats with them, and not foam rubber mats, to sleep on the ground) 2. foam rubber rots after a couple of years (anyone who has seen an old foam rubber mattress will understand)
DESIGN: 1 front backrest (the child’s back is in contact with it) 2 rear backrest (you can make an applique or pocket on it), 3 seat bottom
1450 rub. for SEWING seats of this design (plus materials and accessories)
WHAT'S INSIDE THE SEAT?
I insert ISOLON (a sports mat) INSIDE the seat of the sled, it retains heat, while the child does not come into contact with the metal back of the sled and the seat. THICKNESS 1CM in the back and 2CM in the seat.
Izolon has advantages over any other materials (it does not rot over time or from moisture like foam rubber, does not cool in the cold like any other materials, and is wear-resistant).
WHY do I insert Isolon, not FOAM, inside? 1. foam rubber absorbs moisture (why do you think tourists take isolon mats with them, and not foam rubber mats, to sleep on the ground) 2. foam rubber rots after a couple of years (anyone who has seen an old foam rubber mattress will understand)
About SEAT BELTS (specify for me when ordering a seat).
1. If the design of the sled includes seat belts, then I make holes for them in the seat of the sled (this is not added to the cost of manufacturing the seat)
2. If the sled you bought does not have seat belts, but you need them, I will make them (not added to the cost of making the seat, only for the sling and fastex)
WHY DO I NOT attach the seat with ties (like they sell in the store) - many people complain that it’s inconvenient because they come undone (remember the laces on your shoes)
I AM ATTACHING THE SEAT TO FASTEXES.
I buy fastex only those that work well, and not the kind you get on strollers that you can break your fingers while unfastening (check the fastex when buying a stroller).
As an alternative to appliqué, the BACK back (in a two-back design) can be decorated with patterned jacket fabric. But fleece, fur, and upholstery fabric are still better suited for the SEAT and FRONT backrest. Since it will be uncomfortable to sit on the jacket fabric, it will slide.
Warm COVER for LEGS (COVER for LEGS) can be WITHOUT ZIPPER
COVER for LEGS 850 RUR work (without zipper, universal for stroller and sled)
This cover can also be used on a stroller with this design (read the next post about the materials used)
UNIVERSAL suitable for sleds and strollers https://vk.com/photo-69512695_456239156
IN STOCK. I send to other cities.
The color may be different upon request.
Warm COVER for LEGS (COVER for LEGS) can be WITH ZIPPER for the sled
950 rubles for work (plus materials and accessories).
Unlike ready-made goods in a store, the final cost of a foot cover DEPENDS on the materials and accessories you choose
Fabrics that I have (with a pattern), if you like something (different quantities must be specified specifically) https://vk.com/album-69512695_224161026
2 As INSULATION I use ALPOLUX (thin 125 RUR/m, medium 180 RUR/m, thick 245 RUR/m), if you have already purchased insulation, I can sew it from yours
(just not padding polyester, this is an outdated material, many complain about store-bought products because it rolls into a lump and is not foam rubber, it does not heat at all)
3 INNER part of the COVER for LEGS is most often ordered:
1 jacket fabric (plain or patterned) 2 fleece\polartek
In order to be cheap and high quality at the same time, you have to choose and the choice depends only on you. If you choose more expensive materials that will last a long time, then it turns out more expensive and vice versa.
Therefore, the final price depends on the material you choose, the thickness of the insulation and fittings. View all images
HOW IS THE LEG COVER ATTACHED TO THE SEAT ON THE SLED?
I sewed the first cover so that it was fixed to the linden around the perimeter of the front part of the seat (photo 1),
but then I started making it so that it is attached with buttons, which allows it to be moved as the child grows (photo 2, like all the other photos)
If you have any other suggestions for fixing the case, please tell me.
Advantages and disadvantages of STORE covers for sled legs and seats
Advantages 1. cheap (due to the use of the cheapest materials) 2. beautiful (printing a design on fabric is cheaper and easier than making an applique)
Disadvantages 1. cold (foam rubber) compared to isolon (in the seat) and alpolux insulation 2. fragile (thin fabric) 3. the child slips on it
1 var DESIGN of a sled seat, consisting of three parts
1 front backrest (the child’s back is in contact with it) 2 rear backrest (you can make an applique or pocket on it), 3 bottom of the seat
1450 rub. for the work (plus materials and accessories)
All internal parts come out when washing
This design allows you to put the seat on the iron back of the sled from above; this makes life easier when walking, since it DOES NOT SLIP ANYWHERE
This is the cost for the work (for different design options). I can tell you exactly how much material will be needed when I make the pattern on the fabric (different sleds differ in size). That is, you need to decide exactly whether you will order and what design, and in terms of fabrics and materials, I will tell you everything that is best, what is cheaper, what is more expensive, we will discuss everything and choose the appropriate option. If you have questions about the design (which is better, worse, different) or if something is unclear, please ask.
As an alternative to appliqué, you can decorate the back with jacket fabric with a pattern, but sitting on jacket fabric will be uncomfortable; fleece, fur, and furniture fabric are better suited for the seat.
Or you can make the back wall of plain fleece with a large pocket made of patterned jacket fabric.
Source
LiveInternetLiveInternet
And now in more detail With the onset of winter, many mothers are in a hurry to put their children on a sled. After all, storming snowdrifts with a sled is much more convenient than with a stroller, and children also like it. What should your baby's first sled be like? * Light, low, durable and stable. * It’s very easy to check stability - the lower the sled and the greater the distance between the runners, the more stable it is. * The sled must have a back and a pusher handle so that the child is in front of the mother (like in a stroller). In this case, the baby is always in sight and his actions can be controlled. Some sled models have a reversible handle - this is especially convenient in windy weather. You can hang a net or stroller bag on the handle, which is also very convenient. Another advantage of a sled with a handle: with it you can overcome obstacles like a stroller - by lifting one edge. * In order not to freeze a child's bottom, there must be a mattress in the sled. * For very small children, seat belts will be needed; a footrest or raised seat will also be useful to make the child more comfortable. * It is better to choose a sled in which the boards on the seat are located across, rather than lengthwise: in this case, the mattress will be less likely to bunch up.
Most sleds, unfortunately, do not have seat belts, and a mattress is not always included. You can make all this yourself without much difficulty.
MATTRESS - The simplest mattress is an ordinary baby blanket, folded several times. It must be secured to the sled in several places. — Another simple option is to use a winter sleeping bag from a stroller on the sled. Owners of transformable strollers can adapt a stroller carrier onto a sled.
How to sew a mattress A mattress consists of: - the inner part - the base - a cover - a bag for the legs As a base, you can use thick foam rubber, a tourist rug, foam, padding polyester, batting, etc. If the base material is hard, then two parts are cut out: according to the size of the seat and backrest. If the insert is made of soft material, then it makes sense to cut out one long part. The cover is cut using the same pattern: two parts (top and bottom), taking into account the necessary allowances. Place the cover pieces right sides together and stitch, leaving one edge open. Turn the cover inside out, insert the base inside and sew up the edge. For the cover, it is better to take thick fabric - calico, raincoat fabric, drape. To secure the cover to the sled in key places (in the legs, on the fold and in the upper part of the back), sew ribbons. At the top of the cover, on the reverse side, you can sew a “pocket” strip, which will be placed on the back of the sled. You can also sew a foot bag to the mattress. You will need the same fabric as for the mattress cover, warm fabric or fur, two long zippers. Two identical parts are cut out (the upper one is made from mattress fabric, the lower one is warm). Length: slightly less than the length of the mattress, width: the width of the mattress plus 20 cm - to fit the legs loosely. On each part, lay and stitch two folds (10 cm each) along the width, while the width of the lower edge of the parts becomes equal to the width of the mattress. Place the pieces right sides together and stitch along the width only. Turn inside out and sew one part of the zipper into each side seam. Align the lower edges of the mattress cover and the flap and sew them together. Sew the second parts of the zippers on the sides of the mattress. The result is a warm bag for the legs, fastened with two zippers.
SEAT BELT - If you have a cane stroller with an attachable safety bar, it is quite possible that the safety bar will fit on your sled.
— You can use a long waist belt as a seat belt: attach the belt to the back of the sled and you can fasten your little one. — You can make a belt based on the principle of insurance on a high chair. To do this you will need a long thick braid and a lobster clasp. Measure the braid to the required length and sew both parts of the carabiner clasp to the edges. Fasten the braid to the back of the sled. In the middle of the sled seat, make a loop of braid; you will have to make a slot in the mattress. The braid loop should be located between the legs of the baby sitting on the sled. When fastening the seat belt, one end of the long strap is threaded through the loop and the carabiner snaps into place. It turns out to be additional insurance - the baby will not move forward.
https://www.znaika-club.com.ua/academy1192709346/
Sleigh bag
Good day
When I was pushing my daughter in a stroller, it was convenient to put things in the bag. And everything was at hand. But time passed, the child grew... And we grew up to a sled. Sledding is great in winter! Convenient, easy, safe - but there is nowhere to put things. How to be?! Backpack - you say! No, it's not for me! I'm not ready to take it off/put it on a hundred times. The fact is that we are walking on a site the length of a six-entrance house. And it’s really inconvenient to get all the toys at once. Now we want to swing, now we want to go uphill, dig, sculpt, play ball. No, now let’s run to that swing - catch up! - and my daughter ran headlong. And instead of catching up, I will frantically collect all the toys in my backpack? No, it won’t work that way! Although this option is good for freezing people - always on the move. Shouldn’t I sew a bag for a sled? - I thought. The idea is good and we went to the store. We bought everything we needed. I measured the handle of the sled, estimated the dimensions, drew what I wanted and got to work. I must say that I never repaired the sewing machine... And I had to sew everything by hand... I sew... and sew... and sew... And my son keeps joking: “Summer will come faster than you can finish your bag.” Well, let it be! So next winter we will have a bag. Yes, yes, it was not easy to sew a bag. But I sewed it! Hooray! And I will be happy. The bag turned out to be bright, comfortable, with pockets! Everything fit and there was even room left. Bag size 60 cm x 32 cm x 4 cm. One large pocket with a flap with buttons, two pockets on the back (with a zipper and a button), one pocket on the front with a button. And now when we walk, we always have spare mittens, a scarf for mom, a wallet, a phone, keys, napkins, shovels, a bucket, a ball, a snowball, and even a snack (we walk for three hours). This is such a magical handbag. Now it’s convenient to take out toys and put them away! The bag attracts the attention of mothers)) It is the only irreplaceable thing for a sled!
Well, that's all)) Thanks everyone for your attention!
Yamogu: I really like to knit for Baby Born and Gotz dolls. I will be happy to dress up your kids
Yamogu: I can sew clothes for a doll that I have in my collection. Carefully and creatively. I embroider with cross stitch and satin stitch. Always happy to chat! Stop by for a visit.
Source
What to sew from a down jacket and an old jacket with your own hands - the Kurpach method
Today's consumer, of which I include myself, gets bored with things faster than they can become unusable. Old socks and T-shirts are usually used as dishcloths, but what to do with high-quality and expensive jackets and down jackets? Before introducing the reader to the ideas of remaking old jackets with your own hands, I will tell you about kurpacha.
The exotic word means rug-blanket-mattress. It came from Central Asia, where such a product has been a household item for centuries.
First, the master quilted a layer of cotton wool, first beating and fluffing the natural fiber. Then a cover made of silk, velvet or cotton was put on the resulting mattress for the upper, front half. The bottom surface of the cover was always cotton. A thin soft mattress was sometimes additionally stitched with threads.
They sat on kurpachi while eating and talking, and slept at night.
In Russian culture, the closest relative of kurpacha was quilted cotton blankets.
Such things are still preserved in Russian families and serve faithfully.
Here are some remakes of old jackets based on the kurpaca technique, hopefully they will inspire the readers.
What you need to sew a bag
Resourceful mothers decided not to spend money on buying expensive sled bags and created a way to make this useful thing with their own hands.
We will look at two ways of creating: with and without a pattern .
For a bag with a pattern
We will need the following.
Simplified version
Sewing involves the use of such materials.
REFERENCE! The use of a sewing machine is not provided for this option; the work can be done manually.
For mountaineering tourists
It happens that you have at your disposal not just a down jacket, but an entire mattress or duvet. Don't rush to waste this treasure on trivial pillows. Sew a real down sleeping bag!
In general, approach the issue creatively. Put the item in front of you and look closely at it: does this piece of outerwear inspire you to transform it into something beautiful? If not, take it to the trash or to a charity. Perhaps someone will be happy with such a gift - don’t be greedy.
Latest news
Recently, new models have appeared on store shelves.
- Envelope with a hard bottom. A new model, made in the image of an envelope-bag. This product differs in that it contains a removable thick mattress. The presence of this element allows you to keep the child’s fragile back in a certain position. This is most important for inexperienced parents who are not accustomed to how to hold a child in their arms.
- Car envelope. This model has special “pockets” that allow car seat belts to be threaded through them.
Each of the mentioned models has its own advantages and disadvantages. When choosing any product, you should consider how often it will be used, the time of year and the dimensions of the stroller. In addition, it would be a good idea to pay attention to models that have special fasteners that allow you to adjust the size of the envelope. This product will last you more than one year.
We sew a mattress into a stroller
The desire of all loving and caring new parents comes down to one thing - the health and comfort of the baby. Mothers certainly want to provide only the best conditions for their child, especially during walks in the fresh air. Parents purchase pillows, rugs and blankets, toys, mosquito nets and other equipment.
During summer walks, it is important that the child does not get too hot. Due to stuffiness, lack of humidity and, as a result, increased sweating, the baby's skin may develop prickly heat (a red rash that resembles irritation). But during winter walks, adults never cease to worry about the child not freezing. No matter how warmly you dress your child, the stroller in which the baby will be will still be cold (especially the lower base). Many mothers cover the bottom of the stroller with a blanket or blanket. But during walks, the child turns around, and the covered fabrics move and crumple. In addition to the fact that folds are formed that interfere with sleep, the heat in the stroller is not retained. Children from such bedding not only experience physical discomfort, but can also become hypothermic and, as a result, get sick.
To avoid unpleasant consequences, experienced parents and pediatricians recommend using a mattress for walking in a stroller. The only condition is that for summer and winter walks these must be completely different mattresses. For warm weather, you should choose a lighter cotton-based option, and for the cold season, a thicker, printed option is suitable.
Not all young parents can afford to purchase two different accessories at once. And finding exactly what will completely satisfy the needs of mother and baby is not so easy. That is why we suggest, using a simple master class, to sew a mattress with your own hands. Only in this case will you be confident in its quality and convenience.
Envelope in the stroller
When the cold season arrives, mothers begin to think about additional insulation for their babies while walking outdoors. Often the best solution is an envelope in a stroller. We'll tell you what they are and what you need to pay special attention to when choosing such an accessory.
Features of the envelope
No matter how warm the stroller is, it is still not enough in the cold Russian winter, since the child himself should be insulated. At an older age, clothing such as overalls may be suitable for this, but this is not an option for children.
The envelope protects much better from frost and wind, but at the same time it deprives the child of the opportunity to move and explore the world, so it is used when the child sleeps most of the walk. For active children, it is recommended to buy modernized options with the ability to free up their arms or legs without depriving them of warmth.
Some recommend replacing the stroller envelope with a regular blanket, but it will not be able to insulate heat as well, not only because it does not have tight fasteners, but also because it has only one layer, and it is blown.
Materials
If you have already decided that you need an envelope, then all that remains is to decide on the material. Today the following options are presented on the Russian market:
- fur (sheepskin);
- fleece;
- padding polyester;
- downy
It is believed that the best option for walking with your baby in winter is a fur envelope
: it insulates and retains heat best, but it is necessary to take into account the size of the sleeping space in the stroller. The fact is that such an accessory is quite voluminous, and it is very important that the child does not feel cramped during walks.
We sew a mattress for a sled with our own hands (master class, photo)
We sew a mattress for a sled with our own hands (master class, photo)
Sleds are the most common type of winter children's transport, which is very popular with both children and adults. Nowadays there are various accessories for sleds in stores, for example, a sled mattress. Depending on the chosen material, it provides softness, windproofness and warmth, which is very important, because during this winter period parents want to protect their child from colds. You can sew such a mattress for a sled yourself.
Mattress for sleds
To make such a mattress, we will need: fabric (I took raincoat fabric), threads in the color of the fabric, padding polyester (or foam rubber) and Velcro for fasteners (you can do without it - with ties).
Necessary materials Cut out 4 pieces from fabric: 2 pieces measuring 110x22 cm (for the sides of the mattress) and 2 pieces measuring 50x33 cm (for the mattress itself).
We cut out the parts from the fabric. First, we take smaller parts, put both parts together and sew them from the wrong side on 3 sides, inserting ties in certain places (I sewed 2 in the front on both sides, but you can also have one in the middle). We turn the product inside out, cut out a rectangle measuring 46x29 cm from padding polyester or foam rubber and insert it inside (if you use padding polyester, it’s better to take 2-3 layers).
We sew a mattress Mattress We make straps (ties) in the same way as shown in the photo.
We sew straps (ties) Then we take 2 pieces 110x22 cm and also sew them from the wrong side, inserting 3 straps (ties) between the fabric. We cut out a piece measuring 107x19 cm from synthetic padding or foam rubber and also insert it inside the future sides of the mattress. Parts for the sides of the mattress Sew the sides Then, we sew the mattress with the sides together, not forgetting to sew the straps in the right places (I sewed 2 more pairs of straps at the bottom back), and sew Velcro onto the straps. By the way, to prevent the padding polyester from rolling up inside, you need to sew it on top with fabric (you can see it in the last photos). Velcro straps I got this mattress with sides for a sled. Straps 2 in front, 2 on sides and 3 in back (1 on top and 2 on bottom). Mattress for sledding Rear view Recommended material for you
See also:
Rate a homemade product, a master class, an idea. Comments
Sew an envelope for a sled with your own hands
We converted oilcloth to leatherette.
It seems to be ok to use, you can put a diaper on it in the summer, but so far we’ve used it anyway, my nephew likes it =) Hello! Please share the pattern if possible. Thank you.
Good night all! Girls, I'm into sewing um. a beginner or, so to speak, an old man with basic cutting and sewing skills) at the moment I am sewing a muff for the stroller of my newborn niece, for the set I want to make a trim on the hood of the stroller, but I still can’t figure out how to sew it, with elastic or Velcro? And then how to attach it? So it should be removable. Maybe someone has bothered with this or just can tell me how to do it. I would be very grateful! I'll show you the result later)
I just don’t know if it’s worth shaping the hood? There will also be a wind flap at the front. Inside there is fleece, foam rubber, isolan.
to photo hosting → IMG_20151102_145644.jpg
to photo hosting → IMG_20151102_145655.jpg
NataliyaVedernikova , please tell us in more detail how you made such a beauty! I also really need to make such a visor! If you have one, post the diagrams
gusarev68 , took this photo as a basis https://club.osinka.ru/picture-1689043?p=5460142. then I roughly cut out the hood and sewed it on) I wanted to make it lockable first, and then I didn’t bother. Now I have inserted foam rubber for the form and a windproof strip. I can take a photo in the evening
link pictures → great idea with skis! My husband suggested it to me last year, when Lyalya was little, I brushed it aside, now I see that it was in vain that our seat was in vain, inside there was a camping mat, padding polyester 300, and cushion fabric. there’s a backpack in the back))) my own idea, but as it turned out, I didn’t come up with anything new, thanks aspen.
gusarev68 , that’s how it happened) if it’s not needed, everything is removed.
to photo hosting → PC090414.JPG
to photo hosting → PC090418.JPG
I sewed envelopes like these for the stroller, although I didn’t take enough fabric, I had to make some tricks to make sure there was enough; I could have made the envelope a little wider if I had more fabric.
NataliyaVedernikova , I also have such a sled. We've been there a couple of times already, it's just great. Can you be more specific about how the hood is attached?
Nastena86 , simply sewn on. zippered windbreak. I could have made a hood with a lock, I was too lazy))
Girls, I’m sewing a visor for a sled, like a stroller’s. It will be attached with Velcro on the handle. Tell me, what kind of thing could be inserted there for stiffening ribs? There is a tape that is used to tighten boxes in hardware stores, I think I’ll fasten it together in 2 layers of tape, but it still comes out somehow flimsy. There is also an old basket for toys, but the rod there is already hardened with small turns and does not want to straighten out. I read that the girls were taking some kind of construction slope, but I still didn’t understand what and how. The cap will be made from ordinary raincoat fabric, dense but not thick, I took the cheapest one at the market, the kind that traders sew tents and awnings from there. And I’m also thinking about how to fix the mouth guard when it’s unfolded; in strollers there’s this little plastic thing that you bend down and it holds everything just fine. And I also wanted to know where I can get a thick and very transparent film for protection from the wind, I’m thinking of making it with a zipper to fasten to the visor. The idea was to ask the merchants for all sorts of blankets/plaids made of such film; they seem to have bags for these blankets.
Nastena86:
where can I get thick and very transparent film
Buy greenhouse film, it comes in different densities.
Nastena86 , there is a bandeau for partieres, it keeps its shape very well.
Girls, please tell me what fabrics should be taken for replacement covers for the stroller. I want to sew a mattress, a cover for the legs and an additional sun canopy.
Do-it-yourself mattress in a sled
In the snowy winter, kids happily transfer from strollers to sleds. And here the question arises about the insulation of these very sleds. The choice of mattresses in stores is small, and choosing by color, quality, price, and size is not always possible. Therefore, I suggest you sew a mattress into a sleigh with your own hands: it will not only make winter transport as warm, soft, and comfortable as possible, but will also serve as decoration for it.
How else can you decorate a sled? Follow the link below to find our detailed master class, which shows how to decorate a children's sled using the decoupage technique.
DIY sled for twins
Store-bought versions of sleds for two, controlled, with a steering wheel, help save parental strength. The main difference between a sled for two kids is the elongated seat and two backrests. Kids can sit like a train if they are riding down a slide, or face to face if it is a means of transport to kindergarten and on a walk.
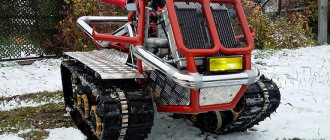
It doesn’t matter what the steerable sleds will be made of, whether they will be with or without a steering wheel—wood, metal, plastic pipes, or old skis. In a product of your own production, you will take into account the exact height and weight of children. The quality of fasteners and materials will also not cause you concern.
You can use one of the drawings above.
DIY ice sled
Do-it-yourself ice sleds can be easily made from anything - the main thing is that the material is slippery and does not allow moisture to pass through. As an option - ice cubes made of linoleum. All you need is sharp scissors or a cutter and a piece of linoleum.
The pattern for an ice cube made of linoleum is small in area.
DIY Finnish sled: drawings
Finks are sleds with elongated runners and a high seat. One person sits down, the second stands on the runners behind and pushes off. Adults can accelerate to high speeds. Sometimes large dogs such as huskies or huskies are even harnessed to such sleds.
Before you use the drawings to create a Finnish sled with your own hands, think: perhaps you can modernize an old children's sled by adding a high back to it?
DIY cheesecake sleds
An inflatable cheesecake or bun will give the joy of sliding down a slide to both children and adults. One of the simplest models to make allows you to reach high speeds and protects you from hypothermia. I’m especially pleased that the cheesecake sleds from a car inner tube have very simple patterns.
To protect the inflated chamber, you need to cover it with a cover made of awning fabric, thin linoleum or wide vinyl wallpaper. According to the size of the base, but with a margin, it is necessary to cut out the protective material in the form of two circles. Take your time and measure several times.
The circles are sewn together along the front seam. The camera can be lowered, and then the edges can be stitched even on a sewing machine. For convenience, you can equip the cover with carabiners, to which an additional seat cushion will be attached.
With the onset of winter, parents of young children are eager to get a sled. They are much more comfortable for a child than in a stroller, especially if the baby is already one and a half to two years old. At this time, he no longer wants to sit quietly in a stroller; he wants to be as close as possible to understanding the world around him. And then a logical question arises before mom and dad: “What to choose, which model to prefer?” Today, the variety of children's accessories is dizzying. After all, you want to buy a really worthwhile thing that will serve for several years. Sometimes parents very carefully study the offered assortment and only then make a purchasing decision.
A sled with retractable wheels is a convenient and original invention. Today, many parents choose them. They have clear advantages over other products, and they are much more convenient to use. Perhaps, externally, a sled with 4 retractable wheels does not look quite familiar, but the child feels comfortable. But, you see, this is the most important thing.
Step-by-step work on making a mattress for a stroller
As you may have noticed, sewing a mattress into a baby stroller yourself is not at all difficult. You just need to spend a little time and effort - and your useful accessory is ready! If desired, you can sew several removable covers that can be washed when dirty.
And to make it not only comfortable, but also fun for your child to ride in a stroller, you can use photos of ready-made author’s works to make a funny mattress-toy.
Such a soft accessory will not only make you stand out among young mothers, but will also demonstrate your creative skills. After all, you can sew a cozy product for a stroller in the form of a child’s favorite hero or make a personal inscription. This item would also be a great gift for a newborn.
I like 0 Similar posts
DIY foam sled
It’s a pity to throw away the polystyrene foam from household appliances right away, and it moves to the balcony. To prevent valuable material from lying around useless for a long time, try riding on a homemade foam sled. In cold weather they are warm to ride on.
It is enough to cut out a streamlined outline with a sharp knife and punch holes for the rope. Even if these are disposable sleds, they will cost practically nothing.
Another option for free sleds is made from plastic bottles. It is enough to wrap the required amount of empty containers with plastic film, four or six pieces at a time, and put them in a large plastic bag or greenhouse film. Seal the edges with an iron and ride to your health.
Install runners made from a metal corner, plastic pipes or old skis on the stroller, which is possible even without removing the wheels. Riding such a sled from a stroller in winter is much more convenient.
Do you have old skis lying around? Don't rush to get rid of them! If they haven’t fallen into disrepair, it’s time to make a pair of sleds from skis with your own hands.
All you need is a little skill and some additional materials. By making a sled from old skis, you can save a lot of money.
Briefly about the creation of such a sled - a corner is stuffed onto the ski runners, a seat is attached on top, to which a rope is tied.
DIY wooden sled: drawings
The most standard material for making sleds is wood. A wooden sled can be made entirely of wood or contain elements woven from vines or branches.
To make the sled smooth and comfortable, you will need drawings. They will be the basis, and you can think of additional elements yourself.
We offer you such a drawing for making children's standard sleds with your own hands.
To decorate a vehicle made according to the drawing, you can cut out several carved elements of the back from plywood with a jigsaw. For strength, it is recommended to make the runners from thicker timber or cover them with sheet metal.
With the growing demand for replacing iron water supply and heating pipes with plastic ones, craftsmen often began to make sleds from plastic pipes with their own hands. If your family members or friends are engaged in a similar business, or you have a few straws left after repairs, then you will not have problems. You can make a sled from pipe or polypropylene.
Sleds made from profile pipes, PVC, polypropylene pipes or square pipes will be equally good if they are made durable. The main thing is to have a special soldering iron and grinder within reach for cutting off sections of the desired valley. Some hardware stores can rent these tools.
What you will need:
- actual plastic pipes;
- adapters for connection;
- metal corners to strengthen the runners;
- sheet of plastic for sitting (optional);
- rope so that the sled can be pulled.
A home craftsman can weld a metal sled with his own hands, and such a product will be much cheaper than purchased sleds. Welded iron sleds from a corner or from a metal profile left over after construction are a good use for what could have been left in the garage in the “useful” category.
Forged decorative elements made from metal profiles, metal rods left in the artistic forging workshop are better used in business. You can decorate them with snowflakes made of thin wire, and then the Snow Queen herself will envy such sleighs.
You can make a sled from an old cot or bed headboards.
What you will need:
- corners for runners and frame;
- seat profile;
- bolts with nuts and washers for fastening;
- rope, preferably not synthetic, so that the sled can be pulled.
You can add a board for sitting, since metal becomes very cold in the cold.