As discs accumulate, their owners, faced with constant disorder in their collections, are increasingly beginning to think about purchasing special furniture. However, you can save a lot by making a shelving unit for your home yourself.
All racks are divided into fixed and removable. The first shelves are attached directly to the wall. In the second case, they are installed on fixed vertical posts. Metal profiles that have either many holes or a longitudinal groove with brackets are most often used as the supporting structure of removable shelving. This allows you to install shelves at any level and easily change their original position.
The main materials for shelving are wood (laminated chipboard, fiberboard), plastic (chipboard - plastic), glass (impact-resistant) and metal (steel, aluminum). Wood is distinguished by its simplicity and ease of processing. Plastic is light and inexpensive, but the cuts have to be covered with decorative elements. Glass shelves, due to their transparency, will easily fit into any interior, but due to their weight they will require more reliable fastening. Metal, which also significantly increases the weight of the rack, is also difficult to process. Each material has its own unique properties and characteristics, so they are often combined in various combinations.
Racks for storing CDs and DVDs are divided into several types:
- compact hanging racks for storing 50 - 100 discs
- more spacious floor racks for 100 - 300 discs
- floor-standing “rack cabinets” for 400 – 1000 disks
Let's look at several options for home shelving that you can make yourself.
Rack for 50 discs
The simplest option is more of a shelf than a rack as such. Since the boxes for DVD and CD discs differ significantly in dimensions (1.5 cm and 1 cm in width), in this example all sizes will be focused specifically on CD discs.
For the future rack we will need:
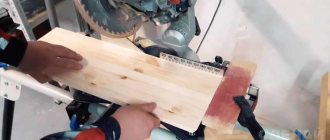
- wooden blank (100cm x 40cm x 3cm)
- narrow board (40cm x 5cm x 1cm)
To make a small shelving unit for your home with your own hands, you need:
1. Draw 25 horizontal lines (along the width of the workpiece) at a distance of 3 cm (1 cm under the disk + 2 cm of free space) from each other. 2. Along these lines, cut grooves 1.5 cm deep, into which the disks in the boxes will actually be inserted. 3. Leave a space free of grooves at a distance of 12 cm from the top and bottom. 4. Nail a board at the bottom of the back side so that the rack hangs at an angle and the discs do not fall.
Simple solutions for the home
Light and beautiful crafts made from CDs will find their place in any room. You can make stands for hot cups for the kitchen, and organizers and lampshades for the bathroom. Clocks and decorative dishes will decorate the living room.
Souvenir pincushions and napkin holders will be a good gift for grandmothers from skillful grandchildren. Children can be involved in the manufacturing process. It's better not to trust them to cut compacts.
Rack for 200 discs
This CD and DVD storage rack will consist of 2 vertical racks with 4 glass and 1 wooden (for the player) shelves. To make a shelving unit for your home with your own hands, we will need the following materials:
- 2 support slats 150cm x 10cm x 1.5cm
- 4 tempered glass shelves 80cm x 20cm x 0.5cm
- 1 wooden shelf blank 9.5cm x 2.5cm
- 4 sets of accessories
- screws and dowels for attaching the rack to the wall
- 2 screws for fixing a wooden shelf 90mm x 5mm
- glue (carpenter's glue, PVA)
When everything you need is ready, you can start assembling the rack.
1. On the support rails, mark the locations of the grooves for the shelves. The distance between the shelves will be 30 cm, and the margin (from the top and bottom) of the support slats will be 15 cm. The grooves are cut with a chisel using preliminary cuts. Their depth should be 5 cm, and their width will correspond to the width of the shelves (0.5 cm - glass, 2 cm - wooden). 2. Cut the edges of the support rails at an angle of 45 degrees (for aesthetic purposes). 3. Mark the locations for the fittings (25cm from the edges of the support rails). 4. Drill holes for the screws with a drill, secure the fittings to the slats. 5. Secure the wooden shelf. To do this, coat the grooves with glue, insert a shelf into them and fasten it with two screws on the reverse side. 6. Mark 4 mounting points on the wall. Depending on the material, either immediately screw in the screws, or (for concrete, brick) use dowels. 7. Secure the rack to the wall with screws. 8. Insert glass shelves. If they stay in the grooves too loosely, you can stick insulating tape to the joints.
This completes the assembly: a spacious and convenient rack for storing CDs and DVDs is at your disposal.
Christmas decorations
CDs can be used to make all kinds of Christmas decorations. This is a good idea for crafts made from computer disks for kindergarten or just home decoration. To make a simple toy you need:
- disks;
- pictures for applications (can be printed, cut from postcards or magazines);
- glue gun;
- small decor - beads, rhinestones, sparkles, etc.;
- satin ribbon.
The procedure for creating decoration:
- Glue the tape to the disk with hot glue.
- Apply markings for decorative pictures. Applications should cover the holes.
- Fix the pictures evenly in a circle with glue.
- If desired, decorate the toys with additional decorations.
The shape, size and decor of such toys can be almost any. You can connect several disks to each other.
Toys with movable fasteners and pendants made from several disks look original.
Universal disc rack
A universal rack consists of separate sections, the number of which can be changed. The design of each section resembles an accordion and consists of 5 - 10 wooden shelves and 2 metal pipes. You need to make 2 holes in the shelves; metal pipes are inserted into them. To fix the shelves, you can use steel bushings with a locking screw. Both plywood and laminated chipboard are suitable as materials for shelves. The length of the shelf is approximately 25 - 30 cm, width - 1.5 - 2 cm, and as for metal pipes, their diameter can be almost any. To add a new section, you only need the appropriate number of shelves and 1 additional pipe, since the shelves of the first and second sections will have one common rack. Thanks to the mobility of the structural elements, the rack can be built in a straight line or in the shape of the letter L.
Shimmering curtains
From computer disks you can make original curtains that add modernity and originality to the interior of your home. Thanks to the surface shimmering in the light, the design looks very bright and attractive.
For production you will need:
- CD discs (the number depends on the desired size of the curtain);
- paper clips;
- drill.
In each disk it is necessary to make 4 holes, having a diametrically opposite arrangement. For convenience, you can apply marks by simply drawing an even cross on the circle.
The holes should be located almost at the very edge, leaving only a few millimeters for secure fixation. The disks are connected to each other in a single plane using paper clips.
The shape of the curtain can be almost any. It is not necessary to make it a classic rectangular one; you can give it a round, diamond-shaped, oval or any arbitrary shape. It is convenient to attach curtains to regular curtain rods.
It is permissible to use the same fastenings as for conventional curtains. If the cornice is round, you can enlarge the hole in the center of the discs and hang the curtain without additional clamps.
Wall holder for angle grinders with storage space for cutting and grinding discs
To keep the grinder always in sight, but not get in the way of your hands, you can make a wall holder for it. Additionally, you can provide storage space for cutting and grinding discs.
This idea was shared with us by the author of the YouTube channel Gavin Clark.
You can make a wall holder from scrap metal. But even if you specifically buy metal, it won’t hit your wallet hard.
- metal strip;
- fittings;
- round steel bar.
Choice of materials and design
For high-quality music reproduction, every detail is important - from the selected materials, their combination and design features of the stand to the coating applied to the surface of the shelves with anti-resonance properties. All these factors affect the sound of an audio system and the listeners' perception of sound. Each material resonates differently, for example, the sound of an acoustic guitar depends even on the type of wood from which the body is made.
The equipment rack is similar in purpose to the body of a guitar or other musical instrument. It plays the role of a kind of filter, which in a certain way reflects and absorbs various frequencies from vibrations occurring in the system components. Professional equipment racks are developed using the latest achievements of science and technology. For example:
- to create an effective system of decoupling from the floor and components, developers combine materials in different ways, calculate their relative position, mass and density, and look for optimal shapes;
- supports and frames are made of steel and aluminum, shelves are made of honeycomb materials and multi-layer sandwich;
- Black lead powder and special graded cast iron can be used as a filler.
Wall holder for angle grinders with storage space for cutting and grinding discs
To keep the grinder always in sight, but not get in the way of your hands, you can make a wall holder for it. Additionally, you can provide storage space for cutting and grinding discs.
This idea was shared with us by the author of the YouTube channel Gavin Clark.
You can make a wall holder from scrap metal. But even if you specifically buy metal, it won’t hit your wallet hard.
- metal strip;
- fittings;
- round steel bar.
Rules for storing car wheels
Not every car owner knows that they need to follow the rules for storing wheels, otherwise they quickly become unusable and can fail at the most inopportune moment. Different sets of tires have specific storage conditions, but general rules can also be identified, the observance of which will be relevant in any situation:
- Do not store wheels near heating or cooling devices. Significant temperature changes occur near them, which cause condensation to accumulate and deformation of the rubber.
- Make sure that the wheels are not exposed to moisture, oil or acidic liquids.
- Store tires in a cool, dry place.
- If the wheels are wrapped in film, do not forget to periodically remove and ventilate them. Otherwise, dampness will begin to accumulate inside, which will negatively affect the material in the future.
Now let's look at the individual storage features of different sets.
Summer tires
Summer tires are made from materials whose composition is different from winter tires, and accordingly, the storage conditions will be different. The peculiarity of storing summer tires is that the room temperature should be kept around 20 o, with a relative humidity level not exceeding 60%. Small deviations from these indicators are acceptable.
Winter tires
Winter tires do not tolerate high temperatures well. Therefore, beware of installing racks and fixtures for storing it in:
- rooms with high temperatures;
- places exposed to direct sunlight.
On disks
Storing wheels on disks adds additional nuances to the preservation process. The thing is that when stored vertically, the tires, under the influence of the weight of the rims, will begin to deform. This will reduce their quality of adhesion to the road surface, which can lead to an emergency situation.
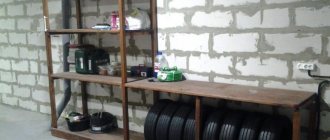
It is recommended to store assembled tires in a horizontal position, on top of each other, or suspended on a rope that is threaded through the center of the disk.
Note! When storing tires for the winter, they must be well inflated. The pressure inside the wheels should be working or slightly below normal.
No disks
If you store tires separately from wheels, follow these rules:
- keep them upright;
- once a month, rotate the tire 20-180 o;
- It is allowed to store the wheels in a suspended state, stringing them on a rope or metal cable.
