How to do
Preparing raw materials
To make a salt dough vase we will need green salt dough, orange salt dough, a bottle of contact lens cleaner, a silicone glue gun, scissors, toothpicks, acrylic paints, a leaf, a piece of tulle or braid, and varnish.
Making salt dough
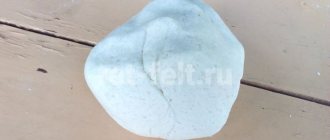
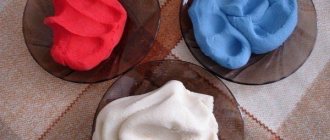
So, first we make colored salt dough. For this we need 3 parts flour, 2 parts fine salt and 1 part water. Mix water with food coloring of the desired color and pour it into the salted flour, poured in a slide. Knead the dough well. If it crumbles, add a little water; if it seems runny, add flour. It is important to achieve a uniform color of the dough mass. We make salted dough in other colors we need.
Making the base of the vase
We cut off the top of the bottle of contact lens cleaner and we get the base of the vase. Take the green salt dough and spread it evenly over the surface of the plastic. To level the vase, roll it with your hands on a flat surface.
Making relief
To make the vase more interesting, take a piece of paper and begin to carefully apply it to the vase so that you get imprints.
We make bees and dry them
Now we make bees from orange salt dough. To do this, we make an oval part from a piece of mass, then use a stack to separate the head from the abdomen. Break off a piece of a toothpick with a point and insert it into the middle of the head, forming a bee sting. Leave the craft to dry at room temperature for 1-2 days.
Forming bees
Now we coat the vase with varnish. We paint the bees with acrylic paints, making a black head and black stripes. We cut a rectangle from the mesh fabric, round the edges, tie it in the middle with a thread and glue it to the bee. We got the lids. All that remains is to glue the bees to the vase.
sqart for Vse-sama.ru (
text from the author
)
“For a long time I have been looking at floor vases made by myself.
But my 45 square meters and my son, who had just learned to walk, simply did not leave me such an opportunity.
And then such an opportunity arose - to try a new type of creativity through adventurous exchange, which was organized by our forum “All by myself.”
And the work began to boil, it really took a long time to boil - a month, but this is what happened.
I bought 1 m of the thickest sewer pipe, sawed off 80 cm with a hacksaw. The excess is in the pantry, waiting in the wings.
I cut out the bottom from a plastic container lid and glued it on.
At first I simply painted the vase with a regular construction primer and acrylic paint - the result was not impressive - the paint strokes were too obvious.
Then I glued a piece of regular wallpaper for painting - I painted it - I liked it.
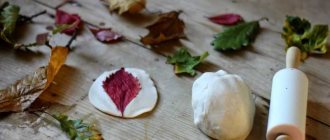
I kneaded the most ordinary salty dough and kept it wrapped in cling film in the refrigerator. I tore it off piece by piece - otherwise the dough will quickly become airy and dry. I rolled out the dough into a layer, using a regular leaf from a houseplant as a template, and cut out the amount I needed. I also pressed through the veins of the leaves with a knife. I glued glue onto the “Master” in a rather chaotic order.
Next came the turn of the lilac clusters themselves. A small ball is made, a droplet is made from it, which we cut into 2 or 4 parts with nail scissors. Open them a little - the lilac flower or bud is ready. A bunch of these small flowers is collected. I glued it directly to the base. I dried it near the radiator, turning it one way or the other. I decided to somehow decorate the top - I cut out circles from the dough and glued them
.
The main sculpting work was completed. I painted the grapes and leaves with watercolors and shaded them with glitter nail polish. Something was missing—my flowers looked like little orphans on a white background—I went over the convex parts of the wallpaper with blue paint. Painting the vase as a “birch tree” improved the appearance. At intervals of a day, allowing it to dry thoroughly each time, I coated it 3 times with acrylic varnish.
This is exactly how my vase left for its new place of residence. All!!!
«
You can make a huge number of crafts from salt dough, for example: flowers, animals, various figures, inscriptions, numbers, toys, paintings and whatever you want! Modeling from salt dough is called bioceramics. The advantage of salt dough is that it is convenient to work with, this material is absolutely harmless and crafts made from it will delight you for several years. In this article we will look at how to make crafts from salt dough with your own hands.
You will need:
a glass of wheat flour, a glass of extra salt, half a glass of cold water, a bowl.
Recipe
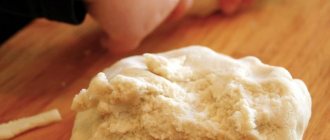
The finished salted dough should not stick to your hands or crumble. It should be cool and easy to sculpt. I recommend watching the video master class!
There are two most common ways to dry salt dough. The first method: the finished craft will dry on its own. The main thing is that it should not be exposed to direct sunlight, otherwise it will crack. The craft can be placed on a flat surface and wait a few days. Second method: dry the finished craft in the oven for 3 to 6 hours (depending on the size of the craft). Drying occurs in batches with breaks. One approach is 1-2 hours. For quick drying in one go, set the oven to 75-100 degrees, and then the craft will dry in an hour. At a temperature of 120 degrees, the craft will dry in 30 minutes, but it is better to dry it naturally.
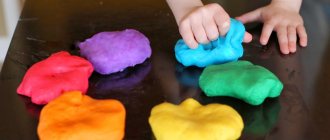
There are two most common ways to color salt dough. The first method: after drying, paint the finished craft with acrylic paints or gouache using a brush. Second method: food coloring is diluted in water, then added while preparing the dough. When the craft is completely painted and dried, it must be coated with transparent manicure or furniture varnish in 2-3 layers. Each layer must dry before applying the next. This way the craft will last for a long time.
You will need:
colored salt dough, stack, clear manicure polish, toothpick.
Master Class
The salt dough star is ready!
Fabric monkeys
Do you prefer another fabric to felt? Patterns of monkeys - very, very different ones - have been collected especially for you!!! Choose any one you like and sew with pleasure!
Monkeys in Tilda style
Fans of Tilda dolls will definitely want to sew the symbol of 2016 using this technique. A master class consisting of 2 parts (part 1, part 2) will help you.
But you can sew such a monkey toy with your own hands if you purchase the pattern from its author (tilda4kids).
Coffee monkeys
Coffee toys are sewn from simple white fabric (for example, calico), tinted in a special solution of coffee, cinnamon and vanilla, dried in the oven, and then painted with acrylic paints. The technology for making such toys is described in great detail in this Cross master class.
Do you already understand where I'm going with this? Of course, this means that you can make coffee monkeys in the same way, which will fill the house with a wonderful aroma, and everyone who gets it will be in a great mood!
You can buy these naughty coffee monkeys here
Another good idea is to sew a pillow in the shape of a monkey. There are many options here, as they say, choose to your taste. Here are some ideas for inspiration!
You can buy this pillow
Salt dough caterpillar
You will need:
colored dough, knife, pva glue, toothpick, pendant, clear manicure polish.
Master Class
- Roll out the sausage.
- Cut it into 6 equal parts.
- Roll into balls.
- Glue 5 balls together.
- Glue the head.
- Make a nose and eyes, then glue them on.
- Poke a toothpick into the hanging area.
- Dry the craft.
- Attach the pendant.
The salt dough caterpillar is ready!
Small and cute pencil holder in the shape of an apple
For it you will need a small oval plastic bottle, red acrylic paint, gold string, a sheet, a plate, a nail file and a glue gun.
Manufacturing instructions:
Pour acrylic into the bottle and shake it so that the entire inside turns red. Then we drain the remainder, put the bottle on a plate and wait for it to dry completely.
If necessary, remove excess paint and file the edges of the neck with a nail file. And the last stage: wrap the neck with golden lace and glue the leaf. And the pencil holder - the apple is ready!
Note!
Salt dough elephant
You will need:
colored salt dough, pva glue, clear manicure polish.
Master Class
- Make the elephant's body by rolling an elongated ball.
- Make 4 legs in the shape of plump sausages.
- Make a proboscis.
- Make the elephant's ears in this way: roll out 2 flat cakes, glue flat cakes of the same shape of a smaller size and a different color to them.
- Make a small ponytail.
- Blind your eyes.
- Assemble the elephant in the following sequence: glue the legs to the body, then glue the proboscis, then the ears, eyes and tail.
- Dry the craft.
- Apply varnish and wait until completely dry.
The salt dough elephant is ready!
You will need:
salt dough, foil, a candy bowl or similar plastic container, gouache, a brush, clear manicure polish, a modeling board, a knife or a stack.
Master Class
You will need:
salt dough, nail scissors, PVA glue, acrylic paints or gouache, manicure brush.
Master Class
Salt dough hedgehog is ready!
Felt monkeys
If not all, then many needlewomen love felt. It’s a pleasure to sew memorable souvenirs from it! Let's get straight to the point and see how to sew an adorable felt monkey with your own hands.
Option one
According to the pattern, cut out the required number of blue and white parts from felt.
And then we sew all 4 legs and the tail with a buttonhole stitch and don’t forget to put the filling inside!
We try on the position of the legs and tail relative to the body and fix it with several stitches to the back of the body.
If desired, embroider the navel on the front half of the monkey’s body in the form of a cross, and then sew both halves together with a buttonhole stitch. We stuff the body tightly with padding polyester and only after that we completely sew these parts together.
Now comes the most crucial moment - we will make the face. The overall appearance of the toy depends on how cute it turns out, so be careful!
Using a drop of glue, fix the white felt piece on the blue circle, then sew it along the contour with a buttonhole stitch.
Using a few stitches of matching thread, sew on the beaded nose and embroider the mouth with brown thread. Using regular pink blush we draw the monkey’s cheeks)
We connect the front and back parts of the head with a loop stitch, not forgetting to insert ears on the sides, and a loop on top for hanging the toy! In the neck area we leave a hole for filling, fill the head with padding polyester and sew it up. Then we sew on the beaded eyes.
All that remains is to sew the head to the body and the monkey is ready! She's really very cute, it would be nice to receive one as a New Year's gift)
Option three
If you don’t have time to sew a monkey with arms and legs, then sew only the head, it will be perfect as a keychain.
Option four
Such a monkey can be cut out of thick felt by gluing all the parts together. It will be faster, and it will look just as decent.
Option five
Anastasia Kirilenko took the technique of decoupage on fabric as a basis and made felt medallions decorated with beads and sequins.
The medallions are perfect as decorations for the New Year tree, and Anastasia also suggests decorating gifts and champagne bottles with them.
Owl (eagle owl) made from salt dough
You will need:
salt dough, pva glue, nail file, manicure scissors, acrylic paints or gouache, brush, wooden board with a pendant, clear manicure varnish.
Master Class
The salt dough owl is ready!
You will need:
salted dough, the base on which the craft will be attached, for example, a board or plate, a glass or a knife, a sheet of paper, a simple pencil, a garlic press, a rolling pin, pva glue, acrylic paints or gouache, a brush, clear manicure polish, cloves.
Master Class
Salted dough fruit basket is ready! I recommend watching the video master class!
You will need:
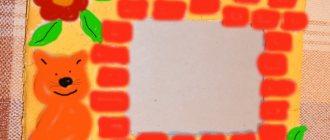
salt dough, knife, rolling pin, simple pencil, sheet of paper, sandpaper, acrylic paints or gouache, brush, transparent manicure varnish, glue gun or pva, base for crafts, for example: a board with a frame, transparent manicure varnish.
Master Class
- Draw a cat or print a template.
- Roll out the dough into a thin layer.
- Attach the template and cut out the cat.
- Dry the craft.
- Sand the craft with sandpaper, removing any unevenness.
- Using a simple pencil, transfer the desired design onto the cat’s body.
- Paint with paints and wait until completely dry.
- Glue the cat onto the base with the frame.
Stationery organizer made from popsicle sticks
Wooden ice cream sticks are an affordable and convenient material. At the same time, there are many options for making an organizer for stationery.
In the example presented, about 100 sticks were used. You will also need a piece of cardboard, a sleeve for a cup in the form of a cardboard sleeve or a metal jar, and decor. We will work with scissors and a glue gun:
- We cut out a rectangle from cardboard, one side of which is slightly less than the height of the stick, and the second is twice as large as the first.
- We glue stick “floors” onto the cardboard using hot glue.
- We turn the workpiece over and glue the legs of the craft from several sticks stacked on top of each other.
- The bottom of the gadget box consists of sticks laid on edge. We lay them across one with the sticks of the side of the box and fix them with hot glue.
- Glue the sticks to the back of the phone socket.
- It is enough to glue a few parts in front so that the gadget does not fall out.
- To assemble a round pencil holder, it is convenient to use a cardboard or plastic sleeve. We glue sticks on it in a circle.
- Now the pencil holder can be glued to the base.
- We decorate the craft based on taste and capabilities.
The pencil holder itself can be square in shape. In this case, its walls are pre-glued onto transverse sticks on the outside of the craft. To strengthen the structure from the inside, diagonal elements can be glued. After preparing the five walls, they are glued together.
To decorate the craft, sticks can be pre-painted with acrylic paints in bright colors, decorated using the decoupage technique and decorated with a variety of additional elements.
The design of ice cream sticks glued flat on top of each other looks fundamentally different.
You can fold a pencil holder into shapes with different numbers of edges. To decorate the craft, you can paint the sticks or add decor.
For those who are passionate about wood burning, this situation opens up great opportunities.
Salt dough pencil
You will need:
water, flour, extra salt, cardboard jar for the frame, PVA glue, scissors, a piece of decorative rope or corrugated paper, gouache, brush, button, stacks, acrylic varnish for crafts, toothbrush.
Master Class
- Knead the salted dough in this way: add a glass of flour, a glass of salt, add water, then knead until the desired consistency of the dough. Separate part of the dough, add beige gouache, then knead.
- Roll out the cake to a thickness of 10-15 mm.
- Apply PVA glue to the outer rim of the jar and wrap it with dough. Cut off the excess with a stack and smooth the joints with a damp brush.
- Create a small dotted texture with a toothbrush on the surface of the dough.
- Knead the brown dough, roll it into a flat cake 10-15mm thick.
- Cut a 5cm wide strip of brown pastry and glue it to the bottom of the jar.
- Make 2 large owl eye bases from white dough, then glue them on.
- Make a beak out of brown dough and glue it on.
- Make eyes from turquoise dough and glue them on.
- Roll out 8 strips of pink dough, twist them into 4 flagella and make a bow, then leave it to dry for 2 hours.
- Make droplet-shaped owl wings using brown dough, then glue them on.
- Weave ropes of beige dough and glue them onto the neck of the jar.
- Roll out a sausage from white dough, draw the texture of the lace with a stack and glue it as a collar under the beak.
- Place the craft in a warm place for a day.
- Paint the bottom and wings with brown gouache and decorate with white dots.
- Draw the pupils and eyelashes with black gouache, wait until the paint dries, then paint white highlights on the eyes.
- Glue a pink bow above the wing.
- Glue a button with a bow from a corrugated strip onto the lace.
- Cover the craft with varnish and wait until it dries completely.
The salt dough pencil is ready!
DIY photo of pencil holders
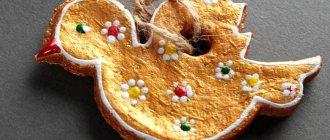
Master class with step-by-step photos of a pencil holder “Strawberry aroma” using the technique of modeling from colored choux salted dough.
The master class is intended for technology teachers, additional education teachers, and for those who want to master the technique of working with colored choux salted dough. Purpose:
pencil holder, pencil stand. Target:
making a pencil holder using the modeling technique from colored choux salt dough.
Objectives: Educational:
master the technique of making a pencil box using the modeling technique from colored choux salt dough;
Developmental:
develop accuracy in working with color dough, artistic thinking;
Educational:
instill a love of modeling;
Required materials:
“Extra” salt, premium flour, citric acid, vegetable oil, plastic glass, paper napkin, stack, rolling pin, brush, pencil, toothpick, five-leaf cutter, “Flower”, food coloring, round jar diameter 12 cm, PVA glue.
Recipe for colored salty choux pastry.
In a bowl, combine 1 cup flour and 0.5 cup salt, stir until smooth. Make a hole and pour food coloring of your desired color into it. Pour 1 cup of water into a small saucepan. Add 0.5 tablespoon of vegetable oil and 0.5 tablespoon of citric acid to the water. Put it on fire. As soon as the water boils, immediately pour it into a bowl of flour. The dough will brew and roll into a large lump. Once the dough has cooled down a little, start kneading it for 5-7 minutes to get a lump of the same color. Let the finished dough cool completely under a cloth, and then put it in a plastic bag. Using the same recipe, knead the colors you need for the pencil holder. Store each color of dough in a separate bag. If you don't have brown food coloring, replace the coloring with cocoa. The dough will turn out a beautiful chocolate color.
To get a white dough, just do not add food coloring when kneading. Progress:
During the work process, we glue all the elements of the choux pastry with PVA glue. Roll out the green dough with a rolling pin. Using a round jar, cut out a circle with a diameter of 12 cm. This will be a stand for a pencil holder. The thickness of the stand is 5-6 cm.
Apply PVA glue to the stand in the place where the glass will be, leaving 1 cm to the edge.
Place the glass and press it slightly into the stand. You will have about 1 cm left behind the glass. Take a lump of brown dough and form the belly of the bear. Spread glue under the glass and place the bear there. Using a simple pencil, press the dimples in the center of the abdomen. Insert a toothpick into the belly. We will put a head on it so that it holds more firmly. Form a small brown lump into a head and place it on a toothpick. Lightly coat the head with glue and glue on the small ears. Form an oval cake from a small white lump and glue it to the face. Use a pencil to push in the eyes. Glue on a small nose. Form the legs and glue the teddy bear. Form handles from slightly smaller lumps and glue them in the same way. The teddy bear is ready. Now our task is to fill the entire base with strawberries. Make two identical strawberries from red dough and glue them on both sides behind the bear. This way we fill the empty space between the bear and the glass. Make small notches, similar to grains, in a stack of strawberries. Add more strawberries and glue them around the glass. On the other hand, glue the strawberries in the same way. Roll out the green dough with a rolling pin to a thickness of 2-3mm. Using a five leaf die cutter, cut out the leaves and glue the tails onto the strawberries. Roll out the white dough and cut out flowers. Glue a few flowers directly onto the strawberries. Glue a yellow center in the center of each flower. We have glued all the elements and now the pencil holder needs to be thoroughly dried. It is best to do this on a sunny windowsill. It will take 10 days to dry. After the dough has dried, coat it with glossy varnish. The pencil will become brighter. Ready. I wish you creative success!
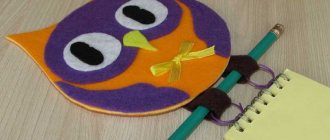
A pencil is a useful office accessory that makes it absolutely easy to keep your desk organized. Our photo tutorial today will tell you how to create a pencil holder from salt dough with your own hands. We will make it in the form of a funny owl that will fit perfectly into the interior of a children's room. Be sure to involve your children in this exciting work. Watch a step-by-step master class on how to make this wonderful children's craft.
Salt dough dachshund
You will need:
salt dough, simple pencil, scissors, cardboard, paints, brush, rope, toothpick, foam sponge, clear varnish, PVA glue.
Master Class
- Draw a dachshund on the cardboard as shown in the image.
- Cut out the template.
- Roll out the dough to a thickness of 5 mm and cut out the dachshund according to the template.
- Roll out the oblong eyes, then glue them on.
- Blind the eyelids and glue them onto the eyes.
- Use a toothpick to outline the paws, nose, mouth, ear and body contours.
- Roll out an oval, then glue it onto the ear and smooth the seam with a wet finger. Use the same method to add volume to the dachshund's back and tail.
- Mark stripes in different directions around the entire perimeter of the dachshund, so that the stripes resemble wool.
- Dry the figurine.
- Glue a piece of rope to the back of the craft for further hanging.
The salt dough dachshund is ready!
Stand for pencils and pens made of wood knot
Perhaps a pencil holder made of wood hemp is the most successful option for an organizer for wooden stationery. Judge for yourself: the material is available, in fact, waste, the work is not difficult, and the product turns out unusual every time, not like everyone else!
To work you will need:
- a hacksaw for wood with fine teeth, perhaps suitable for metal;
- fine sandpaper;
- drill with drills;
- wood varnish;
- brush.
The most creative part of the work is the selection of material. Any piece of wood you like, comparable to the dimensions of a pencil, will do. In the simplest case, it can be a thick branch; it is more interesting if it has a twig. Birch or pear are good. Next we proceed step by step:
- Use a hacksaw to cut a piece 120-150 mm long.
- We clamp it in a vice and drill from the end a series of blind holes with a diameter of at least 13 mm. Larger nests can be prepared using feather drills or Forstner drills. In the simplest case, an ordinary drill is enough, but it is more convenient to work on a drilling machine. Large holes, including rectangular ones, are best made using a cutter. If you have experience, you can drill a series of holes with a drill, and then connect them with lateral and inclined movements of the drill. A chisel will help remove excess wood. Unevenness can be smoothed out with sandpaper wrapped around a strip or a file.
- All that remains is to sand the product and varnish it.
You may want to change the color of the wood by using stain. You can make the craft more expressive using a burner or using the technology of burning wood with a blowtorch.
Using the same scheme, you can make a stand for stationery from a horizontally placed “log”. Its large area allows for many slots for pencils and pens.
The geometrically correct organizer made from valuable wood looks very impressive. This material can be easily purchased at a building materials store.
Boletus mushroom made from salt dough
You will need:
salt dough, light bulb, paints, brush, foil, cardboard, masking tape, superglue, PVA glue, paper napkins, clear varnish, stack.
Master Class
- Cover the light bulb with tape, then cover it with dough and dry the workpiece.
- Cut a ring out of cardboard and place it on the light bulb as a base for the hat.
- Form a hat from crumpled napkins, then secure with tape.
- Wrap the hat with foil.
- Roll out the dough to a thickness of 5 mm and stick around the cap.
- Remove the cap from the stem, cover the bottom with dough and make stripes in a stack.
- Glue the hat onto the leg.
- Mold the mushroom's arms, legs and nose, then glue them on PVA.
- Make a caterpillar and glue it to the hat.
- Dry the figurine.
- Paint the figurine, then leave to dry.
- Cover the craft with varnish and wait until it dries.
Boletus mushroom made from salt dough is ready! I recommend watching this video!
Option 2. Stylish cardboard pencil holder
Useful accessories made from toilet paper rolls
A roll of wallpaper or toilet paper is an ordinary piece of garbage, but not in skillful hands, who can even make cute pencil holders out of such seemingly unnecessary material!
Materials and tools
What you will need for work:
- bushings;
- thick fabric (velor or velvet);
- cardboard;
- decorative buttons;
- twine;
- ribbon;
- colored paper;
- glue.
Step 1 . First, make a stand. Cut a circle out of cardboard corresponding to the diameter of the sleeve and glue it. You can additionally nail the bottom with small nails if the roll cylinder is tight.
The bottom is nailed down
Glue is applied
Step 2 . Cut out two circles from colored paper: one according to the size of the sleeve, the other according to the diameter of the bottom. Cover the bottom and inside with the resulting blanks.
Circle is glued
The inner side is glued
Step 3 . Apply a small amount of glue along the edge of the cylinder. After this, apply the twine and, as soon as it sticks a little, begin wrapping the sleeve. Proceed carefully, slowly, turn by turn.
Glue is applied along the edge of the cylinder
Twine is applied
Step 4 . Cut a circle from thick fabric along the diameter of the bottom and glue it. Decorate the finished product with a ribbon, attach a bow and sew on a button. Ready!
Twine is wound
The craft is decorated with ribbon
Use bright thread
Circle of thick fabric
The bow is glued
The button is sewn on
On a note! The simplest pencil holder from a sleeve is made like this: strips of colored paper are cut out to fit the size of the cylinder, then it is covered with them and decorated.
Video – Penguin Pencils
Funny salt dough pigs
You will need:
salt dough, paints, brush, foam sponge, stack, thin rope, toothpick, black gel pen, PVA glue.
Master Class
- Roll 2 balls for the snout and use a toothpick to make the nostrils.
- Make a muzzle, glue a snout and eyes above it.
- Make triangular ears, glue them, then mark stripes with a stack at the junction of the ears and head.
- Make a heart and glue it to the bottom side.
- Make indentations along the edge of the entire circle.
- Using a toothpick, make 2 holes on the top for attaching the rope and 2 holes on the bottom for the legs.
- Roll up the arms and glue them in such a way that they hold the heart.
- Make the hooves and make holes in them for the rope.
- Dry the workpieces.
- Paint the blanks with black paint and let them dry.
- Wash off the paint from the convex parts of the workpiece under running water with a sponge and wait until it dries.
- Prime the figures with a sponge and white paint.
- Color the piglets.
- Draw small details with a black gel pen.
- Cover the craft with varnish and wait until it dries.
- Glue wool threads as hair.
- Make a pendant out of rope.
Funny salt dough pigs are ready! I recommend watching this video!
Cat bookmark: how to create it yourself
Cats always look cute and cute. As a bookmark, they will be the most suitable options for girls.
To work you will need:
- scissors;
- glue;
- colored paper;
- a simple pencil;
- White paper.
Cats always look cute and cute
Stages of work:
- Cut 3 identical squares from white paper;
- Then also cut out 3 identical squares from colored paper but of a larger size;
- Glue the colored squares together to get a diamond-shaped muzzle and ears;
- Cut off a part from the upper squares (first draw a line diagonally);
- Bend the right corner towards the middle;
- Apply glue to the left one and glue it to the curved corner - you get a rhombus;
- The workpiece should be folded in half and straightened;
- Glue 2 small white triangles onto the ears (1 each);
- Glue another white square onto the bottom of the workpiece in the form of a diamond.
Be sure to engage in the exciting origami art with your child in your spare time. An inquisitive mind will find it incredibly interesting to fold paper to create an unusual product. And if the paper is also bright and glossy, then the interest will double.
An unusual craft - an origami pencil. Of course, you can’t draw with it, but it looks quite childish and attractive, especially if you use double-sided paper. A detailed description of the process of creating a pencil from paper, illustrated with photographs, is given below.
1. Prepare a square of colored paper of any bright shade. The length of its side can be arbitrary, for example, 10 cm.
2. Make the first fold of the square through the middle of the opposite sides.
3. Return the square to its original position.
4. Make a fold using the other two sides.
5. Unfold the part again.
6. Measure a quarter from the side of the square, make another transverse fold. An ironed strip, prepared in advance, will help make measurements accurate.
7. Unfold the square.
8. Similarly, define another fold, focusing on the new strip.
9. Moving closer to the edge, bend the square again and leave it in this position.
10. Finally fold the square through opposite sides, perpendicular to the ironed strips.
11. The marked stripes will help you perform all subsequent operations. Bend the top ends towards you.
12. Bend the corners for future fastening.
13. Form a pencil-like shape. Secure the paper in this position.
The final look of the craft.
The origami paper craft is ready.
Gifts have long become one of the indispensable attributes for any, especially children's, holiday. And if we are talking about a school holiday, then in order to lift the mood, you should definitely give each of the students in the class at least a small present. At the same time, it is quite logical to want the surprises to have a practical purpose, but at the same time look festive. One of these options could be a craft in the form of a pencil made of cardboard.
What is good about a paper pencil?
This version of the craft is relatively easy to do; even the youngest children can do it, albeit under the supervision and under the strict guidance of adults.
Advice
Before you start doing it and calling the children to join, look at the workshops for the corresponding one. This will help avoid many mistakes.
Recipe for salted play dough
You can prepare play dough from simple ingredients that are available in every home. The dough recipe includes:
- a glass of flour;
- a glass of rock salt (extra);
- half a glass of boiled water.
Step-by-step cooking plan:
- Pour a glass of wheat flour into a large bowl;
- Add salt to flour;
- Pour in half a glass of water and mix well.
The resulting mass should be slightly dense and easy to sculpt. If it sticks to your hands, then you need to add a little more flour.
Option 9. Stand made from old jeans
An unexpectedly beautiful desktop device.
To make such a denim pencil holder, you need:
- old jeans;
- lace;
- a shoe box (or rather, just the lid);
- tin cans (or other containers) of different sizes;
- glue;
- paper clips;
- scotch;
- pencil;
- ruler.
Step 1 . Place the denim on the table and the lid on top of it. Mark the boundaries and connect them with lines.
Borders are marked with a pencil
Step 2 . Cut a rectangle along these lines, then, armed with double-sided tape, glue it inside the lid.
The fabric is glued inside the lid
Double sided tape is used
Step 3 . Cover the sides of the lid in the same way (see photo).
The sides are also covered
Step 4 . Place the can on the material, measure, cut off the excess, and then glue the fabric to the can. Don't forget to leave an indent at the top by folding it inward and gluing it. Wrap the remaining cans in denim in the same way.
The jar is placed on the fabric
Gluing fabric
Wrap each of the cans
Step 5 . Almost done. Wrap the pencil jars with braid, and you can also decorate the lid with it. Then assemble the entire composition.
Wrap the jar with tape
In the finished set you can store not only pencils, but also other small items that should always be at hand.