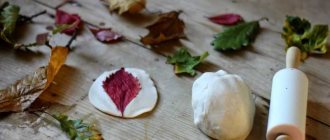
Salt dough apple
You will need: colored salt dough, PVA glue, clear manicure polish.
Read also: Gel polish runs on the cuticle
Master Class
- Make half an apple, make the inside flat, pressing it onto a flat surface.
- Make a thin flat center and glue it to the main part.
- Roll 6 seeds and a stick, then glue to the apple.
- Blind the leaves, then glue them.
- Dry the craft.
- Apply varnish and wait until completely dry.
The salted dough apple is ready!
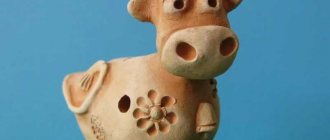
Hedgehog
A hedgehog is considered a simple three-dimensional toy that you can instruct a child to make on his own when moving from flat figures to three-dimensional ones. The sequence of actions is as follows:
- Prepare foil and roll it into a ball;
- Roll a ball of salted mass on top of the wad of foil and give it the shape of a pear;
- For the eyes and nose, use black pepper grains;
- Using nail scissors, give the upper body a jagged texture (an adult helps with this part of the work);
- After the hedgehog has dressed in a coat of needles, you can send it to dry;
- Color it.
Foil is placed inside the hedgehog's body so that it dries faster and is lighter. Instead of black peppercorns, small balls of dough, painted black after drying, are suitable. The beautiful hedgehog is ready.
How to make a basket of apples from salt dough
Shot: Jodee Luna / YouTube
This craft does not need to be covered in bright colors. Decorate your kitchen with it.
What you will need
- Salty dough;
- clip;
- knife;
- glass of water;
- brush;
- apple cuttings;
- rolling pin
How to do
Make a flat trapezoid with rounded corners from the salt dough. This is the base of the basket. Use a knife to make horizontal notches on it. This will show the texture of the woven material.
Shot: Jodee Luna / YouTube
Roll the material into a long thin sausage, then fold it in half and twist. Brush the base of the basket with water using a brush. Secure the part in a damp place. Cut off the excess.
Shot: Jodee Luna / YouTube
Make another sausage. It should be several times larger than the previous one. Fold in half and twist. Fix the workpiece with an arc at the top of the craft. This is a pen.
Shot: Jodee Luna / YouTube
Make seven balls. Flatten them slightly on top and bottom. Fix five pieces on the basket in two rows, placing two on the sides. Cut the cuttings from the apples. If the pieces seem too long, shorten them. Stick into the tops of the balls.
Shot: Jodee Luna / YouTube
Using a rolling pin, roll out the dough into a flat cake. Cut out six leaves from it. Make strokes on each piece with a knife to show the veins. Secure the molds under the apples. Some may overlap the fruit.
Shot: Jodee Luna / YouTube
Make many small balls. Brush the leaves with water. Arrange the parts so that you get a voluminous bunch of grapes.
Shot: Jodee Luna / YouTube
Make a small sausage and then flatten it. Carefully gather the strip into a roller. This is the base of the bud. Make several small balls and make a cake out of each. Fix these parts in rows around the roller. You will get a rose. Place it next to the grapes.
Shot: Jodee Luna / YouTube
Make another large rose and secure it on the other side of the bunch. If desired, you can also make the rollers that you made for the base of the bud. Fix them, for example, between apples.
Shot: Jodee Luna / YouTube
Small details are in the video instructions:
Master class on modeling from salt dough: Volumetric castle
Author: Zibnitskaya Oksana
Author's blog
First of all, we decide on the lock model. You can draw it yourself, or if you can’t, find something interesting on the Internet. My version:
In the picture, the red marker indicates the number of parts into which I mentally divided the castle: 1 and 3 - the main walls of the castle (protrudes 1 cm); 2 - large tower (protrudes 3 cm); 4 - small tower (protrudes 2 cm); 5 - background or background (the part of the castle that is drawn); 6 is the roof. The most convex part will be the 2nd part, a little less than the 4th part, then come 1 and 3. The convex part of the lock is approximately A4 in size. Since it was supposed to hang on the wall, I didn’t want to make it heavy. The foil frame was out of the question, because I definitely wanted a window. The choice was made on paper. Whatman paper was quite suitable for my work: it bends easily and holds its shape. I think that if you conceive a larger model, whatman paper will no longer be suitable. You'll need something tougher...
We start making with parts 1 and 3 (then everything else is attached to them). 1 is a regular rectangle with a depth of 1 cm:
3 detail looks like the letter G:
At 4 I already have windows that need to be cut out too. Don't forget that this part is already 2 cm deep!
Here's what you should get, preliminary arrangement:
Part 2 is round. And we only need half. Let's remember geometry: circumference = 2*Pi*R. We count: Length = 2*3.14*3 (the part protrudes 3cm!). And since we only need half, we divide it in half. Add allowances of 1 cm (I have 1 cm, since this part will be attached to parts 1 and 3) and draw out:
To give it a rounded shape, we cut out the required number of strips of arbitrary width, but their length should be equal to the diameter of our tower, i.e. 6 cm. And glue on the sides:
Attaching the tower to the walls: cut out two strips, bend them in half, glue one to each wall, and then attach the tower to them. I think everything is clear in the photo:
Now let's move on to the roofs. For a small tower we will need a triangle, the side of which is equal to the width of the tower, and a “tile” (the length of the strip is equal to 2 * the width of the tower plus a little more). We attach the “tiles” to the triangle, then glue our roof to the tower:
The roof of the large tower was made by eye. I simply rolled up a bag, as for seeds, of a suitable diameter, glued it along the seam, and cut off the excess from the bottom.
We cut the allowance at the top of the tower, bend the tabs and glue the roof to them:
Now there is something similar to a castle. You may have noticed that the partitions on the upper windows are bent. Firstly, this is due to soft paper; there were no such problems with whatman paper; secondly, I still reinforced the windows with an additional layer of whatman paper, which I advise you to do, so that when sculpting they retain their shape.
And one more thing: we also don’t completely need the roof of a large tower. I cut off the excess part (I marked the cut line again by eye, turning the layout sideways). Or you can just bend it inward.
And now our handsome man is ready.
There is nothing complicated about window decoration either. Transparent soft plastic packaging was suitable for glass (usually used in the packaging of various electronic gadgets, but not only). And since I was too lazy to do the interior decoration, by the way I came up with curtains, I have dark brown velvet. Both the “glass” and the curtains are cut out slightly larger than the window openings and glued. “Glass” around the entire perimeter, curtains only on top.
If desired, you can further strengthen the lock at the back with additional gluing strips or even a single sheet, as if to make a back wall.
Now about the sculpting. We start from the roof. Roll out the dough to the required width and length. The only note: the thickness of the layer increases at the bottom, that is, it is, as it were, beveled. It is very thin at the top, and towards the bottom the thickness increases to 1 cm, so that the transition to the walls goes smoothly and beautifully. I don’t have a lot of dough, so this transition is not so noticeable...
We imprint, indeed we imprint, our castle into the roof. Next, we cut off the excess and decorate the tiles. I only did it on the right side to make it clear.
Then everything is simple: roll out thin layers of dough, approximately 3-5 mm, and carefully wrap our castle, piece by piece. First the first layer, the main one.
Then there are decorative elements: bricks, stonework. Window elements are made separately. Here only your imagination works. An example of the first wall with bricks (I also cut them out and laid them separately):
This is what I ended up with:
Regarding the invoice:
1. Volumetric decorative elements (stonework under windows, bricks, etc.) will have a more beautiful texture if you let the dough dry a little and then begin to form the elements. For example, stonework between windows. At first I just laid out a smooth layer of dough, let it sit, and then just started forming individual stones. With this modeling, beautiful cracks are formed. After painting, all this will appear and you will be satisfied. Here, for example, is a fragment of an already painted wall with a transition to a large tower:
This method is also suitable for walls. I overdid it in aligning them, and then I had to scratch additionally.
Now we have a castle blank.
Let's move on to painting our castle. I use gouache.
We start from the roof. Choose the appropriate color. I like red roofs. First we apply the lightest color to the entire roof. Then we highlight the tiles along the grooves with darker shades and, naturally, draw the necessary shadows.
The bricks, stonework between the windows and the rims at the top and bottom of the walls are first covered, unlike the roof, with the darkest color. After a minute, use a slightly damp cloth to wipe off the excess paint. This way all the cracks show up.
The castle was intended to be light, but old, so I couldn’t just leave the walls and windows white. I mixed white with a drop of black, diluted it heavily with water and applied it to the walls. Large cracks on the large tower were specially scratched after drying. I applied a thin layer, just a little, of dark paint on them and immediately wiped them with a rag. The walls themselves remain light, but the crack is now clearly visible. I darkened the corners with grey. In the photo, I think you can see everything:
The result was:
Let's start working on composition. No matter how much I lighten the lock, it still has weight. Therefore, a strong foundation is needed. My choice fell on chipboard. We arrange all our elements, estimate what size the picture will be and cut out the required rectangle (or circle, or triangle - it all depends on your idea). Prime with white acrylic paint, 2 layers possible. Since I wanted a textured background, I also glued canvas onto PVA (the material that serves as the basis for embroidery, I forgot the correct name). All my foundation turned yellow (you can see it in the photo).. I was scared, but then the paints covered everything up. I also thought that the material could have been attached directly to the paint, but... the job was already done. We take our initial sketch of the castle and first with a pencil, then with paints we finish the rest of the details. I have this part 5 with a roof, chimney, door.
On the left I have this mini park:
Therefore, I designed the background on the left in the form of a clearing. Well, and the tree, of course, which can be seen here.
If we add foreground elements, it will look like this. In my opinion, it looks very good.
In my picture it’s a sunny, fine day, so the sky is blue with light clouds. The color of the sky changes slightly: it is darker from above, and the closer to the horizon, the lighter. To the right of the castle I also added greenery. Even if the frame goes all the way to the lock, it will still be unpleasant if unfinished areas are visible.
In front of my door there is a column and a piece of roof above it. They molded and dried at the same time as the lock. The column is painted like the walls, and the roof is brown, like wood. In this photo they are not yet painted, but they are clearly visible.
And here it is in color:
It is better to attach all the volumetric parts of the castle and the tree after everything has been drawn on the canvas. Otherwise they get in the way a lot. I glued it to Titan.
The work is almost finished. All that remains is to make the “floor” and work on individual details.
For the “floor” I also used chipboard. 5 cm in width was enough for me to fit everything I planned. Since there were no suitable corners available, and my hands were itching, I used disk separators as fastenings. You can also use the discs themselves. Heated it over a lighter along one line and bent it at an angle of 90 degrees. I glued it to Titan. First to the main part, then the “floor”. Then you can simply paint the inside out, and everything will look quite neat.
When the bottom was already attached, it turned out that the lock did not fit tightly on it. To hide the gaps, I used paper pulp (the same as for modeling a tree trunk). With its help, it was also possible to make the “ground” in relief and secure greenery (grass, bushes), and design a path in front of the castle. All this is done in one step until the mass dries. So it’s better to prepare all the elements in advance.
The path in front of the house was sprinkled with colored salt. It is painted very simply: take the required amount of salt, prepare the required color, add it to the salt, mix well. Give it time to dry.
Greenery. I used plastic plants to decorate aquariums. There are a lot of varieties, all of them are collapsible. I'll post a few photos so you have an idea of what I'm talking about. This twig went to the grass:
This is the same thing, but already disassembled. The similarity with grass is already more obvious:
This species served as the basis for the bushes:
A separate branch and an already formed bush:
You can adjust or give the desired shape using a regular lighter: heat it, bend it, etc. I simply attached it by sinking it into the paper pulp. PVA dries clear, so don't be afraid to overdo it.
Bench. The basis is a frame twisted from wire:
The crossbars are made of dough, everything is painted with gouache, fastened with Titanium. My beloved husband also participated in the work on the painting. The book is his find. She breathes life into the picture: as if someone had just been reading in the shade and was away on business. The cover is made of whatman paper, a page of plain paper aged by coffee. First, the pages are attached to each other in blocks. Then to the cover to the desired thickness. To make the book three-dimensional, everything is glued only at the fold. And it is also advisable, during gluing, to firmly press down the fold with something thin, for example, a ruler. When it dries, you can give the pages the desired shape.
Flashlight. The frame is also made of wire. The glass is clear plastic, which we used for windows. Bottom and top from whatman paper. The top cover consists of 3 elements. Painted with gouache. This is the simplest version of the form. There are more interesting flashlights on the Internet. The leg is glued to the column. When everything was finished, I realized that the wire frame was not really needed. You can immediately cut out the required shape from plastic, glue the beginning and end, and draw a black metal grid. It will look much neater.
The finishing touches. Everything is already in place, all that remains is to paint the “floor.” We add “earth” to the flower beds, shadows (for example, under a bench), and make the path more interesting by also adding different colors. Let the painting dry well and varnish it. Aerosol is best.
That's all.
Materials for making crafts
Kneading the dough is only the first stage of independent creative work. Also, to create original crafts, you need various decorating materials that need to be prepared in advance:
- Paints (you can use acrylic) and clear varnish.
- Glue.
- A sharp knife (stationery) for cutting out shapes.
- Threads, metal wire (if you plan to create New Year's toys).
- For homemade dolls you will need various accessories (eyes, yarn, clothing parts).
You can also prepare instructions in advance for making your own salt dough crafts. Such training schemes and video lessons will help inexperienced craftsmen conduct creative activities correctly.
DIY craft
Both professionals and beginners in needlework can create a beautiful product. You just need to put in a little effort, patience and perseverance.
Crafts on a Russian-folk theme are often created from scrap materials and simple tools. If you know how to sew or knit, you can make dolls, characters from Russian folk tales, and amulets.
The basis is made:
- Made from material stuffed with cotton wool,
- Straw,
- Mattings,
- Tree.
The top is decorated with sewn and knitted clothes, hair made from threads and yarn. From leftover yarn and fabric you can sew bright patchwork rugs, blankets, and sofa cushions.
It’s easy to make a matryoshka doll or a Dymkovo toy from clay or plasticine. It is better to use polymer clay for the product. It holds its shape well and does not crack when drying. With the children, paint the finished craft with bright ornaments and cover the top with a layer of varnish.
Make three-dimensional pictures from salt dough or plasticine: scenes from Russian fairy tales, nesting dolls, fairy-tale characters. Stick the details of the painting onto a board, dry it, and paint it.
How to dry salt dough?
There are two most common ways to dry salt dough. The first method: the finished craft will dry on its own. The main thing is that it should not be exposed to direct sunlight, otherwise it will crack. The craft can be placed on a flat surface and wait a few days. Second method: dry the finished craft in the oven for 3 to 6 hours (depending on the size of the craft). Drying occurs in batches with breaks. One approach is 1-2 hours. For quick drying in one go, set the oven to 75-100 degrees, and then the craft will dry in an hour. At a temperature of 120 degrees, the craft will dry in 30 minutes, but it is better to dry it naturally.
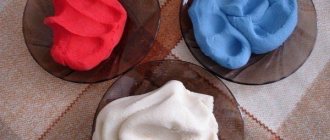
Dough coloring
Natural colored dough crafts are a bit boring. I always want to color them. In practice, two simple methods are used for this:
- color the dough;
- paint finished crafts.
Finished products are given color using acrylic paints or gouache. A regular paint brush is dipped into paint and the toy is painted over, or contour patterns are drawn on it.
Another method involves giving the modeling mass a uniform color using food coloring. Coloring agents are diluted in water, then combined with the dough during its preparation. The final stage in creating the craft will be drying and coating with transparent varnish in 2-3 layers. This will extend the life of the toy and maintain its presentable appearance.
Christmas tree
Roll out an even layer from a piece of modeling mass and cut out a simple Christmas tree consisting of three tiers using a stack. Make a small hole in the top. Dry, paint with green acrylic paint or gouache, decorate with beads and sparkles. Insert a decorative cord or satin ribbon into the hole. The result was a New Year's toy, a pendant. On the eve of the New Year, you can make many of these Christmas trees as gifts for friends in class, family, and friends.
Products made from salt dough are cozy and soulful. It's always nice to receive them as a gift or make them for yourself.
Play dough recipes
There are many play dough recipes, below are some examples. When kneading, there is one rule: take the same amount of salt as flour, not by volume, but clearly by grams. It is recommended to use fine salt: it does not contain hard dark granules, which can cause unpleasant tactile sensations and spoil the appearance of the product.
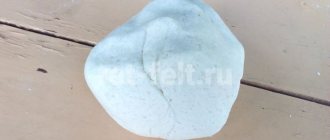
Classic dough
The tradition of creating crafts from dough goes back a long way. During this time, many recipes have appeared, but let's start with the basics - the classic one. It differs from others in its density.
You will need:
- 200 gr. wheat flour;
- 200 gr. fine salt;
- a glass of cold water.
Sift the flour into a deep bowl, add fine salt. Add cold water as needed and mix thoroughly after each time. Mix until the resulting dough becomes elastic and elastic.
Dough with added PVA glue
When you add PVA glue to the batch, the finished craft becomes as durable as possible and you won’t be afraid to drop it in the future. This is especially true when creating toys. The dough is of medium density.
You will need:
- thick PVA glue;
- 200 gr. wheat flour;
- 200 gr. fine salt;
- a glass of cold water.
Pour a glass of cold water into a deep bowl and add a tablespoon of glue. When the glue dissolves and the water turns white, add all the salt and stir until completely dissolved. Add flour and knead until dough forms.
Soft dough
Used for playing with children and when creating small parts. It is distinguished by its softness and ductility.
You will need:
- 200 gr. wheat flour;
- 200 gr. fine salt;
- 5 tablespoons of vegetable oil;
- a glass of cold water.
Mix all the dry ingredients, add all the oil and gradually add water. Knead the dough until smooth.
Dough with glycerin
Another not the most popular recipe, but it is the one that will allow you to make dough like the famous Play Doh toy. It is distinguished by its shine and special softness.
You will need:
- 4 tablespoons of glycerin (can be found at any pharmacy);
- thick PVA glue;
- 200 gr. wheat flour;
- 200 gr. fine salt;
- a tablespoon of vegetable oil;
- a glass of cold water.
Dry ingredients are mixed in a deep bowl. In a separate bowl, in a glass of cold water, mix glycerin and 2 tablespoons of PVA glue. Gradually pour the liquid into the flour and salt, mix thoroughly.
The resulting dough can be divided into containers and dye added.
How to make a gnome from salt dough
Shot: Basil Lemonade / YouTube
The gnome is a good decoration. It will fit into any interior.
How to do
Tear two large pieces from the foil. Give one the shape of a cone with a depression at the base, the second an oval, flattened at the bottom. These are blanks for the cap and body.
Shot: Basil Lemonade / YouTube
Using a rolling pin, roll out the dough into a large flat cake. Wrap the future body.
Shot: Basil Lemonade / YouTube
Make a second cake. Spread the material over the surface of the foil hood. At the same time, give the part a curved shape.
Shot: Basil Lemonade / YouTube
Using a knife, make a lot of strokes on one side of the body - this will show the texture of the beard. Place the cap on the body.
Shot: Basil Lemonade / YouTube
Make a small oval and flatten it slightly. Attach the piece to the craft. Roll out the dough into a long, thick sausage. Secure it at the bottom of the headdress. Send the gnome to dry in the oven or leave it to harden at room temperature.
Shot: Basil Lemonade / YouTube
Apply blue paint to the cap.
Shot: Basil Lemonade / YouTube
If you need to better understand the details, watch the video:
What other options are there?
This way to make a gnome is a little more complicated, but you can do it:
Another cute craft option:
What can you create from salt dough?
Salt dough opens up endless possibilities for imagination and modeling; you can use it to create both flat simple decorations and complex figures. Below are examples of creating simple crafts that will captivate not only children, but also adults.
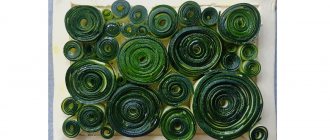
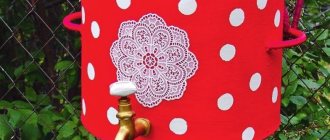
Home decorations
Additionally you will need:
- glass or molds;
- small figurines or herbariums;
- cocktail tube;
- ribbons or twine.
The simplest yet most impressive decoration. To begin with, roll out the dough to approximately 5 mm thickness. Use a glass and cut out some round bases. Place the herbarium in the center of the base and use a cocktail straw to make a hole for later hanging the decoration. You can experiment with figurine patterns or use cookie cutters to cut out the base. After the resulting result has dried, attach ribbons or twine. This way you can make decorations for the Christmas tree for the New Year.
Keychains and magnets
Additionally you will need:
- bases for keychains;
- magnets.
The dough is suitable for creating anything: forest and sea inhabitants, plants and corals, insects, characters from films and cartoons... The list is endless. If making figurines doesn't sound like the most fun activity, what about making magnets and keychains? The bottom (base) will be flat, while the top will be voluminous. An excellent option for a gift.
Volumetric figures
Figures occupy a special place in modeling, at the very top of the hierarchy of complexity. There are many ideas, but if they seem too complicated, then you should remember your favorite pastries and translate them into miniature products. Simplicity is captivating, and you can go further and model fruits and vegetables. Children can use them for games, and adults who are especially persevering can work on small details and make decorations.
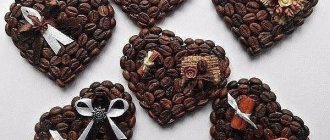
Cones and plasticine
To make this red-nosed gnome, you will need fir cones and three colors of plasticine. Cones are a fertile material that has long been used for crafts in labor lessons in schools. In addition to the fact that you can construct many figures from them, classes are preceded by an interesting and useful walk through the forest.
INTERESTING: How to make a rooster from plasticine or clay
We make a green cap and attach it to the top of the cone. On the opposite side of the cone we stick flipper legs for stability. All that remains is to make the hands and small details of the face.
Master class on making animal crafts for children
And since most of us do little creative work, those who have children try to come up with interesting activities just for them, so that joint activities will be very exciting.
I suggest you, together with your daughters and sons, make this funny hedgehog, look for photo instructions further.
We will need:
- Salty dough;
- Scissors;
- Beads
- Paints.
Manufacturing process:
1. Make a drop-shaped piece from a piece of dough.
2. Make eyes and a nose from beads.
3. Now we will make needles, for this we take nail scissors and make small cuts, lifting them up a little.
4. We perform the next row in a checkerboard pattern and so on until the entire back is covered in needles.
5. Dry the finished toy in the oven. We color the hedgehog at will.
It’s also very easy to make a bird and decorate it with bean seeds; it’s not only easy, but also useful for developing children’s fine motor skills. Watch the video of how this craft is made:
Of course, there are a lot of options, and if you surf the Internet, you can find a whole storehouse of ideas, and your leisure time with your child is guaranteed. I share souvenirs that I personally liked:
- Magic fish
- Cows
- Princess Frog
- Mice
- Snail
- Blue elephant
Crafts for children
All children love to draw, sculpt, and make things. Join them in creating folk crafts. This exciting activity will appeal to kids and older children.
Consult with your children what interests them most and get to work. Make small amulets from threads or yarn. They can be used as a toy, decoration or keychain.
Testoplasty - where to start
Modeling from salt dough is an interesting process that will bring pleasure to everyone. The dough turns out so soft and pliable that you don’t want to let go of it. Therefore, for some needlewomen, dough crafts - testoplasty - are not just periodic activities with children, but a real hobby.
The youngest children can be introduced to dough as the first material for modeling. The dough is superior to plasticine because it is harmless to children. If a young researcher has tasted the mixture, do not worry, the dough does not contain foreign impurities or harmful additives. The child can do whatever he wants with the dough: knead it in his hands, pinch off pieces, roll it into balls, sausages, cut it with a knife. Such manipulations are useful for fine motor skills.
For children aged 2-3 years, simple crafts are enough. First, these are flat dough shapes that are cut out using cookie cutters, round lids, or a clay knife.
Children over 4 years old are ready for crafts that are more complex than just cutting with a shape. These can be Christmas tree decorations, three-dimensional animal figurines, vegetables, fruits, small toys as gifts for friends. Using salt dough, you can make wonderful counting material for teaching mathematics in games.
Salt dough counting material
Figures, figurines, and toys are created from the salty mass, which are then given to friends or used in games or to decorate a room. This creative work also has an educational function - the creation of counting material for teaching children mathematics and counting in a playful way. The peculiarity is that you need to create several identical items, for example, ten fruits, vegetables, mushrooms.
Counting material in the form of mushrooms is easily made from salt dough. You need to start working with preparing the material, and then according to plan:
- Roll out the dough into sausage shapes;
- Cut the sausages into equal pieces, these will be mushroom stems;
- Roll a small ball and flatten it into a hat shape;
- Make 10 blanks of legs and caps, connect them in pairs using water;
- Make a hole in each leg using a ballpoint pen;
- Dry the products;
- Paint with bright colors.
The resulting mushrooms are strung on a string and used to teach counting.
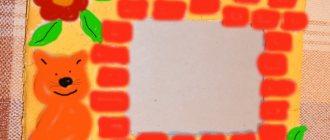
Step-by-step instructions for making dough crafts for beginners
Now that you know how to prepare material for creativity, it’s time to begin the sculpting process itself. Let's start with the simplest. I will show you step by step how you can easily and quickly make a beautiful thing. We will sculpt a cute bear.
We will need:
- Flour;
- Salt;
- Water;
- Cup;
- Acrylic paints or gouache;
- Brush.
Manufacturing process:
1. First, knead the dough: mix half a glass of flour and half a glass of salt, add a little water and mix everything well. Next, wait 2 hours, during which time the dough sits in the refrigerator.
2. Now we start sculpting the figure: we make one medium-sized ball for the head, a larger one for the body and 7 smaller ovals for the paws, ears and nose. We connect everything together. Then we put the product in the oven and dry it for an hour. After drying, take out the craft and cool it.
3. Next we proceed to coloring. Take a brush and the necessary paints. We are waiting for the “Bear” to dry. That's all!!
Advice!! Cover the finished souvenir with varnish. This will make the craft brighter and more practical!!
Thus, the step-by-step instructions for sculpting products from salt dough are as follows:
- knead the dough;
- we sculpt the necessary elements and connect them together;
- dry the work in the oven;
- paint and wait for it to dry.
And remember that the main sculpting techniques are balls and sausages.