The battery is a lattice plate made of either lead dioxide or pure lead, sometimes coated with calcium. Between them is an aqueous solution of sulfuric acid. Lead and acid react with each other to create electricity, but break down into other elements that do not create electricity (salt and water). The battery is dead. When we charge the battery, that is, we apply current to the electrolyte, a reverse reaction occurs: water reacts with salt, forming acid and metal (or metal oxide), which are again capable of creating electricity.
What is battery desulfation?
Sulfation of acid battery plates
Desulfation is the removal of sulfuric acid salts from the battery plates.
Desulfation is the removal of sulfuric acid salts (lead sulfate or calcium sulfate). This salt appears on the walls of the lead plates as a result of a chemical reaction that occurs during battery discharge. However, not all the salt is converted back when charging the battery. Some of it settles on the metal plates, preventing contact between lead and acid, and over time there is so much lead sulfate that the battery stops working altogether.
What is sulfation, causes and possible consequences
During charging, discharging, and idling of a lead-acid battery, chemical reactions occur in it involving active substances:
- lead (plates);
- lead oxide (plate coating);
- electrolyte (sulfuric acid).
As a result of reactions during discharge, lead sulfate (PbSO4) and water are formed. The density of the electrolyte decreases. When the battery is connected to a charger, the reaction proceeds in the opposite direction - from lead sulfate and water, lead, its oxide and sulfuric acid are obtained. Due to its formation, the density of the electrolyte increases.
In theory, PbSO4 is formed during discharge and completely consumed during charging. In fact, the first reaction occurs even when the external circuit is open due to self-discharge, and the amount of lead sulfate released depends on many factors (including temperature, battery age, etc.). During energy replenishment, complete compensation does not occur; as a result, over time, crystals accumulate on the surface of the plates. This process can be slowed down by proper operation and timely maintenance of the battery, or it can be accelerated by careless attitude towards the battery. The situation is especially aggravated by frequent (and even one-time) deep discharge.
Sulfation is a uniquely harmful phenomenon. PbSO4 crystals cover part of the area of the battery plates, “masking” the active part and excluding it from reactions. The battery capacity decreases.
How to desulfate a car battery
Proper battery desulfation is a method of alternating short, weak charges with short, weak discharges. To carry out such cycles, there are special chargers for car batteries with desulfation. Let's say a few words about the “wrong” (in quotes, because such methods exist, but we do not recommend them) desulfation of battery plates.
- Mechanical cleaning of plates from lead sulfate (we disassemble the battery, take out the plates and clean them).
- Chemical cleaning (open the filler cap, pour in a special solution that will corrode the salt on the lead).
These methods are controversial (in terms of effectiveness) and are very dangerous. But the choice, of course, is yours.
Electrical desulfation
This desulfation is also divided into two parts:
- Automatic desulfators
- Regular battery charger
Automatic desulfators are very easy to use. You connect it to the terminals and due to a special charging system, the sore goes away.
This happens in a ratio of 10/1
10 minutes - charge 3A
1 minute - discharge 0.3A
There is only one downside to such a device - the price.
These devices from normal manufacturers cost from 5,000 to 15,000 rubles.
Take it with an eye to the future; I don’t think many are capable of this in our time of crisis.
If your battery is simple and costs no more than 3,000 rubles, you don’t need to buy a device.
Now let's move on to desulfation with a conventional charger. This method works with batteries that are still slightly alive.
How to desulfate a battery at home
Battery desulfation at home
To desulfate the battery, chargers with a desulfation mode and special devices for this are sold.
As mentioned above, you can purchase a battery charger with a desulfation mode, or a special device for desulfation. In this case everything is simple. We connect the battery to the device and monitor the indicators on the display; sometimes this process can take several days depending on the degree of sulfation. Note that such a device is not cheap and it makes sense to “get confused” to make a device for desulfating the battery with your own hands. First, let's try to do the simplest thing possible. Namely, desulfate the battery with a charger. Before starting work, check the density (usually 1.07 g/cm³) of the electrolyte level in the battery; if it is not enough, then add distilled water (not electrolyte!).
It is very important that after 8 hours of charging the battery at low current, disconnect it from the charger for a day.
- Let's take our regular charger and set the voltage on it to 14 V (but not more than 14.3), and the current to 0.8-1 A (there are chargers that cannot set such parameters, which means such chargers are not suitable for us ). Desulfation of the battery with low current is carried out within 8 hours (some error is allowed, for example, you can leave the battery to charge overnight). We check the density of the electrolyte, it should be approximately the same as at the beginning of the “experiment,” but the voltage should change and be 10 V.
- If everything is so, then we disconnect our battery from the charger for a day (this is important!).
- The next stages of desulfation will be to set the current to 2-2.5 A at the same voltage. We also leave the battery to charge for 8 hours. Then we check the battery voltage (12.7 V) and density (1.11-1.13 g/cm³). If the indicators correspond, then we proceed to the next stage.
Discharging the battery using a light bulb.
This method of restoring the battery will take you from 8 to 14 days, and the battery will be restored by 80 - 90%.
- We connect a low-power consumer of electricity to the battery (for example, a low-beam lamp). We discharge the battery to 9 V, this will take approximately 8 hours. In this case, it is necessary to monitor the voltage in the battery (it should not drop below 9 V), otherwise the process of plate sulfation will start again, which we are trying to get rid of. The density should remain at 1.11-1.13 g/cm³.
- We repeat the previous 4 steps. In this case, the density will increase slightly (1.15-1.17 g/cm³). Then we perform 4 steps again, and again, until the density of the electrolyte is approximately 1.27 g/cm³.
This method of restoring the battery will take you from 8 to 14 days, and the battery will be restored by 80 - 90%.
Available ways to restore a car battery
So, besides desulfating the battery plates using a charger, there are other solutions. Let us note right away that such methods cannot be considered the best option, but in some situations they can be used.
For example, if mechanical cleaning of plates from lead sulfate requires disassembling the battery, removing the plates and cleaning them, then chemical cleaning eliminates the need to disassemble the battery. To do this cleaning, just open the lids on the jars, pour in the cleaning solution and wait until it washes away the salt on the plates.
Of course, such methods are difficult to implement and even dangerous (working with batteries and acid requires compliance with safety rules). However, if the battery is fully serviced and the electrolyte is replaced, desulfation can also be carried out as part of such work.
As for ordinary car enthusiasts, in practice, not everyone will provide comprehensive battery maintenance. In this case, it is much easier to purchase a battery charger with a desulfation mode or a separate device for desulfation of battery plates. Taking into account the fact that the second option is not suitable for everyone, below we will consider the method of desulfation with a conventional charger.
Diagram of a device for battery desulfation
Charger circuit for battery desulfation
The basic principle of the “blinker” for battery desulfation is that the charge should be no more than 10% of the battery capacity and the voltage should be within 13.1 - 13.4 V.
In order to restore the battery, you can create a load circuit with your own hands, in which charges will alternate with discharges. Such a circuit consists of relays and 12 V light bulbs. The lamps put a load on the battery and discharge it to a certain limit, the relay, in turn, turns off the circuit at the moment of this limit, and then turns on the “blinker” when the battery is charged again to the required level. The basic principle of the “blinker” for battery desulfation is as follows: the charge should be no more than 10% of the battery capacity and the voltage should be within 13.1 - 13.4 V. The voltage can be monitored manually using a voltmeter connected to the network, or you can connect one more, auxiliary, relay that will control the set voltage. Typically, the ripple mode of the circuit is as follows: for 4.3 seconds there is a discharge with a current of 1 A, then there is a charge of 5 A for 3 seconds. Since the load lamps turn on and off alternately, the circuit seems to “blink”, which is why it got the name among the common people “blinker”.
Any car enthusiast has encountered the phenomenon when a battery, after lying idle for some time, stops delivering its nominal capacity, turns the starter for half a second, then dies, but the voltage on it is normal - 12 volts.
Anyone can face this, but why does it happen. A car battery consists of lead plates in an electrolyte solution—in this case, the electrolyte is sulfuric acid.
The process of charging and discharging a battery is nothing more than a redox process; a chemical reaction occurs during which the lead plate reacts with oxides on the adjacent plate. During this reaction, sulfates are formed, which over time accumulate on the plates. Sulfates prevent the flow of current because they are a poor conductor and over time the battery loses capacity and is not able to deliver large current to operate the starter.
If your battery charges and discharges faster than before, without any mechanical damage, it most likely failed due to sulfation of the plates.
The proposed device (desulfator) creates short pulses of high amplitude and frequency. The desulfation pulse lasts for a certain time, then a simple one, then another pulse. Such impact processes can destroy the sulfate layer, and in theory this is possible; in practice, not all batteries can be restored due to the design features of the latter, but judging by statistics, about 85% of old batteries can be restored, of course, if the cause of inoperability is sulfation and not a break lead plates or other mechanical damage.
How to use the device?
This option is a charger-desulfation device, a conventional desulfator is powered by a battery, which it desulfates and gradually discharges, while in this case the device charges the battery with short bursts of high-frequency high voltage.
This circuit can also be used to charge low-voltage lead-acid batteries with a nominal voltage of 4-6 volts; these are used in Chinese lanterns, children's electric cars, and so on.
The circuit was originally created for charging low-capacity batteries, but it can also be used to desulfate car batteries. Before starting the desulfation charging process, the battery must be slightly recharged.
First you need to find any power source with a voltage from 8 to 12 Volts and connect it to the desulfator input, but not directly, but through a 12 Volt incandescent lamp with a power of 21 watts, so as not to exceed the charge current, we’ll talk about this in more detail at the end . A battery that needs to be restored is connected to the output of the device. Since the device operates in the audio range, you will most likely hear a faint whistle; the power components of the circuit should heat up slightly.
How does the scheme work?
The voltage from the charger is supplied to the desulfator circuit through a fuse and diode. For the low-power portion of the circuit, power is supplied through a current-limiting resistor, then smoothed by a small electrolytic capacitor.
The NE555 chip contains a rectangular pulse generator, the frequency of these pulses is about 1 kHz. Fill factor is about 90%. The CD4049 chip inverts and amplifies this signal, turning it into pulses with a fill rate of about 10%. From the output of the inverters, pulses are sent to the gate of the field-effect transistor VT1. When it opens, it closes the inductor to the power ground, energy accumulates in the inductor, when the transistor closes, the circuit breaks, due to the phenomenon of self-induction, which is characteristic of inductive loads, the inductor releases the accumulated energy. This is a short-term voltage surge with a high amplitude, and the self-induction voltage is several times higher than the supply voltage. This voltage surge is rectified and applied to the battery. The process occurs more than a thousand times per second, that is, short-term high-voltage pulses with high frequency are applied to the battery, which is what destroys the sulfate film.
The circuit involves a fuse and another rectifier diode. The fuse will protect the desulfator in case of accidental short circuits at the output, and the diode performs several functions - firstly, it protects the circuit if you accidentally connect it to the charger incorrectly and, secondly, it protects the charger from possible impulse noise and voltage surges that form on the desulfator board.
About the components
IRF3205 field-effect transistor, or any other N-channel with a voltage from 60 to 200 volts and a current of 30 Amps, I advise you to install the transistor on a small radiator.
The inductor has an inductance of about 200 microhenry, wound on a ring of powdered iron, the kind you can find in computer power supplies. The winding is wound with 1mm wire, the number of turns is 60, in my case there was not enough wire and the inductance was slightly less, but the device works well.
The dimensions of the ring are not particularly critical, the main thing is to maintain inductance and wind the winding with 1-1.2 mm wire.
It is very advisable to take a 100-220 µF capacitor with a low internal resistance, since the generator circuit is actually powered by this capacitor, which means it will constantly accumulate and release energy, even heating up slightly.
Both diodes need to be taken with a current of 5-10 Amps, you can use regular ones, but it is advisable to take pulsed diodes.
On the charger itself, you need to set the current to no more than two amperes, otherwise the fuse on the desulfator board will blow. Someone will say - 2 amperes of charging current is not enough, yes I agree, but do not forget that we are not dealing with charging, but with desulfation.
When idle, the device consumes a current of only 100 mA from the power source. It can be connected to any charger with a voltage of 12-15 Volts and the current can be limited to 2 amperes. The limitation can be made with a powerful resistor or an incandescent light bulb of the appropriate power connected to the power supply positive gap.
You can also use lower voltage power supplies with a voltage of 8-10 Volts, since our circuit still increases the initial power supply to several tens of volts.
How long should the desulfation process last? The author of this scheme says that within 2 weeks of regular charging it is possible to completely restore an old battery.
PCB here
How to desulfate a maintenance-free battery
Homemade battery desulfation device
Desulfating or cleaning the plates from sulfuric acid salts will extend the life of your battery, but, unfortunately, not for long.
A maintenance-free battery cannot be desulfated for the simple reason that there are no filler holes in it, which means it is impossible to check the level and density of the electrolyte. In practice, the battery capacity is examined with a flashlight, the liquid level is determined, a hole is made above this level, and distilled water is added through this hole with a syringe. Upon completion of the work, the hole is sealed. You can also try to restore a maintenance-free battery using a circuit for cyclic discharging and charging, in some cases this helps. A calcium battery can also be classified as maintenance-free, but for a different reason. In such batteries, along with lead sulfate, calcium sulfate is formed (lead plates are doped with a layer of calcium, which gives such batteries a number of advantages), which in turn “plasters” the plates, and subsequently the space between them. If you do desulfate the calcium battery, the calcium sulfate will dissolve along with the coating layer. Let's summarize. What does desulfation give us for the battery? Cleaning the plates from sulfuric acid salts will extend the life of your battery, but, unfortunately, not for long. In any case, if your battery is sulfated, this is a sure sign that it has already exhausted its resource and whether it makes sense to restore the battery is up to you to decide.
Read also: LED strip 5 or 12 volts
Sooner or later, every driver has to face the problem of battery sulfation. When the first signs of sulfation appear, you can leave everything to chance and wait until the battery runs out, then replace it with a new one, or try to extend its life by your actions. There are several ways to do this, by desulfating the battery plates, maintaining its vital activity. In this article, we will consider what the desulfation process is, how to carry it out, and what are the results of such work.
Tips for operation and assembly
The requirements for the power transformer are similar to those of the previous circuit. Diode 1VD1, thyristor 1VS2 and triac 1VS1 must be installed on radiators. Powerful resistor 1R11 can be anything (single or multiple), and 1R1 must be a wire resistor. It wouldn't hurt to install a fan in the housing. It can be powered from the +12 volt line. The 1R6 resistor is installed on the front wall of the case, and a voltmeter and ammeter must also be mounted there.
For clarity, we recommend a series of thematic videos.
Desulfation can significantly extend the life of a battery. It can be done at home, and the safest and most effective method is electrochemical. If you have qualifications, you can make a device for performing such a procedure yourself.
What is car battery desulfation
The concept of desulfation refers to the work of cleaning the battery plates from the lead sulfate that has accumulated on them. Such work is carried out through special charge and discharge cycles.
As you can remember from the definition of plate sulfation, a similar problem occurs during normal operation of a car battery. Over time, the working plane of the positive and negative plates decreases as lead sulfate adheres to them. At the same time, the density of the electrolyte also decreases, down to 1.05-1.07 g/cm 3, which is critically low for normal battery operation.
If the battery plates become coated with lead sulfate, they must be cleaned to ensure the battery continues to perform at its best. To clean the plates, you should use a special charger, with which desulfation is performed.
Please note: If a special device for desulphating the plates is not available, a regular “charger” can be used by performing the special charge and discharge cycles described below. The effect will be worse, but the plates will still be partially cleared of precipitated lead sulfate.
Desulfation involves performing battery charge and discharge cycles using a special technology. Let's take a closer look at how this is done below.
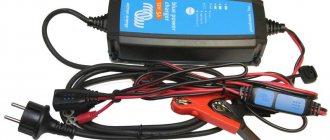
Desulfation Charger for Car Battery
In industrial conditions, at car depots, where batteries are charged by trained workers, battery desulfation is carried out using a special desulfation charger. To remove sediment from a heavily clogged battery, reverse pulse currents are used.
Reversible current is alternating, with different amplitude and polarity, repeated cyclically. Pulsed desulfation by charging and discharging acts gently on the battery, the temperature of the electrolyte does not rise, and gas evolution does not occur.
To create reverse currents, a special device is used, a reverse current generator, the cost of which is approximately equal to two batteries. How to desulfate a battery using a reverse current generator?
The generator is used for medium sulfation of plates with a current supply of 0.5 - 2.0 A for 20-50 hours. The process is completed when the voltage and density of the electrolyte remain unchanged for 2 hours.
A heavily clogged battery is cleaned using a desulfation device with distilled water in several stages. To do this, the voltage on the battery must be reduced to 10.8 V, the electrolyte removed, and filled with distilled water into the jars.
Carry out desulfation of the battery with a low current so that the voltage is up to 2.3 V. Gradually the sediment dissolves in water, the electrolyte acquires a density of about 1.11 g/cm3. Replace the solution with fresh distilled water, and continue the process until the density is 1.12 g/cm3. Now set the current strength to 1 A and watch the voltage increase until the indicator stabilizes.
After the first stage of battery desulfation, the current is increased to 20% of the discharge value, the battery is charged for 2 hours, discharged, and so on until a constant density and voltage is achieved 3-5 times.
Bring the acid to a density of 1.21-1.22 g/cm3, charge the battery completely and after 3 hours adjust the density using the table. The method is labor-intensive, but the desulfation of the plates is complete. The battery returns to its second youth.
Which batteries can be desulfated?
To desulfate a battery, it must meet a number of criteria. When a battery fails, it is not always a sign that its plates have become sulfated. This can happen, among other things, due to the destruction of the plates or the short circuit of the cans. That is, before starting the battery desulfation process, you should make sure that:
- There is no mechanical damage on the battery case, that is, it did not fail as a result of a fall or impact;
- There is a white coating on the battery plates. This can be checked by unscrewing the plugs;
- Checking the battery capacity shows that it is around 30-40%;
- When you try to charge the battery, it takes a charge, but quickly discharges. In addition, it heats up quickly and may boil while charging.
If the cause of the battery malfunction really lies in the sulfation of its plates, you can proceed to the desulfation process.
Desulfation of plates with a special charger
On sale you can find special charging stations designed to desulfate a car battery. They operate in the required discharge-charge mode and cope effectively with the task of cleaning the plates from lead sulfate.
Please note: The cost of a charging station designed to desulfate battery plates is quite significant. For the price of one such station you can purchase 3-4 new batteries. Accordingly, having such a station for “home use” is not economically profitable.
Having a special charging station, it is very easy to carry out work on desulfation of plates. To do this, just take the battery, connect the charging station to it and turn on the desulfation process, after which the device will do everything automatically.
Please note: The desulfation process using a special charger takes several days.
This charging station works very simply. Voltage is supplied to charge, and after a while the discharge begins. Most often, the charging and discharging currents are in a ratio of 10 to 1, that is, if a current of 2 Amperes is supplied to the charge, then 0.2 Amperes are supplied to the discharge.
When the work is completed, the charging station will use an indication to show how much the battery capacity has been restored, if it has appropriate indicators or a display.
Circuit for car battery desulfation
Of the chemical methods for desulfating batteries, the most commonly used is a complex composition of Trilon B and ammonia. These substances are available, but they should be used in accordance with the instructions and on strong batteries. Trilon B, sodium salt of ethylenediaminetetraacetic acid, soluble in water, sodium replaces the lead ion in the salt and the precipitate dissolves. But the active putty also dissolves.
The procedure for desulfating a battery chemically:
- Prepare a solution - take 60 g of Trilon B, 622 ml of NH4OH 25%, 2340 ml of distilled water for 3 liters. You can take 10% ammonia solution 1560 ml, water 1140 ml and 60 g Trilon B.
- Drain the electrolyte from the battery into a suitable container.
- Immediately fill the wet jars with the prepared mixture and leave them in the battery for no more than 60 minutes.
- Drain the contents and rinse the jars 3-4 times with distilled water.
- Fill in fresh electrolyte of the required density and perform a full charge cycle.
The method must be used with caution. If desulfation of a car battery is carried out to remove a small amount of sediment, the exposure time is reduced to 30-40 minutes. Trilon B doesn’t care whether it dissolves a harmful sediment or an active mass. At the moment of the reaction, the liquid heats up and boils. You need to work outdoors and use protective equipment.
Desulfation of plates with a conventional charger
As noted above, work on desulfating the battery plates can be done using a conventional charger. But the work in this case will be much more complex and will require regular intervention in the process.
We will consider the desulfation process for a battery that has a terminal voltage of 8 Volts and an electrolyte density of about 1.07 g/cm 3 . During normal charging, such a battery begins to boil after about 15 minutes, without receiving voltage.
Desulfation is performed using a conventional charger as follows:
- Remove the battery and place it in a well-ventilated area where the work will take place;
- Next, check that there is enough electrolyte in the battery. If it is not enough, then add regular distilled water. Please note that under no circumstances should you add electrolyte or concentrate ;
- Next, you will need to take a regular charger, which allows you to rigidly set current and voltage indicators (Ampere and Volt), and connect it to the battery;
- Set the voltage to a level from 13.9 to 14.3 Volts, and the current to a level from 0.8 to 1 Ampere and turn it on, then leave the battery in this state for 8-9 hours;
- Having completed the steps described above, you will notice that the density of the electrolyte in the battery has not changed, but the voltage has increased to approximately 10 Volts - this is what is required;
- Disconnect the charger from the battery and leave it in this state for 24 hours;
- Next, reconnect the charging station to the battery, but this time set the current to 2-2.5 Amperes. Again we leave the battery to charge for 8-9 hours;
- After this, you will notice that its voltage has increased to a level of about 12.8 Volts, and the density has increased to values of 1.11-1.13 g/cm 3 ;
- As you can see, the desulfation process has begun. To continue it, you need to apply a small discharge current to the battery. To do this, it is best to use a car's high beam lamp, or something similar in load. Leave the battery with the load connected for 8-9 hours. It is advisable to constantly monitor the result so that the voltage does not drop below 9 Volts, while the density remains at the same level;
- After this, we charge the battery again for 8 hours using a charging station with a current of about 0.8-1 Ampere. Then again we leave it standing without a connected charger and load for 24 hours, and then we charge it with a current of 2-2.5 Amps to again increase the battery voltage to a level of 12.7-12.8 Volts. After the second cycle, you will notice that the density has increased to 1.15-1.17 g/cm 3 . Next we load the battery again.
Similar procedures should be carried out until the battery density approaches the ideal - 1.27 g/cm 3 . Such work will allow you to clean the battery plates by 80-90%. Please note that depending on the complexity of the situation, work may take up to two weeks.
Read also: How to glue metal to metal tightly
DIY crafts for car enthusiasts
Hello everyone, you have been asking for a long time to write an article about a device for restoring car lead-acid batteries. Probably any car enthusiast has encountered the phenomenon when a battery, after lying idle for some time, ceases to provide its rated capacity.
The starter turns for half a second, then chokes, but the voltage on it is normal - 12 volts, in this case people often say “the battery does not hold current”, anyone can encounter this.
But why is this happening?
A car battery consists of lead plates in an electrolyte solution, in this case the electrolyte is sulfuric acid. The process of charging and discharging a battery is nothing more than an oxidation-reduction process.
A chemical reaction occurs during which the lead plate reacts with oxides on the adjacent plate.
During this reaction, sulfates are formed, which over time become overgrown with the plates; sulfates prevent the flow of current, since they are a poor conductor and over time the battery loses capacity and is not able to supply a large current for the starter to operate.
If your battery charges and discharges faster than before, without any mechanical damage, most likely sulfation has killed it, but don’t despair, read the article to the end...
The proposed device, from now on - a “desulfator” creates short pulses of high amplitude and purity, the pulse lasts a certain time, then a simple one, then a pulse again.
Such impact processes can destroy the sulfate film, and in theory this is possible; in practice, not all batteries can be restored due to the design features of the latter. But judging by statistics, about 80-85% of old batteries can be restored. Naturally, if the cause of inoperability is sulfation, and not breakage of lead plates or other mechanical damage.
This is what the device will look like...
How to use the device? This option is a charger-desulfation device, a conventional desulfator is powered by a battery, which it desulfates and gradually discharges, while in this case the device charges the battery with short bursts of high-frequency high voltage.
The circuit can also be used to charge low-voltage lead-acid batteries with a nominal voltage of 4-6 volts; these are used in Chinese lanterns, children's electric cars, and so on...
The circuit was originally created for charging low-capacity batteries, but it is also successfully used to desulfate car batteries.
Before you begin the desulfation charging process, you need to lightly charge your car battery. First you need to find any power source or charger with a voltage of 8 to 12 volts and connect it to the desulfator input.
But not directly, but through a 12-volt incandescent lamp with a power of 21 watts, so as not to exceed the charge current.
A battery is connected to the output of the device, which needs to be restored, and that’s basically it.
Since the device operates in the audio range, you will most likely hear a faint whistle; the power components of the circuit should heat up slightly.
Using an oscilloscope, you can verify that the battery is being charged by high-frequency current pulses.
The device circuit is quite simple...
In simple words I will explain how the circuit works.
The charger voltage is fed through a fuse and diode to the desulfator circuit, for the low-power part of the circuit, power is supplied through the current-limiting resistor R1, then smoothed by a small electrolytic capacitor.
The NE555 chip contains a rectangular pulse generator, the frequency of these pulses is about 1 kilohertz, the duty cycle is 90%, that is, the high-level signal lasts most of the time, it is this pulse that we need in order to open the field-effect transistor.
But the problem is that when such a pulse is applied to a field-effect transistor, it will be in the open state most of the time and only 10% in the closed state, this will lead to the fact that the transistor will pump too much current and, as a result, we will get strong heating of all power elements and high current consumption of the entire circuit as a whole.
This is ineffective and can damage the battery. One option is to reduce the duration of the high-level signal, then the transistor will be open for a short time and everything will fall into place.
But unfortunately, in such a connection, the design features of the NE555 timer do not allow this to be done, so what to do?
The CD4049 microcircuit is a logic that contains 6 “not” logical inverters
Each inverter has one input and one output, their task is “negation”. If a high level arrives at the input, we get the opposite at the output, in other words, an inverted or inverted signal.
The field-effect transistor is open 10% of the time, closed 90%, when opening it closes the inductor to the power ground, some let's call it energy accumulates in the inductor, and when the transistor is closed the circuit breaks and due to the phenomenon of self-induction, which is characteristic of inductive loads, the inductor releases the accumulated energy .
This is a short-term voltage surge with a high amplitude, and the self-induction voltage is several times higher than the supply voltage; this voltage surge is rectified and supplied to the battery.
The process occurs more than a thousand times per second, that is, short-term high-voltage pulses with high frequency are applied to the battery, which is what destroys the sulfate film.
I connected a storage capacitor to the input of the circuit and it became clear that the amplitude value of the output voltage when powered from a 12 volt source reaches 70-75 volts and depends solely on the inductance of the storage choke.
The circuit involves a fuse and another rectifier diode.
The fuse protects the desulfator in case of accidental short circuits at the output,
and the diode performs several functions: firstly, it protects the circuit if you accidentally connect it to the charger incorrectly... and secondly, it protects the charger from all kinds of impulse noise and voltage surges that form on the desulfator board.
I think everyone understands how it works.
About the components...
Well, I think everything is clear with the timer and logic, in my case they are installed on a socket for solderless installation, but I advise you to solder them directly after checking the circuit.
Field effect transistor IRF3205 or any other n-channel with a voltage from 60 to 200 volts and a current of 30 amperes.
I advise you to install the transistor on a small radiator.
The inductor has an inductance of about 200 microhenry,
wound on a ring of powdered iron, such rings can be found in computer power supplies, the dimensions of the ring are outer diameter 20.5mm, inner diameter 12mm and ring width 6.6mm.
The winding is wound with 1mm wire, the number of turns is 60,
in my case, the wire was a little short and the inductance turned out to be slightly less, but the device works well. The dimensions of the ring are not particularly critical,
The main thing is to observe the inductance and wind the winding with a wire of 1 -1.2 millimeters.
Capacitor C1 is 100-220 microfarads, it is very advisable to take it with low internal resistance, since the generator circuit is actually powered by this capacitor, which means it will constantly accumulate and release energy, even warming up slightly during operation.
Both diodes need to be taken with a current of 5-10 amperes, you can use regular ones, but it is advisable to take pulsed diodes.
Here is the printed circuit board, you can download it at the end of the article.
On the charger itself, you need to set the current to no more than 2 amperes, otherwise the fuse on the desulfator board will blow. Someone will say that 2 amperes of charging current is not enough?
-Yes, I agree, but don’t forget that we are mostly dealing with desulfation rather than exercise.
When idle, the device consumes a current of only 100 milliamps from the power source; it can be connected to any charger with a voltage of 12-15 volts, limit the current to 2 amperes, and that’s it.
The limitation can be made with a powerful resistor or an incandescent light bulb of appropriate power connected to the power supply positive gap.
Enter your email and receive emails with new crafts.
You can also use lower voltage power supplies with a voltage of 8-10 volts, since our circuit still increases the initial power to several tens of volts.
How long should the desulfation process take?
The author of this scheme says that within two weeks of regular charging it is possible to completely restore the old battery, and of course, without testing, I would not write this article.
I have several 6 volt 10 amp/hour batteries that have not been used for several years, over the course of five days I regularly charged one of these batteries with a desulfator, then discharged it.
At the very beginning, the experimental battery gave a capacity of only 700-800 milliamps/hours; filling with distilled water did not help, but the desulfator helped..
After 5 days, the battery delivers as much as 4 amperes out of 10, which I think is a very good indicator.
Archive for the article; board in .lay format
Author; AKA KASYAN
Popular;
- How to restore a car battery with your own hands?
- Do you need to wash your car battery?
- What needs to be done to ensure that the battery lasts a long time?
- Charger circuit for battery recovery with reverse current
Installing an additional battery in the trunk with your own hands.- What to do to make your car battery last long
- Automatic battery disconnection or charger attachment
- How to charge a car battery from a laptop power supply, diagram
Other methods for desulfating plates
Plates can be desulfated not only using charging stations; there are other methods that are much less effective and less safe. You can resort to them in extreme cases, so knowing them is simply useful:
- Mechanical cleaning of plates. An extremely complex method that requires special skills. It consists of cutting the battery case and removing the plates from it. After this, the packages with the plates are disassembled, and the accumulated white deposits are removed from them. As a result of this, in theory, the working plane of the battery increases. Next, all that remains is to put the battery back together, fill in the electrolyte and charge the battery;
- Use sodium sulfate elimination solution. Almost any chemical compound undergoes dissolution, and sodium sulfate is no exception. Accordingly, to get rid of sodium sulfate stuck to the plates, you can use a special solution that will dissolve it. Trilon B is suitable as such a solution.
Both methods discussed above can lead to permanent damage to the battery. If you want to carry out high-quality desulfation of the battery plates, you should resort to the method of charging and discharging the battery using chargers.
A fully charged car battery refuses to start the engine? For most motorists, this may be a reason to purchase a new battery. However, the problem may not be a serious breakdown, but sulfation.
Covering the plates with a coating of lead salts and thus reducing its capacity does not make it possible to extract sufficient current for ignition. “Treatment” of the unit is carried out using desulfation - loosening the plaque on the gratings and returning lead atoms to the plates. This process can be carried out using several techniques: chemical, mechanical, electrochemical.
How the device works
All of the above devices, combined into one device, form an electric desulfator. The diagram not only demonstrates its main components, but also allows you to understand the principle of operation. It consists of several stages:
- The transistor opens.
- Electric current begins to flow through inductance L1. Energy accumulates in its magnetic field.
- A high voltage pulse occurs. According to the poles, it is supplied to the battery and the common wire of the device. Capacitors are used during the transmission process. With proper quality capacitors and their series connection, the maximum current value in a pulse can reach up to 10 A (the amount of current consumed by the battery will be within the limit of only 50 mA).
During the cleaning process, the frequency with which the pulses will follow can be adjusted, and their greatest amplitude can be determined. The generator frequency settings must be such that ion recombination is completed before the start of the next pulse.
To use a desulfator to improve the operation of a faulty battery,
both devices need to be connected to each other , using short-length wires with a cross-section of 2.5 to 4 mm².
At a minimum battery charge level, parallel connection of the desulfator and the charger to the battery using a decoupling resistor is allowed. An incandescent lamp having the required voltage can serve as such a resistor. When the device is connected to the battery, the progress of its operation can be monitored using an oscilloscope or an AC voltmeter. It will show sharp voltage peaks. A reading of about 30 V will indicate strong sulfation of the battery. As soon as it drops to several millivolts, this will mean that the sediment has been broken down and the battery has been restored and is suitable for use. The duration of desulfation directly depends on the battery capacity.
Sulfation - what is it?
The operating principle of the battery is based on the energy of the chemical interaction of lead and acid. The lead grid acts as electrodes. Concentrated sulfuric acid is poured in as an electrolyte, which at the first moment forms salts with calcium or lead and envelops the working surface of the grate with a thin film of this substance.
In essence, sulfation of battery plates is the process of deposition of lead sulfate salts on the electrode plates
During normal battery operation, this is a natural process where the electrolyte transfers charge to the plate as a result of a chemical reaction to form metal salts. On one of the electrodes, small damage forms at the site of atoms “torn out” from the surface, and on the other, salts of the element accumulate.
The desulfation process allows you to break up the salt compounds and return the electrolyte composition to its original form, and the lost metal atoms are returned to the electrode.
Desulfation is the removal of sulfuric acid salts from the battery plates
It should be understood that it will not be possible to completely return all the formed compounds to their original form. With proper care and timely charging, such batteries will last for several more years, but at the same time the electrodes become loose and dotted with salt crystals, which no longer break down during desulfation.
Brief video description of the sulfation process:
A decrease in charge occurs due to a large accumulation of crystallized calcium or lead salts on the electrodes, which prevents the penetration of the electrolyte plate to the surface. A lower concentration of charged ions in the electrolyte leads to a decrease in the battery capacity to a critical level, which does not allow the car to receive the charge required for ignition.
This condition of the battery should be dealt with in several ways: chemical, mechanical, electrochemical. All of them have varying degrees of efficiency and are selected depending on the type of battery, state of wear, and other parameters.
How it works
There's really nothing complicated about using a DIY 555 battery desulfator.
Having roughly understood what the NE 555 desulfator circuit is and how it is connected to the battery, it will not be superfluous to understand the principle of operation.
All of the above components are combined into one device. The output is a complete electrodesulfator. Using a desulfator, the battery is cleaned of deposits that have formed. The 555 circuit plays a huge role in the operation of the device.
If we talk about how the circuit works, then here we can indicate the following operating features:
- the transistor opens;
- electric current flows through one of the chokes;
- energy gradually accumulates in the magnetic field;
- a pulse with high voltage readings appears;
- Along the battery poles, this impulse is supplied to the battery;
- when transmitting pulses, capacitors come into operation;
- depending on the quality of the capacitors and when they are connected in series, the maximum pulse current can be up to 10 Amperes;
- At the same time, the current that the battery will consume will be only 50 mA.
When cleaning, you can adjust the frequency of passing pulses and determine the largest amplitude values. The frequency of the generator must be adjusted so that the process of ion recombination can be completed before the next pulse is applied.
Main features
The most obvious sign that the battery is not delivering the required current due to sulfation is the formation of a gray solid coating on the plates. It is not always possible to consider it due to the characteristics of the battery. For serviceable batteries that are equipped with a removable cover, it is possible to open the device and look into it.
In another version of the battery, if it is completely sealed, such an operation requires cutting the battery, which is unsafe for humans.
Signs of battery sulfation:
- A fully charged battery is unable to start a vehicle's engine.
- Battery capacity has decreased
- Electrolyte density indicators indicate a decrease in the nominal value
- Device cans boil quickly during charging
- The battery charges or discharges unnaturally quickly
To increase the service life of the battery and return to working condition, it is necessary to properly desulfate the device.
How to eliminate plate sulfation
Desulfation refers to the effect on electrodes and plates in various ways that help eliminate the resulting deposits of calcium or lead salts. There are different types of cleaning: mechanical, chemical or using inorganic additives, electrochemical using a charger.
The simplest and fastest method of desulfation is considered to be mechanical cleaning of the plates from the formed salt crystals. Older or serviced batteries allow you to remove the cover and gain access to the plates and electrodes.
These components are removed from the battery manually and cleaned in the same way - the plaque is simply scraped off from the surface and crevices until completely eliminated as far as possible. Modern units are often produced as maintenance-free models. This makes it impossible to get to the jars with electrodes to remove and clean them.
To clean the plates of a dead battery using this method, you need to perform a number of operations:
- Remove or cut off the upper part of the housing for batteries to be serviced.
- Clean each of the plates by hand , carefully so as not to damage the structure of the electrodes;
- Place the cleaned plates in their place in the containers, maintaining the required gap between each;
- Make the case airtight , solder the removed lid;
- Fill the jars with electrolyte of the required density;
- Check the performance of the battery, “adjust” the density of the liquid to the same level in all banks, not allowing a difference of more than 0.01 kg/cubic meter. cm and the electrolyte concentration is not lower than 1.25, but not higher than 1.31 kg/cu. cm.
This method is not applicable for EFB batteries, since each group of electrodes is separately sealed in a separator designed to prevent the plates from shedding.
In this design, the density of the electrolyte in the jar and the package itself (separator) differs, which will damage the device if the integrity is damaged. This factor prevents mechanical desulfation.
Chemical additives
The essence of the process is the introduction into the cavity of the jars with electrolyte of special additives with a chemical composition that affects calcium or lead sulfates. During charging, solutions with additives slow down the formation of salt deposits on the electrodes, which returns the battery to almost nominal charge.
Most often they choose Trilon-B , however, this solution does not work equally effectively on all batteries. The reaction depends on the design features of the battery, model and technical parameters. There is a 50/50 chance that the chemical desulfation method will work.
Important! In many batteries, manufacturers coat the plates with a paste containing lead oxides to increase battery performance and service life. When using additives, such a layer quickly dissolves and chemical “reanimation” of the device leads to its death.
The composition of "Trilon-B" includes 5% ammonia, 2% acid organic derivative of sodium salt, distillate. These components are inert to lead, but react well with deposits on the electrodes. In industry, such a solution is used to convert insoluble salts into soluble ones.
Procedure for chemical desulfation:
- In accordance with the above proportions, a Trilon-B solution is prepared
- The battery is fully charged
- The battery cans are washed with distillate 2-3 times.
- The solution must spend at least an hour in the cavity of the cans so that the chemical reactions are completed and gases stop being released.
- The inactive solution is drained upon completion of the reactions (pumped out without turning the device over)
- Rinse the inside of the jars 1-2 times with distilled water.
- New electrolyte, density 1.25-1.27 kg/cubic. cm, is poured into each jar, its density is checked and adjusted to one value with a spacing of no more than 0.01 kg/cu. cm for each container
- The battery is fully charged, the fluid concentration is adjusted
Read also: Why does an energy-saving light bulb stay on after being turned off?
Electrochemical method
The most productive method of desulfation is considered to be electrochemical, which is carried out with a special charger.
The essence of electrical desulfation is to pass a current through the electrolyte with higher rates than the nominal values of the battery. This leads to natural dissolution of accumulations of lead or calcium salts in the liquid surrounding the plate and dissolution in it, increasing the density of the electrolyte. This brings the battery performance back to normal.
Restoration with a simple charger, do it yourself
You can desulfate the battery yourself using a special or standard charger.
A conventional charger can be automatic with the ability to regulate the current and voltage supplied to the terminals and the “Desulfation” mode, or simplified with the need to control the process. The most convenient option is an automatic pulse charger with a desulfation mode.
Charging steps with an automatic charger with desulfation mode include the following steps:
- The negative and positive terminals of the automatic device are connected to the corresponding poles of the battery;
- The required voltage and current strength are adjusted, and the “Desulfation” mode is turned on;
- Equipment is connected to the network;
- The battery begins to charge, the plate renewal process occurs at the negative terminal;
- At the end of the charging process, until its capacity and electrolyte density are completely restored, the power supply is disconnected and the battery terminals of the automatic device are removed.
Process time depends on many factors:
- Degree of battery discharge;
- Equipment containers;
- Level of sulfation of electrodes.
To calculate the average charging time, divide the battery capacity by the average charging current. Most often, it takes from 15 hours to 3 days to completely restore the equipment.
Instructions for charging the battery with a conventional charger
For this type of battery charging by electrochemical method, it is necessary to regularly monitor the process and constantly intervene in it. For reliability and accuracy of charging, the instructions are developed for a battery with an electrolyte density of 1.07 g/cubic meter. cm and a voltage of 8 V at the equipment terminals. Without receiving voltage, this device begins to boil after 15 minutes during typical charging.
To desulfate, do the following:
- Provide a room with good air circulation for charging the device;
- Check the level of electrolyte in the battery jars and replenish it, if necessary, with distilled water;
Important! It is prohibited to dilute with concentrate or electrolyte of any density before charging!
- Connect the battery to the charger;
- Set the current to 0.8-1 A and voltage 13.9-14.3 V for about 8-9 hours. These manipulations will allow you to increase the voltage at the battery terminals to 10 V, leaving the electrolyte density level unchanged;
- Disconnect the battery from the charger and keep it in this state for about a day;
- The battery is reconnected to the charger with new current parameters: power 2-2.5 A and voltage 13.9-14.3 V for 8-9 hours;
- After recharging, the battery parameters will change: the electrolyte density will increase to 1.12 g/cc. cm, and the voltage at the terminals will rise to 12.8 V;
- This indicates the beginning of desulfation. For the next step, you need to discharge the battery to 9 V by connecting to the terminals of an active resistance - a lamp or headlight. The average time for a discharge is 8-9 hours. The density of the electrolytic liquid will remain at 1.12 g/cc. cm;
It is necessary to control the battery discharge process, since the final voltage must remain at least 9 V.
A subsequent pair of charging and discharging the battery according to the above scenario will increase the electrolyte level to 1.16 g/cc. cm. It is necessary to repeat the cycle until the density reaches 1.26 g/cubic meter. cm or will not come close to the nominal 1.27 g/cc. cm.
Important! The duration of battery desulfation work using a conventional charger, depending on the condition of the battery and the complexity of the process, can take up to 2 weeks.
As practice shows, such manipulations renew the battery by 80-90%.
Video
You may find it helpful to watch the video provided on battery desulfation.
Homemade products from a washing machine engine:
1. How to connect a motor from an old washing machine through a capacitor or without it 2. Homemade emery from a washing machine engine 3. Homemade generator from a washing machine engine 4. Connecting and adjusting the speed of a commutator motor from an automatic washing machine 5. Potter's wheel from a washing machine machines 6. Lathe from an automatic washing machine 7. Wood splitter with an engine from a washing machine 8. Homemade concrete mixer
Desulfator or do-it-yourself dedivan charging
Our task is to obtain a long-lasting chemical battery from a battery. (c) dedivan
Where to begin? I'll start with trance. Everything in order - Take a ferrite ring K28x15x9. This is the most popular size. I warn you right away - Chinese yellow rings will not work from the power supply - they are not ferrite. The permeability can be from 600 to 3000. This is because we will not drive it through a full magnetization loop, to save losses in the core. Therefore, he has a reserve. First of all, we make a gap. A 0.4 mm thick diamond cutting wheel produces a gap of about 0.5 mm. Well, it’s like someone’s hands are shaking.
Secondly, we wind the windings. The first thing is isolation, for my grandfather this is sacred - never dangle on a bare ring. The varnish on the wire will be scratched, the voltage on our turns is up to 500 volts, it will break out sometime, usually at the most crucial moment. We take a 0.8 wire - we calculate that 60 turns should be removed along the inner circumference, turn to turn. We start to shake - here’s where my grandfather’s fingers cramp - there’s no longer the tension that was before. Only 56 were removed. But the trance has a reserve. And then the secondary winding - there should be 10 times fewer turns, only 6, but we wind it in several wires. It’s easier to wind this way - the wire is softer than one thick one, and the connection between the winding and the core is better. We also select the wire based on the condition of filling the inner circumference of the ring. Turn to turn in one layer. I got 4. Then we solder them in parallel on the board.
Well, now... let's connect this trans to the circuit. Our key is a field-effect transistor for a current of more than one ampere and a voltage of more than 400 volts. We apply a pulse of 50 μs more than +5 volts to the input. During this time, the current in the primary increases to approximately 1 ampere. When the key is opened, the energy of the magnetic field seeks an outlet - and finds it through the secondary winding and diode into the battery. The voltage in the secondary jumps to 20 volts. But according to all transformer rules, the current in the secondary is 10 times greater than in the primary. At the same time, it is clear that in the primary there will be 200V, and taking into account emissions from parasitic inductances, up to 400. That is why the field switch should be installed like IRF 740,840, etc. Well, don’t touch it with your hands - inductance is simple - it doesn’t care what your body resistance is - the current will always provide 1 ampere. So the comb may fly off. There are practically no diagrams - just installation rules. The power and ground wires are separated because a strong short pulse runs in the secondary wires and even on a few centimeters of straight wire a large emf occurs. The battery also shows a surge in voltage - up to 5 volts, depending on how bad the battery is. Therefore, we also install filters everywhere, both to power the circuit and the load.
The circuit works like this: we accumulate energy for 50 microseconds, then we give it back to the battery for 5 microseconds, and we wait 500 microseconds for the battery to digest it so that it can be absorbed. You can send impulses less often. In a practical scheme, this is exactly what needs to be regulated. If the voltage on the battery increases, and we do not have time to consume all the energy, then we need to slow down.
This is a simple pulse generator for pumping. It gives a 50 µs pulse every 500 µs.
50 μs is a plus, after which there is a pause of 500 μs. 50 μs - the key is open - we are saving energy. At this time, on the secondary side there is a minus - nothing goes into the account. And only after the switch is closed, an emf pulse occurs. 5 microseconds - we give it back. And 500 microseconds - we wait for digestion. Well, or 495, to be precise.
How to make your own desulfator
A desulfator is a device capable of autonomously cleaning the battery without the need to remove it from the vehicle.
The process will require removing at least one terminal connecting the battery to the car. This is done in order to protect the machine’s electronics from possible loads. In addition to cleaning the electrodes from salt deposits using a desulfator, you can perform regular maintenance on the working battery, which can significantly extend its service life.
The operating principle of the equipment is based on receiving power from the battery and generating high-frequency short-term pulses in this circuit. When resonance occurs in lead atoms and lead salt molecules, reverse sulfation of the plates is initiated. This process restores the resistance and capacity of the battery to its original values.
The main disadvantages of the “miracle equipment” are the long desulfation period - in rare cases it reaches a month or at least a day, as well as the inability to restore approximately 10% - 15% of the batteries with it.
A simple low-power desulfator circuit is popularly called a blinker. Most often, such a device can effectively help restore the battery.
To make it you will need:
- Turning relays , imported ones with a voltage of 12V and a power of 21 W are better suited. To increase the working time, it is worth replacing the capacitor in the device with an analogue of a larger capacity. Suitable for 100 uF for relay operation for 3-4 s
- The relay is 5-pin with normally closed contacts (contacts 3 and 4 are closed, contacts 1 and 2 are control). Instead of an imported one, a domestic relay from a Soviet VAZ is suitable
- Load resistors or light bulbs
- Soldering iron and connecting wires
A basic diagram is drawn up with the main points:
- The negative terminal of the battery is connected to the output of the same charge of the device;
- A rotary and 5-channel relay is connected to the “-” output on the battery with the corresponding charge outputs;
- The output of a 5-channel relay of a similar charge is connected to the charging equipment at “+”;
- The turn relay and the 5-channel relay are connected to each other, as well as the output of both relays with the “+” terminal of the battery;
- The turn relay is loaded with a light bulb or an active resistor;
- It is advisable to monitor the assembly and check the functionality of the device by connecting an ammeter and voltmeter to the circuit between the device and the battery.
A textolite plate is used for the base for fastening all elements. There is a possibility of the rotary relay breaking due to the closed state of outputs 3 and 4. This will prevent the battery from being discharged.
Benefits of desulfation
A completely different technique - desulfation - allows you to cleanse faster, safer and more effectively. It consists of using short, high-amplitude pulses. A device that promotes the destruction of sparingly soluble sulfate sediment is called a desulfator. On the 555th diagram you can see its main components:
- Generator (DA1). In a certain sequence, it sets short pulses, the frequency of which falls within the range from 1 to 3 kHz.
- Resistors (R2 and R3). Adjust the oscillation frequency and pulse duration accordingly.
- Field effect transistor (VT1). It works using logic levels and has a voltage of 1.5 V.
- Inverting Schmitt trigger (DA2). Ensures the functioning of the field effect transistor. The trigger is characterized by a voltage lag of 1/3 and 2/3 of the supply voltage.
- Diode (VD1). It protects the transistor from the action of high-voltage pulses and keeps them at a level of 30 V. An analogue of such a diode can be a zener diode of type D816 V, G-D817A. It is complemented by a high-speed diode (VD2).
- Chokes (L1, L2).
We recommend: Tenax battery - a modern battery at an affordable price
Connecting a transistor to the trigger pin allows you to connect the gate to the common wire directly, maintaining a low output level, and making the operation process more stable.