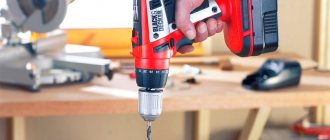
Every master encounters the problem of reduced tool performance, or complete failure due to the battery. Manufacturers use batteries made from nickel-cadmium batteries in 12, 14, 18-volt screwdrivers. The sequential assembly of several elements creates the required voltage. Replacing nickel-cadmium batteries with lithium ones increases battery life by making the design lighter. Mandatory installation of a BMS board adds reliability. Therefore, converting the screwdriver to lithium batteries, mainly to the 18650 form factor, is justified.
The meaning and procedure for converting screwdrivers to lithium batteries
Why do nickel-cadmium batteries fail quickly? In a garland of cans connected in series, each one is special. The chemical process is individual, the charge in closed systems is different. If there is a malfunction in one bank, the design does not provide the required voltage. A charge control and balancing system is not provided in individual components.
- Each Ni-Cd bank provides 1.2 V, and li-ion 18650 - 3.6 V.
- The capacity of a lithium battery is 2 times larger than a nickel-cadmium battery, which is similar in size.
- An overheated li-ion battery threatens to explode and catch fire, so installing charge uniformity control in the banks is mandatory. BMS is not installed in nickel-cadmium batteries - the manufacturer is not interested.
- Lithium cells do not have a memory effect, unlike Ni-Cd, they can be charged at any time and within an hour.
- The screwdriver becomes much lighter after converting the battery to li-ion, using 18650 cans.
There are only two obstacles to converting a screwdriver for lithium batteries - it is impossible to work with it at minus. The capacity of the cans decreases, starting from a decrease already from +10 0 C. Lithium batteries are expensive.
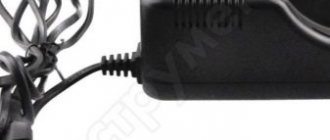
Knowing what input voltage is required for the screwdriver, the charger is redesigned, taking into account the placement of lithium battery cans and control elements in the factory container. You can do the same with a flashlight by upgrading the socket for a block of 18650 elements.
Let's say you need to rework a 12 V screwdriver using Ni-Cd cans on li-ion. If you use 3 banks, the output voltage is not enough: 3.6 x 3 = 10.8 V. With 4 components, the power of the device will be higher: 3.6 x 4 = 14.4 V. At the same time, the tool will become 182 g lighter , its power and capacity will increase slightly - all pluses. But when dismantling it is necessary to leave the terminals and the original temperature sensor.
What you need to know before remodeling
Before converting a screwdriver to lithium ion, you need to know exactly the voltage produced by the old unit. These indicators are indicated on a sticker affixed to the battery. In the absence of information, the battery is disassembled, the voltage value is determined by the number of installed elements.
Li-ion batteries have the following positive properties :
- low self-discharge;
- high specific capacity;
- no memory effect.
They also have their own characteristics. They cannot be heated above 45 degrees , they are afraid of temperature changes, deep discharge, and overcharging. The capacity of appliances decreases in the cold. Once the nickel-cadmium batteries are replaced with lithium-ion ones, you don’t have to wait for the battery to run out, but charge it at any time.
You cannot use different types of batteries, as well as old ones from a laptop. In the assembly, all batteries must have the smallest range of capacity and characteristics . The latter must be compared with the values of the indicated voltage and discharge current. For example, to assemble a 14-volt battery power supply, you need to install a controller with a similar voltage level, and be sure to install a protective board. Otherwise, the lithium-ion cell will overheat during operation and a fire will occur.
1 Li-ion battery completely replaces 3 nickel-cadmium batteries.
Conversion of a screwdriver to lithium batteries 18650 14 V
When converting screwdrivers of different power and flashlights from Ni-Cd to Li-ion, 18650 form factor batteries are more often used. They easily fit into a container or socket, since instead of two or three original ones they install one lithium one. The modification of the screwdriver battery should be carried out taking into account the features of 18650 lithium batteries.
This type of energy source does not tolerate deep discharge and excessive charge. This means that it is necessary to use voltage control boards. Since each battery has its own character, their charge is adjusted by a balancer. The point of converting a screwdriver with a voltage of 14.4 V is to create a device using lithium batteries to make a hand tool lighter and improve its performance. 18650 lithium batteries are most suitable for these purposes.
When selecting components, it should be taken into account that the starting current of the screwdriver is high; you must select the appropriate BMS for the required number of cans and at least 30 A. To convert the charging of the screwdriver to a lithium battery, you need to stock up on a good soldering iron, non-acid flux and thick wires for making jumpers.
Equipment:
- Lithium-ion cans in the amount of 4 pcs.
- Li-ion battery controller for 4 banks, CF-4S30A-A fits well. It has a built-in balancer that controls the charge of each element.
- Hot melt adhesive, TAGS soldering flux, solder.
- Heat-resistant tape;
- Connecting jumpers or thick insulated wire with a cross-section of at least 0.75 square, cut for bridges.
The procedure for converting a screwdriver for 18650:
- Disassemble the case and remove a bundle of 12 Ni-Cd elements from the container.
- Remove the garland, leaving the connector with the “+” and “-” terminals. Instead of a temperature sensor, a thermocouple from the controller will be installed.
- Solder the assembly, taking into account that you cannot use acid, only neutral flux and clean solder. During the connection period, the lids must not be heated. Work precisely.
- Connect balancing points to the controller according to the diagram. There are connectors on the board.
- Connect the assembly to the plus and minus terminals.
- Check the functionality of the circuit. If everything works, place the assembled battery, place the controller in the socket, and secure it with sealant.
If the memory is not universal, additional rework will be required. 12 V screwdrivers with a universal charger are assembled in the same way, but a protective circuit for connecting 3x18650 3.7 V to lithium batteries is used. A screwdriver is converted in the same way using a 18650 battery kit consisting of 2 elements.
Instructions for setting up the memory
- We connect to a power supply whose voltage is at least 1 V higher than the battery assembly can provide. For example, to assemble from 6xLi-Ion you need a power supply with an output of 26.2V. The output current of the power supply depends on the battery charging current.
- At XX we set the desired output voltage corresponding to the maximum battery voltage in a charged state. In my case - 25.2 V.
- We connect the battery to the charger, and place a current meter in the gap between them - set the required charge current. I set 1 A for a battery with a capacity of 2800 mAh.
- When the charging current decreases to 0.1 x Charge current, turn the middle multi-turn until the blue LED lights up - “charging is complete.”
Everything corresponds to the clumsy description)). Works great. I will use a converted screwdriver to charge. It reached Samara in 25 days. For those who cannot understand the operation of LEDs, I found an excellent description:
The top one lights up while the converter is capable of delivering the set current to the load (if used as a charger, this is an indicator of the CC phase; as soon as it goes out, the CV phase has started) the middle LED lights up until the current in the load drops to 0.1 of the set value, then goes off - the charge is complete.
The value 0.1 is set by default; if desired, it can be adjusted either higher (charge faster, capacity less) or lower (charging time increases, battery is charged more fully) with the middle potentiometer. But the charge continues even after it is turned off, this is only an indicator that the battery is in principle charged and ready for use. The lower LED is simply an indicator of the converter's operation.
charge - this indicator lights up while the current in the output circuit is above the set value. This value is set relative to the maximum current. When setting a large maximum current (units of amperes), it may not be possible to set the indication to a small current (units and tens of milliamps).
Converting a Makita screwdriver to a lithium battery
There is a Makita screwdriver with a battery capacity of 1.3 A/h and a voltage of 9.6 V. To change the power source on it to lithium-ion, you will need 3 18650 components. The conversion will give the old tool new capabilities: it will increase the operating time on a single charge , will add power as the operating voltage rises to 10.8 V.
The design will require the use of a BMS, a control controller that maintains the operation of lithium cells within operating limits. With this breaker, the charging of each bank will be uniform without exceeding 4.2 V, the lower voltage is 2.7 V. A built-in balancer is used here.
The controller parameters must accompany the operation of the tool when the operating current increases to 10-20 A. A 30 A Sony VTC4 board, designed for a capacity of 2100 A/h, can ensure operation without shutdown. Of the 20 amperes, the Sanyo UR18650NSX is suitable, receiving energy 2600A/h. The board is needed for 3 elements, which is marked in the 3S classification. In this case, the board should have 2 contacts, plus and minus. If the terminals are designated with the letters “P-”, “P+”, “C-”, they are intended for later models of screwdrivers.
Step-by-step instructions for converting a Makita screwdriver to lithium batteries look like this.
- You can disassemble the battery with glue by tapping the joint while holding it with a soft-headed hammer. The direction of the blow is downward, into the joint along the lower part of the body.
- Take only the contact plates from the old assembly, carefully disconnecting them from the battery. The sensor and breaker must be left.
- Solder 3 elements in series using TAGS flux and insulated jumpers. The wire cross-section must be greater than 0.75 mm2.
- Assemble the circuit with the controller, and connect the power supply to the contact connectors with 1.5 square wires.
- Check the functionality of the circuit and reassemble the body, placing it back on the glue.
In a screwdriver with an old DC9710 charger, after the 18650 lithium battery has finished charging, the red LED on the panel will turn off. The charge level is monitored by a built-in controller.
The Makita DC1414 T charger is used to charge 7.2-14.4 V power supplies. While charging is in progress, the red light is on. But when charging a lithium battery, its voltage does not fit into the standards of salt products, and after 12 V the charger will start flashing red and green. But the necessary charging is already there. The screwdriver is ready for use.
Assembling the finished battery
First, they clean all parts of the case and think about where to place the new charging unit. The converted battery will be much smaller in size than the original one, so it must be well secured inside the case. If this is not done, then due to vibration during operation of the tool, the unit will fail after a short period of time. For fastening, you can use Moment glue or sealant . Wires are soldered to the assembled block. When working, follow the connection diagram. Wires with a cross section of 4 mm2 are soldered to the batteries. To prevent the parts from touching each other, use heat shrink tubing. The terminal block with soldered wires is installed in its original place. If there are no grooves for it in the housing, it needs to be secured. The assembly is connected to “plus” and “minus”.
Assembling the protective board involves connecting all parts of the battery pack. Be sure to check the reliability of the placement .
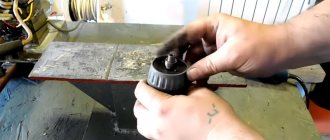
Battery cells can be connected in different ways
Converting a 12V Hitachi screwdriver to 18640 lithium batteries
Features of converting a 12 V Hitachi screwdriver to lithium batteries. The very compact battery cell socket is designed for finger-type cells. Therefore, you should prepare space for 18650 elements. It is necessary to cut one side of the partition in order to tightly place 1 element.
You need to get flux, flat metal connecting tape, hot glue. It is necessary to install lithium batteries in a screwdriver during remodeling through a protective controller. It should handle 3 18650 cells, 3.7V and rated at 20-30 amps.
Remove the old battery from the socket, carefully disconnect the contacts in the assembly with the temperature sensor and power indicator. Clear and sign contacts. They should be brought out in one direction, connected with solder to the leads from thick wires, and the assembly should be filled with hot glue.
Assemble an energy source with one of the controllers designed for 3 elements. Assemble a sequential circuit of 3 Li-ion elements. Connect the controller. The 12-volt lithium battery conversion is complete when the structure is installed in the block, secured, and the charging indicator lights up. After full charging, measurements show 12.17 volts in the external network. But this is enough for trouble-free long-term operation of the device.
Battery cell connection methods
The block that accumulates energy can be assembled in different ways. There are three types of assembly :
- soldering;
- spot welding;
- cassette.
You need to solder as quickly as possible, so you need a powerful soldering iron of about 100 W. Lithium batteries are afraid of overheating, so they should not be heated for a long time; high temperatures will cause damage. If you lack experience, you should resort to the services of a professional.
The technique of connecting elements into a block using spot welding is considered the best. A master who has a special welding machine can do the job better.
Special cassettes are considered not a very reliable method . The resulting contacts have significant contact resistance, which will quickly begin to deteriorate at high current.
The elements are connected in series, then the voltage is summed, but the capacitance value does not change. Batteries connected in series do not all fail at the same time, so in some cases, from two batteries of a screwdriver, you can restore one working battery by selecting serviceable ones. But we must keep in mind that it will not last long. Therefore, experts advise resorting to such repairs in rare cases.
Converting the Interskol screwdriver to 18650 lithium batteries
Sooner or later, the nickel-cadmium assembly of 15 cans fails. One or two elements have become lazy, and it is no longer possible to obtain output voltage. Modern Interskol DS with lithium batteries serve much better. Craftsmen have mastered converting a screwdriver to 18-volt lithium batteries.
You need to purchase a protection board for 5S, 3.7 V and 40-50 A. You will need a balancing board and the energy sources themselves - 5 lithium 18650 batteries, you can leave them with factory thermistors by lengthening the wires.
During installation, create a contact pad, insert the assembly, check functionality, and secure it. Assembly features and expert advice are given in detail in the video. Here is complete information about converting an 18-volt lithium screwdriver Converting a screwdriver to use lithium 18650 batteries
The process of dismantling the battery case
Before the screwdriver is converted to lithium batteries, it is disassembled. The tool body can be connected using :
- glue;
- locking rivet devices;
- screws.
The most difficult to remake is a model with a glued body. It is carefully disassembled along the joining seams, tapping it with a hammer with a soft plastic head. If you accidentally damage the halves of the box, it will be difficult to assemble, and in the future it will be problematic to work. The case is easily disassembled, connected by latches and self-tapping jumper screws .
Benefits of lithium-ion batteries
Nickel-cadmium batteries have a low price, withstand many charging cycles, and are not afraid of low temperatures. But the battery capacity will decrease if you charge it before it is completely discharged (memory effect).
Nickel-cadmium batteries
Lithium-ion batteries have the following advantages:
- high capacity, which will ensure longer operating time of the screwdriver;
- smaller size and weight;
- Retains charge well when not in use.
But a lithium battery for a screwdriver does not withstand full discharge well, so factory tools on such batteries are equipped with additional circuit boards that protect the battery from overheating, short circuit, and overcharging to avoid explosion or complete discharge. When the microcircuit is installed directly into the battery, the circuit opens if the unused battery is located separately from the tool.
Tips for choosing a security chip
The lithium-ion battery of the screwdriver will not be able to function properly without the BMS protection board. The copies sold have different parameters. The BMS 3S marking assumes, for example, that the board is designed for 3 elements.
BMS board
What you need to pay attention to in order to choose a suitable microcircuit:
- The presence of balancing to ensure uniform charge of the elements. If it is present, the description of the technical data should include the value of the balancing current;
- The maximum value of operating current that can be withstood for a long time. On average, you need to focus on 20-30 A. But this depends on the power of the screwdriver. Low-power ones need 20 A, high-power ones – from 30 A;
- Voltage at which the batteries are switched off when overcharging (about 4.3 V);
- The voltage at which the screwdriver turns off. This value must be selected based on the technical parameters of the battery cell (minimum voltage - about 2.6 V);
- Overload protection current;
- Resistance of transistor elements (select the minimum value).
Important! The magnitude of the trip current during overload is not very important. This value is adjusted to the operating load current. In case of short-term overloads, even if the tool has turned off, you must release the start button, and then you can continue to work.
Connection diagram of elements with a protective board
Whether the controller has an autostart function can be determined by the presence of the “Automatic recovery” entry in the technical data. If there is no such function, then in order to start the screwdriver again after the protection has tripped, you will need to remove the battery and connect it to the charger.