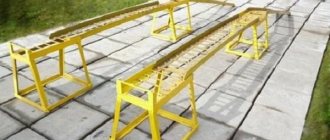
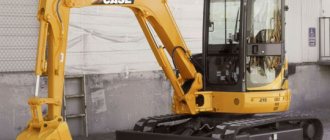
In any private household plot or peasant farm you can find various types of equipment that are used to facilitate labor and increase its productivity. Mini equipment for your own farmstead is used for cultivating land, caring for livestock and poultry. With its support, crops and fertilizers are transported.
Mini equipment for your personal yard
Mini and agricultural machinery for your personal farmstead
Not every farmer has enough financial resources to purchase equipment with more power. In a personal farmstead you have to make do with little effort. Correctly selected mini equipment is capable of performing a wide range of agricultural work. She may be:
- portable;
- pedestrian;
- sledding;
- stationary.
Portable equipment includes power tools that are held by hand, hung on the shoulders, or mounted on road wheels. The power of such structures does not exceed 3 kW. This amounts to approximately 4 hp.
Pedestrian equipment – walk-behind tractors, walk-behind cultivators, walk-behind mowers, walk-behind cultivators, etc. It is driven with the support of manual traction. The power of this type of equipment can reach 10 kW or approximately 13 hp.
Mini tractor BISON
The power of the driving equipment reaches 18 kW or 22 hp. This group includes mini tractors of traction class 0.2 and walk-behind tractors with a trailed trolley.
Stationary equipment – sprayers, pumping stations, etc. Design power up to 10 kW. This amounts to 13 hp.
Masterpieces of homemade equipment for your personal backyard
And if mini-equipment is made with your own hands for your personal yard and with soul, then the work proceeds twice as fast. In any case, I would like it to be so. He built a mini-excavator and dug up the entire field, built a dumper and transported the soil. But this, as you know, depends on the hands that made it. Let's see what masterpieces of homemade equipment for a personal farmstead can be made by craftsmen!
Read Catches fish, dances striptease and saves people. Meet the excavator
So, the first photo of homemade equipment. We talked about the thought... Forget it! Here she apparently left the master. To work on such a homemade mini-bulldozer, apparently, you need to jump into it with a running start. And calculate it so as to fit into the window. And if you are more than one meter tall, then you are not destined to ride this masterpiece!
Photo source: youtube.comHomemade mini bulldozer
A similar homemade “structure”. Here we see the tracks, the blade, everything is in order with the doors. In general, start and go. Have you dreamed of a red Ferrari? Look how this mini bulldozer winks at you, Ferrari is not standing next to you!
Photo source: pikabu.ru Homemade compact tracked bulldozer
Here's a homemade dumper. How do you like this option? The operator's seat is in place and the loading hopper is good. And a do-it-yourself dumper costs much less.
Photo source: cir-cus.ru Homemade dumper
This homemade specimen deserves all praise and approval. And what an arrow! A sight for sore eyes.
Photo source: efsim.ruHomemade excavator
Homemade mini tractor. The details were a bit lacking.
Photo source: wikied.ruHomemade mini-tractor
Read
Romance, extreme or performance: the hidden capabilities of the tap
When winter comes, owners begin to think about how to remove snow over a large area. Many continue to think this way until spring, and some take and make mini-equipment for their personal backyard with their own hands. For example, here is a homemade snow blower.
Photo source: autosam.expert-club.comHomemade snow blower
Here the issue of snow removal is resolved much more prosaically. The snow needs to be crushed. The most important thing in this process is to shout: “Spring, come, melt the snow!”
Photo source: yaplakal.comHomemade equipment
Look
All advertisements for the sale of mini equipment
Conceptually. Decoration for any garden! Depending on the mood, the exterior is selected. Do you want it with polka dots, or do you want it with stripes? If you want, into a rusty piece of metal.
Photo source: megapolis-sb.ruHomemade compact tractor
Did you think it would be easy to deal with such a brood? I wonder what this homemade mini-loader is more intended for: loading, feeding or scaring?
Photo source: nakladaceavant.czHomemade mini loader
Laugh. Of course, laugh! Like the forklift from our last shot. He lies and chuckles!
Photo source: doseng.org Homemade equipment in Russia is characterized by creativity
Mini tractors
The basis of the line of mini-tractors on the Russian market is represented by equipment from Belarusian, Chinese, and South Korean manufacturers. A small share of it consists of European, American and Japanese brands. The latest types of equipment have not gained widespread popularity among Russian farmers due to the complexity and high cost of maintenance.
Mini tractor
Domestic manufacturers are represented at the mini tractor market with equipment that consists of large-unit assembly products from popular brands. Russian farmers buy most mini-tractors made in China. Their build quality has improved significantly in recent years. A good technical base has been created for them in the country, on which repairs and maintenance are carried out.
Rules for choosing a mini tractor
When choosing any type of equipment, each buyer is guided by his financial capabilities. They determine the limit of possibility within which a suitable mini tractor is selected. There are a number of criteria that help you make the right choice. It is important to choose the best technology option for yourself and not overpay for it.
Minitractor with trailer MTZ Belarus 132N
Before purchasing a mini tractor, determine the list of jobs for which it is planned to be used. This helps determine the required power of the equipment. Budget mini-tractors with a power of 16-20 hp can handle the cultivation of small plots of land. Other parameters to consider when purchasing include:
- type and consumption of fuel;
- type of drive;
- speed of shaft turns.
Only all-wheel drive allows the mini-tractor to move freely across the fields. The heavier the equipment, the more stable it is. A test drive is a requirement for purchase. The equipment must be easy to operate. All modern models of mini-tractors have steering control. People who know how to drive cars master this technique without much difficulty.
Minitractor CENTAUR
Any mini tractor has special mounts for attachments. It is better to buy it complete with the main equipment. This will allow you to avoid future problems with docking different nodes. It is necessary to buy mini-tractors from trusted manufacturers.
How to choose a good mini tractor
Which mini tractor is better to buy: characteristics, capabilities
When purchasing a mini tractor, it will never be superfluous to consult a specialist or reviews from other buyers.
Table. The best-selling mini tractors in Russia
| Mini tractor model | Characteristics | Peculiarities |
| Uralets 220 | Diesel engine power 22 hp. Maximum speed 27.35 km/h. Fuel tank capacity 8 l. The transmission is rear-wheel drive. The turning radius of the front wheels is 3.9 m. The gearbox is 6 gears. The engine starts with the support of an electric starter. Weight without attachments 960 kg. | The mini tractor is assembled in Russia from non-original parts. This does not reduce the reliability of his work. |
| Dong Feng DF-240 | Diesel engine power 24 hp. Weight without attachments 1040 kg. The transmission is rear-wheel drive. The gearbox has 8 steps. The engine starts with electric starter support | Mini tractor without a closed cabin. Complete Chinese assembly. |
| PRORAB TY 220 | Fuel tank capacity 6 l. Diesel engine power 22 hp. The transmission is rear-wheel drive. Gearbox – 6 steps. | The mini tractor is assembled in Russia under a Chinese license. |
What is needed to make an all-terrain vehicle
When planning to make an all-terrain vehicle with your own hands, you need to make sure in advance that you have the materials, drawings, and the appropriate tools. For most connections, especially frames, it is recommended to use a welding machine to ensure long service life and high structural strength.
Materials
It can be convenient to use a walk-behind tractor as the basis for an all-terrain vehicle on low-pressure tires, which will significantly reduce costs and simplify the self-assembly process. You will need to find several elements at once, without which the construction of a karakat will be impossible:
- frame of suitable shape and size;
- rear axle, which will be used to mount the rear wheels;
- a seat for the driver, as well as means of protecting him from dirt and precipitation;
- lighting devices that will be required for driving at night.
This type of device is single-seater, but if desired, additional seats can be installed.
All-terrain vehicle from UAZ
You should also make sure that the engine power of the walk-behind tractor used as the basis for the vehicle is sufficient for the selected design. Universal options include walk-behind tractors Neva, MTZ, Ugra, as well as other domestic products with motor power greater than 10 hp.
It is also worth taking care of the cooling system in advance, since when driving at low speed the wind will not be able to lower the engine temperature to acceptable values.
Blueprints
Having studied the drawings of all-terrain vehicles on low-pressure tires, the master can make his own changes to the design of the future product, which will allow him to adapt it to solve specific problems or improve technical characteristics. An example would be a gearbox, which will improve torque performance.
Manufacturing procedure
When planning to assemble a homemade swamp vehicle, it is advisable to make sure that you have everything you need, and then follow the following instructions:
- Weld the frame using a metal profile of square/rectangular section.
- If desired, you can make a breakable frame, which will be the best option for traveling in areas with difficult terrain. To do this, you will need to use a kingpin, as well as independent suspension for the front and rear axles.
- Assemble the rear axle, for which you can use a similar part from an old car, for example Moskvich.
- Implement suspension using shock absorbers, connect the bridge to the frame using bolts.
- Install the walk-behind tractor on the frame.
- Place the seat.
- Attach frame protection made of metal or plastic.
- Install wheels, lighting fixtures.
Also, the design of the model may assume the presence of a braking system, which is important for vehicles moving at high speed. In this case, it will be most convenient to use an old motorcycle and install the brakes at the wheel installation stage.
Caracat frame
Motor cultivators and walk-behind tractors
Motor-cultivators and walk-behind tractors have a lot in common. Their main difference is power. For walk-behind tractors it is much higher. The equipment can operate on electricity and liquid fuel. Its main purpose is land cultivation. The favorites for trade in Russia are models from German manufacturers. Following them in this segment of agricultural machinery are Japanese and American brands.
Motor cultivator MKM-1-B6
Unlike mini tractors, walk-behind tractors and walk-behind cultivators have relatively light weight. When choosing equipment of this class, pay attention to the type of their engine. To process land plots sent from an electric power source, equipment that runs on gasoline or diesel fuel is suitable. You can cultivate the land near your house using a motorized cultivator and walk-behind tractors powered by electricity.
Motoblock Scout
When purchasing walk-behind tractors, you need to pay attention to their power and weight. Landing equipment is divided into 3 classes, each of which is designed for specific working conditions:
- Easy class. Includes walk-behind tractors weighing 50-70 kg. This type of equipment uses a narrow number of types of suspended equipment. It is used to loosen the top layers of soil in small areas of 20-25 acres.
- Middle class. The weight of walk-behind tractors in this group is 80-100 kg, power is 6-10 hp. They can be used to attach a plow, hiller, potato digger and other hanging equipment. The depth of soil cultivation is 15-20 cm. The recommended area for processing an agricultural plot is up to 50 acres.
- Hard class. The weight of such walk-behind tractors reaches 300 kg, power 6-12 hp. This technique is used for processing agricultural plots with an area of 2-3 hectares. It can be equipped with a large number of hanging equipment options, including snow removal.
Heavy class walk-behind tractor
Walk-behind tractor
Alexey Fedorov faced a similar problem when choosing a walk-behind tractor: in stores there is a wide choice of models, but there was no machine that could cope with processing a plot of 19 acres and at the same time fit into the allocated budget. As a result, the idea came to make the device himself, fortunately the familiar artist Mikhalych helped the owner with this: Alexey, as a technician, got to implement the idea and finalize the invention.
The engine for the walk-behind tractor was borrowed from the Ant T-200 scooter: adapting it to other tasks was not difficult. The frame was welded from sheet iron 4 mm thick and 40 mm pipes. The engine was rigidly attached to it on three supports. A magneto and carburetor were installed. From scrap materials and spare parts we made a muffler, an air filter and the upper part of the cover of the forced air cooling system for the engine.
The combine shared sprockets and shafts with flanges. Drive from the engine to the shafts is via a chain drive (two Izhevsk chains were used: one was thrown onto a large sprocket from the gearbox, and a drive to the shafts was made inside the frame). Alexey draws attention to this point. The optimal shaft rotation speed can be achieved by selecting gears, but everything is limited by the size of the lower frame housing, otherwise it will not allow it to simply go deep into the ground.
The craftsmen lubricated the internal chain with oil, providing for this purpose a filler and drain hole. The steering wheel was made from a pipe. It has several height positions and can be folded for transport. The gearbox has three gears, the first one is enough for work, otherwise you won’t be able to keep up with the car. Transmissions are switched off manually. Also made manual is the carburetor damper control drive, made using a grinder and welding from a pipe and rod. The forum member says that a decompressor handle from a motorcycle will also work, but the cable travel will be small.
Alexey attached a wheel to the walk-behind tractor. Its installation allows you to adjust the depth of plowing the soil. Another advantage is a reduction in the load on the hands, which is important given the significant weight of the device - about 90 kg. The nozzles with a working width of 120 cm are made of pipes and an angle; they are fixed on the shaft with a key in a groove and a bolt to prevent axial movement.
After testing, it turned out that the power of the engine used was sufficient: virgin soil was plowed to the depth of a spade bayonet in two or three passes.
On normal soil there is no need to repeat the pass and capture the previous strip. Among the disadvantages is that the walk-behind tractor is somewhat clumsy. However, problems do not arise if you process only the garden, without plantings.
To move from place to place, Alexey inserts the wheels inside the pipe with knives and secures them through with a bolt, without removing the attachments from the shafts (this allows for a 150 mm offset of the shafts). The owner’s plans are to make a stand for the shafts for transportation in the back, since without attachments the machine is much lighter and does not damage the body, to reduce the wheels and make a plow so that potatoes can be hilled up, planted and dug up. The walk-behind tractor cost the forum member about four thousand rubles; many spare parts were found or taken from friends.
Agricultural machinery with your hands
In any farm there is always available material suitable for the manufacture of agricultural machinery. Engineering knowledge and design skills will always find application in auxiliary facilities. For example, they will help you turn a walk-behind tractor into a mini tractor.
Step-by-step guide for converting a walk-behind tractor into a mini tractor
The big disadvantage of walk-behind tractors is manual traction. It is compensated by costs that are lower than the cost of mini tractors. Skilled hands can turn a walk-behind tractor into a mini tractor in a short time at minimal cost. The process of remaking a walk-behind tractor begins with drawing up calculations and design drawings. In the absence of experimental design activities, it is better to use other people's developments.
Double element frame
Step 1. A frame and body for a mini tractor are welded from metal sheets, profiled pipes and angles. Their mass must be calculated taking into account the engine power. If the design uses a walk-behind tractor with a powerful unit, then car trailers can be used in its design. Two-wheeled carts are best suited for adapting a walk-behind tractor to a mini tractor.
Factory trolley for mini tractor
During the manufacture of the frame, it is necessary to provide fastenings for hanging equipment. Special holes are made along the outline of the frame for future installation of cabin and body elements.
Step 2. Components are selected for the prepared frame of the future mini tractor. Motorists can find many useful things in the garage for these purposes. From a VAZ passenger car you can take pedal control units and drum brakes for the drive wheels. For pennies, the necessary parts can be found at car wrecking yards.
Welded frame
Step 3. Installation of bridges The units are assembled from various elements. You can take them from old cars or agricultural equipment. Bridges are made independently from:
- axle bushings;
- ball and roller bearings;
- wheel axles;
- cross beams;
- fasteners
Front axle installation
The rear axle can be used from an elderly UAZ. It will have to be shortened slightly. The shortened version of the rear axle will have short axle shafts.
Step 4. Installing wheels
When selecting wheels for a mini tractor, it is necessary to take into account the fact that they have a direct impact on the controllability of the vehicle. Excessively spinning wheels when turning force the driver to make great efforts to control the equipment. Tiny wheels bury the tractor into the ground. The optimal wheel size for the front axle is 12-14 inches.
Wheel installation
Tires on mini tractors must be installed with lugs. They significantly increase the maneuverability of equipment.
Step 5. Installation of the control system and driver's seat
The control systems begin to be tinkered with after the chassis is installed. The steering wheel follows the installation sequence of the driver's seat in the installation sequence. The height of the steering wheel is adjusted using it. It should not bind the driver when operating the equipment.
Car seat
Step 6. Installing the engine and body
Installing the engine and debugging its work are the final stages of assembling a mini tractor. The installation of the engine begins after the chassis has been assembled. The unit is installed on a special plate. It must have grooves for fastening. After installing the engine, the electrical circuit is installed and the helm control system and instrument panel are connected.
Installing the engine from a walk-behind tractor onto the frame
At the final stage of converting a walk-behind tractor into a mini tractor, the cabin trim is done.
Video - Converting a walk-behind tractor into a mini tractor
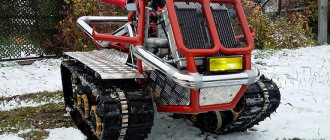
How to make a caterpillar all-terrain vehicle with your own hands
Such a tracked mini-all-terrain vehicle is a single-seater vehicle whose carrying capacity is about 200 kg. The width parameters of future vehicles are calculated depending on the required parameters of stability during movement. The power plant is used from old domestic cars and should produce 50 hp or more. With. Such parameters are enough to move at a speed of 20-30 km/h. But off-road, when driving through swampy areas, the average speed is 10-15 km/h.
The all-terrain vehicle has excellent maneuverability in wetlands
Necessary spare parts and materials for making the machine
Typically, homemade all-terrain vehicles on tracks consist of elements that you can buy or make yourself. So, when a unit is created from a walk-behind tractor, the following elements are included in its design:
- The frame is in the form of the main power element to which all components are attached.
- Rear axle designed for mounting rear wheels.
- Track belt, as well as track tensioner.
- Control system.
- Fuel tank.
- The driver's seat, which is recommended to be protected from possible dirt getting on it while driving.
- A lighting system that allows you to move safely even at night.
Recommendations from specialists for assembling the unit
It is recommended to equip such vehicles with a reduction gearbox, as well as a forced cooling system for the power plant. Air flow alone while driving at low speeds is not enough to maintain proper thermal conditions. The frame is installed between the front and rear axles, using square pipes as the base.
This will give the structure rigidity. In this case, it is recommended to make the joining of the frame elements rigid, so that a single-volume homemade tracked all-terrain vehicle is obtained.
One of the most crucial moments is creating a sketch of the future unit. On such drawings, it is necessary to clearly indicate the location of all mechanisms and components as accurately as possible. The choice of parts (homemade or factory-made) is determined depending on their performance and the load to which they will be subjected. The power plant used is one removed from an old car (often domestic). If the unit is made in small sizes, then the power of a motorcycle engine will be enough.
All-terrain vehicle drawing
As for the chassis, it has the form of rubber tracks, a special tension system, suspension and forks. To create the tracks themselves, old car tires are often used. A metal frame is used as the base for the chassis.
But to create a control system, you need to use ready-made elements borrowed from cars or motorcycles. Homemade swamp vehicles are equipped with a power supply system, where the entire fuel supply is stored in a special tank. Often it is gasoline or diesel; gas power plants are extremely rarely used.
The process of creating homemade all-terrain vehicles with a tracked chassis design begins with the installation of the body. This element must be highly durable and waterproof.
The base is created rigid, for which steel pipes are used, which are able to withstand loads several times greater than those that arise during movement.
After this, the tracks themselves are installed. For this purpose, ordinary sheet rubber is used, from which ring rubber is created. Then special aluminum blades are attached to it from the outside. On the reverse side, limiters are mounted with a step width no greater than the width of the wheels.
After this, the bridges are removed through special holes in the body. For protection it is worth using rubber couplings. The tape itself is attached so that the driving front and rear wheels are between the limiters. Next, additional wheels are installed and secured between the main ones. They are necessary to support the tape.
Upon completion of all work, heavy-duty glass must be installed in the cabin to prevent dirt from getting inside.
As individual elements and parts of the structure are created, it is recommended to check them for strength and performance. It is recommended to provide at least a 5-fold level of safety margin in order to increase the reliability of the future unit. As soon as the bench tests are completed, you can begin testing the all-terrain vehicle in the field. This will allow you to evaluate the behavior of transport.
What can you use to make an irrigation system for your garden?
Watering plants in the garden can be considered labor-intensive work. It takes a lot of time and physical effort. You can make the task of caring for your garden easier by making an irrigation system from scrap materials. The design of the system depends on the water source. It could be:
- water supply network;
- well;
- containers;
- natural reservoirs.
Watering bottle from a plastic bottle
Water is taken from a well, natural reservoirs and containers using a pump. The optimal pump option for the garden is “Baby”. Him:
- body water intake;
- productivity - 432 l/hour;
- the period of work without a break is 2 hours.
Watering the garden
For drip watering of plants, hoses with holes are laid around the garden. The water from them should get under the root of the plant. When taking water for irrigation from the water supply, the hoses are connected to the tap. If a pump is used, the hoses are connected to its outlet nozzle.
Among the advantages of drip irrigation:
- saving water consumption;
- mechanization of manual labor.
You can read more about the manufacture of equipment for watering a garden in our article.
What can an old washing machine be good for in a farmstead?
There is never any need to rush to scrap an old washing machine. From it you can make various devices for subsidiary farming. For example, adapt it for washing vegetables. To do this, the machine is installed above the drainage system. It acts as a local sewerage system. Vegetables are loaded into the laundry hatch and placed. Water is supplied to the machine with the support of a portable hose. Waste water flows out of the washing machine by gravity into the drainage system. This vegetable washing system works on the principle of a colander.
Homemade grain crusher
From an old washing machine you can make an original flowerbed, barbecue or smokehouse. The vestibule and electric motor are used to make grass choppers, grain crushers and other devices.
Circular grinder
The easiest way to turn an angle grinder into a saw is to replace the standard blade with one designed for wood. Such a device has a limited action limit. It can cut slats or thin bars. A khaki casing is put on the grinder. The handle is made a continuation of the body.
Hand saw from a grinder
Cross-cutting lumber requires a cross-cutting pull. You can make it from a grinder by attaching the tool to a rotating bar. A circular saw is used to cut larger quantities of lumber. With its help, you can cut a board or bar of any size. Making a circular saw requires certain knowledge. The saw blade on a circular saw is fixed on a table mounted on the frame. For its manufacture, a 50*50 corner is used.
A circular saw
The sawing table is made of plywood or boards. The control button and switch are located on the side. You can figure out how to make a circular saw from an angle grinder with the help of a video.
Video - How to make a circular saw from an angle grinder
Homemade products for the garden
The fantasy of summer residents knows no bounds. From scrap materials they make a variety of devices that make their work easier in the field, garden or garden.
Potato storage box
Long-term storage of root vegetables requires compliance with certain storage conditions. After digging, the potatoes are sorted, cleared of slush and dried to remove excess moisture. It is better to store tubers in boxes. In such a container, natural ventilation of the potatoes occurs, which significantly reduces the percentage of their smoldering.
Potato storage box
To make a box, use 15*20 slats, 40*40 or 50*50 timber, and 8-10 mm thick plywood.
Grape press
You can make a press yourself from a barrel, a filtration mesh and a screw-shaped mechanism. You can replace the barrel with a mesh cylinder, or a screw mechanism with an ordinary jack. When using a barrel, its sides are expanded due to the gaps made between the side slats. The width of the slots is 2-3 mm. The barrel is installed on a carriage made of a metal profile welded specifically for it. The grapes are placed in a barrel, which is covered with a tire having a diameter corresponding to the internal size of the container.
Homemade press
With the support of a screw mechanism or a jack, pressure is applied to the cover. Under its influence, the grapes release juice, which flows out of the barrel through the cracks. To collect it, a collection tray is installed under the bottom of the barrel.