Jewelry in the form of little angels looks very touching and cute. They are great for modest symbolic gifts for New Year, Christmas, Easter and any other holidays. You can, of course, buy a ready-made souvenir in a store or market, but it is better to make such a craft with your own hands. Angels made from cotton pads are easy and quick to make. At the same time, they turn out to be unusually tender. Both adults and children sincerely admire such beauty.
A simple scheme for making angels from cotton pads
The craft will be a wonderful decorative element for decorating a room for Christmas. Angels are also used to decorate the New Year tree. A child can do this craft because it is simple and quick to do. To make a Christmas tree decoration you will need some disks. To form the product you will not need a lot of time and special knowledge in needlework. Children of different ages are involved in the creation process. They will enjoy making their own decorations.
An angel made from cotton pads is made with your own hands in stages as follows:
1. The cotton pad is divided into 2 parts. 2. The cotton wool that is between the halves is removed and rolled into a small ball. 3. One half is wrapped around the resulting circle. 4. The remaining ponytail is tied with white thread. This is the head of the future angel. 5. Now take the second half of the disk and smear it with glue on one side. 6. The circle turns in half. 7. A wing is drawn on the whole disk. 8. If it is not possible to outline the wing yourself, a template is used. It can be found in special publications or on the Internet. 9. The wing is cut out using the template. You will need two wings. 10. To make the workpieces neat and even, glue is applied along the contour where the halves of the circles diverge. 11. The edges are compared with each other, pressed against each other. 12. Two small triangles are cut out from the remnants of cotton pads that were used to make the wings. 13. They are rolled into a cone shape and glued. These are the hands of angels. 14. Now the figure needs to be connected together. 15. The arms are glued to the sides, the wings are placed at the back.
Next, they begin to decorate the product. The dress can be covered with lace, beads, rhinestones, ribbons or other material. A cord is attached to the angel's head, with which the product is hung on the Christmas tree.
Angel for a mini gift
Anyone can easily make this craft. Even those who do not have the slightest experience in such a matter. You don’t have to worry - no one will have to sew the parts together on a machine. All working aspects are done step by step with your own hands, so that the angels made from cotton pads turn out tender and cute without rough stitches or seams.
Required material. Usually all of the listed items are found in every home. Therefore, most likely, you will not have to buy anything. You just need to carve out 20-30 minutes of free time.
Creative kit includes:
- glue;
- scissors;
- cotton pads;
- rhinestones and sequins;
- colored and white threads.
The consumption of working material in each case is calculated individually . It all depends on the planned number of angels.
Step-by-step instruction
Before starting work, you need to prepare your workplace and all the necessary items. School-age children can be involved in the process. They will like this activity.
All actions are performed in the following order:
- The cotton pad is divided into two layers. Then remove the fluffy cotton wool from both parts. Roll it with your palms (to form a small ball) and place it in the center of one of the halves. Fold the disc in half and tie with white thread.
- Carefully straighten the free edges in different directions. Align them with scissors, giving them a wavy shape reminiscent of wings.
- The second part is also bent in half. The corners are connected to each other and glued. You should get a figure similar to a cylinder.
- In the second blank, the back part is smeared with glue and connected to the “wings”. Thus, the corner of the “cylinder” should be in contact with the “head” of the angel.
- The last step is decorating the craft. Small rhinestones and sequins are great for this. The decor is glued to the body (to imitate buttons) and to the edges of the wings. A halo is placed on the angel’s head, which is easily made from several layers of colored threads wound around a finger.
In this simple way you can make an angel from cotton pads, which is not only a pleasure to give, but also to receive as a gift yourself.
Christmas tree made of cotton pads
The main attribute of the New Year and Christmas is the Christmas tree. It can be made from cotton pads. If it is not possible to put up a real Christmas tree, then you can make one from scrap materials. It will bring a festive atmosphere to your home. For a school exhibition, you can make a composition of mini Christmas trees.
Master class of angels made from cotton pads:
1. First, needles are made for the future craft. To do this, the disk is folded in four, one edge is secured with a stapler. 2. A large number of such parts will be needed. The more there are, the more voluminous the tree will be. A cone is formed from cardboard. 3. If you need a larger Christmas tree, then make several cones. They are placed one above the other, and the resulting figure is secured with glue. Next, they begin gluing the bottom strip, then the entire cone is gradually filled with rows of cotton pads. 4. If desired, the product is decorated with beads, sequins or rhinestones. All parts are attached using a glue gun or PVA glue. 5. A small star is cut out of a sheet of paper and attached to the top of the tree. 6. Each ray of the star is divided in half to make it more voluminous. The edges of the star are trimmed with tinsel. 7. A small stick is glued to the top of the tree. To do this, twist a tube from a small sheet of paper and attach it with glue. 8. A small hole is made at the top of the tree, and a star is attached to a stick.
A Christmas tree and angels made from disks will decorate any room. They will be an addition to the Christmas interior, and they can also be used as a gift for loved ones.
An easy way to create a toy
To create a simple angel from cotton pads with your own hands, you need to make blanks from a hygienic pad.
Just split it into 2 parts. Wrinkle one up and put it in the middle of the other, straightening out the folds and tying it with white thread under the resulting ball. Spread the free edges in different directions and trim the edge with a wave - these are the future wings. Taking the second disk, fold it in half and roll it into a funnel shape. Now we need to connect the head and wings with the funnel body. Apply glue to the back, first glue a loop of braid, and then press it to the wings so that the head is in contact with the body of the angel. All that remains is to do the most interesting thing - decorate the angel. Cover it with rhinestones, beads, sequins, and draw a pattern on the wings with varnish. Make a halo out of a small rubber band by painting it with glitter and gluing it on top of the head. So the little guardian of family happiness is ready!
The simplest Christmas tree toys
When there is absolutely no time to bother with decorations, you can use the following scheme, which will help you make a Christmas tree decoration in a short time. The “Angels” craft is one of the simplest decorations, so even the smallest children can make it with their own hands. Another advantage of the product is that it is perfect for decorating Christmas cards . The next master class will tell you how to make them correctly.
- Separate the cotton pad, creating two halves. If desired, you can use special zigzag scissors to decorate the edges of the cotton pad.
- Wrap a bead in one of the halves and tie it. A tail has formed under the small head, which needs to be straightened to form wings.
- Take the other half and fold it in half. Now fold the corners so that they do not reach the middle a little. Pour glue into the hole created. Fold the resulting figure with its corners towards the center, making a flat cone.
- Using acrylic paint with a thin brush, place dots along the edges of the wings, and also draw a halo. You can get creative and add more patterns.
- Add a string hook to the angel's head, or stick the figurine onto a card.
Act seven. Making arms and legs
The angel can be left as it already is, but you can also slightly embellish it.
Method one - you can make sleeves-handles by dividing a cotton pad first in half, and then into quarters. Then you need to roll them into small cones, and cut the corners with scissors so that the handles are better attached. Then you need to carefully glue the arms to the body.
Method two - you can use not only sponges to create arms and legs. You can create them using cotton swabs too. First you need to cut the cotton swabs. And not strictly in the middle, but into larger and smaller halves.
Then attach the smaller halves to the body at the top (these will be the arms), they can be glued to the body with glue near the wings, and the larger halves (legs) can be glued inside the body.
In addition to New Year's holidays, there are many others. For example - Easter. You can make an Easter angel in the following way.
First you will need materials - a cotton pad (or sponge), white threads, gold (or yellow), beads, scissors, toothpicks, glue (preferably PVA).
First action. You need to take 1 cotton swab. Then divide it into two layers.
Act two. Use scissors to make teeth along the edge of the disk.
Act three. Place a bead inside it, and then tie the bead with white thread. This will be the head and wings.
Act four. Fold the edges of the cotton pad one on top of the other, and then glue it with glue.
Act five. Lubricate part of the toothpick with glue and secure it inside the resulting package.
Act six. You need to coat the body with glue, and then glue the previously created wings to it.
Act seven. Tie the halo and decorations with gold threads.
That's it, the Easter angel is ready!
It’s quite easy to make such angels and please your loved ones with these simple, but so cute crafts.
A simple craft option
To make the product you will need scissors, a glue gun, white threads, cotton swabs, beads, seed beads and rhinestones. The craft is done as follows: two thin circles are made from one sponge, which are separated along the fibers. A ball or bead is folded into one half, the sponge is tied with white thread, and the head and wings of the product are formed. The other part of the disk is cut, the sleeves are rolled up. They are secured with glue.
Like the first sponge, the second is divided in the same way. Two triangles are formed from two circles. They will serve as clothes for the little angel. One triangle is secured with glue from the inside out. The result is hoodie sleeves for crafts. The head and wings are attached to the top. The body is formed using glue. The last step is decorating the product with jewelry. A halo is formed from golden-colored threads, and the shining robe is made using sequins, beads and rhinestones. Making crafts in the shape of angels is very fun and enjoyable. Because the products turn out cute and kind.
What do you need to create a small “Angel” craft?
This would be a great addition to a girls bedroom or holiday card. To make an angel with your own hands from cotton pads, you need to prepare the following materials:
- packaging of cotton pads;
- a spool of white cotton thread;
- glue that hardens quickly;
- rhinestones;
- decorative threads;
- scissors.
The necessary materials can be found in every housewife's home.
Fluffy wings
Angels with large wings look very harmonious. They are able to show all the beauty of these heavenly creatures and give the craft lightness and originality. We offer you a master class that will help you create an angel with very beautiful wings. With which? It's up to you to decide!
To create a craft you will need:
- Cotton pads;
- PVA glue;
- Scissors;
- White bobbin thread;
- Automatic pencil;
- Decorative elements - beads, ribbons, sequins, lace.
To create the head of a celestial inhabitant, you need to split a cotton pad into two halves. Using gentle movements, collect the cotton wool, leaving only the base. It will be used to stuff the head. Place cotton wool in one half of the disk and wrap it with threads.
Attention! Do not pull the cotton shell too tightly; it is quite thin and may tear.
You will make the angel dress from the second half of the disk. Lubricate half of the circle with glue along the bottom edge and fold the disk.
Now wrap the resulting blank around the tail remaining from the head. You need to first glue one half, then tuck the second half as shown in the photo.
The dress needs beautiful sleeves. They are made from a quarter of a disk, wrapping it in a cone around a suitable object. Use an automatic pencil; its head has a suitable shape. Roll and glue two conical pieces.
Now you need to attach the item of clothing in place.
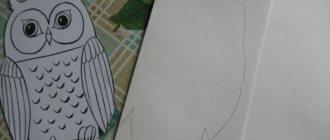
It's time to create the fluffy wings. Use one of the cutting templates below, after cutting it down to the size you need.
Transfer the template onto cardboard, attach it to the disk and cut it out.
Related article: Crochet Snow Maiden: master class with diagrams and description
After cutting, the two halves of the disk began to stick out in different directions, showing the sloppy filling.
To smooth the edges, place glue between them and press them together. A clear and even contour immediately appears.
Glue the feathering to the back.
Decorate the angel to your liking. You can use any materials, because both beads and ribbons are suitable for this craft. If you do not glue the celestial to the base, make a pendant from a lace or rope.
Flying angel with fluffy wings
Such products look incredibly cute and tender. The method of creating them is somewhat more complicated than the previous ones, but the result is worth it!
So, an angel made of cotton pads, master class.
We make the head using absolutely the same method as before. The dress is made from a disk folded in half. We wrap it around the ponytail located under the place where the head is tightened. Trim the angel's robe with lace pieces.
For sleeves, cut the disk into 4 parts and take 1 quarter. We form a pointed cone on a pencil and glue the free edges. In this way we make 2 sleeves and glue them to the sides of the dress.
Now it’s the turn of the wings: they need to be very carefully cut out according to a cardboard template (options are presented below, before work they need to be reduced and transferred to cardboard).
After cutting, the edges turn out to be very disheveled, so they will need to be glued with glue. Very carefully draw a contour inside the disk and press. Now the edges are smooth. Attach the finished part to the back.
For decoration, use beads, ribbons, rhinestones.
Big angel
A large figure of an angel made from cotton pads will wonderfully decorate a Christmas composition. It will look great both on the window, next to snowflakes, and next to the Christmas tree.
To create the body of an angel, you need to draw a circle with a radius of 11-14 cm on cardboard. Now you need to cut out a segment the size of 1/3 and glue it with a cone. Now we form the dress. Divide several disks in half and cover the cardboard with them, placing the cotton circles on top of each other with their edges, leaving no gaps in the cardboard.
Glue “hair” from light threads onto the foam ball.
Now create the wings. For them, cut out a heart-shaped blank from thick cardboard. Tear the discs into small pieces and cover the heart on both sides so that there are no gaps.
For the sleeves, roll 2 discs into a funnel.
All the elements have been created, you need to combine them into one, gluing them very carefully with glue. Decorate the angel and place it in the most visible place.
Good day to all. Many people use cotton pads for their intended purpose. What else can you do with them? You ask, and I will answer you that if you use your imagination, then you can create beautiful things from ordinary cotton pads, for example, Christmas trees, toys or a Christmas angel. Just today we will make an angel. For production we will need: - Cardboard. - Scissors. - Pencil. - Glue. — Cotton pads. — Woolen threads of white and pale yellow color. - Large bead or foam. — An iron ring from a key fob or aluminum wire. — Children's yellow hair elastic. — Mascara with glitter for eyelashes, this is for decoration. You can use something else.
Let's begin. First we'll work on the angel's body. Let's take cardboard, draw a kind of cone on it (as in the photo) and cut it out. The height of the cone was 10 cm, you can make it any height you need.
Now let's glue the part. Here's what I got.
The body frame is ready. Now we need cotton pads. We separate each disk into two disks and glue them overlapping onto the cone, starting from the bottom of the body, as shown in the photo.
In this way we cover the entire body. We also glue each top layer overlapping the bottom one. We glue a cotton pad on top so that the hole that was there becomes closed.
We leave the body aside for a while so that the glue dries well. In the meantime, let's start making the head. For the head we will take a large bead, but it can easily be replaced with a foam ball. In general, we wrap this bead with white woolen threads, having previously smeared it with glue.
So we have a head, only the hair is missing. For hair, we will take light yellow woolen threads, although you can take threads of any other color. Cut the thread short. We spread it with glue in the middle and glue it on top of the head. The ends of the thread were not glued. Thus we glue a few more threads.
I glued the hair at the back a little differently. We cut the thread again, only twice as long as originally, fold it in half, grease the fold with glue and glue it to the back of the head.
Glue the required number of threads in the same way.
This is what happened.
Let's also put the head aside for now and let the glue dry. In the meantime, we will make the wings. We will need cardboard. In fact, wings can be of any shape. I made them in the shape of a heart. To do this, I hand-drew a heart of the desired height and cut it out.
We take cotton pads, tear them into small pieces and begin gluing them to the wings. You need to start gluing from the edges, gluing in the middle last.
After the glue has dried, glue the second side of the wings. When the glue dries on the other side, glue the wings to the angel’s back.
The angel also needs hands. Take one cotton pad and roll it into a cone, fixing the edges with glue. You need two of these parts. Cut the top of the cone at an angle, as shown in the photo. Hands are ready.
Making an angel quickly and easily from cotton pads is not at all difficult; even a child can do it. And it won’t take much time to make, but the result will be a very small and cute craft.
Angels are made for many holidays, but they can be made not only for holidays. A small sign of attention in the form of a handmade gift will bring joy on any day. We will look at the basic principles of making an angel from the most ordinary cotton pads in a small master class.
Large product
A figurine made from cotton pads can be an excellent decoration for a Christmas composition. It will look organic both with protrusions on the windowsill, and on a shelf or under the Christmas tree. Let's look at the process of creating such a figure step by step.
To make this beautiful creation, take:
- Styrofoam ball or wooden bead;
- Scissors;
- Cardboard;
- White and yellow yarn;
- PVA glue;
- Cotton pads;
- Metal ring (can be made from wire);
- Sheet of cardboard;
- Yellow hair tie;
- Decorative elements.
To make an angel's body, draw a circle on a piece of cardboard and cut out a third of it. The photo shows a height of 10 cm, but you can take any. Cut off the top of the piece and glue it into a cone.
The base for the dress is ready, you can start gluing it. Layer each disk into two parts and glue them to the cone with an overlap. There should be no gaps on the dress. After filling with disks, leave the cone to dry.
As a head, you can use either a large bead (pictured) or a foam ball of a suitable size. First decorate the bead with white yarn.
Glue the hair onto the head and send the part to dry.
Let's move on to the wings. The simplest option for making it is a heart-shaped template, but you can use absolutely any shape. Tear cotton pads into pieces and fill the space of the cardboard template with them on both sides.
Related article: DIY paper balls for decoration: master class with diagrams
Make tapered sleeves by rolling up a cotton pad.
Put the pieces together.
Come up with decor for an angel's dress.
Create a halo by wrapping a hair tie around a wire ring.
The beautiful figurine is ready!
