Any work that is done with your hands has a positive effect on the development of creative abilities and motor skills. Therefore, adults and children are encouraged to spend time together doing crafts. Now we have to figure out how to make a bird with our own hands from scrap materials for a competition or just for interior decoration.
Making a bird out of paper
These are the materials you will need to create a simple paper bird craft:
- Cardboard paper.
- Scissors.
- Quilling paper or strips of colored paper.
- Paper glue.
- Markers and pencils.
- Sample.
Brief instructions on how to make a paper bird with your own hands:
- Using a pre-printed template, you can make several versions of birds at once. To do this, the drawing is transferred to cardboard and then cut out along the contour with ordinary scissors.
- Next, take quilling paper, but you can use any colored strips of 0.5 cm.
- Next, you need to glue the bird’s body itself from cardboard, as well as strips, to the base. This is done using a regular glue stick.
To make the craft look interesting, you can glue the strips (which act as wings) not completely. Then, in any draft or wind, they will move. Using a marker, details are drawn - eyes, lines for the ears, etc.
LiveInternetLiveInternet
Tuesday, February 09, 2016 09:55 + to quote book
In the master class we will tell you in detail how to make a bird with your own hands from yarn and other materials quickly and beautifully. The idea is very simple and kids will definitely love it. You can bring this craft to school or kindergarten and decorate the interior of a child’s room or living room with it. What we need: yarn of 4 different colors; scissors; cardboard; ruler; PVA glue; wire cutters; 2 medium sized black beads; black thread with a needle. copper wire (jewelry). To begin, we will prepare 3 rectangles of cardboard: 2 – measuring 9 x 7 cm and 1 – measuring 12 x 7 cm. The dimensions of the rectangles will depend on the size of the future bird.
We wrap yarn of different colors on each of the rectangles. We wind along the rectangle until the thickness of the yarn layer reaches 1 cm on each side.
When choosing the color of the yarn, it is advisable to wind darker yarn on a 12 cm long rectangle (the upper part of the future bird), on the first 9 cm long rectangle - light yarn (the lower part of the bird) and on the remaining rectangle - a combination of yarn of 2 colors (bird wings) . Holding the wound yarn tightly, we cut it on one side, resulting in 3 parts.
Now we place the dark part (12 cm) horizontally and place light yarn on it perpendicularly. The result is a cross.
Then fold the dark yarn in half, twisting the light yarn. Then take one strand of dark yarn and tie it tightly around the dark yarn folded in half at the fold.
In the same way, fold the light yarn in half and tie it tightly around it with a thread of light yarn.
At this stage it is also necessary to align the ends of the yarn. Add a third group of yarn. To do this, put it under the groups already connected together perpendicularly. The knot of dark yarn should face up, as in the picture.
To form the body of the bird, take a piece of paper (newspaper) and crumple it into a ball and place it between 3 groups of yarn (see picture).
Holding the ends of 3 groups of yarn, which lie evenly on the paper ball, tightly tie a thread of any color around them.
We also straighten the ends of the yarn if necessary.
Now we will create the missing elements for our bird. From orange cardboard we cut out and glue a cone that will serve as a beak.
We will make legs from decorative wire and insert them into the yarn of the lower part of the bird, first bending the free edges of the wire.
Let's add eyes to our bird, for which we sew 2 black beads on both sides of the head.
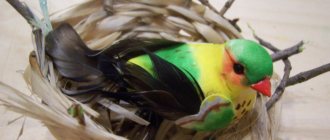
All you have to do is glue the beak and you're done!!! We came up with such a great craft for children:
We got a simple and very cute bird made from threads, which we made with our own hands. You can experiment with different colors of yarn to create a unique bird color.
Author Camilla Bellezza https://bellezza4u.ru/diy/dlya-detey/item/254-ptichka-iz-nitok.html
| Categories: | handicrafts, master classes for children |
Tags:
needlework bird made of threads master class for children
Cited 9 times Liked by: 2 users
Like share
0
Like
- 2
I liked the post - Quoted
- 0
Saved
- Add to quote book
- 0
Save to links
Liked2
0
How to make a double-sided bird
This work option is suitable for the smallest craftsmen, since there is virtually nothing to cut out. The creative process must take place under the supervision of parents. Brief instructions:
- To begin with, the blanks are printed. To do this you need a color printer.
- One bird consists of 3 main circles, which will decrease in diameter from the larger one.
- Next, each part is glued to each other, after which it is folded in half using a ruler.
- You can glue wings made of felt or even fabric to the base of the bird.
Next, draw the eyes; you can glue the yellow beak separately. This craft takes no more than 10 minutes. You can make a whole garland from a number of such birds.
How to make an amulet from wood
Of course, the easiest way to purchase such a talisman is ready-made, especially since they are sold in a wide range - all surprisingly beautiful and different. But people endowed with ingenuity in working with wood can create an amulet by hand, imbuing it with their own positive energy, love and warmth. To make a talisman, choose high-quality types of wood, such as pine, spruce or fir. You will need two bars - from one you will make the body, and from the other - the wings.
The feathers for the wings and tail should be the same shape - a pre-drawn cardboard template will help you with this. Applying the template to the part of the block marked “under the tail”, outline the contours and give the block the appropriate shape. Now the tail part needs to be split into thin plates, each of which will be a separate feather. The thickness of each feather should be about a millimeter or a little more so that the bird looks light and delicate.
Having split the tail part, carefully bend the feathers in turn - to the right and to the left. On the second block you need to draw the contours of the feathers of the left and right wings and split them into strips in the same way. Then the wings also “unfold”, bending the feathers and securing them together. We attach the blank with wings to the body, and in the center of the back we make a hook for thread or twine.
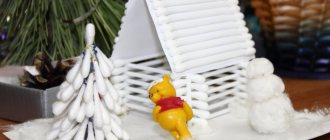
Bird - Christmas tree toy
Some parents may still remember how many years ago there was a huge shortage. On the Christmas trees they hung sweets, fruits and products that they could make with their own hands. Today you can buy anything in a store, but toys lack that interest and sincerity.
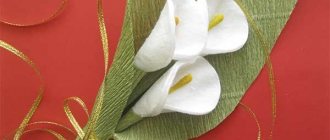
To immerse yourself in childhood, it is recommended to make Christmas tree decorations in the form of felt birds or pine cones with the children.
What do you need:
- Several pieces of felt of different shades and colors. You can collect the bird from leftovers, as it should be small in size.
- Next, find red woolen threads.
- After this, you need to print the pattern templates using a printer.
- The details are cut out and transferred to the fabric with soap.
- After this, pruning is done.
- The parts are carefully sewn together with threads.
Such a toy can last for many years; to make it look voluminous, it is filled with padding polyester or cotton wool. Using the same technology, you can make birds from foamiran with your own hands. This foam material will withstand any load, even if it is sewn together with threads. It feels like felt itself.
Video tutorials on crocheting birds
I recommend crocheting a bird from Yarn Art Jeans with crochet size 1.7-2 mm. The size of my toy is 12 cm high and 12 cm wide. Embroider it with beads and beads if you plan to hang it on the Christmas tree.
The video should load here, please wait or refresh the page.
Crochet bird of paradise
This bird of paradise is EASY and SIMPLE to knit! And if you are thinking about giving the same to your mother? What to knit for Easter? Of course this bird!!!
In this video tutorial, the author will show you how to crochet a bird according to the pattern easily and quickly. It will become clear even to beginners.
The video should load here, please wait or refresh the page.
Making a porcelain bird
If you are tired of using ordinary polymer clay, you can also plunge back into childhood and teach your descendants how to make crafts from cold porcelain. This activity is suitable for schoolchildren who are interested in creating something unusual. The recipe for porcelain at home is very simple:
- First you need to find any frying pan with a non-stick coating. It will not deteriorate during operation and can be easily washed.
- Next, you need to find 1 cup of starch, add a tablespoon of cream to the mixture, then fill everything with PVA glue (1 cup) and 1 tbsp of glycerin (available at any pharmacy).
- Place everything on low heat and stir until smooth.
Next, the mass is pulled out, you need to let it cool a little. After this, it is completely ready for modeling. It is better to work with gloves. The bird is molded as if from ordinary clay, first the body is formed, then the head and beak. After drying, you can carefully cut out the wings with a knife. This toy will look very expensive in any interior.
Alternative recipe
In many cases, craftsmen end up with a mass that quickly becomes covered with cracks. This often depends on the quality of the starch and PVA glue. There is another option that will help if the solution begins to crumble in your hands:
- You need to add another spoonful of glycerin.
- Next, add a few tablespoons of dissolved citric acid (not juice) to the total mass.
Painting porcelain afterwards is very difficult, as a special glaze is needed. However, adding a little dissolved food coloring can create some truly beautiful items.
How interesting is it to play around with a painting in the interior?
Birds made from yarn will beautifully complement any interior. You can even create an entire composition. Birds on a tree, on a branch, in a birdhouse.
You can simply take a frame, string a few strings (perches), and place your birds on them. Take bright threads, then the picture will be noticeable.
You can make a small birdhouse and add birds to it. Such a composition in the interior will not go unnoticed.
Use birdhouse templates for your painting. At the bottom of the frame, make a small ledge out of cardboard and place your little birds there.
You can decorate the wall in the nursery with a real birdhouse made of cardboard. Add a small branch ledge at the bottom and place your beautiful bird on it. Place several of these birdhouses randomly. So, you can easily dilute the interior of the room with bright elements.
Make a whole live composition on your table or windowsill. Place the toys on a branch that you can find while walking.
Or buy a small cage and artificial flowers from a craft store and create a beautiful, delicate composition.
Making a bird from threads
This option is suitable for little ones, but it must be done under adult supervision. DIY thread bird step by step:
- It is best to use regular wool threads, they look more voluminous.
- You will also need a small amount of cotton wool or foam rubber.
- To work you need 3 small skeins of different colors. For example, if it is a bullfinch, then you need white, black and red.
- Next, each color is wound on a piece of cardboard. Then it is cut so that the same threads are obtained.
- They are put into a bundle and pulled together using knots.
- Foam rubber is placed in the center for volume.
This bird can even be worn as a keychain.
DIY thread birds - step-by-step instructions
Option #1
1. Wrap a piece of cardboard with 3 types of yarn.
2. Connect black and red threads.
3. Place all the black ones on one side and tie them.
4. Place gray threads under the red threads.
5. Connect the remaining red threads through the bottom to the tail and tie with thread.
6. Throw the gray threads of yarn over the top to the tail and connect.
7. Make a spout out of a nut and put it on a wire. Use glue to fix it. Insert into the bird.
If you wish, you can add eyes and decorate them in some interesting way.
The bird is ready!
Another craft option. Option #2. Sparrow
You can make a soft toy together with your child. The process is fun, uncomplicated, and the end result is a cute little bird.
For work we will need:
- yarn. Any quality, color is important. For this sparrow we will need 3 colors: brown, gray and light gray. To make a motley sparrow - use red, yellow, blue, green;
- adhesive fabric tape;
- wire;
- glue or glue gun for convenience;
- a small piece of newspaper;
Add decorative elements: beads, rhinestones, feathers, seed beads. Then your bird will become bright and unusual.
- 2 cardboard pieces 9X12;
- scissors;
- pliers.
Step by step process:
1. Wind 3 types of yarn onto cardstock paper. The sparrow's back will be brown, its chest and wings will be dark gray and brown.
2. Cut the yarn. Wrap the brown threads.
3. Next we fold the threads for the brisket and back.
4. We throw brown threads to one side and tie.
5. In the same way as in the previous step, tie light brown threads.
6. Place a piece of newspaper inside the yarn.
7. Place the tied breast and back of the sparrow on top.
8. Tie and trim the excess.
9. Next, tie the wings and tie them with a thread to the tail.
10. We take wire and pliers and make legs. We wrap the paws with adhesive tape.
11. Make holes in the yarn and place the legs there. Add eyes and a nose (it can be made from nuts).
Ready!
You've got a cute little sparrow. It can be given as a gift, worn as a talisman, keychain or to decorate a child's room.
Option #3. Bullfinch
We will need:
- cardboard paper;
- A4 sheet of paper;
- glue;
- paints with a brush;
- compass;
- yarn 3 colors. We take threads of red, white and gray colors;
- scissors;
- pencil, felt-tip pen.
Step-by-step process for creating a bird:
1. Take a sheet of paper and draw 2 circles: a large one and a small one. We add a tail and beak to them.
2. We draw the template onto cardboard and cut out 2 such parts. Inside these parts you need to cut out small circles. We will thread threads through the bottom.
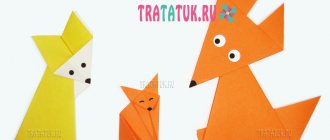
Making an origami bird
This is another option on how to make a paper bird with your own hands for children. The instructions are very simple:
- To create a beautiful dove, you only need a square sheet of paper and a black marker.
- First, the sheet is folded diagonally.
- Next, the resulting triangle is folded in half.
- Next, the upper corners are bent upward.
- Having turned everything over, the folds are repeated on the other side.
- Next, the structure unfolds as in the boat technique.
- An internal fold is formed.
- The corner bends upward again.
After this, the structure unfolds from the side, and the dove gets a wing. The head in this scheme does not look very similar to itself, however, using a marker you can fill in the eyes and make the beak more pronounced.
From pompoms
A bullfinch made of threads, which you can make together with schoolchildren in class, will become a classroom decoration during the New Year holidays. Children may like acrylic yarn because it is bright, can fluff up after cutting, and does not fade in the sun. To make a bullfinch from this yarn, you need to wrap enough yarn around the base to make a pompom.
This master class will require the following materials:
- Beads or seed beads (2 pcs);
- Acrylic yarn in grey, black, white, pink and red;
- A small piece of felt for the beak;
- Blanks for pompoms;
- Scissors;
- Hook;
- Super glue.
The pompom bullfinch is made according to the following steps:
- Prepare 2 pieces: a small one for the head and a larger one for the body. Prepare several skeins of thread, no more than 1 meter long. The thickness of the skein depends on the thickness of the thread.
- To form the head, you should wind red threads around a small workpiece and arrange them so that they occupy a third of the workpiece. The remaining part should be occupied by black threads.
- Wind the yarn in several very dense layers. A crochet hook can help with this.
- Tie a few black and gray threads onto the blank for the bullfinch’s body. They will later become part of the tail. Start winding the white threads next to the tail. The winding direction is to make 2 turns to the right, then 2 turns in the opposite direction, towards the tail.
- Wind pink threads. Start winding to the right of the white threads, make 2 turns and return in the opposite direction, grabbing the white threads.
- Tie the red threads to the right of the pink ones, braid the workpiece with turns to the right, then move to the left, then right again. And thus cover a layer of pink thread with red turns. It is necessary to ensure that the winding thickness is uniform. These actions shape the bird's belly.
- Wind gray threads on the 2nd half of the circle. Yarn of this color forms the back of the bullfinch. Thus, 2 colors for the body of the bird in equal quantities should be wound on the workpiece. For the head, 2 colors should be wound - a third of the workpiece is braided in red, and the remaining two thirds are braided in black.
- For the wings, the remaining gray and black skeins are used. Their length is approximately 10 cm.
- After the body is completely formed, you should stretch the threads for the wings. Distribute the length of the threads evenly on both sides.
- Without touching the tail of the bullfinch, cut the rest of the winding. To prevent the pompom from coming undone, you should take a strong thread and tie it at least 2 turns. Tying the head and body are slightly different in their location: when tying the head with strong threads, you should move them towards the red threads of the head. When tying the body workpiece, you should place the threads at the junction of the red and gray colors.
- Carefully remove the rings so that the threads do not move and the appearance of the bullfinch does not change. Tie the head and body of the bullfinch with the remaining ends of the binding threads. Tie the threads from the back.
- Use sharp scissors to trim the yarn forming the pompom. The scissors must be sharp, otherwise the threads will become very fluffy and worsen the appearance of the finished product.
- Trim the lower part of the tail, check the threads throughout the body of the bird: if any piece of thread is knocked out, trim it. Also trim both wings to make them more realistic.
- Take round beads, cut a triangle out of felt, fold its 2 corners into an envelope. In the place where the red and black colors border each other, push the threads apart with your fingers to form indentations for the eyes.
- Place a drop of superglue into these indentations and place the beads there. The beak is glued last.
- After the glue has completely dried, trim it as necessary.
- The creation of the bullfinch is complete.
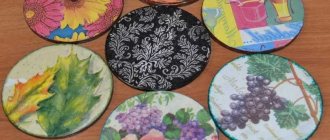
Birds made from cotton pads
This is one of the simplest options that is suitable for little ones. There is no need to print anything out; all the necessary materials are at hand. Here are simple instructions:
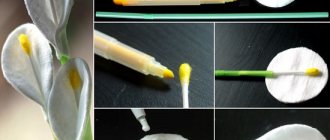
- To begin, draw the background in watercolor on a thick sheet of paper. The sky and a branch from the tree are added.
- After this, take two cotton pads and connect them together on a sheet with glue. Next, another disk is taken and cut into two parts - these are the wings.
- After this, you can add eyes and beak, which are also made from scrap materials.
Even a child as young as 2 years old can do this cute work. It is advisable to use a glue stick to glue the parts together.
Tools and materials
What materials and tools are required for the work depends solely on the choice of the master. In order not to encounter difficulties when creating a bullfinch from threads, it is best to prepare everything you need in advance. All the goods you may need to create a craft can be purchased at craft stores.
To make the bird bright and look like a real one, you can choose bright shades of thread.
Thus, the basic materials and tools that will be needed for the craft can be presented in the following list:
- threads corresponding to the color of the plumage: black, red, gray;
- cardboard;
- wire;
- fruit grain, for example peach;
- scissors;
- glue;
- 2 artificial eyes, used to create toys;
- depending on the type of craft - pom-poms.
We learn to weave Slavic amulets with our own hands: the bird of happiness
One of the most popular good luck charms is the “Bird of Happiness”.
Most often it was made of wood, but nothing prevents us from making a bird from twine and woolen threads. Necessary materials:
- leg-split;
- woolen threads of bright colors;
- beads.
Operating procedure.
To form the head and beak, cut the twine into 30 cm pieces, fold them in half and tie them in the middle. We wrap the resulting loop tightly with red thread, first in one direction, then in the other. We tie a neat knot and cut the thread.
We decorate the bird's neck by wrapping a fairly wide section of twine with red thread. We make wings by inserting another bundle of pieces of twine perpendicular to the body. We secure the future wings crosswise with red thread. By analogy with the neck, we form the waist.
Having stepped back a few centimeters from the waist, we begin to braid the tail with colored threads in a checkerboard pattern, dividing the twine into several equal bundles, as shown in the photo below.
Similarly, we braid the wings as close to the body as possible. Then we give the bird a round shape by cutting off the excess twine using a template.
At the end of the work, we sew on bead eyes, make legs from beads, and, if desired, sew on a loop.
The bird of happiness is ready! Broom.
The Slavs attached great importance to their home and protected it with so-called “house” amulets. One of the symbols of well-being and comfort is a decorative broom, richly decorated with various objects that have a certain meaning and bring family happiness.
Operating procedure.
To work, you will need a small broom, dust broom or similar material made from natural materials. You can make an improvised broom yourself from twine, rope, thread, jute or thin branches.
If a real broom is used, its handle must be carefully trimmed. We tie the handle and working surface of the broom with wide braid and woolen threads. It is best to use threads of black, white, red, blue, yellow and green, because according to the beliefs of the ancient Slavs, these colors bring good luck.
Let's proceed to the most important part of the work - decorating the broom. Depending on what action you expect from this amulet, you need to choose various items:
- a bag of coins - financial well-being;
- sunflower seeds - rich offspring;
- garlic – protection from the evil eye;
- nuts - good luck in business;
- rose hips - the beauty and energy of the housewife;
- wheat ears - the health of all family members.
By attaching the necessary items to the broom and additionally decorating it with flowers and bows made of silk ribbons, we get a very powerful home amulet.
Amulet doll for a child.
Since ancient times, the Slavs hung a doll amulet over the cradle of a child, which protected him from evil spirits and the evil eye. Such an amulet will not hurt a modern child, and making it will not be at all difficult.
Necessary materials:
- bright scraps of cotton fabrics;
- cotton threads;
- filler optional.
Operating procedure:
- Cut out a long rectangle from white material. Having folded its edges, we roll it up and tie it with threads close to the edges. These will be the doll's hands.
- From a colored scrap (traditionally we used blue fabric for a boy and red fabric for a girl), cut out a larger rectangle. Roll it up and fold it in half.
- Between the halves of colored fabric we place blanks for handles and secure them with threads from below and above, thus forming the head and skirt of the doll.
- At the end we make a loop by which the amulet can be hung above the crib.
If desired, you can additionally decorate the doll with embroidery, ribbons, and beads. Thus, amulets for girls were often decorated with bows and beads.
Very often, a small canvas bag with a small amount of dried herbs was placed in the doll. Plants were chosen depending on their purpose:
- rose petals gave the baby beauty and an easy-going character;
- thistle protected from the evil eye and people with bad intentions;
- periwinkle drove away evil spirits;
- thyme protected from damage.
One or more dolls were hung over a bed or cradle and never removed.