Useful tips
Watch the video if you are too lazy to read
Watch the video if you are too lazy to read
Envelope
- This is just a shell or packaging for inserting various objects or papers. Basically, we are used to thinking of an envelope as a “packaging” for letters or documents. But there are also envelopes made of thick fabrics or blankets for newborns.
Today we will learn how to make envelopes for different needs
and let's start, perhaps, with the most common envelope - a paper envelope.
How to make an envelope out of paper?
The simplest envelope
can be made from a square sheet of paper by folding the corners towards the center. To do this, you will need a square sheet of paper of the desired size, a ruler and a pencil.
1) Mark the very center of the sheet
point, measuring the distance to it using a ruler.
2) Fold the left and right sides inward so that the corners touch the center point
.
3) Then fold the bottom side up so that it covers the center and can be glued to the two already folded corners
.
4) Apply glue to the bottom sides of the envelope as shown in the photo. You can also use double sided tape
.
5) Fold the top corner down. The envelope is ready!
This envelope can be made in just a couple of minutes. It is based on the simple principle of adding angles. Here are a few more schemes for making envelopes from sheets of different shapes:
Diamond envelope
Envelope “from the heart”
Envelope with a square
Current
With today's hectic life, very often we can miss important little things. So, for example, when we need to send a beautiful postcard or make a monetary gift, it turns out that we forgot to buy an envelope. But you can always find a way out of any situation. In this case, a couple of methods will come in handy, which describe how to make an envelope for a disk from A4 sheet or an envelope for money.
Surely, we have all encountered a situation where we need to find an envelope for a CD. And if the original envelope is lost, there is no problem: you can use a regular A4 sheet.
To fold the disc sleeve, follow these instructions:
- Fold the paper sheet in half across the long side.
- Unbend the fold - this mark will be the middle of the product.
- Fold one short side into a triangle so that its sides can meet in the middle.
- Now bend 4 cm inward on both sides.
- Fold the workpiece along the intended fold.
- Fold the top edge inward to the level of the base of the triangle and fold it inward.
- Fold the triangle upside down.
The CD envelope is ready!
To make a paper envelope for a disc, you will need:
- Double-sided colored paper.
- File.
- Cardboard.
- Ruler (simple and with circles).
- Simple and curly scissors.
- A simple pencil.
- PVA glue.
- Knife.
- Spoke.
- Toothpick for curling paper.
- Beads.
Work order:
- To make an envelope from paper for a disc, first cut out a template for the future envelope.
- Take the cardboard from which the envelope will be made. Place the template on the cardboard and trace.
- Cut with simple scissors, but one edge needs to be cut with curly scissors for beauty.
- After the base of the envelope is cut out according to the template, you should “punch” the folds so that they look beautiful on the outside and bend easily. A knitting needle can be used for these purposes.
- Next, you need to bend the product and continue working.
- On the side of the pocket where the disk will be placed, you need to mark a slot in the middle. Cut with a knife. Apply PVA glue and glue the “wings”. The envelope is ready!
- Now you need to decorate it. From orange and blue paper, cut strips 5 mm wide and 30 cm long. Glue them together one at a time. The length of each strip should be 60 cm.
- Insert the tip of the strip into the slot of the toothpick and begin winding, making a rotation, starting with the blue color. It is necessary that the turns of paper fit snugly against each other. Having reached the end, place rulers with a diameter of 12 mm in the circle, remove the toothpicks, and let the spiral unravel. Give the roll a teardrop shape.
- For the center of the flower, take yellow strips 30 cm long and 10 mm wide. Cut the strip into noodles. If you find it difficult to cut evenly, you can draw a line in the middle with a pencil.
- Roll the roll tightly and secure it at the end with glue. Unbend carefully.
- Make a flower from the received parts. Make 5 of these flowers.
- Glue them onto the envelope.
Banknotes as a holiday gift may not be the most ethical souvenir, but they are nonetheless very popular. In order to brighten up some inconsistency with etiquette, it is customary to give banknotes in an envelope. And in this case, you don’t have to limit your imagination when choosing the shape of the holiday packaging by using a standard A4 sheet.
Instructions:
- Cut part of the sheet so that you get a square.
- Fold the sheet along two diagonals and smooth out the folds.
- Bend one of the corners inside towards the center.
- Fold the workpiece along the center fold line.
- Draw the side angles to the middle of the base of the resulting triangle.
- Bend the upper corner that is in the middle in the opposite direction and form a diamond out of it with your finger.
- Fold the top triangle along the base line so that the top fits into the diamond.
The envelope is ready!
There is a somewhat complex, but more sophisticated option to make an envelope from A4 sheet for money. To do this, follow these instructions:
- Fold the A4 sheet in half along the long side and straighten it.
- Now fold the top right corner into a triangle towards the center of the fold.
- Repeat the previous step for the lower left corner.
- Fold the side of the figure so that its edge coincides with the side of the right triangle. Fold the protruding bottom edge over the corner.
- Repeat the previous step on the left side.
- Now fold the corner again into a triangle to the level of the bottom fold - tuck the corner under it.
- Repeat the same operation on the left.
The beautiful envelope is ready!
Envelope with jumper
An elegantly closing envelope with a jumper can be made from brightly colored wrapping paper. However, it is still better to take A4 format for this model.
Instructions:
- Fold the A4 sheet across the long side.
- Fold the top edge outward so that it meets the fold line.
- Fold the resulting rectangle in half again outward and upward.
- Straighten the last fold, make a fold along the line of its middle.
- Slightly bend the bottom corners of the workpiece outward.
- Bring the sides of the figure together along the boundaries of the triangles.
- Unfold all the folds and fold the sheet along the right fold in the middle.
- Bend the folds of the rectangles outward and inward in 2-4 steps.
- Flatten the bottom triangle along the folds so that the outer sides remain in their original position, and the inner ones can fold inward.
- Fold the entire sidewall inward at the center of the triangle.
- Tuck the bottom corners inward.
- Fold the upper part with the tongue and bend it along the lower base of the resulting triangle.
- Hide the tongue behind the bridge in the center.
The envelope is ready!
As you probably already understood, making an envelope for a disk from A4 sheet is not at all difficult. Stock up on the necessary materials, apply a little imagination, and you will end up with a wonderful craft.
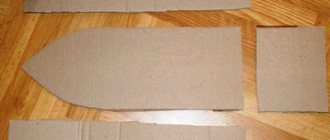
Envelope templates
With this template you can make envelopes from colored cardboard
:
By adding a ribbon, you will get envelopes for different occasions
: For greeting cards, money, invitations, etc.
Long envelope template
:
Envelope template on A4 sheet
:
You can decorate envelopes with colored lace or appliqués
:
You can use beads and threads
to close the envelope:
Envelopes are sometimes decorated with various paper details
, made in various techniques: origami, quilling, scrapbooking, etc.
Read more about the quilling technique
you can read here.
More about paper flowers
you can read here.
DIY money envelopes
What could be more banal than a gift in the form of money
, but sometimes this is the only thing that comes to mind.
To make your gift unique, you can place it in a handmade envelope
. The envelope can be beautifully decorated and signed like a postcard.
Envelopes for money are usually made of cardboard and have an elongated shape so that the bill can fit completely inside it
. You can draw the templates yourself or use ready-made templates:
Decorative and interior decoration
You need to take two satin ribbons of different colors and unequal widths. The length of the material is equal to the length of the side of the envelope with an addition of 3 cm. A wide tape is initially glued to the scrap paper using double-sided tape, after which a narrow tape is fixed on top of it.
In the middle of the envelope, 2 more small ribbons are harmoniously located, secured with tape and tied in a bow. To make the bow more expressive, you can place several beads on it. The template is located below.
To keep the disc safe, the inside of the envelope will have a pocket made of scrap paper, cut in the shape of a rectangle. One corner of the rectangle is made with scissors in the form of a semicircle, and the remaining 6 mm are folded inward. This will allow you to hold the disc firmly.
Using crushed pencil lead, the rounded edge is tinted. Double-sided tape is glued to the curved edges of the rectangle and fixed to the right side of the envelope. Such an envelope will fully fit another disc. To do this, you need to repeat the previous steps only for the left side.
We glue the square, made with decorative trim, onto the front part of the base. And that's it, the envelope is ready.
Envelopes for money (templates):
Here are some helpful ideas on how to make and decorate money envelopes that make great gifts.
along with their contents.
Money in an envelope: original ideas
The envelope design allows you to place the money inside in different ways.
.
Here are some ideas to help you make original envelopes. For example, you can use a postcard
, inside which you paste a small envelope with money.
You can write wishes on the card, and when you look inside, the recipient will find a cash gift
.
Another option is to make the envelope also in the form of a postcard, and attach satin ribbons inside that will hold the bills
.
Book of envelopes
. This original idea will appeal to those who would like to learn how to save money. You can make some simple envelopes and sign them, indicating the purpose for which the money is stored in them and the time when it can be spent.
Step-by-step instructions for making a pocket
When you are already tired of the usual CD packaging, you can do something interesting and unusual. And we will help you with this.
So, let's get to work:
- take old glossy magazines;
- look through them, putting aside the brightest pictures - they will become the basis of your pocket;
- find an old factory envelope;
- glue it very carefully - this way you will get a stencil;
- place it on the selected image (it is important that the main component of the composition is in the center of the future pocket);
- trace the stencil with any black pencil;
- cut the envelope along the marked lines;
- glue it together in the same way as the factory product.
Such pockets can become a real decoration for a teenager’s room, and if desired, one or two envelopes will become the first copies of an unusual collection. At the same time, the choice of topic is always yours.
