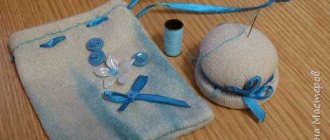
Little and big defenders of the Fatherland will definitely like a DIY cardboard tank. This craft can decorate any exhibition dedicated to February 23 or Victory Day.
For this craft, you can use cardboard or thick paper. Making a paper tank with your own hands is not as difficult as it seems at first glance.
How to make a tank from paper and cardboard with your own hands: diagram with cutting template
How to make a tank out of paper? To create a tank you will need:
- thick paper or colored cardboard
- thick paper or corrugated cardboard
- glue
- scissors
- ruler
- pencil
- toothpick
- tank template for cutting
First, you will need to print out a paper tank template. You can find the template itself at the end of the article.
Printing the tank template
We take a simple green or brown cardboard and transfer the drawing of the lower part of the tank hull onto it.
Transferring the tank drawing
Cut along the contour. We make small cuts next to the triangles.
Cut along the contour
We bend the workpiece along the lines. Glue the edges to each other. This is the bottom of the tank.
Gluing the bottom of the tank
Cut out a rectangle 18 cm long and 12 cm wide from green corrugated cardboard.
Cut out a rectangle
Apply glue to the bottom of the tank.
Apply glue
Glue the rectangle on top to the bottom of the tank.
Glue the rectangle
It should protrude 2 cm from the side edges on each side.
The rectangle should protrude
From green corrugated cardboard we cut out two strips 21 cm long and 2 cm wide.
Cut out two stripes
Glue them from the bottom to the sides under the protrusions of the rectangle.
Glue the stripes
We cut out two more strips of green corrugated cardboard, 24 cm long and 2 cm wide. Glue them from the bottom inside the caterpillars.
Glue the strips inside the tracks
From red corrugated cardboard we cut out strips 2 cm wide and about 30 cm long. The number of strips is 20 pieces.
Cut out 20 red stripes
We take two such strips, put them together with the right sides facing out, twist them in a spiral and seal the edges. It turns out to be a wheel. And so on we do all 10 wheels in pairs.
Spinning the wheels
We glue the wheels inside the tracks. There will be five wheels on each side of the tank.
Gluing the wheels
Cut out a circle with a diameter of 7 cm from ordinary green cardboard.
Cutting out a circle
From green corrugated cardboard, cut out two long strips 2 cm wide and 24 cm long.
Cut out the green stripes
We take two, fold them right sides out and twist them into a ring with a diameter of 7 cm. Seal the edges.
Glue the strips together
Glue the corrugated cardboard ring onto the cardboard circle.
Glue the ring and circle together
From corrugated cardboard of blue and green colors, cut out several rectangles with a width of 2; 2.5; 3; 3.5 cm and approximately 20 cm long. Twist into rings and insert inside the large ring one at a time. We start with rings of smaller width. We glue them.
Insert rings
When all the rings are glued together, cut out a circle with a diameter of approximately 3.5 cm.
Cutting out a circle
Glue on top. The upper part of the tank hull is ready.
Glue the circle
In the upper part of the tank body we carefully make a cutout for the cannon.
Making a cutout for the cannon
From green corrugated cardboard, cut out a rectangle approximately 15 cm long and 2 cm wide.
Cut out a rectangle
We twist a cannon out of it and glue it into the hole in the body.
Twist and glue the cannon
We glue this structure on top of the lower part of the tank hull.
Glue the structure with the cannon
We complement the tank with various decorative elements. Glue the blue stripes along the edges.
Glue the blue stripes
Glue the twisted tubes.
Glue the twisted tubes
This is how our tank will look from above.
Tank with turret and tubes
We cut out a five-pointed star from red cardboard and glue it to the top of the body. Cut out a rectangle and bend it in half. Place a toothpick inside and glue it together. This is a flag. We insert it into the tank.
Glue the flag and star
You can make a tank out of cardboard with your own hands as a gift for February 23 or Victory Day.
Tank for February 23rd as a gift
Or you can play out a real military battle with our tank.
Fighting a cardboard tank
See how to make an origami tank:
How to make a paper tank (video):
True connoisseurs
If you ask the smallest member of the family about the combat vehicle, he will happily and without error describe all the smallest details of its appearance. And he will, without a doubt, react positively to the offer to make a tank with his own hands.
To bring the varieties to life, all kinds of manipulations and materials are used, each exhibit is beautiful and incomparable in its own way. On the eve of the celebration of the Great Victory Day, during labor education lessons, leaders are happy to introduce thematic crafts into classes.
While constructing with their children, parents at home simultaneously tell the story of the Second World War. They remember the heroes, thanks to whose courage all residents of the country owe freedom and a peaceful sky.
From the list of possible ingredients for a tank craft, the diagram of which can be found on the Internet, the following options are common:
- Colored cardboard.
- Pieces of fabric.
- Candy, cookies and drink bottles.
- Purchased parts.
But most handicraft lovers prefer designing paper tanks; the material is always at hand, and production does not take much time.
Important! Decorative elements are easy to correct or supplement with improvised means; juice straws or matchboxes are in perfect harmony and are combined with equipment.
Tank them matchboxes
If you want to make a durable cardboard tank with your own hands, it is convenient to use a universal cardboard material - matchboxes. Depending on the desired size, you can assemble the base of the tank from two or four boxes; for the tower you will need another one.
Preparing boxes
Box o
For the tower and boxes
and
for the base, carefully wrap it in colored paper. For the barrel, we use a toothpick, a kebab skewer or a lollipop stick, wrapping it in a strip of colored paper. We pierce a hole in the front wall of the tower with an awl and insert the barrel into it. We glue the tower to the base of several boxes.
Caterpillars
To depict caterpillars, glue black paper circles to the side surfaces of the base; buttons can be used for larger volumes. We wrap the edges of the base with strips of corrugated paper. If you don’t have corrugated cardboard on hand, you can fold strips of plain paper like an accordion.
Rotating tower
If we improve this model a little, we can make a tank with a rotating turret. This tank will be a wonderful craft for school. To do this we need a plastic soda cap and a plastic straw. For perfect execution, instead of a tube, you can choose a bolt and nut of the appropriate diameter.
The plastic cover will serve as a spacer between the tower and the base. We will need to pierce the tower and base through the center; this can be done with an awl or a thick needle. Heat the awl or nail over the fire and pierce the plastic lid. Naturally, work with sharp instruments, and even more so with fire, is best done by parents, or, at least, in their presence.
Now we assemble our structure onto a plastic tube or onto a bolt, securing a nut on the opposite side. To prevent the tube from slipping out, you can melt its end over a fire and cool it, pressing it against the metal, so that a head is formed at the end, like a nail.
Way to success
At a young age, it is better to start with fairly simple diagrams and instructions; after gaining experience, you can move on to more complex and unique specimens. There are documents with a large number of blanks, following them you can assemble a paper tank for children, which will be as similar as possible to a real car.
Looking at the visualization, you can notice quite small nuances and all the subtleties of production; undoubtedly, such masterpieces deserve respect.
Young masters begin with primitive works, and the most productive experiments are best obtained from cardboard; the material is quite practical and easy to handle. Handmade execution will allow you to make your own adjustments to the finished design and add the desired modifications.
Note!
- DIY paper machine craft: various options for creating a machine
- How to make paper flowers with your own hands for children - a master class on making
- How to make Minecraft figures and blocks from paper: step-by-step instructions
Recommendation! For the first stages, it is necessary to prepare a photograph or picture of a suitable combat vehicle. It will stand on the table as a visual example; looking at the image, the question of how to assemble a tank from paper will no longer be difficult.
After a good rummage on the Internet, you can find quite rare pieces to repeat; unique and creative things will become the highlight of the interior.
What is polygonal modeling and how does it happen?
Nowadays, polygonal paper modeling is especially popular, when the three-dimensional model is a polyhedron built according to all the rules of geometry. Its faces are polygons, hence the name. Strictly speaking, this is 3D modeling. It appeared when people learned to determine points in space and set coordinates along three axes X, Z, Y.
If we put points in these coordinates as vertices and connect them with edges, then we will get just a polygon. By connecting several polygons, we get a polygonal mesh. Thus, you can create any models you like - animals, people, popular characters, inanimate objects, equipment, etc. The finished model looks very impressive. Another name for the technique is papercraft.
The following types of polygonal modeling are distinguished.
- High poly involves creating a model of an object that is as accurate as possible in all details. Naturally, a large number of polygons are used here. You can create a realistic figure that follows the anatomy of a person or animal.
- Lowpoly means that there are relatively few elements in the polygonal mesh, high detail of the image is not needed, an approximate resemblance to the original is enough.
Polygonal models serve as an excellent original interior decoration, help to decorate a holiday with style and taste, and they can also be used as children's toys, which a child will be happy to make with his own hands.
Short review
Before you sit down to design, you should know what an armored vehicle consists of and carefully think through the work. The chassis is formed from small wheels on which a caterpillar chain is stretched.
Products made from A4 paper come in both smooth and with protruding ribs for greater adhesion to the ground. The case will be the largest part, in real life it can fit 5 people. This is important to take into account if the layout is planned to be made as close as possible to the real structure.
Small hatches for viewing will be integral components of the body. Children get the most pleasure from constructing a tower and a gun; here the most daring ideas and preferences are used.
Note!
- What can be made from a box at home for kindergarten: the best craft ideas + video master class
- How to make flowers from napkins quickly and easily: 15 ways to create bouquets of roses, carnations, peonies
- How to make flowers from corrugated paper with your own hands: step-by-step instructions for creating voluminous bouquets
The upper blank of the tank, made of A4 paper, can rotate if such possibilities are provided for in advance and a wire hinge is inserted. During the game, such maneuvers will be quite useful and exciting, the toy will be dynamic, and the battles will be more exciting and natural.
Advice! All kinds of emblems and, of course, a red star are useful for decoration; when decorating, you can add all the details that the creator’s soul desires.
DIY paper tank
The interest and desire to create models of a combat vehicle, such as a tank, arises mainly among boys. However, there is no fundamental gradation or recommendation for creating this craft.
A tank can be created by absolutely anyone who has expressed a desire and curiosity for this type of craft.
Interesting ideas
When assembling tanks from paper and cardboard, you should pay attention to the corrugated structure of the dense material; it will make excellent tracks for the figure. To do this, you need to cut thin strips from a TV or refrigerator box and attach them to the chassis.
The hollow base can be hidden with sheets of blanks of a suitable size and metal wheels can be drawn on them with felt-tip pens or paints. The moving part can also be designed in another way: twist skeins from long ribbons and fasten them with the inside out, in this case you can create the effect of spinning gears.
If you are planning a large number of models, it is worth making a tank from boxes, the remaining matches can be easily pulled out and used as a blank for a masterpiece.
Recommendation! Cigarette packs are also used as a basis for figurines; an impressive composition can be constructed from a large number of components.
The square geometric components perfectly replicate all the armored elements of military units, and colored paper makes an excellent camouflage.
Plasticine tank
Little children love to sculpt with plasticine, since this material is bright, flexible and can take any shape. Any child, even a very small one, can make a tank craft from plasticine.
To save plasticine, we can use a small box, for example, a match box and a plastic soda cap. They are wrapped in a thin layer of plasticine. Or we fashion all the details from a single piece of green plasticine.
How to make khaki plasticine
As a rule, children's crafts make a tank from bright green or blue-green plasticine. But if we want to achieve greater authenticity, we can mix green and brown plasticine, so we get a military khaki color.
We sculpt the chassis of the tank
First, let's sculpt the chassis of the tank. Let's roll ten identical balls of black plasticine, and four identical smaller balls. We flatten them a little with our fingers, turning them into flat cakes, and with a stack we draw lines, like spokes on wheels. Let's arrange two sets of wheels in one line on the table: five large ones in the center and two small ones at the edges.
Roll a piece of black plasticine into a long sausage and flatten it into stripes. We will wrap this strip around our wheels. You can raise the outer wheels a little to show the tank in motion. You can apply cross strokes in stacks on the finished track part.
We sculpt the base and tower
For the main part of the tank we will need a large piece of plasticine or a matchbox wrapped in green plasticine. You can complicate the part a little by bevelling its front and back surfaces, like a trapezoid.
Note!
- DIY military crafts step by step: 150 photos of the best craft ideas for children for school or kindergarten
- DIY crafts for May 9 step by step: 150 photos of the best crafts for Victory Day
- DIY crafts for February 23rd step by step: master class with photos and descriptions of how to make crafts for Defender of the Fatherland Day
Wrap the bottle cap in a plasticine cake or roll a ball out of green plasticine. It needs to be flattened a little and the “nose” pulled out. We attach the turret to the base of the tank. We attach ready-made tracks to the base on both sides. From a piece of green plasticine we make a long, rather thick sausage for the muzzle. To make the barrel more durable, you can wrap plasticine around a toothpick, match or straw.
Finishing touches
We cut a hatch on the tower with a stack. Behind the turret you can add a rectangular part - a fuel tank. And a small red star on the tower will complete our plasticine tank.
Experimentation is not prohibited
At various exhibitions and competitions in various institutions, models of the same type are presented. Improved options can be provided for home use and games.
Guided by your imagination, you should make personal adjustments and add bright colors to the design. Each young designer decides for himself how to make a homemade tank, the main thing is that the process is interesting and entertaining.
Taking old models of equipment as a basis and arming them with modern guns, such a solution would look very extraordinary.
Having a large amount of material available, it is worth trying your hand at creating three-dimensional compositions. Thanks to its small components, a tank made of modules looks very beautiful; the process will be painstaking, but the end result will delight you with its uniqueness.
Important! By experimenting with shades, you can create both winter and summer camouflages; khaki-style design will complement foreign models fighting in hot climates.
Materials and tools
To create a volumetric polygonal model you will need the following:
- pattern-scan;
- paper;
- ruler;
- a simple pencil;
- stationery knife, scissors - large and manicure;
- toothpick;
- glue;
- napkins;
- modeling mat on which you can cut with a knife.
To print the development, you should choose thick enough paper or thin cardboard so that the finished model holds its shape well, and at the same time, it is easy to make folds. Best suited:
You can immediately take colored paper or cardboard or then paint the finished product with nitro-based paint from a spray can. It is better not to use water- or oil-based paints, as they deform the paper.
Paper is an ideal material for beginners. Experienced craftsmen often use plastic or metal for 3D modeling.
As for glue, it is best to take a glue stick or transparent glue moment. The main thing is that it does not have a water base, sets quickly and does not leave marks on the paper. Use a toothpick to apply in hard-to-reach places. Some craftsmen connect parts using double-sided tape, but it is not always convenient.
For fun
Boxes from a washing machine or refrigerator make huge exhibits; a pet can easily fit into the hatch and take part in the game. All parts of the tank for gluing are easy to draw, following the detailed instructions, and for joining you will need the help of a friend.
The chassis in such copies can be made from some components of old toys, after which the machine will be able to move around the room.
Such ideas will be of interest to large families with more than one child. By participating in the process, children will unite to achieve a common goal and the team spirit will be strengthened. By playing with a work of their own art, young people will understand that everything can be done by themselves, they just need to show a little patience and perseverance.
Paper plastic in diagrams and templates for beginners
This type of creativity lies in the fact that volume is the key characteristic of the product, while the details are realistic and plastic.
We advise the boys to search the Internet for models that they like: a warship, a car, an airplane, a tank.
Diversify your everyday life
You don’t have to wait for a themed event or February 23 to start creating; in any free time you can start implementing ideas. Making it yourself is very entertaining and interesting, minutes of labor fly by unnoticed, and the figurines will delight the eye for many years.
Children are often bored and don’t know what to do with themselves; parents should provide support in any endeavors of the young person. Taking the preparatory steps upon yourself, offer to create a masterpiece together and, at the same time, talk about all the intricacies of the work.
The question of how to make a tank out of paper is not as complicated as it might seem at first glance; the origami style does not involve the use of glue and scissors at all. And the figurines turn out to be quite cute and neat; with their help you can decorate a boy’s nursery.
The voluminous panels will fit perfectly on the wall; the huge background will easily accommodate all the desired designs of military equipment. Working together with your beloved child will bring a lot of positive emotions and memorable moments. It would be foolish to neglect such opportunities, and all the time and effort spent will not be in vain.
Crafts using ready-made templates
There are many ready-made models carved from wood or metal that only a high school student can assemble. You can find ready-made drills for making military equipment with your own hands. They need to be printed, cut and glued. This way you can collect a whole collection of different tank models.
How to make a paper tank: photo instructions with examples of beautiful specimens
Please repost
0