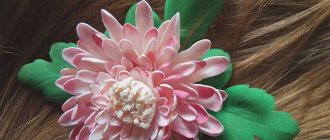
Welcome to the pages of bantomaniya.ru! I would like to dedicate today’s article to foamiran bows. For a whole week I worked with great inspiration, day and night, with this unusual, very light and beautiful material.
I photographed the entire process in order to collect a whole collection of master classes. I am sure that it will be very useful for many beginning craftswomen for learning, and for more experienced ones for inspiration. I myself have a young craftswoman growing up, who, by the way, helped me (her work will be below).
Bows are mainly used for hair, but I think their range of applications is much wider. For example, for decorating gift wrapping or for decorating photo frames, notebooks and other items. Below in the comments you can share your ideas for using such decorations!?! In the meantime, let's move on directly to their manufacture.
All products are made according to a template that you can make yourself. The photo with the blank must be enlarged to the required size and, attaching tracing paper or a white sheet of paper to the monitor screen, redraw the finished pattern along the contour, and then cut out this template. If the pattern is needed for repeated use, then it is better to transfer it from paper to cardboard.
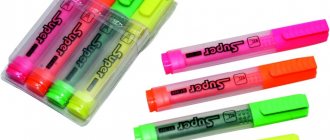
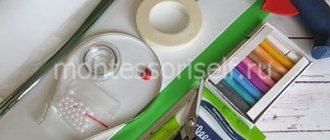
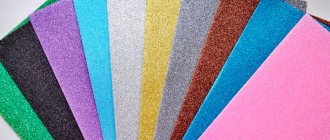
What else is needed for production: -Foamiran (you can use different ones); -Glue (moment crystal, hot glue or any other suitable); -Ruler or measuring tape; -Pencil (crayon or thin piece of soap); -Various ribbons (satin, grosgrain, knitted lace and nylon); -Felt; - Cabochons, rhinestones, etc.; -Basics (elastic bands, hairpins, clips, headbands, etc.); And of course, a creative mood and a lot of inspiration!
How to make bows from foamiran in 5 minutes - step-by-step instructions for beginners
These easy-to-make and at the same time quite interesting curly bows can be made in literally 5 minutes.
My stencil turned out to be 12 cm long and 3 cm wide; the finished bow is a little less than 6 cm. You can increase this template to a larger size. This is optional.
I use white glitter foamiran.
On the left side we trace the outline with a pencil and cut it out.
It is cut very smoothly and easily, the main thing is that the scissors are comfortable.
We lubricate either the ends or the middle with glue (I use instant crystal glue).
We wrap the ends to the middle and press with our fingers, holding until completely glued.
We glue the elastic band together with hot glue, but this is not essential; you can also use another suitable glue.
I use a small rubber band the size of a bow.
To wrap the bow and elastic band you will need a small strip of foam, glue it in a circular shape at the joint.
It took longer to describe than to do) At the end I glued a couple of rhinestones.
It also looks very nice from the reverse side.
What is foamiran
Perhaps some of you have encountered foamiran. Touching it, it will seem that you have suede or some kind of sponge in your hands. But the sensations will be deceived, since in fact it is rubber. If you heat it up, it can be deformed, and the material will remember its shape, and the point to which it can be stretched is sometimes very large. This property allows handicraft lovers to create unusual shapes, which you can do with us.
There are enough ways to influence foamiran sheets with temperature. For example, one of the simplest is an iron or lighter. Having warmed up the rubber, you squeeze it with your fingers like plasticine, twist it, make folds. Depending on the heating method used, different effects can be achieved, since the temperature of exposure will differ.
Foamiran can be cut perfectly with scissors, which is why even a child can handle it, creating round or other shapes from the material. Speaking of children, it is worth noting the absence of any toxicity in its composition. The material paints well due to the presence of pores in the structure.
Bows made of glitter foamiran according to the trident pattern with elastic bands
The bows turn out to be very light, almost weightless, and you can wear them even on very sparse and thin hair (the kind that little girls usually have) they will not fall off or get lost. But the only thing I noticed is that the glitter foamiran clings to clothes and the sparkles fall off.
I concluded for myself that such bows are not durable compared to ribbons, but they are very beautiful, so they also have a place).
My trident is 11 cm long and 4 cm wide. The length of the tail is 6.5 cm, the width is 2.8 cm. Redraw the template and cut it out.
We also trace along the contour on the shape.
You need to cut very carefully so as not to accidentally cut too much.
You should get something like this.
Apply glue to all edges of the trident on both sides.
We glue only the outer ones first, folding them towards the middle. We glue them not overlapping, but end-to-end.
Afterwards we glue the middle ones on top, also end to end with each other, so that there is no large thickening.
Hot glue the tail.
We fasten the matching elastic band with the same glue.
You can first wrap the middle with a piece of grosgrain ribbon.
And on top there is a strip of tire that imitates rhinestones.
They certainly look incredible. For a real princess)))
We tried the rubber bands right away and made cute braids with bows).
Materials for work
To make the bow, not standard, but glitter foamiran was used. It is thicker and less elastic than regular plastic suede, so it holds its shape well. Glitter sheets must be purchased immediately in the desired color, since they cannot be tinted .
Working with the material is pleasant and exciting, but you need to keep in mind that it only shines on one side. Therefore, it is not suitable for all crafts.
To make one bow you will need:
- glitter foamiran in green and red colors, 2 mm thick;
- 30 white half beads with a diameter of 4 mm;
- two snowflakes;
- 2 half beads in pimples with a diameter of 1 cm;
- white double-sided stamen with sparkles;
- transparent (or white) oval center of the oval.
If you want to make two crafts, then take more materials. You can create one at a time or both at once to get perfect symmetry. Here it is more convenient for someone.
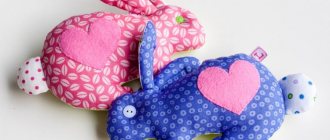
Bows with ears on clips - made of foamiran with sparkles
I also wanted to make something funny, like a bow with bunny ears. I think many creative lovers will appreciate it.
Redraw the ears, 2 pieces and the inside of the ears, also 2 pieces.
In addition to the ears, you also need a bow; an ordinary standard one will work best here.
We cut out the large ears from white, and the inner ones from pink.
The bow itself and its back part will also be white.
We glue the bow blank, grease the ends with glue and secure it in the middle.
Now we glue the pink part of the ear to the white one.
Assembling the bow, before gluing the ears to the bow, we must first arrange them evenly and beautifully.
We have determined the appropriate location for the ears, now you can glue them here, and put a bow on top of them.
It will be attached to a clamp, so we apply a moment to it (it must be applied according to the instructions on the tube).
Hold until the surfaces are completely set.
We wrap it in a circle with a small piece of the same color.
You can leave it like that, or you can attach some fluffy stuff in the middle.
Second detail of the bow
Now take the second rectangle, fold it in half and cut it at an angle on the right side.
This is what it should look like on a reversal.
Further work will be similar to what was previously done. Apply a drop of hot glue in the center of the workpiece, then bend the edges in the longitudinal direction.
Then we make folds on the sides. Don't be afraid of small traces of hot glue; we will then cover them with another blank.
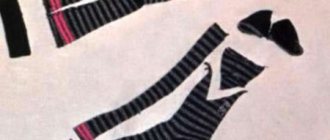
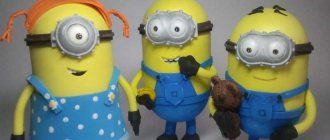
Butterflies made of marshmallow foamiran according to a template with dimensions on a hairpin
I really like the structure of this material, it is light and very delicate, pleasant to the touch, but the main thing is that it is easy to work with, it does not crumble and does not need additional processing, it also holds its shape quite well. Therefore, you can make different fantasy patterns, for example, wavy wings on the wings of a butterfly. Such ideas look quite original and interesting.
The only thing is that to cut out such beauty you need to have good thin scissors (you can use nail scissors) and work hard.
It is advisable to also sharpen the pencil so that it has a thin tip.
Marshmallow, unlike glitter, is thinner, so cutting out shaped products is much easier.
For the bow, you can take the usual classic version.
Everything is assembled, such a butterfly can be attached to an automatic hairpin.
First, attach the tail to the hairpin.
Then we collect the bow itself.
We first attach the large butterfly to the bow, and then the small one.
Now let's glue everything together.
We wrap a strip around the middle.
Ready. You can decorate the wings with rhinestones or paint patterns with acrylic paints. But I decided that it looks very nice anyway).
Tips for beginners
Bows made from plain or glitter foamiran hold their shape well, do not fade and serve as an excellent addition to any outfit. Step-by-step instructions and templates will help you create a real work of art in just an hour. It’s better to start with one or two-layer bows. Later, you can begin more complex designs from shaped parts.
It is important to choose the right color combination. It is advisable not to mix more than 3 colors in one product. You can decorate the craft with a detail made of gold or silver glitter foamiran. Finished bows are sometimes painted with oil paints, pastels or acrylics.
There are several subtleties of working with foamiran. Beginning craftswomen also need to take them into account:
- It is better to choose sheets no thicker than 1 mm, then the products will not look rough;
- although it is a plastic material, you should not stretch it too much, it may tear;
- It is better to glue parts together using a hot glue gun;
- To impart plasticity, it is easiest to heat the material by applying it to a warm, but not hot, iron.
Foamiran bows are a beautiful decoration for hair, clothes, shoes and interior items. Making them is very simple; a large number of master classes with templates will help you cope with even a complex model.
How to make a bow from Thomas and felt
Continuing the theme of butterflies, we’ll make another one, only now together with felt and you can attach it to the headband. Also on our website you can find a master class on how to make a felt bow trimmed with beads and rhinestones.
The wingspan of the butterfly was 10.5 cm. The height of the wings was 4.5 cm. The bow was 12 cm long, 3 cm wide.
Another larger bow is 13.5 cm long and also 3 cm wide.
It is no longer possible to draw contours on felt with a pencil, so you can use soap or chalk.
We glue the bows by connecting the ends in the middle.
Then we connect them to each other.
We make the middle the same as the butterfly itself.
It looks very nice.
The headband was also shiny and just the right color.
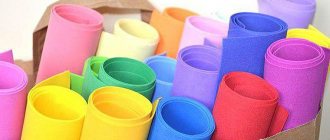
Hair bows made of foamiran and ribbons
Another of my favorite materials is ribbons and lace; with them, jewelry is more durable and looks amazing. Of course, fiddling with them is a little more difficult, but the result is worth it.
redraw the stencil.
The steps are similar to the previous decorations, outline and cut out.
Lubricate the ends with glue.
We connect one by one, first one pair, then on top of another pair.
For 1 bow you need 3 strips of ribbon 2.5 cm wide and 17.5 cm long. Knitted lace 2 strips 1 cm wide and 13 cm long.
First, let's assemble the colored ribbon. We find its middle and fold both ends to it with a slight overlap on each other.
We collect on a thread. Initially I wanted 2 strips, but then it seemed to me not enough and I made 3 strips of tape.
We tighten the thread and fasten it.
The lace is a little more difficult to assemble because it is all in a hole. It is necessary to go back and forth with a needle and thread several times.
Sew an elastic band to the colored bow.
Glue a foamiran bow.
Then from lace.
For wrapping we take grosgrain ribbon.
And the final touch is the cabochon.
All our bows are ready! My eyes are happy looking at them.
DIY bows for children for school on September 1
For school, white bows are always relevant; they are needed both for September 1 and for everyday wear.
For anyone interested in the topic of bows for school, I recommend checking out this article
we transfer the stencil and cut it out, then according to the template we cut out a blank from the glitter material.
For 1 bow you will need 2 strips of lace, 15 cm long and 4 cm wide.
We fold the edges of the lace in the middle with a slight overlap on each other and stitch it with a needle and thread, then pull it together and secure it.
Satin ribbon 5 cm wide, 20 cm long, you will also need 2 pieces.
We stitch and tighten in the same way as lace.
All the necessary parts that need to be put together.
First, an elastic band is sewn to the satin ribbon bow.
Then the foamiran blank is glued.
By the way, you can leave it without using lace, that’s an option) I also cut out the middle using a template from foamiran; you can take any other idea for the middle.
However, I have already prepared the lace, so let’s glue it.
We fasten everything in a circle with grosgrain ribbon.
And decorate the top with a suitable center. The next day my daughter went to school wearing this bow. Beauty!
Bow hair clip
Tools and materials
- foamiran sheet;
- metal base for a hairpin or hoop;
- thick paper or cardboard for the template;
- glue gun;
- scissors
Step-by-step making of a bow
- We draw three templates of parts for the hairpin on thick paper or cardboard, as shown in the photo, and cut them out. If you have problems with drawing, you can find templates for foamiran hairpins on the Internet and print them on a printer. One by one, we apply the templates to the back side of the foamiran sheet and trace them with a pencil or pen.
- Carefully cut out the parts from foamiran.
- We make a butterfly by gluing each end in turn to the center of the part, as shown in the photo.
- Glue the butterfly to the base.
- Glue the strip. Apply glue on all four sides. First, on top of the butterfly, then on the sides, cut it to size and seal the edges.
- We glue the finished decoration to the selected type of base; a hairpin, hairpin, hoop or hat will do.
Video instruction
The author's video demonstrates how to make jewelry from foamiran with your own hands step by step. After looking at it, you will find out what materials are needed, how to make parts and connect them together to get the desired accessory.
Master class from blanks with rounded edges
And my daughter made this bow. For the first time, she didn't do too bad. This suggests that any novice needlewoman, regardless of age, will be able to create such beauty with her own hands.
Of course, I helped her make the stencil, but she did the rest on her own.
My daughter managed even without my prompting. Everything is intuitive. Trace and cut out.
The only thing I didn’t have time to tell her was that she needed to trace with a pencil and not with a pen.
A drop of glue and half the job is done.
The parts are connected together.
To decorate the middle, she also cut out a butterfly with glitter. And I glued all this beauty onto an elastic band for my hair.
My daughter worked for a reason, she was making a gift for her beloved friend).
Video about how to make bows from eco-leather - foamiran with your own hands
I’ll show you another interesting way to create a bow in my new video. The template for it is below.
Our YouTube channel is quite young, so I will be grateful for your likes and comments, and if the topic of creativity is close to you, then subscribe to the channel so as not to miss new videos.
If you liked our master classes, be sure to share them on your social network page.
Continuing the topic, I recommend looking at the article “how to make bows from different materials”
That’s all for today, see you in our new master classes! Join our group at https://vk.com/bantomaniya to be the first to know about their release.