Requirements for hair bands
Such accessories are a must for long hair. When planning to make hair bands with your own hands, you must comply with a number of requirements:
- The product must be made of elastic and elastic material that can retain its shape well and hold hair.
- The rubber band must be safe to use. It should not injure the hair and scalp.
- For work it is necessary to use materials that are safe for health.
The elastic band for fixing the hairstyle should not catch the hair or have protruding sharp decorative parts. The product should be comfortable and safe for hair.
Case for smartphone
Instead of the usual fabric or leather phone cases, it is proposed to create an exclusive model from rubber bands. The video of making crafts from rubber bands shows that the process is simple. It is important to consider the size of your phone so that it will fit in the case.
To create an accessory you will need a lot of rubber bands. The more colorful the shades are chosen, the more attractive the case will be in the end.
The model looks very interesting, reflecting the transition of different shades. The colors of the rainbow will look positive. Thanks to the machine, weaving will be convenient. A special hook will also be a useful assistant.
Materials for hair-fixing elastic bands
You can use various available materials to make decorative elastic bands to secure your hairstyle:
- ribbons;
- braid;
- grosgrain ribbon;
- satin fabric;
- velvet;
- any other beautiful fabrics.
For additional decoration, it is easy to use beads, beads, buttons, lace, and rhinestones.
A non-standard approach to work will help you make stylish and beautiful hair ties from any leftover fabric.
For the base of the product, it is easy to use existing rubber bands, old hairpins, or purchase an inexpensive option for remodeling.
Often, underwear elastic is used for crafts. Much depends on the design of the future product.
It’s easy to make elastic bands to decorate your hair and hold your hairstyle in place. Making baby rubber bands will take no more than an hour. Detailed master classes will help you cope with the work.
Some time ago, our blog published
an article by our author Lena Panda about storing jewelry.
Now it’s time to talk about storing children’s elastic bands, hairpins and other hair accessories. As often happens now, the topic was raised by participants in our private chat, and many immediately shared their photos and thoughts. What a small thing - you will say, and you will be wrong. It is worth teaching a girl to order from childhood. And where to start, if not with hair ties, which are so popular with fashionistas-babies from a very early age. Moreover, organizing the storage of these children's accessories is as easy as shelling pears.
The main rule when organizing the storage of children's hair accessories is the same as for any other category of things - they should be easy to take and return to their place, especially for a child. It is equally important that caring for storage areas is simple and quick: pick up the storage device, wipe off dust from the surface, and return everything to its place.
Of course, be sure to consider your child's age. It is not recommended to give small objects to children under three years of age. But, I must admit, elastic bands and hairpins are such wonderful educational material (colors, sizes) that you can use them from early infancy. The main thing is under the supervision of an adult.
Let's find out together which storage methods are convenient for children's hair accessories.
Closed storage
Closed storage is a method that many space organizers offer. When your things are put away in containers, drawers, cabinets, they collect less dust and do not clutter up the space of the room. Children's hair accessories are not such a voluminous category, but they tend to crawl around the house like cockroaches. But removed from the surface of chests of drawers, shelves, tables, and organized in one of the ways below, they will always be ready to come to the aid of the young fashionista and her “stylist”.
Containers with dividers
Plastic containers with dividers look like they were made for storing girly accessories. They are often sold in construction, fishing and fixed price stores in the department with all sorts of tools.
A “mobile” version of such storage is a pill organizer or a special travel container for cosmetics. In these, you can take rubber bands and hairpins with you to the garden or school, and set up a hairdressing salon there with your friends.
Closed cans and boxes
This is exactly our method with our daughters. The children I came across are not amenable to organization, and they refuse to put their wealth into separate cells. So the small but capacious jar holds all of their hair accessories. Yes, side by side, but in one place.
A more interesting method, but requiring preparation, is an organizer box for accessories. Several photos were sent by our readers. Each type of accessory - be it elastic bands, hairpins or headbands - has its place in the overall volume of the box (note that small boxes, containers, tubes are used as dividers - as holders for elastic bands). After use, such a box can be put away in a chest of drawers or a closet, and, if necessary, taken to any room where there will be a “beauty salon” today.
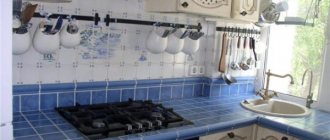
Drawers with dividers
If you have such an opportunity, move your daughter's hairstyle to a chest of drawers or a dressing table with a drawer. The fact is that you can conveniently and neatly organize one of the drawers for storing hair accessories. Use boxes, containers and even cutlery dividers. Taking everything out and moving it to another room may be problematic, but at least you will have your own corner for beauty.
And, by the way, completely unexpected things can be suitable as dividers for rubber bands - for example, an ice tray or baking cupcakes. Linen dividers “Everything is in place” with a large number of cells will also help organize the contents of the drawer. Imagine!
Hanging pockets
We wouldn't be us if we didn't talk about vertical storage. Hanging organizers with many pockets will help out if there is no space on shelves and drawers. They can be hung in a closet, on the wall (hook or rail), if necessary, removed and taken to another room, and then just as easily returned to their place. The contents of the pockets do not gather dust and are in plain sight - the ideal way.
Wall organizers
Since we are talking about vertical storage, I will show you wonderful examples of handmade organizers that are attached to a vertical surface and look like bright, cute decorative elements. I see only one downside to them - the contents will gather dust. But if you attach them to the inside surface of the cabinet door, they will collect less dust.
A ribbon, a ring and a nail (or a wall hook) - and now you have a mount for hairpins.
Photo frame + ribbon + small hooks from a hardware store - and you get almost a picture.
As a variation - a wooden base and clothespins.
Velcro wall hooks are ideal for organizing the storage of any accessories, elastic bands and hair clips, including.
A few more original ways
The imagination of handicraft mothers knows no bounds. With such organizers, the little one will definitely not want to throw away her wealth - she’ll rather put everything back in its place, it’s so interesting.
Dads can also take part in organizing storage space for children's accessories. Go through your bins, and you will probably find something that will be useful for organizing your daughter’s things. Well, or at least pick up a screwdriver :)
Fairytale dressing room
There are girls who love to dress up as princesses, fairies (or their mother - she’s almost a sorceress). For such fashionistas, you can organize a real dressing room, in which you can hang your favorite dresses, place hats and shoes, and even provide a dressing table. Look at all the amazing projects I've found.
Moreover, sometimes you don’t need to buy special furniture - a little princess’s dressing room can be made from an old fruit or tool box, or you can adapt an existing toy storage system.
How are your hair accessories inventories organized? We are very interested to know! Share your photos in our groups VKontakte , Facebook and Instagram!
Tools
Working on decorative rubber bands to secure your hairstyle does not require the purchase of special tools.
You will need:
- regular ruler;
- sewing needle;
- small scissors with sharp tips;
- a burning device or a simple lighter;
- glue gun
When creating bows, it is convenient to use stationery clips to fix the workpiece on a piece of cardboard.
Unicorn Headband
You will need: a hoop, shiny cardboard, scissors, a glue gun, white felt, a simple pencil, artificial flowers.
Master Class
- Print or redraw the ear and horn template, then cut it out.
- Trace the ear template onto white felt and cut it out. For one headband you will need 2 felt ears.
- Cut 4 smaller ears from glitter card stock.
- Glue 2 glitter ears on both sides of the felt ear. Make 2 such blanks.
- Transfer the horn template onto glitter cardstock and cut it out.
- Form a cone and secure with glue.
- Cut out a strip of shiny cardboard and glue it to the surface of the rim.
- Glue the cone in the center of the rim.
- Glue on the ears.
- Glue 3 flowers as shown in the image.
The Unicorn headband is ready! This fabulous decoration is perfect for any children's party :-)
A simple elastic band made from a piece of fabric
The simplest elastic band for fixing hair from a shred is a sewn strip of fabric, inside of which an ordinary underwear elastic is inserted.
It’s easy to use a flap for work:
- velvet;
- knitwear;
- suit fabric;
- chiffon;
- silks.
The width of the textile blank varies from 30 to 45 cm. The length of the blank for a narrow elastic band is 7-8 cm, and for a wide one it is better to measure 12-14 cm.
Note!
- DIY satin ribbon bows: photos of original design ideas, step-by-step DIY master class
- DIY shadow theater: step by step how to do it at home! 175 real photos
- DIY photo frames | How to make a simple and beautiful photo frame as a gift or for yourself from scrap materials
After cutting the workpiece, it is sewn along the seam by hand, leaving room for threading the elastic. Having passed the elastic inside, it is sewn together with several stitches. The remaining seam is carefully sewn up.
Children's master class on making rubber bands
Even a child can beautifully decorate an elastic band from satin ribbons with his own hands. Detailed instructions will help with this.
To work you will need:
- satin lilac ribbon 5 cm wide;
- crimson satin ribbon 2.5 cm wide;
- sewing needle and thread;
- a piece of glass;
- a device for burning;
- steel ruler;
- button or bead;
- universal glue;
- scissors.
Operating procedure.
- Cut 5 pieces of 7 cm length from the raspberry ribbon.
- Treat the sections with a burning device and place them on glass.
- Fold each piece in half, shiny side up.
- Run a running stitch and pull it together a little.
- Combine the petal blanks into a flower.
- Make 5 pieces of 10 cm long from lilac ribbon.
- Repeat the work according to the previous scheme, obtaining a slightly larger flower blank.
- Straighten the resulting flowers, glue or sew them.
- Secure a button or bead in the middle.
- Sew an elastic band on the wrong side.
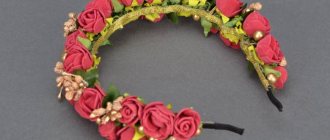
Wreath of fresh flowers
You will need: fresh flowers in delicate shades, wire, scissors, tape.
Master Class
- Form a wreath frame from wire.
- Cut off the most beautiful flowers and twigs.
- Wrap the wire with tape.
- Attach twigs and flowers as shown in the photo instructions.
A wreath of fresh flowers is ready! I recommend watching this video!
Wreath with veil for Halloween DIY Tsvoric Wreath with veil on Halloween
"Strawberries"
It’s easy to make your own hair bands in the shape of berries. The child will certainly be pleased with such decorations.
DIY elastic bands made from satin ribbons look elegant and very attractive.
Note!
- DIY bird feeder - interesting ideas on how to make it quickly and easily from scrap materials
- Do-it-yourself cold porcelain: the best options for porcelain products, step-by-step instructions and recipes for making it yourself (photo + video)
DIY curtains - types of curtains, choice of materials for sewing and design + step-by-step instructions and simple patterns for beginners
To sew interesting strawberries you will need:
- red satin ribbon 20 cm long and 5 cm wide for a pair of products;
- green satin ribbon 5 cm wide and 10 cm long;
- a pair of elastic bands for the base;
- soft stuffing material;
- beads of light brown or yellow color.
Operating procedure.
- Make two pieces of red ribbon, 10 cm long, and two green pieces, 5 cm long.
- Cut 5 cm twice from a narrow ribbon.
- Carefully process the cuts with a lighter.
- Fold the red ribbon in half, right side inward. Sew the edge by hand so that you get a berry-shaped piece.
- Place the filling inside and sew it up.
- Cut leaves from green ribbon. Burn the edges with a lighter.
- Sew a narrow braid to the elastic band.
- Attach a berry with a leaf to the braid.
- Sew the second strawberry in the same way and sew it to the elastic band.
- Add berries with beads.
It will take no more than an hour to make these berries.
Hairpin in the shape of a rose from foamiran
Foamiran or foam rubber is a convenient material for work. You can give it any shape, make beautiful flowers out of it. A foamiran flower will be a chic decoration for any hairpin. Try making a hairpin in the form of a hairpin adorned with a beautiful rose. The materials you need are two pieces of green and peach colored foamiran, pink pastel, beads and a hairpin.
Make a template for the petals and leaves out of cardboard, and then cut out the petals and leaves using the Thomas template. Tint the tips of the petals with pastel to make them look more natural. Set three petals aside; they will become a rosebud. Heat them with an iron, fold them and gather them into folds. Secure them by twisting them together, and pull out the middle a little.
Cut a wire 15 cm long and string a bead of the appropriate size onto it. Leave a drop of glue on the wire so that the beads do not get lost. Insert the wire into the center of the bud and begin to collect the flower. Glue one petal to the bud, applying a little glue to the very edge. Iron the leaves. Using wire, wrap the flower to the hairpin itself and glue the leaves to the hairpin to hide the wire.
If you liked the first experiment, look for other DIY foamiran hairpins that you can also easily make at home.
Elastic band made from ribbon
Using ordinary nylon or satin ribbons, you can beautifully design an elastic band to secure your hair in literally half an hour.
There are many ways to make elastic bands from ribbons with your own hands.
Ribbon rose
To make a lush rose you will need:
- any tape (the longer the better);
- elastic band for base;
- sewing needle and thread.
Operating procedure.
- The prepared ribbon will need to be folded in half along its entire length.
- The edge at the junction of the halves is stitched manually with strong thread.
- The thread is pulled together to form a lush flower.
- The resulting rose is sewn to an elastic band.
Having a pair of identical ribbons, it is not difficult to make a beautiful set of two decorative rubber bands.
Casual option
To fix your hairstyle at home, it’s easy to decorate a boring elastic band with tape.
- To do this, just wrap the elastic band with a ribbon, securing it with hand stitches.
- It is easy to sew a sausage from a wide ribbon, then passing a regular linen elastic band through it. Fasten the elastic band and stitch the edges of the sausage manually.
Elastic band with bow
Various bows are a classic option for decorating hairstyles.
To create an elastic band with bows you will need:
- a pair of rep ribbon blanks 20 cm long, 4 cm wide;
- a piece of tape 52 cm long, 2.5 cm wide;
- a pair of blanks made of narrow 0.6 cm tape, 20 cm long;
- elastic band for the base.
Operating procedure.
- Singe the cuts to prevent material shedding.
- Fold a wide ribbon 20 cm long in half. Iron the fold.
- Unfold the piece and fold the edges inward. Place them overlapping at the fold.
- Sew.
- Using a similar pattern, make a second bow and connect them together.
- Wrap a long ribbon three times around a cardboard blank, placing the turns sequentially.
- Sew exactly in the middle.
- Remove the cardboard to form a bow.
- First sew the first bow to the elastic band, taken as the base, then fasten it on top of the second one and straighten it.
- Make a bow from a narrow ribbon, add rhinestones, and glue it to the center.
Showing your imagination, it’s not difficult to make various bows with decorative additions from grosgrain ribbon.
Step-by-step instruction
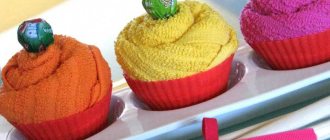
Lay the fabric out on the table and make sure it is not wrinkled. If there are creases, iron or steam until perfectly smooth.
Attach a cardboard cylinder, wrap it with canvas and check that the measurements are correct.
There should be a margin of about 5 cm on the sides. This excess will need to be placed carefully inside the cylinder so that no folds form on the outside. The edges should be carefully glued to the box. If you are afraid that the fabric will shift during use, additionally glue it to the cylinder body when laying it approximately 3-5 cm on each side using a glue gun.
The average family uses 2250 liters of water: March 22 is World Water Day
How to grow strong tomato seedlings with the right fertilizer?
“Creative thinking”: Rosobrnadzor assessed the possibility of transforming the Unified State Exam
Cut two circles from the strip. The blanks should fit on the outer surface of the plastic lids butt to edge. Glue them with a glue gun. If the ends of the lids look unsightly, you can glue decorative cord along the edge, but I did without it.
Kanzashi elastic band
To create a delicate chamomile using the kanzashi technique, you need to prepare in advance:
- white satin ribbon 0.5 cm wide;
- yellow tape 1 cm wide;
- a piece of yellow felt;
- glue;
- elastic band;
- sewing needle and thread.
Operating procedure.
- Make 29 pieces of white ribbon, 8 cm long.
- Fold in half and burn the edges with a lighter.
- Sew a yellow ribbon and assemble it on a thread.
- Sew a circle from the resulting accordion.
- Cut a circle of felt 4 cm in diameter. Cut, retreating half a centimeter.
- Glue the petals in rows to the felt base.
- The first row consists of 16 blanks.
- For the second one you will need 13 petals.
- Glue the yellow piece of tape in the middle.
- Sew an elastic band on the back side.
If desired, you can complement the magnificent daisies with buttons in the shape of butterflies or ladybugs.
Making rubber bands with your own hands is a fascinating process, and it’s easy to involve a child in it. There are a lot of options for decorating rubber bands. They are limited only by the imagination of the master.