DIY flash drive modding
Creating unusual cases for flash drives has long been a separate trend in modding. Many craftsmen work exclusively with flash drives and, moreover, even sell their mods through online stores and auctions.
It would seem like an ordinary compact USB drive - why exactly has it become so popular? Before the advent of flash drives, almost every PC was equipped with a floppy drive for reading and writing floppy disks. Unfortunately, floppy disks were not very convenient and significantly limited the capabilities of users.
A flash drive has become a step forward - a compact device, characterized by reliability, lightness and the ability to accommodate a large amount of memory.
A flash drive has become a constant companion for many people, because carrying disks or bulky external HDDs with you is very inconvenient and it is much easier to take a neat keychain that stores all the necessary information.
Since this thing is always at hand, many began to think about the external design and style of USB drives. Modding a flash drive does not require a huge amount of materials, a lot of money and time. There are a huge number of ways to decorate your flash drive or make it a full-fledged custom case with a unique design, and many are within the capabilities of even beginners and inexperienced modders.
Steampunk appeared relatively recently, but its popularity is only growing with each passing year. Many designers have even begun to focus exclusively on steampunk, as the demand for such unusual and original things is growing at a tremendous speed. Steampunk style occupies a special niche in flash drive modding.
Particularly popular is the direction of alternative-historical steampunk, which is based on stylization of the real historical world of the 19th - early 20th centuries.
Modder Rob Smith, also known under the nickname Back2root, became famous in the foreign modding scene precisely thanks to his high-quality work on creating custom cases for flash drives. For all his mods, he uses wood, elements from old mechanical watches for styling, and small inserts of copper and brass.
Each USB drive has an interesting design and convenient housing. Here, for example, is a stylish flash drive capable of storing up to 16 GB of information in a new case in the steampunk style:
Almost all flash drive mods from Back2root have a similar body design. First, the modder removes the flash drive from the standard case, then makes a wooden base, and all the decorative elements are attached to this base. Here are some more photos of this modder's most interesting projects:
It is worth noting that Rob Smith is also involved in modding very compact flash drives. An example of such modding was a stylish pendant in the steampunk style. Inside there is a 4 GB flash drive:
LiveInternetLiveInternet
Hello, friends. Creating unusual cases for flash drives has long been a separate trend in modding. Many craftsmen work exclusively with flash drives and, moreover, even sell their mods through online stores and auctions. It would seem like an ordinary compact USB drive - why exactly has it become so popular? Before the advent of flash drives, almost every PC was equipped with a floppy drive for reading and writing floppy disks. Unfortunately, floppy disks were not very convenient and significantly limited the capabilities of users. A flash drive has become a step forward - a compact device, characterized by reliability, lightness and the ability to accommodate a large amount of memory. A flash drive has become a constant companion for many people, because carrying disks or bulky external HDDs with you is very inconvenient and it is much easier to take a neat keychain that stores all the necessary information. Since this thing is always at hand, many began to think about the external design and style of USB drives. Modding a flash drive does not require a huge amount of materials, a lot of money and time. There are a huge number of ways to decorate your flash drive or make it a full-fledged custom case with a unique design, and many are within the capabilities of even beginners and inexperienced modders.
Modding flash drives in steampunk style. Steampunk appeared relatively recently, but its popularity is only growing with each passing year. Many designers have even begun to focus exclusively on steampunk, as the demand for such unusual and original things is growing at a tremendous speed. Steampunk style occupies a special niche in flash drive modding. Particularly popular is the direction of alternative-historical steampunk, which is based on stylization of the real historical world of the 19th - early 20th centuries. Modder Rob Smith, also known under the nickname Back2root, became famous in the foreign modding scene precisely thanks to his high-quality work on creating custom cases for flash drives. For all his mods, he uses wood, elements from old mechanical watches for styling, and small inserts of copper and brass. Each USB drive has an interesting design and convenient housing. Here, for example, is a stylish flash drive capable of storing up to 16 GB of information in a new case in the steampunk style:
Almost all flash drive mods from Back2root have a similar body design. First, the modder removes the flash drive from the standard case, then makes a wooden base, and all the decorative elements are attached to this base. Here are some more photos of this modder's most interesting projects:
It is worth noting that Rob Smith is also involved in modding very compact flash drives. An example of such modding was a stylish pendant in the steampunk style. Inside there is a 4 GB flash drive:
All the projects in the photographs above relate to modding flash drives in the steampunk style, which is especially popular among both Western modders and domestic craftsmen. Modder Shipton Bellinger, whom we talked about in detail in one of our articles, is also interested in steampunk mods of USB drives. It works according to the same scheme - first a wooden base is made, then the body is decorated with additional elements, but there are some differences from the works of Rob Smith. For example, as you've seen, Rob Smith installs decorative elements inside the wood base, while Shipton Bellinger prefers to attach them directly to the surface. Another, no less important difference is that Rob’s projects belong more to the clockpunk style, since they use exclusively elements from mechanical watches for decoration, while in Shipton’s fashions you can see copper tubes and a huge number of movable handles and rings. Otherwise, it’s easier to look at everything with your own eyes:
One of Shipton Bellinger's most famous projects is The Minotaur, in which he made a stylish custom case for an 8GB flash drive. The main difference between the project is that almost all the elements attached to the flash drive body are movable. The flash drive itself is stylized in the likeness of an old steam engine - on the side you can see a small pipe that supposedly serves to exhaust steam, on the front panel there is an element resembling a pressure indicator, as well as many elements depicting various levers and wheels for adjustment.
The modder also known under the nickname BasementFoundry has been collecting neat and stylish flash drive mods in the steampunk style for many years. The main rule of his projects is that the body should not only be beautiful, but also comfortable. That is why the modder practically does not use additional decorative elements in his projects. The base is most often made of a copper tube, sometimes durable glass is used. So, let's take a look at one of the most popular projects of this modder. Copper tubes, which at first glance seem completely unnecessary, actually serve as latches for the flash drive cover. Especially for this, the modder cuts out a small elastic band of the required diameter for the lid:
Here are some more works from BasementFoundry. The general appearance of modding a flash drive is similar, but, nevertheless, the work is quite interesting and of high quality:
Of course, while talking about modding flash drives in the steampunk style, we couldn’t forget about Steamworkshop, which makes stylish mods to order and puts many of its works up for sale through online stores. Like many modders, Steamworkshop has its own, one might say, unique style of modding flash drives. Many techniques are used from project to project, but let’s not get ahead of ourselves and look at the projects in more detail. The main materials for modding are copper, brass, durable glass and many additional decorative elements - from gears from mechanical watches to various springs, small screws and rivets. The modder supplies most mods with rubber gaskets, which makes them waterproof. Almost every flash drive from Steamworkshop has a window cut out of the case. Through it you can often see a small crystal of quartz, illuminated by an LED (this touch has long been a kind of calling card of Steamworkshop), but in new projects the modder tried to change the established traditions and experiment not only with the shapes of cases for flash drives, but also with ways of stylizing them. So, let's take a look at the photos:
Separately, I would like to highlight the memorable flash drive mod from Steamworkshop. A flash drive in a small glass tube, which is filled with glass shards and illuminated by several LEDs:
And the latest works, characterized by breathtaking quality and attention to detail:
Often, modders use some old, seemingly unnecessary things as a basis for the body. So did Steampunknation. He used an old vacuum tube to create a custom flash drive enclosure. Inside, the drive was covered with a fine metal mesh and also illuminated with an LED. The result is stylish and original work. The only drawback of this project is the relatively fragile body.
A modder under the nickname autumnsteam also sometimes works with flash drives. The main difference between his works is the use of old brooches and pendants. He is especially good at fashioning compact USB drives - the base is made of a thick sheet of metal, and decorative elements are attached to it:
A modder from Florida under the nickname UmbrellaLaboratory made a 4GB USB flash drive mod. The body turned out to be quite simple, but thanks to the high-quality and unusual coloring it looks great:
Cerriousdesign also puts the main emphasis on unique coloring. The cases are decorated with various small elements, and then stylized with various painting methods - for example, the modder likes to create the effect of rust on flash drives or oxidation of metal. It is worth noting that the end result is very stylish flash drive mods:
And here is a steampunk flash drive by a designer under the nickname Kaelessin:
The modder is still trying his hand at modding small and compact items, so it turned out a little sloppy, but an interesting idea - worthy of attention. Hidden above the gears is an LED that turns on when data is transferred.
Separately, I would like to highlight the work of a modder under the nickname teresalayman, who uses leather in modding flash drives. Of course, during modding, elements are also used, for example, copper, stainless steel and brass, but all flash drives are first covered with leather before installing additional decorative overlays.
As you can see in the photo, the modder uses parts of old teaspoons and even a thin wristwatch bracelet as elements to decorate the case. Together with small homemade inserts and gears from a mechanical watch, everything looks very dignified and harmonious.
We also couldn’t forget about a very famous personality among steampunk connoisseurs – Villa Rockwell from New York, USA. He has been interested in modding flash drives for a long time and has a lot of experience in this matter. Of course, among his works are not only USB drive fashions, but also, for example, various lamps, but today we will only talk about flash drives. His projects include both flash drives assembled from wood and entirely made of metal. Both copper and brass and various types of wood are used in the work. So, let's take a closer look at flash drives.
Among the huge number of his works you can find very complex and incredibly beautiful flash drives, which took the author a lot of effort and time to create.
Among Villa Rockwell's flash drives, one can highlight works with a very interesting idea. An example of such modding can be safely called The Hunley project, for which a 16GB drive was used as a basis. The hull is stylized in the shape of an old submarine. In 1863, Hunley's New Orleans consortium experimented with installing electric motors on submarines, but the first boat created sank during testing.
Another very interesting project is The Memory Angel, which is intended for a girl who loves steampunk. The case is decorated with unusual wings similar to gears from a mechanical watch. Inside there is a 4GB USB drive, and as part of the modding process, Vill completely stylized and redesigned the standard case.
Many Villa projects are sold on various online auctions and websites, so at the moment modding Usb drives even brings in a small profit.
Modder WWWorks makes its flash drives primarily from brass and beech wood. Staining and etching are used. The flash drive has an original and very durable and beautiful case:
Modder Ivan Mavrovic has put together a mod that can more likely be classified as a very functional homemade product rather than a modding flash drive. Hidden inside the mod are a USB flash drive, a knife, a set of screwdrivers, a toothbrush, a flashlight and much more.
Of course, we couldn’t forget about the most magnificent flash drive from Valera. Unlike most modders, Valera not only made a beautiful custom case for a USB drive, but also made sure that almost every element moved and worked. On the front panel there is a homemade pressure gauge with a moving needle. The flywheel, also located on the body, is driven by a small electric motor. The work is simply amazing. Inside this miracle is an 8GB drive. Let's take a look at the photos:
But that's not all! Valera decided to make a stylish box for his new flash drive from mahogany and brass.
For those who are interested in this flash drive, Valera published a video on our forum, where you can make sure that all the elements are movable and the flash drive is made carefully and with high quality.
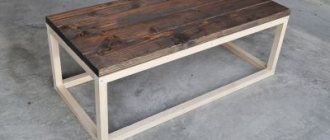
Modding flash drives made of wood.
Flash drives made of wood are especially popular for a reason, because wood is very well processed, you can use it to make almost any case, and it is also easiest to cut out any interesting ornament or design on a wooden case and it will not be erased after a couple of weeks of constant use of the flash drive . This material is also very accessible, so even a beginner who is unsure of his abilities can experiment with it. Also, a wooden case protects the contents of a flash drive from mechanical damage much better than a standard plastic case. As you saw before in the section on steampunk flash drives, wood is used by many modders, but if in steampunk modding only the base is most often made from it, then in the section on wood flash drives you will see mods in which wood is the main material.
An example of original modding of a flash drive using wood is any work from a modder under the nickname WoodenGoat. The modder makes the case from two wooden panels, onto which he first applies a design, then glues them together, securing the drive inside, and thoroughly sands the joint. As a result, when you look at the flash drive, it seems that it is made from a single block of wood.
Making a flash drive in Steampunk style is easy!
This article was a logical continuation of the previously described worklog “Steampunk Flash Drives”. After the publication of the FAQ on creating steampunk flash drives, a lot of questions were asked by those who wanted to reproduce what they saw. But it is simply physically impossible to answer everyone, which is why I decided to describe my new work and, if possible, understand it with at least some of your questions.
Basics or a few words about design
If you want to save time and nerves, then use a brass pipe from a water tap as a basis for work, because... after heating and tempering, it can be given almost any shape. Alternatively, you can bend the desired shape from a sheet of metal, but this will take more time, and the seam at the fitting site will still remain noticeable.
- The simplest option is to squeeze the pipe in a vice and give it an oval shape.
- This is what happened as a result
- In this photo, the file served as a mandrel.
- The nuts are screwed onto a long bolt, and after a couple of hours the first result is visible - a hexagonal base for a steampunk flash drive.
The shape of the future product depends only on your imagination and endurance. The main rule is to first release the material as described in the previous article. I was a little lazy, so I left the shape of the pipe untouched and simply cut it with curly cuts.
For accuracy of calculations, it is better to carry out all measurements on graph paper. First, I cut out a square from a sheet of graph paper to fit the size of the pipe, then tried it on, marked it, and only then glued the graph paper to the workpiece.
Next comes the work of drilling holes using a drill. First, it is better to take the smallest drill (in my case it is 0.8 mm), and then drill the hole to the specified diameter.
Now it's the turn of the Dremel. The first pass is done in thin circles.
- The result after passing with a reinforced circle.
- Having slightly corrected the unevenness, we get rid of the paper.
Polishing and glossing
Personally, I found the result boring. Therefore, it was decided to add volume. At maximum speed of the Dremel, chamfering in the right places (even with sandpaper with a 413 nozzle according to the Dremel catalog) is not a difficult task. Here is the result after polishing.
While we're on the topic of polishing, let's look at another frequently asked question. Based on my experience, I can say: “the choice of polishing paste, like the polishing method, is of secondary importance.” The main thing is to take your time and prepare the surface very well. You will need a lot of time and sandpaper of various grits.
In fact, polishing is the penultimate step to the finished product, and the final result will depend on its quality. Even artificial aging of the surface is best done after polishing.
When I get an almost perfect surface, I carry out subsequent finishing with regular GOI paste using a Dremel and a “felt” attachment 414 or 429.
After polishing, according to the intended design, the surface of the brass/copper needs to be somehow protected. Among the methods I have personally tested, I can suggest:
Varnishing
Varnishing with a quick-drying transparent insulating varnish to protect printed circuit boards PLASTIK 70. At the time of writing, the price list of a local store selling radio products was just over 500 rubles for a 400 ml aerosol can.
Some features of working with this varnish:
- It is better to degrease the surface with acetone;
- Before applying the first layer of varnish, it is best to warm up the part a little; I left it on the windowsill (in the sun). A battery will also do;
- when spraying, you should not make hasty conclusions: until the varnish has completely dried, the surface will be slightly cloudy;
- It is better to clean up spills immediately. For example, traces after touching the side surface of the eye of a needle are practically invisible, but the excess part of the varnish “goes away” remarkably.
Aging
Aging of the material is carried out by heating it on a gas burner/stove. The surface becomes distinctly yellow, while hands do not leave marks as a protective film is formed. However, over time, the part darkens a little, but without leaving streaks. This method may well be suitable for parts that do not have soldering.
Passivation
Passivation or a chemical method of protection is good for everyone, with the exception of the chemicals used - two types of acids and chromium. Details can be found online, but I can only say that the color of the metal becomes more pronounced. Looking ahead a little, in the final photos the difference in the color of polished and passivated metal will be noticeable.
Varnishing
Varnishing with a quick-drying transparent insulating varnish to protect printed circuit boards PLASTIK 70. At the time of writing, the price list of a local store selling radio products was just over 500 rubles for a 400 ml aerosol can.
Some features of working with this varnish:
- It is better to degrease the surface with acetone;
- Before applying the first layer of varnish, it is best to warm up the part a little; I left it on the windowsill (in the sun). A battery will also do;
- when spraying, you should not make hasty conclusions: until the varnish has completely dried, the surface will be slightly cloudy;
- It is better to clean up spills immediately. For example, traces after touching the side surface of the eye of a needle are practically invisible, but the excess part of the varnish “goes away” remarkably.
Flash drive
Price: US $10.87 / 802.88 rub.
This original flash drive, made in an extravagant vintage style in the shape of a key, makes a good gift, it can also be worn as a pendant or keychain. The model's case is completely waterproof, made of stainless steel, resistant to damage and provides maximum protection for your data. The memory capacity is 16 GB. Dimensions 15 x 12 cm.
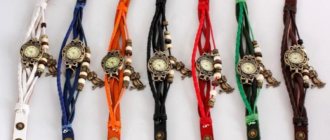
Men's mechanical watches
Price: from US $17.99 / 1328.78 RUR.
A delightful model of men's mechanical skeleton watch with a wide leather bracelet, made in the steampunk style, captivates with its gothic grace. The watch works very well, is durable and has impeccable assembly. The shock-resistant case has decorative elements. There are several case designs to choose from, each of which is stunning in its own way.