Soap bubble generator
Making your own bubble making machine is really easy and fun. It can be made from anything (or almost anything), rolled or glued, and the end result will amaze your kids for hours.
Based on the basic principles of electronics, having only a motor and a fan, this unit is very convenient as a first such experience. I made this car using my free minutes during the week. The longest wait took for the ordered centrifugal fan. During the best part of the test, a huge mess was created until I realized that the best place to test this machine was in the shower.
My bubble maker was made to entertain my little daughter. She loves bubbles, but is now at an age where blowing them herself is quite problematic (not to mention that it will be messy for her). She had the happiest 15 minutes, running through the bubbles and running around them outside. After which, adults began to experiment with heating bubbles to see changes in the size, speed and height of the bubble's flight, and also began to use other ways to change the final bubble in order to identify patterns and make bubbles of better quality.
To make it easier for other people to make a copy of my generator, I decided to simplify the process of making it as much as possible and identified the five main components that it consists of. Of course, this is conditional, and you can do as you please. Here I give information about what actions and what tools and materials I used.
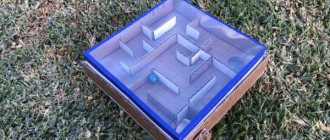
Trough: This is where the material for making bubbles will come from. It should be waterproof and not too shallow, that's all.
Bubble Disc: A disc with holes that will spin slowly, dipping into a trough and rising from there ready to release bubbles through the holes. After rising from the trough, the soapy holes move in front of the fan, which, in turn, forms bubbles due to the air stream.
Movement: To rotate the bubble disc, you need a low speed motor. The best option would be a continuous servo motor.
Fan: Any fan with a gentle air flow will do. It blows a bubble of liquid from the hole in the ring. I used a 12V centrifugal fan.
Energy: Power source to rotate the ring and power the fan.
You will also need nuts, bolts, hot glue or superglue to hold all the pieces together.
The trough can be cut from a milk carton, a plastic food storage container, or other similar materials. I did this in the most convenient way for me, using a CAD computer program and a laser machine, tools most people do not have.
The only thing you should consider when choosing a material for a trough is that it must hold liquid inside itself and a motor with a servo drive will be attached to it.
I laser cut the pieces out of 1/8" thick orange acrylic and used superglue to attach all the pieces together. To ensure water resistance, I sealed the outside of any possible leaks with packing tape. I also took into account and provided several slots for mounting my servo.
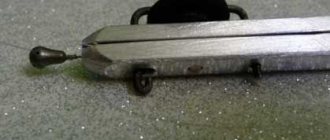
Disc for blowing bubbles.
You will need something to pick up the liquid from the chute and carry it past the fan. There are many ways to improve the design of the disc to increase its ability to carry the bubble source fluid, but I did not do this.
The holes in the disk were cut from 1/8″ thick acrylic. 16 holes were cut evenly over a 6 inch radius. Each hole has slits to hold more liquid. There are holes in the center of the disk to mount a standard servo onto it using self-tapping screws.
Then you will need a mechanism to rotate your disk to blow bubbles in the trough itself. You need a motor that you can attach this drive to.
I used a modified servo for this, which was great for slow rotation and was powered by two AA batteries. You can easily find information on how to modify a servo so that it does not require a control signal to control it. You can also use any suitable motor from an electronics store or even standard motors from Lego.
Fan.
I used a fan that I ordered for $5. It operates at 12V and has a performance similar to a standard fan used in a personal computer, but has a much smaller footprint. The best mode for it turned out to be working with a voltage of 12V.
You can even use a household hair dryer on a no-heat setting with a small cone attachment. I don't recommend using the vacuum cleaner in reverse mode for this, because when I tried to use it myself, it made a big mess in my office when I turned it on 
The power you need will depend on which motor and bubble disc you choose. I used 2 AA batteries for the servo and a 12V cordless drill battery for the fan.
Which gears you choose will determine what kind of battery or adapter you need.
Here's how to put all the pieces together.
Photo 1: The servomotor is attached to the trough and secured to it with two M4 screws and nuts. A container for two AA batteries is glued to the trough using hot glue, the wires to them are soldered and insulated.
Photo 2: The bubble-forming disk is screwed with 4 self-tapping screws to the servomotor. Note how close to the bottom of the gutter the disc runs. This is done so that the disc can be moistened with liquid even with a very small amount of the latter.
Photo 3: Rear view of the ring and servo.
Photo 4: The centrifugal fan is glued to the back of the trough and oriented so that the outgoing nozzle points toward the holes in the disc. Before gluing, test the fan and find the best place for it, i.e. where its location will contribute to the generation of bubbles of the highest quality. I found a position in which the bubbles flew up. When testing, I used power from the mains, and when using the unit outdoors, I used a 12 V battery from a drill.
As you can see, I had a lot of fun making and using my bubble machine. It started out as a way to entertain kids and ended up entertaining businessmen in downtown San Francisco, blowing bubbles near the fire escape on the balcony.
The battery from the cordless drill provides enough energy for my unit, it easily copes with the task and is also very easy to recharge, which is more convenient than running an extension cord from the outlet.
I used a ratio of 1/2 volume dish detergent to 1/2 volume water. This 50:50 ratio is enough to generate quality bubbles, although some people recommend adding an extra tablespoon of glycerin to the trough.
When kids get tired of blowing bubbles, adults start playing themselves! It turns out that you can pre-heat the air entering the fan with an electric hair dryer, and also change the speed of the fan’s air stream and perform other actions, and get a lot of fun at the same time.
Quality checking
The shapes, sizes, strength and “durability” of bubbles depend on the chosen recipe, the set of ingredients and compliance with the cooking sequence and proportions of the ingredients.
The best indicator of quality are neat balls or fancy multi-layered figures, shimmering with all the colors of the rainbow and flying in the air not only for a few seconds, but even for a few minutes.
Quality check, inflate the soap sphere, and then dip your finger in the prepared foam and touch the ball.
If it doesn’t burst, the quality is excellent, the composition is prepared correctly.
If the sphere does not inflate or bursts quickly, then this is not a reason for frustration - you just need to add a foaming agent (shampoo, soap, detergents), glycerin (a few drops) or a little sugar.
How do you know when the solution is ready?
Determining the readiness and quality of the solution is not difficult. You need to inflate the water balloon, then wet your finger with the solution and touch the bubble. If it does not burst, then everything is in order, but if the opposite situation occurs, then you should add a couple of drops of glycerin.
We recommend: How to make clear ice without bubbles at home?
If the inflation process is difficult and slow, then this is a sign that the solution has a low water content.