- Pineapple decor
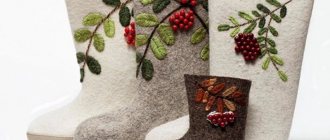
Very wintery: knitted clothes
With the onset of cold weather, we often wrap ourselves in warm sweaters and blankets. Why not knit a suitable “suit” for a bottle of wine? Both decor and packaging at the same time.
If you don’t want to knit anything special, look in the closet for an old sweater. Those who don’t like to knit can simply look for old jumpers in the closet of a suitable color. Well, craftswomen who enjoy spending an evening with a ball and knitting needles come up with exclusive outfits for gift bottles.
Knitted clothes for champagne You can limit yourself to just funny hats and scarves. It will take much less time than knitting a full outfit, and the effect is no worse:
Scarves and hats for bottles The main thing is the winter, New Year's mood. And it can be conveyed literally with one or two expressive details.
A small detail with a New Year's mood
A bottle of champagne in a dress made of ribbons
You will need: 11 meters of pink ribbon, 2 meters of silver ribbon, pink bow fabric, thread, needle, scissors and glue.
Master Class
- Glue 2 circles of silver tape diagonally overlapping.
- Apply pink tape diagonally to half of the bottle.
- Apply pink tape in even circles from the middle to the end of the bottle.
- Gather ribbon onto a string for a bow, making a skirt.
- Glue the skirt to the bottle.
- Decorate the side with a silver ribbon bow.
A bottle of champagne in a dress made of ribbons is ready!
How to decorate with glitter?
An original and elegant bottle for the New Year can be decorated not only with pieces of fabric or themed napkins, but also with shining sparkles. This simple component can give the base a very bright and festive look, which will elegantly emphasize the holiday atmosphere.
Along with glitter, you can use other decorative components. In a single combination, they will make wonderful bottle decorations. Let's consider what positions should be used to decorate such an interesting New Year's homemade product:
- spray can with golden paint;
- glitter;
- adhesive composition (ordinary PVA glue will be sufficient).
Let's consider the correct sequence of decorative design of a bottle using the listed components.
- At the first stage, it is advisable to carefully prepare the workplace for all creative manipulations. The table on which the bottle will be decorated must be covered with newspapers. You should do the same with the nearby area so that it is not stained with golden paint.
- Next, take a bottle. You can remove paper labels and stickers from it, or you can leave it. Different masters act differently. If you decide to remove the labels, it is important to remove all remaining adhesive on the glass walls, otherwise they will be visible on the gold paint.
- The bottle will need to be covered with a continuous layer of beautiful golden paint. After this, you should wait until it is completely dry. Until this moment, you cannot begin further manipulations, otherwise the craft can be ruined.
- As soon as the golden layer on the bottle has completely set and becomes completely dry, the surface of the workpiece will need to be completely coated with a layer of PVA adhesive solution. To make applying this component as convenient as possible, it is recommended to use a brush.
- After this, the prepared bottle, coated with glue, is sprinkled with glitter. They should be beautifully distributed over the surface of the bottle to make it more aesthetically pleasing.
Using a similar scheme, you can decorate the bottle with rhinestones. The only difference in the decoration technique will be in the features of fixing the decorations. For each shiny pebble you will need to select a specific place on the prepared vessel. As a result, you can form a very beautiful pattern, designed in a New Year's theme.
Champagne "Pineapple"
Not just a bottle of champagne, but a pineapple made from it, will look very impressive on the New Year’s table. Take a glue gun and candies with bright yellow wrappers. Ferrero Rocher, Golden Lily, etc. are just right. Start decorating the bottle from the bottom, smoothly moving to the top. Glue the candies in one row, close to each other. After one row is laid, start the second on top of it. Decorate the entire bottle in this way except the neck. For the neck, take green ribbons or candy wrappers and stick them on so that they look like the greens on a pineapple. Place the bottle on a plate with tangerines; your guests will certainly appreciate your creativity.
Removable felt cover
The original decoration is reusable felt covers in the shape of Father Frost and the Snow Maiden.
Felt covers for champagne bottles
Take:
- a bottle of champagne;
- paper;
- bias tape in red and blue colors (sold at any sewing store);
- silver ribbon;
- glue;
- sushi stick;
- a little padding polyester or cotton wool;
- needle, thread;
- wide red satin ribbon;
- decor (white beads, lace, sparkles).
Making a cover
Draw 2 rectangles on a sheet of paper, one with sides 14 and 30 cm, the second - 8 and 30 cm. Cut them out. Attach the wider one to the bottle, glue the ends of the part so that the resulting pipe can be easily removed. Now glue the second rectangle at an angle, cutting off the excess parts. You need to act carefully. Try to make the part even: all small folds and irregularities will be visible on the finished product.
Felt case in the shape of Santa Claus
When the glue dries, start decorating the case. Apply silver tape to the top of the paper piece and cut enough to make a full turn. Place the tape on the paper. If it is wide, then one strip is enough; a narrow one will have to be glued in 2-3 rows.
Christmas bottle covers
Take bias tape and cover the entire cover with it, all the way to the bottom. Proceed in the same way as when gluing tape.
Christmas bottle covers
Take the lace, attach it at the junction of the trim and the ribbon - you will get a collar. Do not rush to cut off the lace by wrapping it around the bottle: use it to disguise the junction of the trim. You can also trim the bottom of the cover with lace.
Satin champagne case
Try removing and putting the cover on the bottle again - is it easy? If no difficulties arise, then everything was done correctly.
Staff
Start making the staff: take a stick, coat it with glue, and then wrap it with red bias tape. Decorate with silver ribbon, securing the ends with hot glue gun.
A bag with presents
Take a wide satin ribbon and cut a small strip. Fold it in half and sew it together using a sewing machine or needle and thread. You need to leave 2-3 cm unstitched on each side. Turn the finished bag right side out and put a piece of cotton wool or padding polyester in it.
New Year felt and wool decoration for bottles
Cut a small strip of narrow silver ribbon and tie a bag. If desired, you can decorate the bow with a bead.
A cap
Cut a strip of paper slightly longer than the circumference of a champagne cork. Glue the ends of the part. Attach it to the paper and draw a circle. Cut it out and glue it to the cylinder.
Knitted bottle covers
When the glue dries, decorate the workpiece by covering it with a wide red ribbon or bias tape. Secure the tape with hot glue.
“Clothes” for New Year’s bottles
Decorate the bottom of the hat with lace or sew sequins in the shape of snowflakes onto the hat.
New Year's apron for a bottle of champagne
Assembly
Christmas bottle decor
Attach the bag to the staff, and then glue the entire structure to the case.
A bottle of champagne decorated with Christmas tree decorations
Make a cover in the shape of the Snow Maiden, just use blue bias tape rather than red.
Champagne bottles decorated for the New Year
Textile
Even an old sweater or a Christmas toy can become a decoration for a bottle. If you have an unwanted white or off-white knitted sweater in your wardrobe, cut off the sleeve and put it on the bottle. If the sleeve is too long, shorten it so that the neck is barely visible. Tie the sweater into a bow using a satin ribbon. You can complement the composition by attaching small Christmas tree balls of different colors to the ribbon.
If you know how to sew and you have a sewing machine at home, then make a bottle costume. You can choose Santa Claus and sew a coat with a hat. Make patterns according to the size of the bottle, and you can secure the costume with tape. The sewn suit will be reusable and will last you more than one New Year's Eve.
Decorating with tissue paper
Why not use this wonderful material to decorate a bottle of champagne for the New Year 2022! Simple, fast and beautiful. Let's study and do!
To work you will need:
- Cigarette paper;
- Paper glue;
- Thermal gun;
- Palm paper leaves;
- Candies.
Progress
- Then, using glue, glue one candy to each square, strictly in the center.
- We wrap the ends of the paper square from the base to the top. We do this with all the squares with candies.
- Moving from bottom to top, apply glue to the square from the back side and glue it to the champagne bottle. Thus, in a circle, in a checkerboard pattern, we cover the entire surface of the container.
- Now we take paper leaves, roll them into a circle (the diameter should be equal to the neck of the bottle), and glue them together.
- Attach the resulting bundle to the neck of the bottle. The product is ready!
Before you start
You can decorate the bottle with any handy items. You probably have a piece of satin ribbon, last year’s tinsel, old beads, an unnecessary piece of fabric with sequins in your home. All elements can be used to create a New Year's look. In addition to the items listed, take:
- sharp scissors. They will be needed to trim excess or cut out individual elements;
- stationery knife. Suitable for working on small details;
- glue gun Without it, nothing will stick to the glass;
- primer or PVA glue. They will help the decor stay in place for a long time;
- varnish When the process is completed, it needs to be fixed and given shine.
Show your imagination, don’t be afraid to embody your desired ideas. An empty festive bottle can be put into a sideboard for storage; it will decorate the house and attract the attention of others.
Do you decorate champagne for the New Year?
Yes, it creates a mood!
50%
No, it will do just fine
50%
Voted: 6
In a holiday bag
In order to festively decorate a bottle of champagne for the New Year, you don’t have to fuss with its design. You can make an excellent decoration with your own hands using fabric in the form of a colorful magic bag, into which your sparkling wine can then easily be hidden. This option is also perfect as a gift for anyone. So, let's start our design business.
To make it you will need:
- fleece in red, beige and white;
- white and red threads of dense quality;
- needle;
- black acrylic paints;
- thin brush;
- scissors;
- satin ribbon or decorative rope;
- a simple pencil;
- white sheet of paper.
Progress:
- To get started, we need to create a pattern for our future bag. To do this, first of all, we take measurements from our bottle of champagne in order to subsequently transfer them to a white sheet of paper.
- We transfer our paper patterns onto red fleece fabric and cut them out using scissors. Let's put aside the details of the bag for a while and start making a pattern for Santa Claus's face in order to subsequently decorate our New Year's product. To do this, we take a beige fleece fabric for the face, and a white one for the beard, mustache and the edge of the supposed hat. Looking at the photo, we create patterns and sew them using a sewing machine to one part of the bag. From a small red piece of fleece we will make a nose for our fairy-tale hero, and using acrylic black paints and a thin brush we will add eyes.
- We sew the decorated part of the bag with its second half. So our beautiful elegant decoration for the New Year 2022 is ready, which should be in sight of all members of your family. And since this work is done with your own hands, it is worth appreciating and extolling.
Our selection of colorful photo ideas will inspire you to new fruitful thoughts and you will create the same beauty.
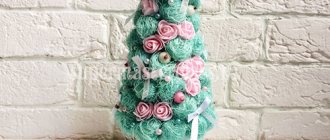
If you know how to crochet, then you have a great chance to make wonderful New Year decorations not only for the Christmas tree, home, but also for the table.
A bottle of champagne as a Christmas tree
So, the costumes are ready, Father Frost and the Snow Maiden are there, what else do we need for the holiday? Christmas trees! And a bottle of champagne (with our help, of course) will cope brilliantly with this role:
A bottle of champagne will successfully cope with the role of a New Year's tree. A Christmas tree decoration for a bottle can be sewn, knitted, made from natural or artificial fir branches, scraps, candies - the possibilities are inexhaustible.
A bottle in a Christmas tree costume is almost unrecognizable. More ideas for “Christmas tree” decor:
- Christmas tree bottle
- Christmas tree that has no needles
- DIY Christmas trees: ideas for every taste
All of the above options have only one drawback: they are quite labor-intensive. It will not be possible to make such packaging or decoration for a bottle five minutes before the holiday. What ideas are there for those who are very busy, don’t like to do handicrafts, or have received an invitation to visit on the eve of a holiday?
Decoupage style
The design technique is very popular and is actively developing today. You can use many techniques to decoupage bottles with your own hands. Most often, work is performed in the style of:
- Shabby chic or shabby style - the effect of an antique item. Specially created abrasions, the appearance of many years of use, which are enhanced with ribbons, images and other decor in a retro style;
- The richness and color of the Victorian era periodically appear in the decor of bottles (the use of rich red, blue or green shades, gilding);
- Provence style is gentle and elegant, pleasing to the eye and will be a wonderful gift for lovely ladies;
- Minimalism is often represented in the deco-patch technique; they are well suited for the festive table of a youth group.
What you need for work
As a material, you can use almost any decor that can be found in every home on the eve of the holiday:
- New Year's tinsel and serpentine;
- costume jewelry;
- corrugated and colored paper;
- New Year themed paper napkins;
- sweets in beautiful wrappers;
- special covers for bottles that you can sew with your own hands;
- satin ribbons;
- sparkles and other decor.
You also need to prepare tools and supplies:
- glue;
- scissors;
- threads;
- acrylic paints and primer;
- tassels;
- glitter;
- foam sponge;
- colored, shiny and corrugated paper;
- pieces of fabric;
- ribbons.
Basic techniques for working with decoupage technique
Background coloring
1. Place acrylic paint of the desired color on a plastic plate. Take a foam brush or a piece of regular dish sponge and dip the foam into the paint.
2. Apply paint to a clean, dry, label-free bottle, lightly pressing the foam onto the surface. Let the paint dry for 2 - 3 hours. The paint can be dried with a hair dryer. After use, rinse the brush in running water.
3. You can apply the second and third layers of paint in the same way - on the entire surface of the bottle or on individual parts. Be sure to dry each layer, otherwise you will ruin the whole job.
Gluing motifs (napkins with designs)
1. Cut out the motif you like from a three-layer paper napkin and separate the top layer of the napkin. You can first separate the top layer of the napkin and tear off the excess paper around the design you like.
2. Apply the motif to the painted surface of the bottle. Place glue on a flat synthetic brush, preferably a special glue-varnish for decoupage, but you can also use regular PVA glue, diluting it with water in a ratio of 1:1.
3. Using brush movements from the center to the edges of the motif, glue it to the surface, straightening out the small folds that form on the paper with the brush.
Decoupage of a champagne bottle for the New Year 2022 “Santa Claus’s House”
We offer another interesting option on how to decorate a bottle of champagne with your own hands for the New Year 2022 using the decoupage technique. For decoration you will need ordinary napkins, but with the image of Santa Claus. If you wish, you can come up with your own plot.
Materials:
- priming;
- acrylic paints;
- napkins;
- acrylic lacquer;
- Styrofoam;
- hot glue, PVA.
Master Class:
- We remove all labels from the bottle and be sure to degrease the surface before decorating.
- Now prime the bottle with white acrylic paint using a small piece of foam rubber or sponge.
- Cut out the desired fragment from the napkin and separate the bottom layer; for work you will only need the top layer of paint.
- The place on the bottle where we will apply the image is lightly rubbed with sandpaper, then we apply PVA glue.
- Place the cut out fragment with the pattern down on the bag or file, sprinkle it with water, and straighten the resulting wrinkles.
- We attach the file with a napkin to the bottle, carefully iron it, then remove the file, let the picture dry and cover it with acrylic varnish.
- We cut the foam into small pieces and glue it around the picture, that is, we make a window.
- Mix the putty with PVA glue and make a chimney on the neck of the bottle. We simply apply the composition to the neck and squeeze out the brickwork with thread.
- We make a mixture of PVA glue and plain water. We dip napkins into it and randomly apply it to the bottle, and in the end we get snow walls.
- Using hot glue we make an ice roof for the house.
- Now we paint the pipe and window brown, and the walls and ice roof white. Finally, for shine, we cover everything with acrylic varnish.
For better adhesion of the primer to the glass surface, make the first layer thin, dry it well and apply the second layer. The pipe can be made from salt dough.
"North Pole"
Master class by Ekaterina Nesmirnaya for our competition.
“There is such a tradition - to bring a bottle of champagne with you on New Year's Eve. But a simple bottle is not at all interesting. I propose to make a festive, New Year's bottle out of an ordinary bottle.
It's not at all as difficult as it seems.
You will need:
- bottle of champagne,
- acrylic paint,
- a beautiful napkin with a New Year's picture,
- contours on glass,
- sequins,
- ribbons and button for bow,
- PVA glue.
Let's get started:
We soak off all the labels from the bottle. I leave it in a bucket of water overnight - by morning they are all just floating around.
Using a foam sponge, using “smacking” movements, paint over the entire bottle. We are waiting for it to dry.
Cut out a suitable motif from a napkin.
Using PVA glue, glue the napkin to the bottle. We are waiting for it to dry. We again go over the edges of the napkin with a foam sponge and white paint.
Glue the sequins in random order with super glue (I have defective Soviet sequins, so they don’t have holes). We place dots along the glass around each sequin.
And then we draw curls with a different color - “frosty patterns”.
Leave it overnight, the contours take a long time to dry.
In the meantime, let's make a bow. You will need ribbons of two colors. Cut a long piece from one ribbon and glue it into a ring with super glue (measure the required size according to the bottle).
Cut 2 more ribbons of the same color. We sew them into a bow. From a ribbon of a different color, cut 4 pieces and sew them into a bow.
Use super glue to glue all the pieces together. Glue any suitable button on top of the stitching area (I have a homemade plastic button).
All is ready! This bottle will surprise and delight everyone!
Painting
On the eve of the holiday, buy a special paint that can be applied to glass. The paint is not destroyed by water because it has a stable base. Take a bright paint color, then the bottle will look festive, but tasteful. Place the bottle, cleared of the label, on a piece of unnecessary paper, it could be an old newspaper, for example. Apply paint with a brush or from a can onto the glass. Wait for it to dry completely and after about 1-2 hours, coat the glass with a second coat of paint. Next, rhinestones, snowflakes cut from napkins and other small details are suitable for decoration. Distribute the elements over the entire surface of the bottle, secure with double-sided tape or superglue.
Important! When you paint a bottle, open the vents and windows in the house, and don’t forget to wear gloves so as not to get dirty.
New Year bottle design options
Snowmen, Christmas trees, cheerful children on skis - there are many motifs of napkins for New Year's decoupage, choose according to your taste
Since preparations are underway for the New Year, Christmas motifs should be present in the equipment. The most popular material for work is three-layer paper napkins, with New Year's drawings or photos. In addition to these you will also need:
- PVA glue, if there is no special one for decoupage;
- acrylic paint (in this case white);
- acrylic varnish, preferably transparent;
- nail polish remover (always on hand);
- cotton pads;
- red and green ribbons, each 1 m long and 0.5 m wide;
- dry sea salt (the grind should be fine);
- brush for varnish and glue;
- sponge or paint brush;
- paper and scissors;
- rubber spatula;
- container with water.
Prepare everything you need to decoupage a bottle and get to work
When all the auxiliary materials and tools are prepared, you should pick up a wine bottle, and it will be even more interesting if it comes with contents. An alternative would be to decoupage a bottle of vodka for the New Year.
Decoupage of champagne for the New Year with romantic notes
Champagne decor in vintage style
Work organization tips for beginners
Most of us don’t have extra time and money, so you should take care of organizing your workplace in advance - so that later you don’t have to suffer excruciatingly from the sight of furniture damaged by glue and paints.
So:
- It is recommended to cover the working surface with an unnecessary bag, film or paper;
- It is important to use only high-quality tools: sharp scissors, brushes with natural bristles. If desired, you can purchase ready-made decoupage kits;
- It is better to always keep nail polish remover on hand in order to remove excess paint stains in time;
- To make your craft the highlight of the celebration, pay special attention to choosing a picture to transfer to the bottle. It should please the person to whom your gift is intended, or match the style of the holiday table setting. You can even create a drawing yourself in any graphics editor and print it on a laser printer.
Original bottle decor made from thuja branches
If you need the best ideas on how you can decorate a bottle of champagne with your own hands for the New Year 2022, then we offer original decor from thuja branches. Such a bottle can serve as a New Year's gift, New Year's table decoration, or as a night light if you place a garland in an already empty bottle.
Materials:
- thuja branches;
- acrylic paints;
- acrylic lacquer;
- beads;
- salt, glitter.
Master Class:
- We degrease a bottle without labels and cover it with acrylic varnish, but apply the varnish only to the area where we will apply the twig.
- Now we apply a thuja sprig and also apply acrylic varnish on top with a brush. Leave until completely dry, and then glue all the other branches in a circle.
- Then we glue small ones between the large branches.
- Using hot glue we make a snowfall, which we then cover with white acrylic paint. We also apply paint to the thuja branches.
- Then cover the bottle decor with acrylic varnish and leave for 5 minutes.
- Mix salt with silver glitter, sprinkle and leave until the varnish is completely dry.
- Now we glue small beads or rhinestones to the thuja branches and secure everything with hairspray.
For decoration we use only fresh thuja branches; dry branches will simply break.
"Winter forest"
Master class “ Decoupage of a champagne bottle for the New Year ” is presented by Elizaveta Ruzanova.
For this you will need:
- 1. The bottle itself with any champagne.
- 2. Primer for glass.
- 3. Acrylic paints: white and silver.
- 4. Silver outline with sparkles.
- 5. Napkin for decoupage.
- 6. Decoupage glue or PVA.
- 7. Synthetic brushes.
- 8. Two-step craquelure and crack grout (silver purple or oil paint).
- 9. Foam sponge.
- 10. White lace.
- 11. Acrylic varnish or final decoupage varnish.
First stage. First, the bottle needs to be cleared of labels. To do this, you can wet it under cool water and use a knife to carefully remove any remaining paper. We leave only the paper covering the cork.
Now the surface of the bottle needs to be primed. You can first degrease it with alcohol so that the soil adheres better. Take a medium sized flat synthetic brush and coat the entire bottle with primer. Wait until it is completely dry.
Second phase. After this, you can start actually decorating. Take a ceramic plate, turn it over and stir white acrylic paint onto its surface. Instead of a plate, you can use a special plastic palette. In the same way, using a flat brush, paint the entire bottle with white paint in two layers so that the dark glass does not show through.
Third stage. Once the paint has dried, you can begin gluing the image. Take a napkin and separate the 2 bottom layers from it so that only the top layer remains, which you will use. In this master class, a two-layer napkin was used, so only one bottom layer was removed.
Apply the motif to the bottle, take a brush and drop a little plain water into the center of the napkin. So, with a brush dipped in water, continue moving from the center of the napkin to its edges. The napkin will seem to be stuck to water. If you notice air bubbles forming, lift the napkin by the dry edge and lower it again, smoothing with a wet brush. “Glue” the entire napkin in this way.
Now take decoupage glue or dilute PVA glue with a little water and cover the top of the napkin with it using a brush. Glue the napkin carefully because it is wet and can tear easily. After this, the napkin will need to be left until completely dry.
Fourth stage. While the napkin is drying, you can start making lace to decorate the bottle. Cut two strips of white lace - wide (for the top of the bottle) and narrow (for the bottom). For the top, you need to cut off more so that the ends of the lace overlap each other.
Now mix acrylic silver paint on a plate and use a sponge to silver the lace. And wait for it to dry again.
Fifth stage. When the napkin on the bottle dries, take the sponge again, dip it in white acrylic paint and use “smacking” movements along the entire edge of the napkin on all sides so that the borders of the napkin are not so sharp.
When the white paint is dry, dip the sponge into the silver paint and once again go over the entire bottle (except the area with the napkin) using light movements without pressing. Now a light touch of silver is noticeable on the bottle, giving it a more festive look.
Sixth stage. Now we will use a two-step craquelure to create the effect of cracks on the surface of the napkin. This will age our bottle a little and add originality to it.
Let's take the first step of craquelure and cover the entire napkin with it using a synthetic brush.
Let's wait for the composition to dry relatively (about 20 minutes), when the craquelure varnish is still sticky, but no longer stains. After this, you can apply the second step of craquelure from the jar, number 2. The size of the cracks that will appear in the future depends on the thickness of the layer with which the second step was applied. The thicker the layer, the larger and more noticeable the cracks. After applying the second step, the napkin can be dried with a hairdryer. Then the cracks will become visible.
And to make the cracks even more noticeable, they need to be rubbed with oil paint or a special grout - purple. In this master class, silver grout was used. We rub the silver into the cracks, and remove the excess from the surface with a damp cloth.
Now the crackle effect has become more noticeable.
Seventh stage. Take a wide strip of silver lace and glue it to the top of the bottle so that the lace slightly hides the top edge of the napkin. You can glue the lace using the same PVA glue.
In the same way, glue a narrow strip of silver lace to the bottom of the bottle. It should now dry.
Eighth stage. Using a silver glitter outline, draw snowflakes on the napkin and on the entire free surface of the bottle.
When the outline is dry, the bottle can be coated with finishing varnish in 2 layers, drying for 15-20 minutes between layers.
Now the decoupage bottle of champagne is completely ready. And now it is no longer a simple, familiar bottle, but a real interior decoration that creates a festive mood.
Decorating champagne with candies
Pineapple decor
The traditional combination of chocolates and sparkling wine can be arranged as one whole composition. We invite you to make New Year's champagne-pineapple.
To make a pineapple from sweets and champagne for the New Year with your own hands you will need:
- sparkling wine of your choice;
- wide paper tape;
- scissors;
- round chocolates in yellow packaging;
- hot glue gun;
- decorative bow or ribbon;
- green corrugated paper;
- paper for packaging.
How to decorate a bottle of champagne for the New Year in this style:
1. The wide part must first be covered with paper tape. This simple action will increase the adhesion force of the candies to the surface.
2. We attach each candy to the walls using adhesive. The first row starts from the bottom. The rows are formed in the same way until the neck begins.
3. Thin strips are cut from corrugated paper, symbolizing the top of the pineapple. The ends of the paper can be twisted by pressing them against the sharp part of the scissors and pulling them through.
- All that remains is to decorate and pack a beautiful gift of sweets and champagne. Wrap everything in wrapping paper and tie a nice bow on top.
Decor in the form of a Christmas tree
Another easy-to-execute way to decorate a gift from a bottle of champagne and sweets.
For the Christmas tree you will need:
- glue gun;
- a sparkling wine;
- green tinsel;
- round shaped candy;
- decorative bow;
- beads
The sequence of actions on how to make a Christmas tree from champagne and sweets:
1. First of all, you need to wrap the tinsel around the champagne. The edges of the tinsel are fixed with glue.
2. How to decorate a bottle of champagne with sweets? By slightly moving the strips of tinsel apart, you can use glue to fix each one separately.
- In this option there are no clear layouts of the candies; the most important thing is the organic appearance of the finished composition.
3. The finished champagne bottle Christmas tree is decorated with a decorative bow at the neck and beads wrapped around it.
Champagne bottle decoration with confetti
A pretty win-win way to decorate a bottle of champagne for the New Year 2022 with your own hands is to use shiny confetti, as in the photo. This bright material will not only decorate our product, but, in addition, will give it a solemn look, which with its dazzling shimmer will captivate all your friends and relatives gathered at your festive table.
To work you need:
- a bottle of champagne;
- confetti;
- spray glue;
- gift bow and ribbons.
Progress:
- We take our bottle of champagne and prepare it for work by removing the label and cleaning the surface.
- Having bought aerosol glue in the store, you use it to treat our product without affecting the neck and plug area.
- Having poured the confetti into a deep and wide container, we roll our sparkling wine drink in it, as shown in our photo. After that, let it dry, and then, if you find some flaws in the work, repeat the procedure.
- At the end of our process, all that remains is to decorate the transformed product with various decorative elements. In our case, this is a ready-made gift bow, which we attach to the neck with glue and complement with curls of gift ribbons.
Make your New Year's Eve 2022 fabulous by creating everything you need with your own hands. But, if this decoration option turned out to be quite simple and primitive in your opinion, then our video will be useful for you.
Master class on decorating a bottle of champagne using tulle - mesh
Decoration with corrugated paper
Corrugated paper, especially festive green, will perfectly decorate your bottle of champagne for the New Year 2022. It’s not at all difficult to do it yourself, especially for beginners, you just need to purchase this material at an office supply store and stock up on some details for further New Year’s decor. As you can see in the photo, these can be golden ribbons that play the role of securing paper, bells, flowers, gift ribbons in all their variety, beads and much more, collected in a specific festive composition. So let's get started.
To work you need:
- corrugated paper (any color);
- a bottle of champagne;
- gold thin ribbon;
- gift ribbon (different colors);
- floral paper;
- ready-made gift bows;
- scotch;
- all kinds of decorations on hand.
Progress:
- Grab a bottle of champagne and get to work. First you need to design the neck and stopper. To do this, carefully wrap them with a small piece of corrugated paper. To prevent the paper from opening, we secure it with tape.
- We do similar work with the rest of our product, wrapping it with the same material, and for fixation we use a piece of gold gift ribbon.
- The final stage. To do this, you need to decorate the sparkling wine with a New Year's decorative composition, which you can make from anything. Let's say, as in our case, these are bells, ready-made gift bows, beads, rain, artificial flowers (you can replace them with small Christmas balls), transparent colored floral paper.
Such beauty, made with your own hands, can be placed not only under the tree for the New Year 2022, but also presented as a gift to loved ones. They will certainly appreciate it. In order to make several souvenir copies, you should check out our video tutorial, which will provide you with another great idea.
How to decorate a bottle of champagne
For New Year 2022, everything should look irresistible. This applies not only to your home, but also, of course, to a superbly decorated festive table, on which, in addition to all sorts of mouth-watering dishes and delicious meat, cheese and fruit cuts, a bottle of cold sparkling champagne will occupy the dominant place. And at the hour when all the jubilant glances of your family and guests will be directed at it, this intoxicating drink should surpass everything around in its appearance. For this you need to work hard, dear friends. Be patient and do a very important creative activity that will undoubtedly lift your spirits. If you don’t know how to decorate this enchanting drink with your own hands, and what auxiliary materials to use for this, don’t despair and take a look at the photo first. As you can see, their range is quite rich and extensive. If you don't believe me, see for yourself.
Champagne bottle design:
- acrylic paints;
- decorative sprays;
- rice napkins;
- newspapers;
- multi-colored fabrics;
- sweets;
- New Year stickers;
- sparkles;
- rhinestones;
- decorative stones;
- beads;
- satin and other ribbons;
- compositions of fir branches, cones, small Christmas tree decorations, etc.;
- rain;
- beads of various configurations;
- bows;
- foil;
- decorative elements made of polymer clay;
- artificial flowers;
- dried berries;
- fruits and much more.
This list can be continued, but it will take up your precious time, which you should better spend on creating with your own hands a unique design of a champagne bottle for the New Year 2022. Remember that you must decorate this everyone’s favorite sparkling wine so that everyone gasps in amazement. As a clear example, we have prepared for you our irreplaceable selection of photo ideas on this topic, after reading which your possibilities will expand significantly.
Decorate in the shape of a pineapple
Turn a New Year's bottle of champagne into a pineapple, like in the photo! This is not at all difficult, and the finished souvenir will look festive and original.
You will need:
- green and orange tissue paper for pineapple leaves,
- round candies in gold foil (such as “Ferero Rocher” or “Evening Kyiv”),
- glue,
- glue gun,
- twine.
Process of creation:
- So let's get started. Cut orange tissue paper into squares measuring six by six centimeters.
- Drip glue onto the flat side of the candy and place the candy in the center of the paper square. After the candy is securely attached to the paper, fold the edges of the paper so that they “envelop” the candy.
- Start by using a glue gun to cover the bottle of champagne with candies in a circle. Since we are not gluing foil, but tissue paper, there should be no problems. When gluing, follow these two principles: place the candies as closely as possible to each other so that there are no gaps between them. The second secret to successfully making a souvenir is to glue the sweets from bottom to top in concentric circles. Of course, you can attach candies in different colors, but then the “pineapple” will look sloppy.
- Using scissors, cut out thin long leaves from tissue paper to decorate the neck of the glass container in a circle. For this we also use glue.
- Wrap it with twine in the place where the candies meet the leaves.
This master class will make you a real specialist in the field of creating an extraordinary souvenir, especially since it will not take much effort and time, and the material you need is the simplest.
New Year's miniature in a plastic bottle
An unusual way to use clear plastic is that it makes a great Christmas themed miniature. What you need: small figures, artificial snow (even white soap shavings are perfect), two halves of transparent plastic bottles, ribbon for decoration, tape.
Stability is provided by the lower part from the bottom. It is better to paint it silver, gold or white.
If you tie a ribbon to the neck, you will get an original Christmas tree pendant.
Necessary materials
To understand what materials will be needed in the process of decorating a bottle, you need to decide on the decoration method. This can be a simple design with tinsel, sparkles, serpentine and other New Year's attributes. To fix them, you don’t need additional accessories; you just need to beautifully wrap the garlands around the bottle or tie them with a bow. Champagne decorated in this way will look good on the table during a noisy festive feast or corporate party.
Another way to quickly decorate a bottle will require you to purchase special thermal stickers (custom labels) with thematic designs and wishes.
The original labels are removed from the vessel by dipping in heated water.
Very often, paints and decoupage techniques are used for decoration. Both of these options are considered the most classic. To create the outer “clothes” of champagne using these techniques you will need:
- acrylic paints;
- special contours;
- brush;
- thematic drawings and stencils;
- napkins;
- PVA glue;
- water-based varnish;
- additional decorations: beads, ribbons, wreaths.
If you decide that your bottle will have beautiful New Year's wreaths on it, you should purchase the following materials to create them:
- wire;
- designer paper;
- artificial or natural spruce branches;
- dry flowers;
- walnuts;
- tangerines;
- dried fruits;
- satin ribbons;
- cord;
- lace fabric.
A wreath created from these materials will itself be a highlight in the design of sparkling wine. For greater solemnity, it is recommended to first wrap the bottle with foil or any decorative paper (for example, corrugated) and put a wreath on top of it.
The finishing touch will be decorating the wreath with a transparent pendant or satin bow.
If you love crafts, you can make special pockets for drinks.
To create them you will need:
- fabric of neutral tone (beige, creme brulee); It is recommended to choose natural materials such as linen, cotton, felt, and if they are unavailable, you can use any fabric that is at hand;
- thick threads (decorative, interspersed with lurex);
- needles or sewing machine;
- a pattern made independently based on the parameters of the bottle;
- decorative elements: buttons, beads, ribbons, stickers, lace, rhinestones, sequins.
Pockets can not be sewn, but knitted or crocheted in the form of a pullover, a Snow Maiden dress, or a Santa Claus outfit. You can also complement these outfits with knitted winter accessories: a hat and scarf. Based on your skills and imagination, knitted items can be made in the form of the symbol of the year, a snowman and other characters.
To create knitted decorative patterns you will need:
- knitting needles – No. 1,2,3;
- hooks – No. 1,2;
- acrylic yarn of different colors (green, red, white, brown);
- knitting patterns.
You can also decorate a holiday bottle with a drink in other ways.
Let us give some interesting examples.
- Decorative cord. Additional tools you will need: glue, lace elements, beads, buttons, decorative figures, fur.
- Sparkles. You will need glue. The decoration can cover the entire bottle or be applied in stencils to certain areas of the champagne.
- An aerosol can. For a more festive design, you can apply paint using appliqués and stencils.
- Rice napkins. It is better if they are translucent and with thematic patterns.
- Decorative stones. They must be placed in a fantasy order on a prepared base - ribbons, painted glass, corrugated paper.
- Newspapers. Clippings in foreign languages, made in beautiful fonts, will look original.
- Rain. Suitable for additional decoration and creating a truly New Year's mood.
- Figures made of polymer clay. This material, like no other, provides limitless opportunity for creativity. You can make snowflakes, figures of snowmen, Santa Claus, owls, Christmas trees and many others from clay. Such decor will make a bottle of champagne a real masterpiece.
Design options
Classic (straight)
Suitable for beginners. In this format, you can easily and quickly learn how to glue selected paper pictures (napkins, cardboard, photographs) onto a prepared base. As a result, you achieve complete coverage of space;
Reverse (illustration inside)
Used for clear glass. The element is glued with a pattern to the glass, decorated with a background accordingly, thereby creating a window behind which the intended content can be seen;
Artistic (smoky)
To perform in this format requires some experience in using color (shading, stretching, shadows). Paint with halftones and shadows is applied around the selected image, the result is a non-standard picture on glass;
3D volume – living design
To work, you can use fabric, relief paste, beads, ribbons, flowers, branches and many different little things. By connecting the elements in the planned sequence, you get the expected unique three-dimensional pattern.
Decopatch is considered a type of decoupage. The principle is to cover the required area with small pieces of paper. This way the entire product is covered, creating the appearance of an antique cracked painting.