/Accessories and decor/Decoration/
Plastic or tin lids are a super versatile material for making home decorations, children's crafts and even garden furniture. In this article, we presented 120 inspiring photos and 12 cool ideas for “deco-upcycling” caps from plastic and glass bottles with tips and master classes.
Idea 1. Placemats (+ master class)
Let's start with practice and tell you how to make these cute coasters for glasses from ordinary plastic lids.
Materials and tools:
- Lids from plastic bottles (for one cup holder you will need 7 lids, and to make a large stand you will need 28 lids);
- Fabric in two shades of pink, as well as a piece of fabric in orange or coral color;
- Any glass, jar or lid, with a diameter of about 7 mm;
- Pencil;
- Needle and thread;
- Scissors.
Instructions:
Step 1. On the existing scraps of fabric, draw 7 circles, tracing the outline of the tin lid, and then cut them out.
Step 2. Now we need to cover each cap with fabric. This is done simply: run large stitches along the entire circumference of the patch, place the lid in the center of the workpiece, then pull the thread and secure the resulting “cover” with a couple of stitches.
Step 3: Now connect all the caps one by one to form a chain. Please note that the connecting seams should be as invisible as possible. Next, roll the resulting chain into a flower (pictured) and secure it by sweeping all the parts together. Hurray, the first cup holder made from lids is ready!
Step 4. If you want to make a teapot stand, then you just need to connect 4 cup holders to each other.
This collection presents other ideas for coasters made from plastic and tin lids.
Coasters for glasses made of beer corks and epoxy resin poured into a mold
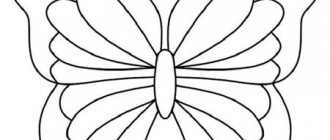
Crafts from bottle caps: facade decoration
The first thing that comes to mind when mentioning plastic bottle caps is the spectacular panels that decorate the fences of personal plots. This mosaic can be used to decorate a place where a child plays and spends time.
For those who are good at drawing, creating a design from caps becomes much easier. It is enough to outline the outline of the future panel and lay it out with multi-colored corks. It is better to glue the material using a glue gun. If you do not have the required colors of plastic lids, you can lay out a general drawing and then paint it with the necessary paints.
If you do not have artistic abilities, but really want to have such a spectacular mosaic on your garden plot, then you will have to tinker with embroidery programs or use ready-made patterns.
Many of us have seen and perhaps embroidered cute designs on canvas ourselves. They will serve as the basis for the future mosaic. Just lay out the lids in layers, repeating the pattern in the diagram.
Experienced needlewomen advise not to use quick-drying glue or a glue gun to secure the material, since in the open air it will simply dry out and the lids will fall off. Your mosaic will remain on the wall for a long time if you attach the covers using thin screws.
Idea 6. Magnets
To learn how to make refrigerator magnets from lids with your own hands, take a look at the article with detailed instructions.
These Photo Frame Magnets are Made from Nutella Caps
These crafts are made from baby food jar lids.
Bottle cap magnets
Lids with a diameter of 5 cm or more are suitable for creating magnets for a refrigerator or a children's board. To create a craft you will need:
- colorful caps
- magnets – can be purchased in handmade stores
- double-sided tape or glue gun
- alcohol - for degreasing lids
- pencils, colored paper, scissors
From this set we will make an alphabet on magnets, which will look much more interesting than classic pictures with letters and will not leave your baby indifferent.
The first thing you need to do is prepare the lids - degrease them with medical alcohol and clean them from dirt. This will make it easier to glue colored paper and magnets onto them.
We glue small magnets to the back or inner covers using double-sided tape or glue. The magnets will hold much stronger with Momente glue, however, if you are making crafts with children, you should choose a safer glue.
Glue circles of colored paper into the inside of the lids, the diameter of which is equal to the size of the cork. Next, we draw letters, syllables, numbers or other designs on paper. In addition to colored paper, you can use ready-made images, with which you can later create logical and educational games for children.
Letter caps can be used even without magnets. Instead of studying at the refrigerator, your child can add words at his desk.
For younger children, you can make fun fruits and smiley faces using colorful caps. To do this, you will need thin colored wire, ready-made plastic eyes, quick-drying glue and thick knitting threads.
Glue beads or eyes to the clean lid. Make a smile from a piece of thread or wire. Tie a branch of cherry into unique petals and glue it to the lids with Moment glue.
Making a cherry is the simplest craft that you can do with your child. In addition, you can make smiley faces, animal faces, bees and other insects from the lids.
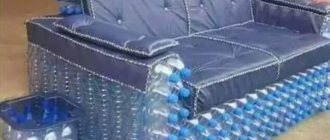
Idea 8. Furniture items
Almost any piece of furniture can be covered with tin lids.
Plastic covers can make excellent garden chairs, tables, and benches.
You can even make storage boxes from plastic lids.
Idea 9. Serving tray
Decorating a boring serving tray with lids is very simple: carefully place all the corks on the bottom, then fill them with a layer of epoxy resin and leave the craft to dry for at least a day. The main thing here is to mix the resin with the hardener according to the manufacturer's instructions (to the nearest gram!) and pour it slowly, avoiding the formation of bubbles. If you want a perfectly transparent resin layer, use liquid epoxy resin for decorative rather than construction purposes.
See also: DIY serving tray - ideas and master classes
Massage mats made from plastic covers
Despite the fact that plastic is quite sensitive to high temperatures, mats made from lids can be used as a stand for hot dishes. Of course, fire pans should not be placed on rugs, but a cup of hot tea or a plate will feel great on such a stand.
To create a mat, prepare the lids - clean them of dirt and degrease them with alcohol. Next, glue the lids edge to edge using a glue gun. The finished mat can serve not only as a stand, but also as a convenient means for massaging the feet. It is enough to turn it over.
Parents of children suffering from flat feet use the reverse ribbed side of the caps for health procedures. In this case, you need to connect the covers using thick twine so that the rug does not unravel while walking on it.
Idea 10. Door curtain
If you have accumulated a lot of plastic covers, you can “sew” them into a door curtain for your cottage. The easiest way is to string caps of different sizes and colors on threads in a chaotic order (see photo).
If you want the curtain to have a pattern, then you need to search the Internet for patterns for making curtains from beads.
Idea 11. Wall clock
Both tin and plastic covers can replace the numbers on a wall clock. All you need is a clock mechanism (can be removed from an old clock), a base, 12 caps and our step-by-step instructions on how to make your own clock.
Here are some photo examples of what a homemade clock made from lids can look like.
Crafts from plastic bottle caps
The idea that lids can be used for decoration and creating crafts arose largely due to the variety of colors that amaze with their brightness and richness. Lids are a great base for crafts with your child.