Crafts made from pompoms - toys, interior decorations, accessories - have been occupying a leading position among hand-made items for several decades. Craftswomen create real masterpieces from them. And it’s easy to learn this “craft” - just stock up on the necessary materials, patience and use your imagination. At the very beginning of your journey, you can look for ideas from experienced needlewomen. The main thing is to learn how to form the pompoms themselves.
How to make a pompom: 3 easy ways
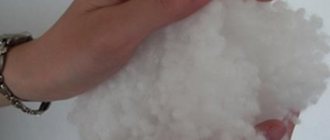
We found three easy ways to make a pompom at home. To do this, you will need items such as cardboard, scissors, a fork, and your own hands, of course.
The first way to make a pom pom is by wrapping yarn around your fingers. Depending on the desired size, you can wind it on 2,3,4 fingers. Then the yarn is removed, tied with thread and cut (see figure). The finished pompom can be trimmed by cutting off the protruding threads.
The second, no less simple way is to use a fork. The yarn is wound around the cloves, then tied into a bundle and cut.
But this way you can only make small pompoms. For larger sizes you will have to find another way.
Option three - the most common - is the use of cardboard rings. Two tori of the required diameter are cut out of cardboard, and yarn is wound on them. Then the threads are cut between cardboard blanks and the resulting bundle is tied with thread.
Pompoms can be made not only from single-color threads. By combining different shades, you can create multi-colored spots on the balls, which can become the side of an apple, the breast of animals or birds, or the wheel of a car.
In addition to the devices described, you can also use a cardboard “horseshoe”. By winding different shades, we get a funny and very real strawberry:
Rugs
For products of this type, you will need not only a lot of yarn, but also a base on which small elements will be attached. As a base, you can use pieces of thick fabric, crocheted rugs, fine plastic mesh, burlap and other materials that retain their shape well.
You will need a lot of pompoms for the rug, and they must be dense. A small one, 1*1 m in size, takes up to 80 balls of yarn.
First you need to prepare the material for the base, give it the desired shape - cut out a heart, square or rectangle, circle of the desired size. Then make one pompom and “estimate” how many you will need.
Only after the calculations can you start making balls. The most durable mats are made on a plastic mesh base. The buboes are usually tied to it, bringing the elements of the knot to the wrong side.
To hide the knots, after finishing the work, the underside is “covered” with thick fabric. The material must be chosen so that it does not slip on the floor.
Many craftswomen have round or oval rugs at home, crocheted from knitted ribbons or plastic bags. They can be updated with fluffy decor. The decor is sewn onto this base. You can glue them with a glue gun, but then you will have to wash them by hand so that the pompoms do not fall off. We start attaching the decor from the middle of the base.
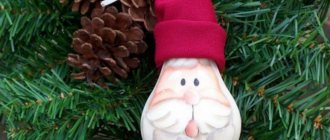
Pom pom chicken
But such a cute chicken is also a little future cockerel. This craft can be made both as a New Year’s tree decoration and as a small present for loved ones. You can also use it as a keychain if you make it 2-3 times smaller than the specified size. We decided to show how to make a small chicken (newborn) and an older one with legs. And what can you make from pompoms?
To make 1 pompom we will need:
- yellow bright thick threads (as for knitting, acrylic, cotton, wool);
- 2 cut-out cardboard blanks, as in the picture (external diameter - 6 cm, internal diameter - 2 cm);
- large needle;
- glue (you can use super glue, you can use instant);
- nail scissors;
- decorative elements (eyes, beads, red cardboard for beak and scallop).
Accordingly, for 3 pompoms we will need 6 cardboard circles of different diameters.
It’s worth saying a few words about the preparation. If the inner circle of the workpiece is made a little smaller, the pompom will be denser - just the right one for a plump newborn chick! So how do you make pom pom chicken?
Chicken baby
Take 2 cut out cardboard circles. wrap them with thread around the entire perimeter.
If you are making a large dense pompom, then you should not wind the thread twice, but fold it at least 6-9 times - it will be much faster. You should end up with a tight yellow circle with a hole in the middle.
Now use nail scissors to cut the threads as shown in the picture. In this case, the blades of the scissors should pass between 2 cardboard circles.
The cut threads must be fastened into a pom-pom so that they do not fall apart. To do this, stretch a thread 15-20 cm long between 2 circles, as shown in the figure, and tie.
Use scissors to cut the cardboard circles and take them out - you won't need them anymore. Cut off the excess threads. Now you can start decorating the newborn chicken. Cut out a comb, legs and beak from red cardboard and glue it to the pompom along with the eyes.
Cute newborn chick is ready!
Adult chick
In order to make a more adult chicken from pompoms. we will need all the same materials as for a newborn, and also:
- wire;
- Red thread;
- red cone-shaped bead (for beak);
To make a children's craft from a chicken pompom, you need to make 2 pompoms of different diameters - one larger for the body, the other smaller for the head. But at the end, do not cut the threads that attach the pompoms - they need to be used to tie the pompoms together.
Attach 2 wires to the bottom of a large pompom, then use them to form chicken legs with 3 fingers. Then wrap the pom pom chicken legs with red thread.
Glue beady eyes and a cone-shaped beak bead to the chicken's head. Pom pom chicken is ready! In order to hang them on the tree, you need to thread a thread from above.
How to make blanks for crafts with your own hands
There are many options for creating balls from threads. The simplest one, which is suitable for beginners, is to use special devices. They are sold in craft stores. The set usually includes several devices of different diameters.
They are easy to use:
- open and wind an even layer of thread on each of the halves;
- close the circle and secure it with a clamp;
- cut the threads on the “ribs” of the device;
- wind the thread between the halves and tighten;
- open the clamp, remove the device from the workpiece;
- fluff the ball with your hands and cut off the protruding ends.
Miniature “fluffies” can be twirled on a regular dinner fork. The yarn is wound on a fork, tied tightly in the middle, the workpiece is cut on the sides and fluffed.
The same principle is followed when using your own hand as the basis for the bubo.
You can cut out a template for making pompoms from cardboard with your own hands and use it to make charming crafts, toys for children or together with children.
On durable cardboard, draw a large circle and a small one inside the large one, and carefully cut out the part. Two such parts are made. To make them easier to use, they cut a “slit” - it’s convenient to wind thread through it. Experienced needlewomen have in their “arsenal” several pairs of templates of different diameters.
It’s easy to work with them - a dense layer of thread is wound on two circles folded together. Carefully cut it “on the edge”, slightly move the cardboard parts apart, wind a thread between them, tighten it tightly, remove the circles - the bubo is ready.
Video tutorial:
The cardboard template can be rectangular. It is also carved by hand.
The wider the rectangle, the larger the bubo made with it will be. Yarn is wound around it, as well as around circles, being careful not to block the place where the cut ends. Then the principle remains the same - we secure it with a transverse knot, cut it, fluff it up and straighten the ball with scissors.
Another unusual but convenient way is to make fluffy blanks for crafts using a chair or table. We turn the “base” upside down, wrap the material around them, and tightly tie the workpiece in several places, at an equal distance from each other. We cut the threads between the knots, fluff the elements and align them.
A few tricks from experienced craftswomen. If used, wavy yarn is used, then it must first be straightened (wetted, stretched and dried). The ball will be fluffier if you wrap as many threads as possible around the template. It is necessary to bandage the middle of the workpiece very tightly so that the product does not fall apart as work progresses.
Pom Pom Rabbit
This funny Easter bunny can be made from two pompoms of different sizes.
You can choose a variety of colors - from delicate pastels to bright and neon. Some parts are cut out of felt and glued with either heat or super glue. So, to make a rabbit from pompoms with your own hands, you will need materials and tools:
- a skein of thread (the fluffier the better);
- a device for making pompoms (you can use homemade or purchased ones);
- scissors;
- a small piece of felt;
- beady or doll eyes;
- beige or pink bead for the nose;
- glue;
- white fishing line for antennae;
- small store-bought white pompoms (by the way, you can also make them yourself).
The first step is to make pompoms. You will need two different sizes.
We cut out two oblong ears from felt.
Glue or sew two pompoms together. Glue the ears to a small pompom, beady eyes and a small fluffy tail at the back.
We sew on a pink bead-nose and make antennae out of fishing line and glue it onto our workpiece.
Our pompom Easter bunny is ready!
Master classes on making crafts
There is nothing complicated in creating bright toys, stylish accessories, decorative ornaments for hairpins and elastic bands; you just need to master the technique of assembling a pompom.
Before further stages of independent work, the master should make a sketch or an initial sketch of the future craft. Thus, the work will be carried out without major errors.
Kids toys
The most popular application for this technique is the creation of soft toys for children. The simplest options are the caterpillar and the bunny. To create interesting and bright toys you will also need felt, cardboard templates, and several large black beads.
Instructions on how to make a pompom craft for children:
- It is better to make the caterpillar multi-colored so that a young child has the opportunity to learn the differences in colors.
- For the body and head you will need about 6-9 fluffy balls.
- Each ball is sewn to the adjacent piece with threads.
- To complement the look, it is fashionable to cut out paws and a pair of antennae from felt. The beady eyes should be placed on glue.
The assembly diagram for the bunny is approximately similar:
- The body is one large pompom.
- The four legs are soft balls of smaller diameter.
The ears are cut out of felt, and the inner contour of a different color must be laid (as a rule, preference is given to white or pink).
Jewelry for children
Any girl will appreciate a beautiful miniature pompom on a hair tie, on a bracelet or on a hairpin. To make a soft ball, you should use any of the above methods.
It is better to attach the hairpin to the metal base using glue. The fluffy ball is sewn onto a fabric elastic band using threads.
Another interesting option for crafts made from small pompoms:
- Toy eyes are glued to one side of the soft ball or beads are sewn on.
- A single thread (any design) is threaded through the center of the pompom.
This decoration can be used as a keychain for a backpack.
Soft rugs for the bedroom
A soft fluffy carpet will be a real decoration for any bedroom. To work, you will need a mesh with large cells, threads with needles, and a large number of multi-colored fluffy balls. Instructions on how to make a stylish craft from pompoms with your own hands:
- Lay out the mesh in front of you on the work surface.
- Through the middle of each ball you need to draw a thread, the diameter of which is absolutely not important.
- The free edges of the thread are passed through the mesh fabric and tied with a knot on the back side of the warp.
If desired, you can create a beautiful frame for the rug using knitting yarn and a large hook.
Panel "Cloud" on the wall
A three-dimensional panel in the shape of a cloud will favorably emphasize the style of a living room or children's bedroom. To make such a craft, you need to prepare 12-16 fluffy balls and several threads of knitting yarn.
The balls are pinned directly to the wall or pre-sewn to a felt base. Clouds can be formed in any image, according to any sketch. From the main “cloud”, several threads should be drawn down, on which child clouds will be located.
Festive wreath
Crafts made from pompoms and fluffy wire can become a real holiday decoration for your home. In this case, the master has the opportunity to sew adjacent pom-poms together in advance in the form of a garland, and then gradually wrap the garland around a metal wire.
Such an accessory will keep its shape for a long time and delight its owners with festive decor.
Creating your first fluffy ball is not difficult, you just need to do a few training sessions. The efforts will not be wasted, since the master will receive a lot of pleasure, both from the process of making crafts from thread pompoms, and from the final result.
Decor
As decorative elements, pompoms can become decorations for photo frames, curtains for windows or doors, or a charming rug:
- For curtains, pompoms are simply sewn with a center thread to a piece of wool thread. They can consist of plain or colored stripes.
- Photo frames are decorated with small pompoms. They are usually selected based on the subject of the photograph. You can make a photo frame with your own hands from two pieces of thick cardboard.
- For the rug you will have to make a lot of fluffy products and find a construction mesh or a piece of fabric. Pompoms are sewn on using the central thread. Some craftswomen even manage to make entire paintings using wool balls. In the same way, you can make a cover for a chair or decorate a ready-made bedspread or tablecloth in a non-standard way.
Small pompoms can be used to decorate a handbag or blouse, make a keychain, decorate a pencil holder or the pencils and pens themselves.
As you can see, pretty fluffy balls can find many uses. They are quickly made and quickly transformed into a new toy or decoration. And creating such crafts will certainly please everyone in the household.
Koala made of colorful pompoms
A multi-colored pompom will make a wonderful koala with an interesting face and ears. Using the same example, you can make any other animals.
4 cardboard figures resembling horseshoes are used as a blank; the first pair will be used for the front of the head, the second for the back. You will also need paper clips, scissors and yarn of different colors (3 shades).
Please note: the outer radius of the circle is approximately 2.5 cm, the inner one is 1.3 cm. Also attached to the inside of the larger horseshoes is a smaller blank with an outer radius of 1.8 cm (it will be needed later).
First, let's work on the front part of the animal's head. First of all, we will wrap the nose and mouth of the koala from black and white threads, taking the latter just a little, about 3-4 turns. It is important that the white yarn is wound on itself. Next, we begin to wind gray threads, also over white and black. We wrap approximately two layers.
Now let's create two eyes from black yarn - slightly above the place where the previous black threads were (the nose). A couple of turns will be enough. Cut the black yarn. We continue to wrap gray threads on top until the inside of the circle is almost filled.
On the side where the muzzle is planned (just above the eyes made of black threads), place a pencil and now wrap gray threads around the cardboard and pencil (Fig. - these will be the koala’s ears.
In the same way, we create the back of the head from the second pair of blanks. For this purpose we use only gray yarn.
Now it’s time to connect both parts: we connect the free ends of both cardboard blanks so that they are perpendicular to the koala’s head (Fig. 10), we connect them with paper clips.
Now we cut both blanks, as shown in Fig. 11 (for this we needed a small blank, it provides space for the scissors to fit in freely). We thread a thread between the cardboard blanks and tie the resulting bundle. Now all that remains is to trim our pompom - don’t forget to leave the ears!
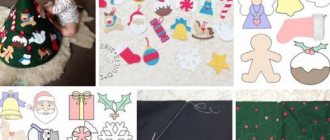
New Year's crafts
Crafts made from fluffy wire and pom-poms will create completely unusual New Year's decorations. These can be standard balls, as well as unique ones:
- Father Frost:
- Snowman;
- Snow Maiden;
- Snowflakes.
The figures are created from two pompoms. For a fairy-tale wizard, red and white colors are chosen, for his granddaughter, blue and white threads are more suitable. The snowman consists of white balls. Eyes are attached to the faces of magical characters.
The heads are decorated with knitted hats or cardboard headdresses. You can complement the craft with an elegant scarf and a cozy belt, make the legs from cardboard, and weave the arms from threads. For the Snow Maiden, additional braids are made. All that remains is to cut out the sleigh from cardboard and put a thick bag of gifts in it.
Christmas tree
Fluffy pompoms are also used as material for creating a Christmas tree. For a charming forest beauty you will need a cardboard cone and green pompoms. Fluffy balls are simply glued to cardboard or sewn to a base.
For an unusual looking Christmas tree, you can use multi-colored fluffies. This will make the craft a completely unique thing that you can even give as a holiday souvenir.
The width and height of the elegant tree will entirely depend on the desires of the young masters and the number of pompoms they create.
Pompom dog
The first step in making a pom pom dog is to create three blanks.
You will need two pompoms - one slightly larger for the body, the other smaller for the head. Another small one is needed for the muzzle; it is better to make it in a contrasting color. We make pom-poms using one of the methods described above, using light threads. We choose a method depending on the desired size of the dog. To get an elastic body, wind the threads tightly enough. Also make the pompom a little smaller. Please note: do not cut the threads used to tie the pompoms together.
Use scissors to form the dog's face by cutting out some of the threads. Try to give it a slightly elongated shape. Pull apart the most “shaggy” part of the pom-pom and glue a small pom-pom inside - this will be our dog’s nose.
Use black beads to make eyes for the animal, sew or glue to the head. Create a nose in the same way - either from a black bead or from a brown one. Instead of beads, you can use buttons.
Tie two pompoms together using thread. who were left. For reliability, you can sew it.
Cut out long ears from felt and glue or sew them to the head. You can decorate the animal to your liking - dress it in a funny suit and hat, tie a scarf or leash around its neck.
Tools and materials needed to make pompom crafts
- Yarn of various colors.
- Cardboard for making blanks.
- Felt. Using it, it is convenient to complement the craft with small details (beak, legs, wings, ears, etc.)
- Eyes and nose. You can buy ready-made ones, or you can use buttons and beads.
- Needle, scissors, glue.
- Braid and ribbons for decoration.
Multi-colored cars and houses made of pompoms
Pay attention to unusual toys made from pompoms - cars and houses with multi-colored inserts. To work, prepare threads of different shades (they will need to be wound in different layers) and scissors. Follow the photo instructions and you will succeed.
To correctly distribute the colors, you need to understand what will happen when you cut the workpiece - the threads are distributed symmetrically.
The peculiarity of such crafts is that they are assembled from different pompoms and cut out from one. The result is not the shape of a ball, but the shape of a car, a house, a Christmas tree or the face of an animal with multi-colored headlights, wheels, windows and roofs.
For such crafts, choose very fluffy and thick threads, since some of them are then cut off, the craft should not look scanty.
How to make a pompom
Required material:
- thick paper or cardboard;
- knitting threads of the required color;
- scissors;
- compass;
- large gypsy needle.
Process:
- Using a compass, draw two similar circles on a piece of paper. In the middle of each circle, draw inner circles of the same diameter. Cut out the details.
- Make large circle cuts in one place. Fold the paper circles so that the cuts do not match.
- Measure out at least 2 meters of thread, pull it into a large needle and wind the thread onto the structure made from cardboard circles.
- Similarly, you need to wind the thread to the end. The more thread is wound, the more magnificent and voluminous the pompom will be.
- Cut the thread along the edge of the cardboard stand, in a circle.
- It is necessary to slightly move the cardboard rings to the sides and tie the entire bundle between them with one thread in a strong knot.
- Pull out cardboard templates from pompoms.
- Flatten the pom pom, giving it uniform hairiness.
7 primitive step-by-step ways to make an excellent bookmark for books yourself, look here https://woman-l.ru/sposoby-kak-sdelat-zakladku/
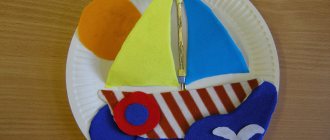
Simple toys made from pompoms and felt
To please your baby with a soft toy, you don’t have to go to the store for it. Look in your bins and look for leftover knitting threads. Make pompoms from them.
We bring to your attention some interesting ideas on what toys can be made from threads and felt:
Ideas for toys made from pompoms with drawings
How to make pom poms with letters
Flowers for the interior
We present a step-by-step process for making flowers from pompoms.
- We make several dense pom-poms of the same or different colors.
- We attach each ball to a wire.
- Now all that remains is to decorate the wire with threads, wrapping it tightly. If desired, you can add leaves. More fashionable in a modern interior are such balls of any color and size without unnecessary elements.
- Now our flowers are ready, all that remains is to put them in a beautiful vase.
Such an amazing item for creativity is an ordinary pom-pom made of threads. Now in any home there can be much less unclaimed little balls of multi-colored yarn.
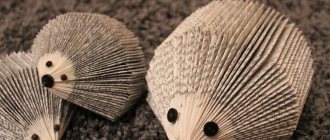
Animals made from pompoms. DIY toys for children.
Toys in the shape of animals, made with your own hands from pompoms together with children, turn out very beautiful. Sometimes you even start to think, was such a cute dog really made from simple threads? This bear looks just like a teddy bear: DIY lilac hippo: Chipmunk toy: Penguin: Be sure to see how to make fruits out of pompoms with your children. Ladybugs: And if you need to make very small pompoms with your own hands, then use a regular fork. To do this, we simply wind the threads on a fork, tie them with a rope in the center, remove and cut them, then remove the excess threads: These pom-poms make caterpillar toys fun and bright: For this toy we make many, many multi-colored pompoms of the same size, and do not forget to leave “ "tails" of threads (15 - 20 cm), with the help of which we will fasten the body: We cut out the eyes and nose from felt or thick paper: All that remains is to glue them to the head, and the caterpillar is ready: For this little sheep we will need two white pom-poms of different sizes (the outer circle for the head has a radius of 2 cm, and the inner one - 1 cm; for the body, accordingly, the outer circle has a radius of 3 cm, and the inner one - 1.5 cm): We tie the pompoms together with the strongest knot: From wire with a pile (14 cm ) we make the front legs, bend them in the middle and wrap them around the neck: For the hind legs, take two pieces of wire 7 cm each: Apply glue and insert them as deep as possible into the body: Felt ears: For the muzzle, take a black thread and tie a knot on it: Cut it off tip: Glue it to another string: The result is a little white lamb: These are the ones you can make with your children with your own hands from pompom toys in the shape of animals.
Click “Like” and receive only the best posts on Facebook ↓
www.igrushki-rukami-svoimi.ru