Crafts from saw cuts
The wood looks beautiful when cut. The simplest decor from saw cuts is an owl. The parts are connected with nails or glue.
Owl eyes are easy to make from bottle caps.
Original flower pots are made from saw cuts glued together in the shape of a vase.
Tall flower pots made from saw cuts are placed on the lawn
Another good option is a bookcase. Holes are drilled in the center of each cut with a drill, then they are put on a wooden pin. To prevent the shelves from sliding, a screw is screwed under each one.
Pots of flowers are placed on shelves made from saw cuts.
A cute decoration for the door is a wreath. Wooden circles are glued to a plywood ring.
Wreaths made from different tree species look beautiful
If you cover the saw cuts with wood impregnation, they will not be afraid of bad weather
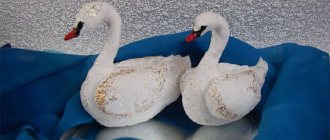
The snowman's mouth and buttons are made of leatherette, his eyes are made of spinach seeds
Gallery: using saw cuts at the dacha
Benches made from saw cuts are placed somewhere in the shade or near the porch. A rough chair made from saw cuts is a reliable thing. A thick cut of an old tree is suitable for creating a table top. Tables made from saw cuts are an ideal solution for a veranda or gazebo. Any flowers look great in flower pots made from saw cuts. An interesting solution is to decorate the outside or internal walls of the house with saw cuts When cutting out the plywood outline for the Christmas tree, leave a spike at the bottom for attaching to the stand Beautiful decor for a country door - a decorative heart from saw cuts To get a candlestick, drill in the middle of the cut and gouge it out with a chisel Sand the beautiful saw cuts and use them as stands for plates Saw cuts - suitable material for New Year's decorations
Master class on decorating a wall with saw cuts - video
Tabletop installation
The next step was to attach the boards to the plywood base. This process required considerable effort and resourcefulness. The boards were installed using self-tapping screws that were screwed in from the wrong side. To ensure a good fit, the top panel had to be weighted. Therefore, while my husband was working with a drill, I had to weigh down the tabletop, that is, sit and sometimes lie on the boards.
A perfectly symmetrical position of the slabs was not required; the presence of seams and some chips was welcomed, because we expected that in the future the imperfections would become the highlight of the project.
After the installation work, it was time for rough finishing. The sharp corners of the tabletop were chamfered and the surfaces were sanded until smooth.
"Dad is offended." Agata Muceniece about her relationship with Priluchny after the divorce
It’s good to wash often: myths about shampoo and hair care that only harm
Why French children behave well: eight ways to raise them
How to do it?
Once the material has been selected, a drawing and all the necessary tools have been prepared, you can begin assembly . When drawing up the drawing of the table, all its constituent elements, as well as fastenings, were highlighted. First of all, all the necessary elements are cut out and turned in accordance with the dimensions indicated in the drawings. Then, after checking and measuring after production, you can proceed to assembling the parts.
Important . Tools may cause damage. Follow safety precautions.
The assembly procedure is quite simple; general steps can be identified regardless of what model of table you plan to assemble.
The assembly steps are as follows: 1. Assembling the legs . The table legs, cut according to the drawing, are fastened with beams using self-tapping screws or nails. For greater reliability, the fastening points should be treated with glue and then tightened with self-tapping screws.
2. The tabletop . To do this, strips are marked on the tabletop that fasten the legs, then using self-tapping screws, nails, screws or fasteners, the tabletop is attached to the structure of the legs.
3. Installation of horizontal screed . Many table models require a tie between the table legs to prevent them from moving apart.
Problems of choice
When drawing up a kitchen renovation plan, we expected to install black granite countertops on all work surfaces, including the island, but after calculating the costs of materials and installation, we came to the conclusion that we did not have enough money. Savings did not force us to abandon the renovation; the dream of granite slabs was postponed until better times, and aged wood became an alternative.
It is not difficult to purchase such material; several private entrepreneurs offered magnificent boards that had aged under the influence of natural causes. Thick pieces look very beautiful; they were once part of barns, fences or floors. We almost made the deal, but realized that we were taking a rash step. After the inevitable sanding, the boards will lose their charm, which means there is no point in investing in the purchase.
So we were faced with no alternative reality - practice has shown that we will have to buy freshly sawn boards and then age them. Refusing pine blanks, we opted for poplar. To ensure that the finished tabletop does not resemble a cutting board in any way, we selected boards of different widths, trying to find samples with a pronounced pattern. It was decided to make a pilot version using the example of a kitchen island and hood cladding in order to understand how practical wood would be in use.
Rack
DIY crafts made from boards can bring real benefits. For example, most families are faced with the problem of a lack of storage space for various household items.
You can solve the problem and at the same time engage your child in a useful activity if you make a shelving unit yourself. At the same time, it can easily fit into any interior by first choosing the right paint color.
Before you start work, you should prepare the following tools and materials:
- 6 wooden blocks 5*5*160 cm;
- 4 boards 25*60 cm;
- 8 wooden blocks 3*3*25 cm;
- self-tapping screws;
- screwdriver;
- dye.
Prepare the boards
Cut the boards into racks Assemble the side supports The rack can be assembled in a vertical position The rack from the boards is ready
To make a rack, you need to follow the instructions:
- Make 4 marks on all long bars. The distance between them should be 40 cm.
- Take 3 bars. Place them on a flat surface, maintaining an interval of 5 cm between them. Connect the structure with small bars. Fixation should be carried out according to the marks.
- Repeat the previous step with the remaining wood blocks.
- Connect the 2 sides of the rack by placing boards on top of the small pieces. Securely secure the result using a screwdriver and self-tapping screws.
- Paint the product, paying special attention to small details and corners.
Original wood decor ideas
DIY crafts from boards: an original shelf made of boards and jars for flowerpots and flowers
Wood always looks good in the interior. Therefore, you can use boards to create crafts for your home. Wall stands for vases with flowers will look interesting.
In this case, you will need a minimum amount of materials:
- 4 boards 20*20 cm;
- 4 rings of any material that can hold the vase suspended;
- 4 jars;
- screwdriver;
- 8 self-tapping screws.
The process of creating crafts is the following algorithm of actions:
- Arrange the first board in a diamond shape.
- Using a screwdriver and self-tapping screws, attach the ring to the diamond. Thread the jar through the ring.
- Repeat the previous steps with the remaining boards.
Afterwards you can mount the crafts on the wall. It is better to arrange them also in the form of a diamond. You can put any flowers in such vases.
Another interesting idea for decoration is a special panel for photographs. This fake will help decorate any living space and will look very original. At the same time, creating a wooden panel will require a minimum amount of time. For the most stylish look, it is better to use black and white photographs.
Before you begin, you should prepare the following materials and tools:
- 2 identical long boards of any width;
- varnish;
- 2 metal strings;
- 4 screws;
- screwdriver;
- wooden clothespins;
- photos.
Then you need to complete the following steps:
- Carefully coat all sides of the board with varnish. Let them dry.
- Step back 3 cm from the edge of the boards and screw in the screws. They should not be completely immersed in the material.
- Pull the string onto the self-tapping screws. The remaining ends need not be hidden.
- Hang the photographs along the strings, attaching them with clothespins.
Another option for storing photos is an eco-style frame. All materials used to create crafts are harmoniously combined with each other. Several similar photo frames placed on any rough-finished wooden surface will look interesting in the interior. The creation process is quite simple, so even a little girl can be involved in it.
In this case, it is necessary for an adult to take over some of the actions or control them. This is especially true when using hot glue and a screwdriver.
Before work you need to prepare the following set of tools:
- 2 boards 10*15 cm;
- 2 boards 2*20 cm;
- 4 screws;
- screwdriver;
- dye;
- brush;
- pin;
- sackcloth;
- twine;
- hot gun;
- scissors;
- lighter.
Algorithm for creating a photo frame from boards in eco-style:
- Connect 2 boards 10*15 cm, tightening them with the remaining boards. In this case, it is better to use small screws so that the fastening is not noticeable.
- Paint the photo frame. Let it dry.
- Cut a rectangle from burlap. Treat the edges of the material with a lighter so that they do not fray later.
- Roll the burlap into a bow. Tie the center with a string.
- Glue the bow and clothespin to the photo frame.
DIY crafts made from boards can be very extraordinary. For example, a fashionable eco-style in the interior can be emphasized with the help of wooden candlesticks. For such work, you should choose old boards.
On the one hand, they should not have an even cut, but be slightly broken. The older the material looks, the more interesting and original the candlesticks will be. For these purposes, you can deliberately make the board older by breaking it.
Before you begin, you need to prepare the following tools and materials:
- 3 boards of any size;
- 3 boards 10*10 cm;
- 6 metal corners;
- jigsaw;
- screwdriver;
- self-tapping screws;
- 3 candles.
Next you need to follow the instructions:
- Saw off one end of long boards so that one of the edges has an even cut.
- Screw 2 metal corners onto each of the boards. Use them to attach the shelves.
- Arrange the candles.
Another extraordinary design solution is an eco-style watch. They are very easy to complete, so any child under the supervision of an adult can cope with this task.
For work you will need the following tools and materials:
- 3 boards 15*5 cm;
- 2 bars 2*2*15 cm;
- clock mechanism with hands;
- battery;
- hot gun;
- stencil with numbers;
- pencil;
- burner;
- drill;
- screwdriver;
- self-tapping screws
The work process is represented by a sequence of actions:
- Press the boards evenly together to form a square. Secure the structure with bars. In this case, the screws should not be visible from the reverse side.
- Make a mark in the center of the square. Drill a hole for the arrows in this place.
- Using a stencil and pencil, draw the numbers 3, 6, 9 and 12. Treat them with a burner.
- Install the clock mechanism using a hot gun.
A wooden key holder can be both useful and an element of home decor. Such a thing is indispensable in the house, because it is much more convenient when all the keys are stored in one place.
To create a craft, you should stock up on the following set of tools:
- board 10*25 cm;
- small wooden choppers;
- wood glue;
- hammer;
- drill;
- pencil;
- burner.
After preparation, you can proceed to the following actions:
- Place the board horizontally. Make marks for choppiks closer to the bottom edge. There should be as many of them as there are keys in the house.
- Drill blind holes. Add a drop of wood glue to each and drive in the choppers.
- Use a pencil to mark the future inscription. It can be in the form of the word “Home” or the phrase “Welcome”, recently the family surname is often used.
- Use a burner to process the inscription.
Crafts made from boards, which you can do with your children with your own hands, can resemble real masterpieces. For example, you can make a wooden picture-panel. The work is creative.
Therefore, the child can be involved in the process either fully or partially. Making panels requires the presence of a stencil. You can use different images. A bicycle or a running horse will look interesting.
To create a product you must use the following tools and materials:
- 4 boards 12*70 cm;
- 2 wooden blocks 3*3*40 cm;
- 4 multi-colored paints;
- White paint;
- brush;
- scotch;
- stencil;
- sandpaper;
- screwdriver;
- self-tapping screws
The work process involves the following algorithm of actions:
- Paint each board a different color. Dry. Afterwards, you need to carefully sand the boards with sandpaper. At the same time, you should not worry because the abrasions are not evenly distributed throughout the material.
- Lay the boards out on a flat surface so that there are no gaps between them. Connect them using wooden blocks. Self-tapping screws should not go through. The attachment point should not be visible from the front side.
- Secure the stencil with tape. Fill the image with white paint. Dry.
Willow weaving
Coastal thickets near the site - Klondike. There they obtain willow branches for crafts. The fences are made according to a simple scheme: pegs are hammered in, then rods with the bark removed are passed between them.
Willow, hazel, and aspen have the best branches for weaving
Nice decor - wicker baskets in which flowers are planted.
Baskets in flower beds give the area a rustic feel
You can knit the frame of any animal from strong branches, and then braid it with vines.
Unusual wicker decor - sea turtle
But the most interesting creation is the living tree. Chopped willow twigs are intertwined and rooted. All buds on the trunk are blinding, except for the top ones.
Rooted willow branches grow into a new tree resembling a palm tree
Gallery: vine products in the garden
For a special occasion, an arch made of wicker is installed. A hut on chicken legs is not only a decoration, but also a feeder for birds. Box beds are ideal for growing greenery. Any flower bed fenced with a fence changes its appearance. Armchairs made of wicker will transform a relaxation area. Canopies and openwork are woven from wicker backs for benches Modern garden decor - balls made of wicker Having achieved mastery in weaving, you can create the figure of a girl Children will like playful piglets made of wicker A hare made of wicker enchants at first sight
How to make a living tree from a vine - video
Outdoor flower box
To create flowerpots, you can use both terrace and facade boards. It will look cool on a wooden deck because all the colors go together. You can choose any shape of the box, usually square, rectangular or triangular.
Making a box from scrap boards is very simple, for this you need:
- determine in advance what size and shape it should be. The best option would be to draw it and check whether there is material of this size;
- I need to make the frame of the future flower pot from the logs, and I already attached boards to it, securing it with self-tapping screws. It is better to make holes in advance, because drilling already assembled is inconvenient;
- You don’t have to waste time on the frame, but use metal corners to which the board will be attached.
Approximately the same principles can be used to make fences for flower beds, only then longer boards will be needed. Flowerbeds are made either with a bottom or without - it’s whatever you like.
Source masteravsetut.ru
Table
A great idea for crafts made from boards is a coffee table. It will decorate any room and can be useful. For example, such furniture is convenient for gatherings with friends. The table can also act as additional storage space. As a result, the product itself looks very aesthetically pleasing, so it will easily fit into any interior.
Drawing of a classic coffee table Fastening the frame with self-tapping screws
Coffee table frame
In order to complete it, you need to stock up on the following set of tools and materials:
- 4 wooden blocks 5*5*60 cm;
- 1 wooden block 5*5*60 cm;
- 2 boards 10*100 cm;
- 2 boards 10*60 cm;
- 4 boards 15*100 cm;
- 4 wide metal corners;
- self-tapping screws;
- screwdriver;
- varnish
The algorithm for creating a table consists of the following sequence of steps:
- Make a rectangular structure. To do this, you need to take boards with dimensions of 10*100 cm and 10*60 cm. Connect them using metal corners.
- Attach 4 wooden blocks vertically to the inside of the resulting rectangle. This should create a table base with legs.
- Using a screwdriver and self-tapping screws, install the remaining wooden block perpendicular to the 10*100 cm boards.
- Make the tabletop. To do this, you need to secure 15*100 cm boards on top of the base of the table. During work, you need to make sure that the material fits tightly together.
- Cover the table with varnish. If desired, you can replace the varnish with paint of a color that matches the interior.
From new to old
According to our idea, the main task of the final stage of work on the island is to age the wooden tabletop. We decided to achieve the desired effect using improvised methods. To begin with, we deepened the seams between the boards with a sanding machine, making the edges deliberately careless.
Next, “secret” technologies were used, which made it possible to make several shaped gouges on the surface of the wood. One of the patterns was an old wire basket for vegetables. Place it on the surface and hit it several times with a hammer, resulting in an interesting imprint on the fibers.
The same method was used to obtain marks from old bolts, pry bars, and even nails. It was a very interesting experiment, for example, a group of sharp marks was made by the sharp end of a nail, which moved along the plane after each blow with a hammer.
Types and advantages of material
It perfectly smoothed out all the shortcomings of its predecessors and retained the best characteristics, including its attractive appearance:
- Anyone can handle the installation of lining, and the price has become much more affordable.
- This material has become widespread due to its excellent characteristics.
Note. The name “lining” comes from the fact that this type of lumber was originally used to close the gaps between the boards of freight cars.
Now this type of material is so widely used that there are already several basic types of lining:
- Regular or eurolining.
- Block house.
- American.
And in order to start making anything from lining with your own hands, you need to know the main characteristics of each of these types.
Characteristic
Ordinary lining is popularly called classical.
So:
- This is a long, narrow, flat board that has a groove on one side and a tongue on the other.
- It's pretty high quality.
- On the inside it is equipped with special grooves for ventilation. The width of one board is from 100 mm, the length is from 2 meters.
- The profile thickness is usually 12 mm.
In the photo you can see crafts made from the remains of classic lining:
Benches and stools, made simply but tastefully Small flower bed Beautiful coffee table Coffee table clapboard glass Kitchen furniture Interior or entrance doors
When laid, the house block imitates round logs:
- In fact, only one side is semicircular.
- The thickness is usually 36 mm, and the length is from two to six meters.
- But the width completely depends on the width and varies from 90 to 190 mm.
- This lining is made from coniferous wood.
An interesting option: a decorative well from the remains of a block house A beautiful shelf for flowers A decorative bench for a summer house A shower cabin Decoration with material Internal design using material
The last type, American, resembles a wooden beam:
- As the name suggests, this type came to Russia from America.
- The profile is made in the form of a rectangular trapezoid.
- One part is thick, the second is narrow.
- The thick one is from 22 to 40 mm, the narrow one is from 14 to 28 mm. It is mainly used for external laying of facades.
- It must be laid strictly from bottom to top horizontally. The wide part is installed overlapping, while the narrow part is on top.
Note. But in some types and styles of interior, American is also used. However, you need to know when and where it will be best to install it indoors.
Thickness simulation
Poplar boards are harder than pine boards, so they are better suited for use in the kitchen. In addition, I was impressed by the greenish tint of sawn wood, which was easily offset by stains with red colors. In addition, this type of wood has a beautifully expressed pattern that becomes brighter over time.
A Brazilian travels 36 km by bike every day to take his loved one home.
The money tree pleases with lush flowering: my secret is in caring for the leaves
Lost weight: what Sofia Tarasova sacrificed for the sake of “VIA Gra” (new photos)
To finish the tabletop, we chose boards of different widths, which were cut to the required size in the store. Pine planks were purchased for the main lumber. After careful sanding, we attached them to the ends of the tabletop along the entire perimeter of the table, obtaining a frame that imitates thick wood. The fastening points were hidden with putty.
Bed made of boards
This piece of furniture is also very easy to make yourself. There is an option to assemble a double bed measuring 200 x 160 cm.
Table. What will you need for the job?
| Materials, tools, fasteners | Photo |
| Boards and furniture board | |
| Self-tapping screws of different sizes | Self-tapping screws |
| Bolts 6 x 80 mm (with washer and nut) – 30 pcs. | Bolts |
| Metal corners: 40 x 40 x 80 mm – 4 pcs., 30 x 30 x 30 mm – 4 pcs., 70 x 70 mm – 8 pcs. | Metal corner |
| Alkyd-urethane varnish, liquid nails | Yacht varnish |
| Jigsaw, screwdriver, sander | Required Tools |
Prices for angle grinders (grinders)
Angle grinders (grinders)
Step-by-step production instructions
Step 1. Components are cut according to size:
- legs;
Legs for a future bed
- sidewalls;
Sidewalls
- slats for supporting the sheathing, lintels, strips for sheathing.
All parts must be treated with protective impregnation.
Step 2. Using bolts, the legs are connected to the sides.
The legs are connected to the sides
Step 3. Metal corners are screwed to the legs.
Screwed metal corner
Step 4. The slats on which the sheathing will rest are mounted to the sidewalls. In this case, in addition to hardware, it is recommended to use an adhesive connection (you can use liquid nails). This will increase strength and minimize the risk of squeaking in the future.
Laths for sheathing are fixed
Step 5. All four sides of the bed are assembled.
Bed assembly process
Step 6. The slats are screwed to the headboards of the bed. It is necessary to make cuts in them for jumpers.
The cuts for the jumpers are visible
Step 7. Jumpers are placed in the cuts and fixed.
Jumpers are fixed
Step 8. Corners are screwed to the jumpers for installing additional legs. Each bar should have two legs.
The jumpers are equipped with additional legs
Step 9. The sheathing is installed. Holes for self-tapping screws are pre-drilled in the planks. The size of the gap between the sheathing elements is determined individually. If the boards have not been sanded previously, they should be sanded after installation.
Lathing installed
Step 10. The structure is varnished. There are many types of varnishes. The material must be intended for indoor work. For these purposes, acrylic, epoxy, polyurethane or alkyd-urethane compounds are best suited.
Step 11. After this, all that remains is to choose a suitable mattress and the bed can be used for its intended purpose.
Externally, the assembled bed looks a little ascetic, but after placing the mattress, linen and a beautiful bedspread, it will look completely different . It is definitely suitable for a country house. If you use some carpentry skills, make the lines smoother and treat the surface with a decorative composition, such a piece of furniture can fit into the design of the apartment.
Wooden bed
Bed made from old boards
Manufacturing examples
Despite the uniformity of all elements of such furniture, it can be assembled in a variety of options. We invite you to look at several examples to see this and find the optimal design for yourself.
In order not to repeat ourselves in each description, we immediately note that all structural elements must be cleaned, planed and sanded before marking and assembly begins. It will be difficult to do this with a finished product.
Low coffee table on two legs
This is the most basic design, the assembly of which requires only a drill with a drill bit, wooden dowels and wood glue.
Step 1. Cut several beams along the length of the tabletop. Their number depends on its width.
Cutting beams to the length of the tabletop
Step 2. Prepare two more pieces of timber with a length equal to or slightly less than the width of the tabletop.
Step 3. Lay out the tabletop beams close to each other or with a small gap, face down, and place supports across them.
Pulling beams
We drill them through approximately in the middle of each flooring beam with a drill equal to the diameter of the dowels. If the drill is long enough, then we continue drilling, making deep but not through holes in the tabletop beams. If not, then drill them separately according to the markings.
Drilling holes
Step 4. Lubricate the dowels with glue and hammer them into the holes cleared of sawdust.
Nog
Step 5. Let the glue set and cover the table with varnish or stain.
Table assembled
Which varnish is best to use for wood?
Advice. Despite its small dimensions, this table has an impressive weight. To make it easier to move from place to place, furniture wheels can be screwed to the supports.
Bedside table with legs
Another simple to make, but very effective model of a table made of timber will become an exclusive decoration for your bedroom or living room.
Bedside table with legs
Step 1. Cut four legs from the timber with a height equal to the total height of the table. Their upper ends will become part of the tabletop. After processing, we paint them or saturate them completely with stain, including the ends.
Legs
Step 2. Prepare blanks for the countertop. For them, bars of a different section and thick boards, which are adjusted to the thickness of the future tabletop, are suitable. The width may vary. Several blanks will be shorter than the rest by the width of two legs. After adjustment and sanding, each part can be impregnated or painted in its own color.
Worktop blanks
Step 3. Using the blind hole method, we attach the first shortened tabletop element to the two legs, forming one side of the frame.
Cross member fastening
Types of jigs for drilling
Step 4. We assemble the tabletop, one by one screwing all the prepared parts to each other with self-tapping screws. The fastener will remain invisible.
Table top set
Step 5. We first connect the penultimate shortened element of the tabletop with another pair of legs, then twist it with the rest of the structure. We place the last board on the dowels to hide the fastening points and get a finished and aesthetic appearance of the table.
Dowels
Step 6. To strengthen the structure, we connect pairs of legs along the bottom with jumpers from scraps of the same timber.
Lower leg bridge
Collapsible dining table
Now let's look at an interesting option for making a full-fledged dining table. Once assembled, it turns out to be heavy, so we will make the structure collapsible to make it easier not only to move, but also to transport.
Collapsible dining table
Step 1. Assembling the tabletop. It can be glued together from bars of different sections and lengths or assembled from identical elements using one of the above methods. There is another option: fasten the longitudinal elements with two transverse studs. To do this, through holes are drilled in all beams at the same level, making a countersink in the outer ones for washers and nuts. Adjacent edges are coated with glue and the tabletop is tightened with pins. The holes with fastener heads can subsequently be filled with putty or closed with plugs.
Assembly diagram
Advice. The glue protruding from the joints must be removed immediately so that it does not clog the abrasive material during final sanding.
Step 2. We make two wide supports for the table, again choosing any joining method available to you.
Table supports
Step 3. In the finished supports, cut out a through square or rectangular hole to install the jumper.
Through square hole
Step 4. Cut a jumper from the timber of such a size that it is longer than the distance between the table supports, but shorter than the length of the tabletop. We reduce both ends of the jumper to the size of the holes in the supports so that they fit freely into them and protrude beyond the outer plane by 8-10 cm.
Spike at the end of the jumper
Step 5. In the reduced parts of the lintel we make holes for wooden wedges that will act as a lock. The inner surfaces of the hole are carefully leveled and ground.
Holes for wooden wedges
Step 6. Cut two wedges to fit the grooves in the lintel.
Wedge
Step 7. We assemble the table frame, trying on and adjusting all the parts to each other.
Frame assembly
Step 8. We lay the tabletop bottom up on a flat plane, install an inverted frame on it, align it with the center lines and draw a pencil around the perimeter of the base-legs along the tabletop. We attach small bars or slats along these lines. The resulting rectangles will serve as grooves that fix the bases in a given position under the weight of the tabletop.
Table assembly, bottom view
After leveling the edges, final sanding and finishing of the wood, the work can be considered complete. Your table will be easily disassembled into four components: a tabletop, two bases and a jumper. And in the assembled position it will be a very stable and reliable structure.
Ready-made timber table
If you are not confused by the appearance of the open fasteners, we suggest watching a video with an example of making another version of the table design made of timber. And at the same time, visually study the ways of attaching wooden elements to each other.
Video - DIY table
Working with this material is easy and pleasant. All you need is physical strength, precision and accuracy. It doesn't hurt to have a little imagination to come up with and implement your own project.
Unique designer and unusual items are and will continue to be in high demand. It's all about their uniqueness - only with your own hands or the hands of a skilled designer can you bring to life something that no one else will have. These things include a table made from cut wood, which you can make yourself.
Table 1. Sturdy and stable dining table for home
To make this table we will need tools such as a jigsaw, electric drill, screwdriver, and sander. You can, of course, do without some of the above “helpers” by using a screwdriver and a block with sandpaper attached to it - such a replacement will simply increase the time and effort spent on making the table.
The material for the manufacture of the tabletop is a tongue-and-groove board with a thickness of at least 30 mm. The tongue ensures a tight connection of the boards, increasing the service life of the table, since with this joining method the possibility of food debris getting into the gaps between the boards is practically eliminated.
To make the remaining elements of the table, take a regular 50 mm board.
- Boards, if they are not treated, must be thoroughly sanded - in addition to aesthetic considerations, this is required by basic safety and practicality: a sanded board is easier to paint, and much less paint is required for such a surface;
- Cut out the table parts:
- Grooved boards for tabletops, length 230 cm – 6 pcs.;
- Spacer board about 170 cm long;
- Bars for fastening the tabletop (their length should match the width of the tabletop, or be slightly shorter) - 4 pcs.;
- Bars for legs - 4 pcs., 2 pieces of board for their base.
Cover all parts with a layer of varnish and let them dry; Connect the tabletop boards tightly to each other (Fig. 1);
Attach 4 bars across the boards with self-tapping screws, placing them evenly along the entire length of the tabletop and retreating from its end by 20-30 cm (Fig. 2);
To improve the appearance of the product, file the ends of the fastening bars at an angle of 45 degrees, carefully cut off the tongues of the outer boards, and slightly round the corners of the tabletop using a jigsaw.
Using a template and a jigsaw, give the legs the same configuration, as shown in the figure below;
Reliable fastening of the legs is carried out in three stages: first, we attach the legs to the outer transverse bars connecting the boards of the tabletop; then we connect the legs with the spacer beam (Fig. 3). We finally secure the legs from above, through the tabletop;
We place the base boards on the lower parts of the legs and securely fasten them (Fig. 4); All that remains is to cover all parts of the table with another layer of varnish and let it dry thoroughly.
Preparation
Removing the old countertop from the kitchen island was very easy; it was held in place by a few screws. We needed to increase the working area so that we could not only prepare food in this part of the kitchen, but also serve breakfast for the whole family. Therefore, the process has become slightly more complicated.
As a base, we laid several sheets of plywood, attaching them with self-tapping screws to the furniture base. So we increased the width of the tabletop by 10 cm. The protruding part was supported by massive brackets mounted on the back side of the plywood and turned figured balusters that act as furniture legs.
Making furniture with your own hands is a useful hobby
Wanting to refresh the decoration of their home, add new, interesting accents to the interior, or simply make a necessary household item, many people think about making their own furniture. Comfortable and attractive designs can be made from various materials: metal, glass, plastic, wood and their combinations. Most often, the choice is made based on the style of the interior and one’s own preferences.
Materials for kitchen furniture
Main types of furniture materials
However, both before and now the most popular material for the manufacture of furniture is wood. It's easy to explain.
- The material is one of the most accessible.
- Timber and boards lend themselves perfectly to any type of processing; any structures can be made from them: from chairs and shelving to beds and walls.
Homemade rack with four shelves - Wood is durable and resistant to mechanical stress.
- Today many people are concerned about environmental issues. The use of new, technologically advanced materials often raises questions regarding their environmental impact. Wood is natural and environmentally friendly, it does not emit substances harmful to human health and nature and does not cause allergies.
Beds made of timber
- The tactile properties of materials are also important when in contact with objects. Wood products are very pleasant to the touch.
- Wood has a positive effect on the psycho-emotional state of a person.
Coffee table made from old boards
- Wooden furniture goes well with almost all interior design styles.
- The tree is attractive to look at.
The variety of textures of different rocks allows you to choose interesting options from a design point of view. Wood species samples
The main disadvantage of wooden products is their susceptibility to deformation and destruction due to exposure to the external environment. But this problem can be overcome by a wide range of products containing antiseptics for wood processing.
Furniture from pallets in the country
Furniture can be made from various materials: solid wood, panel, MDF, plywood, chipboard, fiberboard. The most affordable and popular are solid edged or glued boards . You can purchase them specifically or use improvised means - material left over from the dismantling of structures, pallets, etc. When preparing the materials necessary for creating a structure, it is first necessary to take into account their moisture content. The boards must be dried. The moisture content of the wood from which the furniture is assembled cannot exceed 8%.
Scope of application of laminated furniture boards
To assemble interior items, you can use different types of wood, differing in texture, shade and characteristics. All of them are divided into 3 classes.
- Soft - most of the conifers, linden, alder.
- Hard - larch, ash, oak, beech.
- Very hard - yew, boxwood, acacia. These types of wood are rarely used in the independent production of interior items.
Wood species
When choosing a material, it is necessary to take into account that soft wood is easier to process, but it is less resistant to wear. And furniture, for example, made of oak will last a long time. However, it is also significantly more expensive.
Soft wood is easier to work with
What do you need to make your own furniture?
- Wish.
- Free time.
- Confidence in your abilities, minimal skills in working with wood.
- Product drawing, set of necessary tools, materials and accessories.
- Availability of space for work. Ideally, this should be a workshop that can be equipped in a country house or, for example, in a garage.
A specially equipped workplace will be required
Making furniture can take more than one month, but the result will definitely live up to expectations. You can make furniture for your apartment, country house, gazebo, garden, etc. with your own hands.
Bath products can be quite simple
Prices for construction boards
Construction boards
conclusions
Many people prefer to make garden furniture with their own hands. It turns out very well, even if you use only the remains of boards left over from construction. Even chairs made from old pallets compare favorably with store-bought plastic furniture; and there is nothing to say about more serious work. One can only be glad for the garden that belongs to the master.
On FORUMHOUSE you can find many ideas for making garden furniture with your own hands, garden furniture for relaxation from rattan, read a detailed article on how to make a chaise longue and rocking chair with your own hands, an article on how to make garden furniture from concrete blocks, watch a video , teaching how to make a brutal table for a gazebo.
Subscribe to our Telegram channelExclusive posts every week
Crafts made from bark and cones
Even fragile wood will serve the cause of beauty. Small crafts are usually made from the bark.
Birds will happily visit your feeder if you make it out of bark.
A birdhouse made of plywood will be transformed if you cover it with bark.
Birdhouses made from natural materials will attract birds to the garden
In order for a hedgehog to appear in the garden, you need to glue the pine cones to a plastic bottle wrapped with twine.
For naturalness, berries and acorns are attached to the hedgehog’s back.
Gallery: pine cones and bark at the dacha
Cement pots are decorated with cones, pressing them into the solution. If you paste the box with cones and attach a handle from a branch, you will get a decorative basket. The basket is made by stringing cones onto a wire frame. To make a Christmas tree for the street, glue the cones onto a cone made of waterproof material. If you need closed cones for a wreath. , hold them for 30 seconds in wood glue To make the cones open, dry them in the oven Any corner of the garden will be decorated with a watchful owl made from bark Compositions with cones will decorate the interior of a gazebo or house Unique birdhouses are created from pieces of bark and scales of cones Ordinary plastic flowerpots can be pasted over with pieces of bark To make a basket made of bark, attach it with a stapler to a wire frame. Set up a hobbit house made of bark, branches and moss in a secluded corner with your children
Shelves in the garage or outbuildings
Decking boards are often used to make shelves. I made the shelves like this: I prepared the base (crossbar) and secured the board on it. The length of the crossbar should be the same as the planned width of the shelf. I chose reliable mounts, because sometimes I put heavy things on shelves. Even if you don’t plan to place objects that weigh a lot on a shelf in the garage, it’s better to play it safe and place the crossbars from each other at a distance of no more than 30 cm.
Source theydesign.net
Driftwood and branches in the garden
Any wood is a material for creativity. A board with a greeting is laid out from thin branches.
The decor on the welcome board is attached with glue
Thick ones are used to make unique garden furniture.
A stylish chair will last longer if you remove the bark from the branches
Interestingly shaped driftwood will give your garden a picturesque look if you simply place it among the plants.
Don't pass by beautiful driftwood - it's very rare
And with the help of glue and screws, various animal figures are made from pieces of wood. But first, the bark is removed from the branches and they are lightened.
- Soak the material in a solution of soda ash: 2 cups per 7 liters of hot water. Place a weight on top.
- After 3 days, remove the bark using a wire brush.
- Then immerse the branches in a bleach solution for 2 days: 1 glass per 7 liters of water.
- Dry in the sun for 3 days.
- Sand with fine-grit sandpaper.
Selecting material for drawing up figures is a long but exciting task.
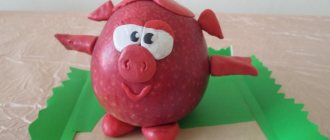
A wreath of bleached branches will decorate a door or gate. Install a strange mushroom from driftwood and branches under the tree. To create a Christmas tree, branches drilled in the middle are placed on an iron pin. It is better to make large figures from driftwood. From curved branches and snags, fancy stands for pots are created. Before installing the seat on the bench carefully polished You can make any decoration for the door from small twigs A funny pig made from driftwood looks great on a green lawn A lamp made from branches is an elegant decoration for a gazebo or veranda
Leisure furniture
Garden dining furniture isn't everything. To fully enjoy a pleasant holiday among blooming greenery, you also need to buy a complete set of furniture. The sets include a sofa, two armchairs or chairs, plus a low coffee table. The most fashionable designs are those made of rattan, strewn with large pillows.
Soft accessories are mainly covered with cotton. Underneath the fluffy covering fabric is highly elastic polyurethane foam. Armchairs, sofas and chairs often have a cubic shape, making them voluminous and very comfortable.
To make a rattan chair yourself, you need to have certain skills.
Furniture made from artificial rattan looks no worse than furniture made from natural rattan.
Artificial rattan is not afraid of moisture, so in bad weather the furniture does not have to be taken under a canopy
There is nothing better than a cup of coffee drunk in the fresh air
Garden set made from pallets (pallets)
Wooden furniture made from pallets is also quite popular. This design is very easy to knock down, paint and impregnate. You can also sew pillows yourself or buy them at a garden accessories store.
Producing furniture from wooden pallets (pallets) is quite simple and, most importantly, fast. Just 2-3 pallets will be enough to fold one on top to get a coffee table. Impact-resistant glass with machined edges is placed on top of the table. That's it - the coffee table is ready, all that remains is to make the chairs. You can also make them from the same material, only here carpentry skills will come in handy. Using a hacksaw or chainsaw, cut the pallet into two parts, one of which will serve as a seat, the second as a backrest.
Decorating wooden pallets with bright pillows will refresh their boring design.
Metal rivets and rope can be used as decoration
A terrace made of bleached wooden pallets in combination with colored pillows looks light and relaxed
A little imagination and an ordinary wooden pallet becomes an art object
The presence of a sofa, armchair or lounger made from pallets in the garden will emphasize the individuality of the landscape design of your site, create a cozy atmosphere, make it truly unusual and worthy of attention.
An original handmade corner sofa made from pallets will decorate your garden
By attaching small wheels to a coffee table made from pallets, you can easily move it to a place convenient for you
If you have a large number of pallets (the material can be purchased for a small amount in construction stores), you can use them to organize a full-fledged recreation area where you can relax with a large group. In this case, you can completely abandon the construction of a gazebo or open terrace.
Construction pallets (pallets) can be used both painted and unpainted. Their design feature allows you to store something useful between the rows of boards. This space can also be occupied by drawers, providing them with a special mechanism and beautiful handles.
Wonderfully designed outdoor seating area
Outdoor furniture made from pallets is a great opportunity to save a significant amount of money.
Peculiarities
Oak is an ideal choice for furniture because it is strong, durable and rot resistant. Wood is flexible in its structure. This material allows you to create beautiful tables using carvings and bent elements. Modern cabinet furniture companies often use natural oak wood to create luxurious options for dining tables and coffee tables.
Oak tables have many advantages:
- Products made from natural oak look harmonious in the interior of the premises. They allow you to emphasize the chosen interior design, add luxury and elegance.
- Since the products are made from noble wood, they look great in an ensemble with upholstered furniture.
- Models coated with varnish can be refinished over time to add shine to the products.
- The oak table is characterized by reliability and is made from high quality wood.
- Oak furniture does not emit toxins because it is made from environmentally friendly material.
- Wood products can be used to decorate various rooms. The table is an ideal choice for decorating a child's room.
- Wood retains the warmth of the sun well, and then transforms it into a positive charge of energy.