If a smoker lives in the same living space as you, then you know firsthand that there are never too many ashtrays. They can wear out over time, lose their attractive appearance, break, break and crack, and sometimes simply disappear. Therefore, it is necessary to have a couple of these accessories in reserve.
Buying such a thing is very simple. Stores are replete with goods of this kind. But I want the object not only to serve its owner, fulfilling its direct function, but also to evoke pleasant emotions or eloquently testify to silent feelings.
Therefore, it is much more pleasant not to buy a soulless finished product, but to make an ashtray with your own hands.
Ashtrays are made in various shapes and configurations: convex, flat, rectangular, round, square, curly. They can be with a lid so that the smell of cigarette butts does not spread throughout the room, or without it.
The material for the manufacture of this household item can be wood, stone, metal, shells and even thick plastic.
Cool ashtray for the workshop
Greetings to all. Today we will make a men's metal ashtray for the workshop. A little work, and in the end we will have an original thing, instead of the old boring ashtray made of a bent vinyl record.
Tools and consumables needed.
1. Welding inverter. 2. Angle grinder. 3. Industrial hair dryer. 4. Gas burner. 5. Sharpening machine. 6. Welding electrodes. 7. Cutting wheels for angle grinders. 8. Black, heat-resistant enamel. 9. Bronze imitation paint. 10. Hammer.
Donors who took part in the creation.
1. Steel pipe, diameter 100 mm. 2. Sheet metal, 1 mm thick. 3. Old bicycle chain. 4. Broken rear bicycle sprocket. 5. Two unnecessary open-end wrenches.
First, measure the height of the bicycle chain and multiply by 3. Measure the resulting size on the pipe and cut it off.
We grind off the irregularities on a sharpening machine.
Mark the diameter of the pipe on the sheet metal.
Using maximum care, we cut out the circle with a grinder.
We clean out burrs and irregularities.
We wrap the bicycle chain around the pipe, measure the size and cut off three pieces.
The preparatory part is completed, let's move on to welding. We weld the bottom of the future ashtray to a piece of pipe.
We grab the chain pieces to the pipe.
The lower section can also be grabbed to the bottom, the rest only at the end.
We hide the place where the chains join, taking two more sections across.
For decoration, we weld a bicycle star to the bottom of the ashtray.
Now we need two outdated wrenches.
We heat one key with a gas burner and bend it slightly with hammer blows.
We weld this key to the ashtray. This part has two functions: to fix the upper section of the chain and to serve as a holder for a cigarette.
We weld the second key to the top of the ashtray. It also holds the chain and serves as a stand for the lighter.
We get rid of dirt and grease residues by burning the product with a torch.
We paint the product with heat-resistant enamel.
After drying, heat it with an industrial hair dryer to bake the enamel.
Using paint that imitates bronze, we give our ashtray a finished look.
The ashtray is ready. Even if you don’t smoke, which is very commendable, this product can serve as a decorative element for the workshop, or as a gift for a friend who smokes.
You can watch a video about making an ashtray here.
directions
Sand helps extinguish smoking tips (Jupiterimages / Photos.com / Getty Images)
Wear gardening gloves and use metal scissors or stronger ones to attach the jar about an inch above your base. Cut horizontally around the can and separate the top for use on another object.
Make 5 to 10 vertical cuts along the edge, which should not be symmetrical.
Fold the trimmers to create a smooth edge. Use coated pliers, being careful not to scratch the outside of the jar.
Gently tap the curved tabs with a rubber mallet.
Paint the inside of the ashtray with heat-resistant paint, such as that used on grills.
Fill the ashtray with sand or small stones.
- Author: Maria Sukhorukikh
Rate this article:
- 5
- 4
- 3
- 2
- 1
(0 votes, average: 0 out of 5)
Share with your friends!
Master class on reverse decoupage of a glass ashtray using magazine clippings
In this master class I will talk about the use of foil, two-step crackle in reverse decoupage and how to work with magazine cutouts using the “Clock” ashtray as an example.
Stages of work.
1. Degrease the glass. 2. Apply crackle as the first step. We're waiting until it's gone. 3. Apply the second step. To make it quicker, I dry it with a hairdryer.
4. Rub (in my case) wax into the cracks.
5. Using a cloth soaked in vegetable oil, remove excess.
6. Rinse off the second step under running water for about a minute.
We wait until the water dries; you can dry it with a hairdryer to make it quicker.
7. We apply those patterns that should overlap the picture, for me it is a gold rim at the base of the ashtray. It will cover the edges of the picture. To get an effect like etched gold leaf, I applied gold acrylic with the back of a very large-pored sponge.
And draw a random pattern along the top rim using a gold outline. 8. When the acrylic dries, apply a thin layer of varnish. I apply regular water. The crackle does not hold tightly on the glass, and several times it happened to me that after gluing the motif, when wiping, washing off the excess glue, the acrylic, the outline was washed off, and holes were formed in the crackle. Well, maybe it’s because of my excessive zeal :), but I decided not to risk it anymore.
9. While the varnish is drying, throw a magazine clipping cut to the size of the bottom into the water, I have a watch and a bezel from it.
You don’t need to soak it for a long time, just so that it gets wet and lies down without bubbles. 10.Take out the tenderloin and pat dry with a towel.
Since this is reverse decoupage and the borders of the cutting are not important here, I did not thin it out. 11. Apply PVA glue.
And glue the picture to the glass, roll it to expel all the excess glue and air. 12. We do the same with the rim.
13. When the glue dries, cover the pictures with white paint or primer.
14. After the white primer has dried, paint over everything with acrylic for the main background. Mine is black acrylic.
If we turn it around, this is what we got:
15. Now we decorate the outside. Draw a gold outline along the top edge of the same pattern that was drawn inside.
16. Apply the face. To create the effect of old flaking gold, apply with a very porous sponge.
17. Wait until it is touch-dry and apply foil, tearing it off with a sharp movement. The gold layer remains stuck to the muzzle, and the film, already empty and transparent, is in our hands.
Some ideas for homemade products
The most common option for a DIY ashtray is to make it from a beer can or drink. By cutting off an empty carbonated drink container, you get a primitive urn for cigarette butts. To make the product more cultured and elegant, you will have to work a little.
The step-by-step master class, shown in the illustration below, explains in detail how to make a cute ashtray with sides from an ordinary metal can.
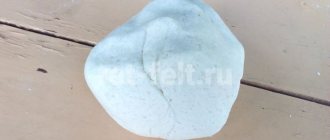
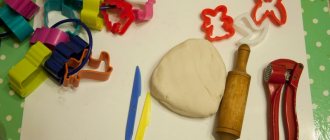
Salt dough is an excellent material for making various crafts from it. It is plastic and can take on any shape when sculpted. After drying in the oven, salt dough products harden and do not change their shape. All these qualities are perfect for creating an ashtray from it.
You can fantasize about the shape and size of the smoking attribute made from dough forever. Experienced craftsmen can handle the presented specimen, but beginners need simpler models.
Properly kneaded dough is half the success when making crafts from it. There are many recipes on a given topic: based on glue, vegetable oil, baby cream. The best is the classic method, thanks to which the dough is moderately elastic, plastic, and does not crack when dried. This mass contains only fine “Extra” salt, water and wheat flour.
A more spartan and simple version of a wooden ashtray can be made from four boards. Even a schoolboy can cope with this work.
To do this, the blanks are glued together. Next, the product is dried for at least 4 hours. After this, the craft is sanded with sandpaper, optionally tinted with stain or a special dye and covered with a mordant.
As a gift for some event or holiday, decor lovers can decorate an ordinary glass ashtray. Compositions made of shells on such an accessory will look not only stylish, but also sophisticated. Such a gift will take its rightful place in the interior of its owner and will become a real decoration of the room.
Instructions for decoupage are given below:
Ashtray from a tin can
After buying soda or other drinks, there are almost always cans left over. Don't rush to throw them away! You can make many useful things out of them. For example, in this problem they can help us out.
Method 1
To work you will need:
To make the thing you need, you need to follow this algorithm:
- Cut off the top of the can.
- Divide the walls of the jar into strips - you should get about 14 pieces.
- Now the strips begin to bend. To do this, the resulting strips need to be passed through each other until the craft is ready.
Important! You need to be careful while working, as the edges of the cut strips are very sharp.
Method 2
Materials for work:
The progress of the work so that in the end the ashtray is ready with your own hands is as follows:
- Carefully remove the top of the jar as described in the first method.
- Wrap the jar with tape.
- Lubricate it thoroughly with glue.
- Now you need to start wrapping it with prepared twine or rope.
- Decorate the finished product as desired.
The end result should be a neat ashtray that will serve you for a long time.
Coconut handicraft
This method can be used by lovers of exotic fruits. For work you will need the hard part. The shape of the future homemade product will depend on how the nut was opened. After all the coconut meat has been extracted, the master processes the edges of the nut. It is desirable that they are even and level with each other. After this, you need to make several 10 mm recesses for cigarettes. To do this, a drill is brought to the desired place at the edge, which is used to make a recess. The homemade product will have fire-resistant properties if it is coated with a special varnish.
We use coconut
Sometimes, when a person eats the contents of a coconut, he leaves behind the hard part of the exotic fruit to use in everyday life. If you still have this part, then you can safely use it as an ashtray. The shape of your craft will come from how the nut was opened.
So, to make such an exotic ashtray, you need:
- Bring the edges in so they are flush.
- Press the drill to the edges of the shell and drill out the recesses for the ashtray with your own hands - they will contain a cigarette. The recesses should be no more than 1 cm.
- To make your craft fireproof, use a special varnish.
Do-it-yourself ashtray: how to make?
Smoking is one of the harmful habits that creates great inconvenience for others. Discomfort is caused by both harmful tobacco smoke and pollution of the surrounding area by ash and cigarette butts. There are special ashtrays for such consumers of tobacco products. Their wide range is presented on store shelves. However, some smokers prefer to use homemade ashtrays. Both empty matchboxes and other jars, as well as more complex products, are suitable for collecting ash. You will find information on how to make an ashtray with your own hands in this article.
Photos of new products and the most original ashtrays for smokers
In this article we will talk about gifts for heavy smokers and I will show you what original ashtrays as a gift you can buy in online stores.
It is much more profitable to buy in online stores than in markets and in standard stores, especially if you make a purchase through the service that I described in this article . Through the Internet you can order a personalized gift for your loved ones, including an ashtray.
The Ministry of Health warns us from year to year about the dangers of smoking, but despite this, among my and your acquaintances there are friends and colleagues who smoke.
Engraved ashtrays are a great gift for colleagues, for example, on February 23rd. Accessories add zest to a person’s image; they complement the image and emphasize the individuality of the owner.
Ashtrays with a personalized engraving are appropriate to give as a gift to a member of your family, as well as to your boss and business partner. All you have to do is decide which ashtray you want to give as a gift:
Second way
It will not be difficult to make an ashtray from a jar with your own hands, using paper tape, twine and glue. It will be easier to work if you follow the following sequence of actions:
Empty beer cans should not be thrown away immediately. You will find a use for them if you smoke and want to make your own ashtray. Photos of such homemade products are presented in the article.
Gentleman's set
What's included in the gentleman's kit? To answer this question, I decided to use the search and I came up with this list of the most necessary items that guys take with them to meet a girl:
- champagne;
- candies;
- flowers;
- cigarettes;
- condoms.
Now imagine, a guy on a date with a girl takes out of his pocket not a crumpled pack of cigarettes, but a personalized cigarette case. Have you already felt how a simple accessory added zest to a man’s image?
To ensure aesthetics are evident in everything, give the young man a cigarette case and an ashtray with engraving. Make him feel important and special with the “Gentleman's Set”.
Progress
To make an ashtray with your own hands, you need to do the following:
- At the very beginning, the glass base is thoroughly cleaned and degreased. At this stage, experts recommend using alcohol.
- After this, a printed sea map is glued to the bottom. This must be done in such a way that its front part is turned down. To remove excess paper, you will have to use sandpaper.
- Then you need to apply a craquelure substance to the surface. With this coating, the handicraft ashtray is given a spectacular antique look.
- After applying this composition, cracks will begin to form on the surface of the product. As they dry, they will become more noticeable. The home craftsman should wait until this substance dries completely.
- Then the ashtray is carefully filled with bitumen compound. With it, judging by numerous reviews, the resulting cracks will visually look much more noticeable and deeper. Despite the fact that the instructions for the craquelure substance indicate that its top layer should be washed off, in this case this should not be done. This recommendation is due to the fact that a yellowish ashtray will better match the antique style.
- At this stage, the product is primed. Putty is applied to the sides and rolled in shells and sand. Transparent acrylic varnish is evenly applied on top. This is necessary in order to securely bond the putty and sand together. When the varnish has dried, you can freely pick up the product without fear that the shells will fall off.
- Large shells are attached using adhesive. Then they are painted.
- Roll the twine into a snail and glue it to the bottom.
Alcohol can be used to remove excess paint. The product needs to be given several hours to dry.
Coughing ashtray
A coughing ashtray will help you think about the dangers of smoking, and perhaps quit smoking. Give it to someone you truly love.
A smoker's cough can be heard a mile away. A smoker knows very well how difficult it is for him to cope with a morning cough, with a cough when the air temperature changes.
Some people get rid of bad habits with the help of hypnosis, while others get help from pills and special patches.
If an ashtray making a cough makes a smoker even just think about the dangers of smoking, this is the first step to success. And those who strive for it will achieve success.
Options for professionals
Wooden ashtrays are less durable due to the holes that form in them, and there is always a risk of fire from an unextinguished cigarette. And yet, a smoking accessory carved from wood is in great demand and respect.
Related article: Champagne “Bride and Groom”: master class with photos and videos
It is quite difficult to make such a model. To work, you will need special sawing and lathes, as well as specialized tools such as chisels, clamps and files. But this will not scare true masters, and the end result will delight them with its spectacular appearance.
Masters of chasing and artistic forging can create a masterpiece from metal.
With the help of a welding machine, the golden hands of craftsmen produce exclusive original works presented in the photo.
Ashtray for woman
An original and functional souvenir can also be chosen for women who smoke. I present to your attention two ashtrays:
Both of these gobies are of unusual shape. They are made of porcelain and equipped with an anti-smoke mechanism. The ashtray lid fits tightly and protects others from unpleasant odors.
It will be pleasant to stew a villain with a filter in a cart, which is slowly pulled by a donkey.
A donkey-shaped bull cart with a cart is a new product for 2016, which received a lot of positive feedback from customers from different countries.
This kind of gift is perfect for a fan of cool and funny things.
The original idea and colorful design can be seen in the ashtray with the firebird. Just like the donkey with the cart, it is made of resin and is perfect for its intended use and even for interior decoration.
From wood:
I think the question of processing may be initially closed, since everyone has their own skills and equipment. Some people can make an ashtray with their own hands, using a hammer and nails, while others would like to make one from a single piece of wood, turning it and giving it the perfect shape...
However, for heat resistance of a wooden ashtray, use: Thermal (aluminum color) for painting stoves and pipes. Withstands temperatures up to +650 C. Thermal (black color), withstands temperatures up to +400 C. Manufacturer: “tikkurilla”. Both paints are silicone resin based. You can also use aerosol paints/varnishes for exhaust pipes.
To the smoking car enthusiast
Any smoking motorist, in one way or another, tries to protect the interior of his car from the smell of smoke and from sparks hitting the car’s upholstery. Built-in ashtrays are not convenient, especially in domestic cars. Dreams come true with an ashtray made of high-quality fireproof material.
Not only does it help reduce the spread of cigarette smoke, but it also comes with an LED indicator for convenience. The backlight turns on immediately after opening the lid.
Are you choosing an ashtray as a gift? Choose not only by appearance, but also by shape, size, and design. Remember, your gift should be as comfortable as possible and memorable for a long time.
Similar things can be bought in online stores. And when the widest range is presented, for example, like on Aliexpress, it is always easier to choose something most suitable for yourself and as a gift.
The purchase will be relevant if the item is convenient to use. In this case, it does not matter what brand of car the car enthusiast has.
Now I suggest you look at a few more photos of ashtrays that you can buy on Aliexpress .
Pouring epoxy glue into the mold (mold)
The mold we used was silicone material. A mold made of such material will easily lag behind the poured glue. Our mold is almost round in shape with cuts along the edges, reminiscent of the shape of an ashtray. This type of mold can be purchased for pennies on Aliexpress. This form cost us 113 rubles. Perhaps you can purchase similar forms on other trading platforms such as Valberis or Ozone.
Important! During mixing, we need to pour the resulting composition into the pier right to the brim.
Trash can made of plastic bottles
You can make a garbage can for use in your country house from a variety of available materials, but we were most interested in the production from plastic bottles, which can be considered a free construction component. That’s right, because there are plenty of bottles at every dacha; they remain after water and drinks, after large gatherings, and there is no point in throwing them away.
The first thing we need for production is a metal frame, which can be made from wire, aluminum plates and even a metal profile for drywall. By and large, we will need only 2-3 identical elements of an oval, round or rectangular shape to construct the base, top of the tank and the middle jumper from them. Having adjusted all sizes and shapes, you can proceed to the next stage.
For this we need 2-4 pieces of reinforcement or the previously mentioned profile. These metal elements are necessary to fasten the main parts together and make racks. You can choose reinforcement and tie it with ovals or circles with wire, or you can bend the U-shaped profile for drywall into one plane, and connect the posts from the profile to the main parts with clamps or even rivets.
When the frame of the homemade trash can is ready, we proceed to the final stage - we build the walls of the bin from plastic bottles.
So, for this we need steel wire, a nail, a mounting knife and pliers. First of all, we measure the pieces of wire according to the height of the tank and cut them taking into account the attachment to the upper, middle and lower parts of the structure. The length of each piece should be 20-30 cm greater than the height of the future tank.
Next, use pliers to clamp the wire on the bottom of the tank, throw several turns on the frame, put 1-2 bottles on the wire, make a hole in them with a nail, make several turns of fastening on the middle part of the frame, again a couple of bottles and now fastening to the upper part.
It is very advisable to think about the size, shape and color of the bottles in advance to avoid chaos. You can define a uniform pattern using bottles of the same volume and color, or you can transform the craft a little by choosing bright bottles.
Consistent fastening of the bottles and good tension of the wire, a tight fit of the bottles one to another vertically and in rows will ensure the high quality of the homemade garbage can. Of course, after production it is worth remembering that it is not intended for heavy waste and burning debris.
These bins can be created with or without a bottom, but today most of these bins and bins are created without a bottom so that they do not have to be turned over during cleaning. It will be enough to simply lift them.
A small urn made from an old bucket or barrel
Used tanks for liquid and bulk products should not be immediately disposed of in a landfill, because they can also serve well within the perimeter of a summer cottage. As an example, we would like to give old buckets and barrels, which can be easily converted into trash cans and small trash cans.
Any old bucket that is not too dilapidated, or a barrel that is not rotten, can become a garbage container in a gazebo, near a summer kitchen, and so on. To do this, we won’t have to upgrade much, but just adjust the tank to size, perhaps patch up the old holes a little, repaint it in a cheerful color and install it where necessary.
Buckets can be used almost immediately, but barrels often have to be trimmed a little because they are too large. After carrying out the simplest reconstruction work, you can upholster the tank with building materials - plastic, wood, thick cardboard, after applying patches of tin or aluminum sheet. That’s it, now it’s just painting in the desired color or a bright pattern to match the design style of the location.
From turtle:
If your turtle has gone to another world. Don't worry, you can make a beautiful ashtray from its durable shell. To do this, you should carefully saw through the shell of the turtle, remove the corpse of the animal, burn the organic residues on a gas stove (it will stink), then go through it, first with coarse sandpaper, and then with fine sandpaper. To fix the shell, you can use the lower part of the shell (photo) or other available things.
Buying a lot of country accessories involves serious waste, but today we are learning to save and making some of them with our own hands. Garbage cans, trash cans and ashtrays for the dacha using improvised materials - it’s not as difficult as it might seem!
Of course, many are already accustomed to using an old bucket instead of a trash can, and a small glass jar instead of an ashtray. It is quite possible that it is convenient and inexpensive, but such devices do not have any appearance, or rather, they spoil many of our achievements in design and decoration with their too simple appearance. That is why we decided to find a way to correct the situation and tried some hand-made work on ourselves, thereby learning how to make trash cans and ashtrays for the dacha with our own hands. Everything is very simple, and now we will tell you how to do such interesting things yourself without a lot of money and time.
