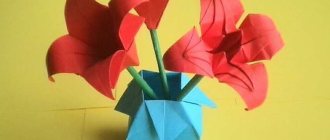
Probably every adult in our country knows how to make a paper airplane. After all, this simple toy, originally from childhood, invariably delights and amazes with its ability to fly. Before the dominance of tablets and other gadgets, it was ordinary paper airplanes that delighted boys of all ages during recess.
How many schemes for assembling this toy do you know? Did you know that from an ordinary sheet of A4 paper, you can fold many different types of aircraft, including long- and far-flying ones, as well as military models?
Are you already intrigued? You can start folding airplanes right now. After all, all you need for this is paper, desire, a little patience and our diagrams. Let's fly!
History of paper airplanes - when did they appear?
Historians claim that the first airplanes made from sheets of paper appeared about 2 thousand years ago. But paper in those days was a scarce commodity, so airplanes made from this material were considered too expensive, which did not contribute to the growth of the popularity of the game. But paper is gradually becoming cheaper for the population, and at the same time, children's paper airplanes are gaining popularity.
The modern history of the appearance of paper airplanes can be dated back to 1930. The design bureau of Lockheed Corporation, on the advice of one of its founders, proposed creating paper mock-ups for testing real aircraft. Since that time, paper modeling has become popular, and fans of the process of creating aircraft from sheets of paper offer interesting and original ideas that help create new aircraft models.
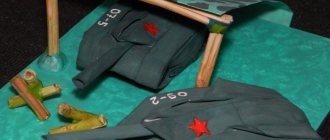
Jet fighter
The boys will really enjoy making military combat aircraft that are similar in shape to real ones. You can use colored paper, and also draw model numbers on it with felt-tip pens or pencils.
The red model maneuvers well and picks up high speed due to the weight in the nose, while the tail is lightweight. In this case, even the wind will not be an obstacle to the plane.
But the green layout is designed for long-distance flights. This model is capable of a slow and smooth descent, with a soft landing.
These are real F15 and F16 fighters. They are capable of complex maneuvers, go through a loop, various dives and turns. Only an experienced and fearless pilot can cope with such devices.
Aircraft Design Tips:
- It all depends on your imagination. You can use colored pencils, pens, markers, markers and paints. Paint ready-made designs.
- Make crafts from colored paper, choose bright shades so that the plane immediately stands out from the general background.
- If you want to organize competitions to see whose model can fly faster or longer, make your planes from the same color. This will make it easier to distinguish your layout from your opponent's. To understand the process of creating a paper airplane, strictly follow the instructions in the pictures and videos.
Basic rules for modeling
Paper airplanes are not just a toy for children. In Japan, there is a separate direction of origami for folding various types of airplanes from paper - arogami.
World championships in flying paper crafts are held annually. Even a special set of rules for modeling airplanes has been developed.
You can assemble a toy from any piece of paper. But it is worth considering:
- The thicker the paper, the better the plane will stay in the air.
- It is best to make an airplane from an A4 sheet of paper.
- The toy is assembled using the origami technique without the use of improvised materials: glue, paper clips, tape.
- In order for the craft to stay well in the air, it is necessary to maintain symmetry.
- The shape of the toy largely plays a role in the flight range.
- Long, narrow models with short wings fly further and better than large, wide crafts.
Choosing paper to create airplanes
When working on a paper airplane, you need a little patience, a diagram according to which you plan to create the airplane and a sheet of paper. Modeling paper can be any kind, although for some models it is best to choose the right stiffness of the material.
Most often when creating airplanes they use:
- newsprint;
- regular printable sheets;
- sheets from a notebook;
- colored paper;
- the napkins are thick.
To decorate the plane you will need felt-tip pens, pencils, stickers and glitter. The choice of decor depends on the child’s imagination, because the process of creating a paper airplane is a truly creative process that develops imagination, helps train motor skills, and also contributes to the development of attention and perseverance.
Where to begin
It is better to start with simple options, gradually creating more complex models. Below is a simple diagram for assembling an airplane that children can easily assemble.
This craft can fly a couple of meters. Having mastered these simple instructions, you can move on to more complex ones.
How to make a paper airplane, step by step instructions?
Classic paper airplane model
This paper “flying machine” can be made from any paper: printed A4, notebook page or even newspaper.
Important: Try to learn how to make simple layouts first, and then move on to complex ones. Kids love to do origami, so they will be happy to help.
So, if your little one comes to you with the question: “how to make an airplane out of paper?”, prepare a small piece of paper and follow the following steps. Step-by-step instruction:
1. Place the paper piece with the smaller side facing you
2. Fold the sheet exactly along the center line and make a mark in the center. There will be a bend, no need to smooth it out
3. Open the piece of paper and fold it so that the top corner touches the center
4. Do all this with another corner of the sheet
5. Open the sheet again. Now fold the corners, but so that they do not touch the center
6. Now fold the smaller corner. It will serve as a holding element for all the corners folded earlier
7. At the last stage, bend the resulting product along the center line - the triangular part will be visible from the outside. Fold the sides towards the center. That's it - the plane is ready
Instructions
So, how to make a propeller with your own hands? The process of creating a propeller looks like this:
For beginners, it is not uncommon for the blades to not match in size. For example, one turned out thinner than the other. But to make the correct propeller, you will have to achieve equal size by reducing the thickness of the other blade. Otherwise the propeller will not have balance. Small mistakes can be easily corrected. For example, stick small pieces of fiberglass or smear with small sawdust mixed with epoxy resin.
Origami airplane
You will need: a white sheet of A4 paper.
Master Class
- Pay attention to the symbols in the image: the blue line shows where the fold needs to be made, the green arrow shows the direction, and the red dot indicates the place where the paper will end up after folding.
- Fold a piece of paper in half lengthwise, then unfold it.
- Fold the top corners towards the center.
- Fold the top folded part down.
- Fold the top corners into the center.
- Raise the center corners up, then lower their halves.
- Pay attention to image 7 and check that everything matches your plane.
- Fold the center corner up.
- Fold the plane in half lengthwise.
- Form the wings of the airplane as shown in the photo instructions.
The origami airplane is ready!
Basic elements of a weather vane
Regardless of what shape your weather vane will be, it must contain certain elements, the main ones being an axis and a flag with a counterweight.
Vane body and axis
The body serves as a support for the entire structure. Both steel and brass pipes with a diameter of 1 inch are suitable for its manufacture. The body has a strictly vertical axis - a rod, usually made of steel reinforcement.
The main function of the support rod is to hold the windmill. The diameter of the reinforcement is about 9 mm, this is enough to withstand strong winds and any other mechanical load that will act on the weather vane.
The weather vane body is the support of the entire structure
Flag with counterweight (wind vane)
The main part of the device located on the vertical axis. The flag shows which direction the wind is blowing. The counterweight serves to balance the flag and is located on the opposite side. The main difficulty in the manufacture of this element is that the flag and the counterweight must be located evenly on both sides of the axis, that is, have the same mass.
Of the entire structure, it is the weather vane that is of artistic value. An experienced craftsman is able to make a part of any shape without disturbing the balance between the flag and the counterweight.
When making a weather vane, it is important to maintain an even distribution of mass on both sides of the axis
Protective cap
The protective cap has the shape of a circle or a cone and is located on the axis of the weather vane, most often directly above the body. Its main function is to protect the housing and bearings from moisture and dirt.
Rose of Wind
A cardinal direction indicator consisting of two rods crossed at an angle of 90°. As a rule, the rods are attached to the top of the lid in a stationary state. At the ends of the pointer, letters are installed to indicate the cardinal directions. To fix the element in the correct position, you need to use a compass.
To set the cardinal direction indicators in the correct direction, you need to use a compass
Bearings
They are located inside the body and ensure free movement of the supporting rod under gusts of wind. The internal diameter of the parts is 9 mm.
Fasteners
The choice of fasteners depends on the material used and the method of fastening. These can be corners, overlays, bolts, rivets.
Propeller
It helps determine wind speed. You can make the propeller yourself from plastic and wood or use ready-made parts.
It is the airplane with the propeller that looks most organic, since this detail is also present in the original design. And it’s much easier to model this shape than others.
The plane is ideal for making a weather vane with a propeller
How to make a flying plane
Did you know that the longest distance a paper airplane has flown is 69 meters. This distance is recorded as a Guinness record. Of course, achieving such results is difficult, but making a craft that flies 10-20 meters is quite simple.
So, I’m posting step-by-step instructions on how to make a plane that flies for a long time:
1. Take a sheet of A4 paper. We bend the right side of the sheet towards the left edge, forming a corner. Try to avoid distortions, remember symmetry.
2. Proceed in the same way with the left side of the sheet. Having unfolded the workpiece, we get two folds along which we will assemble our aircraft.
3. Next, bend the right side towards the left fold, as shown in photo (3) above.
4. We do the same with the left side. The result should be something like this - photo (4).
5. Next we bend the upper part, as shown in photo (5). Don't forget about symmetry.
6. Make the corners again (photo 6).
7. Now fold the craft in half, first making sure that the corners match.
Carefully bend the wings.
Pay attention to how the nose of the plane should look correctly.
If everything is done as it should, you should end up with a plane like the one in the photo below.
Now we can safely let it fly. And know:
The softer the plane is launched, the farther it will fly.
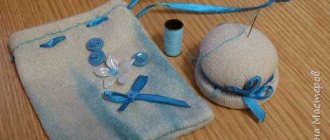
Clothespin souvenir toy
Creating such a product helps develop a child’s imagination and imaginative thinking, as well as instill a sense of gratitude towards the older generation.
The choice of materials for DIY crafts will be as follows:
- clothespins;
- ice cream sticks;
- set of paints;
- glue;
- a sheet of red cardboard;
- pin
The tools you will need are scissors, a stationery knife and a brush. The procedure is as follows:
- Paint some of the wooden sticks blue. These will be the main wings.
- The clothespin is the “body” of the plane. Cover it with red paint.
- Take a stick, cut it strictly in half, round the edges. You will have a blank for the rear wings.
- Make a tail. To do this, you need to cut 1 cm from the stick using a stationery knife.
- Assemble and paint the tail section red. Use glue to hold parts together.
- Glue all parts of the toy together.
- Draw and cut out a propeller from cardboard.
- Attach it to the plane with a pin.
Dart
This is the lightest and most common version of an airplane that flies far and fast. A simple way to make an airplane out of a sheet of paper, which every aspiring “aircraft designer” should own.
How to make such a paper airplane step by step:
- Fold the paper in half vertically.
- Unfold the paper and fold each of the top corners toward the center line.
- Fold the top edges to the center line, leaving 2 cm at the bottom.
- Fold the plane in half.
- Fold the wings down, aligning the top edges with the bottom edge of the body.
- The finished paper airplane should look like this.
How is Carlson dressed?
The basis of the suit will be any shirt or turtleneck and breeches/pants with suspenders. It is best if the top is checkered or striped. But it will work just as well with a plain, bright shirt. The lower part of the suit is pants with suspenders. You can take a ready-made jumpsuit or sew/fasten the straps to regular jeans or breeches. If the child is very thin, you can artificially increase the volume of the body in the abdominal area by sewing a layer of insulation into the overalls. Carlson's suit can be complemented with bright shoes. Let it be colored shoes or sneakers with contrasting laces.
Stealth
Now I’ll teach you how to make a military plane out of paper. A plane made this way covers long distances, is very fast and besides, it just looks cool!
How to make a paper airplane out of paper:
- Fold the paper in half vertically.
- Unfold the paper and fold each of the top corners toward the center line.
- Fold the top of the sheet down, 2 cm from the bottom edge.
- Fold both top corners towards the center line.
- Fold the bottom corner up onto the airplane wings to secure them.
- Fold the plane in half away from you.
- Fold the wings down 3cm from the bottom of the plane.
- Fold the sides of each wing inward 1.5 cm.
- Cut two small slits on both sides at the back of each wing. Fold the pieces of paper inward.
- Apply double-sided tape to the inside of the airplane body. The finished paper plane should look like this.
Cardboard airplane
You will need: colored cardboard, a simple pencil, scissors, an empty matchbox, a ruler, PVA glue.
Master Class
- Cut a strip of colored cardboard 21 cm long and 1.5 cm wide.
- Cut 2 identical strips of cardboard measuring 17x4 cm, then round the corners.
- Fold the long strip in half and glue it exactly in the center of the matchbox.
- Apply glue to the top and bottom of the box and immediately glue the wings.
- Cut out the remaining parts: 2 strips measuring 5x1.5 cm; propeller and chassis.
- Cut and round the corners of one of the strips.
- Glue 2 strips to form the tail of the plane.
- Glue the propeller and landing gear to the plane.
- An airplane made of cardboard and a matchbox is ready!
Bumblebee
Folded correctly, this bee-shaped beauty will remain in the air for a long time.
How to make a paper airplane:
- Fold the paper in half horizontally.
- Unfold the paper and fold each of the top corners toward the center line.
- Fold the top down towards the edge of the previous fold.
- Fold the sides in at the center line.
- Fold the top edge 1.5 cm away from you.
- Fold the plane in half towards you.
- Fold the wings down 1.5 cm from the bottom of the plane.
- Apply double-sided tape to the inside of the case. The finished paper airplane should look like this.
How to make lightly salted cucumbers at home
Features of a weather vane with a propeller
This device can be of different shapes, most often the weather vane has the shape of a domestic or wild animal, an angel, a fairy-tale hero, or an airplane.
A weather vane is not only a functional device, but also a decoration for the roof of a house.
Selecting material for making a weather vane
The main criterion when choosing material for a weather vane should be the ultimate purpose of its manufacture. But despite this, it is recommended to choose the material that will make the structure a decoration of your home for a long time. A weather vane can be made from almost any material, but each of them requires different tools and equipment.
Wood weather vane
A fairly light and easy-to-work building material that does not require specific tools and skills. High quality raw materials are suitable for a weather vane. Before use, it is recommended to impregnate the wood with mixtures to protect it from dampness and harmful insects. However, such a product will not last long.
Hunter
The next way is how to make a paper airplane that flies far and fast. This aerodynamic paper plane flies at high speed over long distances.
How to make an airplane from A4 paper:
- Fold the paper in half vertically.
- Unfold the paper and fold the top edge down 5 cm.
- Fold the top edge back down towards the edge of the previous fold.
- And once again fold the top edge down to the bottom of the previous fold.
- Fold the top edges down and away from you toward the center line on the back of the paper.
- Fold the plane in half towards you.
- Bend the wings at an angle, 1.5 cm from the lower nose of the plane and 4.5 cm from the lower rear part. Bend the side edges of the wings down 1.5 cm.
- Apply double-sided tape to the inside of the case. The finished paper airplane should look like this.
Original corn plant
Your child will definitely like this model, especially if you have a boy. This craft resembles the shape of a real corn plant. You need to purchase red colored paper, green double-sided cardboard, an empty matchbox, sharp scissors, a pencil, and glue.
Let's start creating:
- Cover a box of matches with a sheet of paper and cut out a cardboard strip 3 centimeters wide. Exactly half of this length will be the body of your corn truck. We bend the strip in half and glue it to the box.
From cardboard we cut out both wings in the form of two strips, slightly rounded at the edges. We glue them to the box parallel to each other at the top and bottom. Cut out a rectangle from green cardboard and seal the side of the box, masking it completely.
Now we cut out parts of the tail, they should also be rounded. Then we cut out the strip and fold it as shown in the photo.
We glue all the parts to the tail section, and we can start decorating. Glue two red stars cut out of colored paper onto the wings on both sides. You can draw or glue a small imitation propeller on the front. The video below shows how to make such a paper airplane with your own hands.
- Your child will be delighted with such an airplane! This could be a great idea for a gift or for a craft competition.
How to make a cool paper airplane?
Cool paper airplane “Glider”
After you have learned how to make classic paper layouts, you can try folding something unusual and complex. The Glider airplane will maneuver high and far.
So, how to make a cool paper airplane? Step-by-step instruction:
1. Take a piece of paper and fold it in half
2. Then open it to its original position and place it with the fold facing up. Fold the corners of the paper inward to create a mark in the middle of the sheet. Now the triangles will be even, and this will help make a layout with good flying qualities
3. Draw a visual line in the center and make a bend in this place. You will get a sharp nose of the product
4. Fold the spout so that it extends a couple of millimeters beyond the edges of the corner bends.
5. Fold the product in the center so that the back side is inside
6. Bend the wings - they can be made small or, conversely, hollow. Experiment with the width as you wish. That's it - the plane is ready
Very fast plane
How to create a model of a cool airplane that flies fast. This is a supersonic bomber and is very easy to make:
- Fold a regular sheet of paper in half lengthwise.
- Bend the side parts inward.
- Fold the paper inward along the dotted lines.
- Then fold along the axis, and the corners should be on the outside.
- Fold the wings of the bomber as shown in the diagram.
- The angle between the wing and the fuselage must be right.
- It turned out to be a cool supersonic airplane.
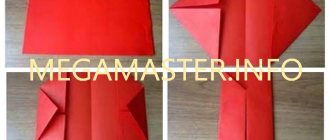
Make a military plane out of paper?
Paper military plane
The layout of the “Hawk” model is a little more complicated. But you have already learned how to make simple models, which means you will be able to fold this paper sample.
Step-by-step instructions on how to make a military aircraft out of paper:
1. Prepare a piece of paper and place it on the table with the smaller edge facing you
2. Fold along the center line. Fold the top corner. The top of the paper sheet should coincide with the side. Do the same with the second corner element
3. The piece should look like a cross. Press its side elements to the center line of the paper and iron all the formed lines. Fold the upper right corner so that it is flush with the top of the sheet. There should be 1 centimeter left from the fold to the midline. Repeat the same with the other side
4. The result is “horns” that need to be folded in half, and the excess paper should be folded inside
5. The bottom corner is turned in the opposite direction from you. Make a fold line to the point where the “horns” emerge
6. Fold the airplane in half - it's ready. Paint it with paints and you will get a real military fighter
Important: You can make other military aircraft models using the drawings presented below.
Schemes for making paper airplanes
Step-by-step instructions for making an airplane weather vane
This device will become the hallmark of the house only if the element is properly made and installed.
Metal weather vane
It is performed in the following sequence:
- Cut a pipe 120 mm long. Make small holes in it for fastening to the support with rivets or bolts. The holes must first be tapped.
- Insert bearings from each end into the pipe, securing with welding. Additionally, the bearings can be fixed by heating the pipe into which the bearing must be inserted. After the pipe has cooled, the bearings will sit quite firmly in it. Fill the pipe itself with grease. Bearings help the weather vane to easily rotate around its axis
- Close the top of the pipe with a cap, which can be a plastic plug. Now you need to seal this place with insulating tape. A layer of felt gland must be laid between the cap and the body.
- Now you can start making the weather vane. You need to make a drawing on paper, which then needs to be transferred to a steel sheet. Remember that the dimensions of the aircraft must be proportional to the body parameters. It is recommended to make a product with a length of 400–600 mm and a height of 200–400 mm. It is very easy to cut steel sheets with special metal scissors
- After the airplane figurine is ready, you need to attach it to the supporting rod using clamps or welding. The last step is the installation of the propeller. It must be installed on a weather vane or on a supporting rod. In the case of an airplane, it will look more harmonious on the weathervane. For fastening, it is recommended to use a bolt, which must be placed between two washers. To reduce the noise of the weather vane, it is recommended to place it on a bearing.
Weather vane made from plastic bottles
You can make an airplane weather vane from plastic bottles. To do this you need:
- Collect empty containers and wash them thoroughly. For a weather vane in the shape of an airplane, 4 bottles are enough. Cut off the top part of two bottles with the cork halfway. As a result, you should get 2 cut off tops with a cork and 4 bottoms, the height of which is 5 cm. You need to cut off the top and bottom from the bottle
- On each bottom at an angle of 45°, make cuts in the form of burrs, which will serve as fasteners. The bottom of the bottle must be cut into strips
- Now you need to work with the top parts of the bottles. You need to unscrew the plug in which to make holes for the axle. This can be done with an awl or a hot rod. Screw this plug back. Leave one top part of the bottle without a cork. Use an awl to make holes in the plugs for the axle.
- Now you can start assembling the weather vane. The two upper parts are connected with cut surfaces facing each other. This process is reminiscent of collecting nesting dolls. It is necessary to attach the bottoms with cuts, placing them around the body in one direction. Now you need to thread a rod or metal rod through the bottom holes of the bottle, and place the bottle cap on top of it. That's it, the plane's weather vane is ready. Install it in a suitable place. A weather vane made from a plastic bottle does not look very aesthetically pleasing, but it performs its functions effectively
How to make an airplane with a paper propeller?
Paper airplane propeller
To fold such an airplane, you need to prepare a sheet of paper, a paper knife, a pencil, and a needle with a bead at the end. Step-by-step instructions will tell you how to make an airplane with a paper propeller:
1. Take a flat sheet and fold it diagonally twice
2. Open the piece of paper and fold it along the line that will divide the diagonals into two parts. Open the sheet again, raising the corners along the resulting lines
3. Turn the left edge of the corner to the right and bend it. Return it to its original position and bend the right edge upward
4. From the left edge, make a bend again - the bottom should lie on the bend line of the triangle that was made at the previous stage. Bend the edge of the corner behind the resulting part
5. Unfold the right side and bend it towards the center
6. Make another fold towards the center, and tuck the top of the corner inward
7. Bend the right side towards the center, then straighten it again. Turn the left corner over and tuck the bottom edge into the hole on the right piece
8. Bend the resulting product in the center and fold the wings
9. All that remains is to make the propeller: take a sheet of paper measuring 6 cm x 6 cm. Draw it diagonally with a pencil. Make cuts along the drawn lines, not reaching the middle 7 mm
10. Fold the propeller through one corner and secure with a needle and bead
Important: The part may move apart, so glue the corners in the middle or smooth the propeller where it bends
11. Attach the part to the “tail” of the aircraft. The product is ready, you can launch it or give it to a child
A PAPER AIRPLANE FLYS FOR A VERY LONG TIME
In order for the plane to fly, you need not only to release it, giving it acceleration, but also to make a model that will be light, and at the same time, “weighted” in the body. This is exactly the model we will talk about now.
1. We start as usual: fold the sheet (A4) in half lengthwise.
2. We bend the corners to the middle line diagonally.
3. Once again, diagonally bend the sides to the middle line.
4. Fold the model along the middle line.
5. Bend the sides of the workpiece to the bottom line.
That's all. Such a simple model will fly great. She can handle even a little wind!
How to make a boomerang plane out of paper, diagram?
Paper boomerang airplane
There is another model of a paper “flying machine” - a boomerang. Imagine a product made by yourself that comes back to you after launch.
Scheme for making a boomerang plane
The diagram and step-by-step instructions will tell you how to make a boomerang plane out of paper:
1. Fold a piece of paper into four times and press on the corner with your finger
2. Bend one half of the paper cut to the center line and push the corner onto the quarter of the paper
3. Fold the sheet inward from the quarter fold to the top corner. You will get a bend in the form of a triangle. Press your finger along the edge
4. Straighten the triangle, and lifting it, insert your finger between the resulting parts. This is necessary to make sure that the folds are folded perfectly evenly.
5. Turn the product over and bend the other side of the triangle inward. Fold the wide end of the paper in the opposite direction
6. Do all this on the other side of the product
7. It turned out to be a “pocket”. Lift the top and fold it so that the edge lies evenly along the length of the paper. Place the corner in the “pocket”. Bend the top corner down
8. Do the above step on the other side of the plane - both sides should look the same
9. Fold the part on the side of the “pocket” upward. Do the same on the other side.
10. Open the product and place the leading edge inside. Protruding sections will appear in front - bend them. Remove the rear fin-shaped parts that appear
11. Turn the product over and fold the front part. Fold in half and iron the folds
12. Make the fuselage piece: Fold one side of the piece down along a line that runs parallel to the center fold. Do the same with the second side.
13. Fold a small piece of one and the other wing upward. Unbend the product. It already has a base and flat wings
14. Run your fingers along the front of the wings to create a curve. The plane is ready and can be launched
Weather vane device
As a rule, outbuildings are installed on the roof of the house. At this point they can be seen from anywhere on the site. Based on this, increased aesthetic requirements are imposed on the appearance of such a product. Based on it, an opinion will be formed about the tastes, worldview and wealth of the owners of the land plot. Therefore, when making a weather vane, you should show maximum imagination and creativity when designing and creating every detail.
The design of the weather vane is quite simple:
- Frame. It is made from inch steel pipe. It is possible to use brass pipe, which is quite durable and resistant to corrosion.
- Bearing rod. It is inserted into the body. It is steel reinforcement without notches. The windmill itself is attached to it. Based on this, it is recommended to use reinforcement with a cross section of 9 mm. This is enough to withstand the wind load acting on the weather vane.
- Wind vane. It is the rotating part of the device, which indicates the direction of the wind. In addition, the weather vane contains an artistic component that determines the theme of the product.
- Bearings. These parts are necessary for free torsion of the supporting rod inside the housing. For assembly, products with an internal diameter of 9 mm are used.
- Fasteners Depending on the method of fastening the outbuilding, corners, plates, screws, bolts or rivets are used.
- Propeller. This is a part whose rotation frequency can be used to determine wind speed. The propeller is made of tin, plastic, plywood or wood. A good option is to use an old computer fan.
Despite the abundance of ready-made products on sale, a homemade weather vane will allow you to put your soul into your work and bring together all family members to implement a joint project. When making this device with your own hands, there is a job for everyone.
Since the main part of the windmill is the weather vane, its design needs to be given special attention.
It may look like this:
- cockerel;
- sailboat;
- ship with propeller;
- an airplane with one or more propellers;
- galloping horse;
- a cat sneaking after a bird;
- hunter with a gun;
- moon with stars;
- lion on the hunt;
- angel;
- swans or stork in the nest.
You can make a weather vane in any design.
For a fishing enthusiast, this could be catfish or pike. Car enthusiasts will love the contours of a sports car. There are no restrictions for imagination in this matter. Magazine "Modelist-Constructor"
Article from the magazine Modelist-Constructor No. 1 for 1974. Scan: Petrovich.
Snowmobiles, airboats, all kinds of hovercraft, acranoplanes, microplanes and microgyroplanes, various fan installations and other machines cannot operate without a propeller.
Therefore, every technical enthusiast who plans to build one of the listed machines should learn how to make good propellers. And since in amateur conditions it is easiest to make them from wood, we will only talk about wooden propellers.
However, it should be taken into account that using wood (if it turns out to be successful) it is possible to make completely similar screws from fiberglass (by molding into a matrix) or metal (by casting).
Due to their availability, the most widespread are two-blade propellers made from a whole piece of wood (Fig. 1).
Three- and four-blade propellers are more difficult to manufacture.
.. Rice. 1 . Two-bladed wooden screws made from a whole piece of wood: 1 - blade, 2 - hub, 3 - front flange, 4 - hub stud nuts, 5 - shaft toe castle nut, 6 - shaft, 7 - rear flange, 8 - studs.
MATERIAL SELECTION
What wood is best to make a screw from?
This question is often asked by readers. We answer: the choice of wood primarily depends on the purpose and size of the screw. Screws intended for engines of higher power (about 15-30 hp) can also be made from monolithic hardwood bars, but the requirements for the quality of wood in this case increase. When choosing a workpiece, you should pay attention to the location of the growth rings in the thickness of the block (it is clearly visible at the end, Fig. 2-A), giving preference to bars with horizontal or inclined layers, cut from the part of the trunk that is closer to the bark. Naturally, the workpiece should not have knots, crooked layers or other defects.
If it was not possible to find a monolithic bar of suitable quality, you will have to glue the workpiece together from several thinner boards, each 12-15 mm thick. This method of manufacturing propellers was widespread at the dawn of the development of aviation, and it can be called “classical”. For reasons of strength, it is recommended to use planks made of wood of different species (for example, birch and mahogany, birch and red beech, birch and ash), having mutually intersecting layers (Fig. 2-B). Screws made from glued blanks have a very beautiful appearance after final processing.
.. Rice. 2. Propeller blanks: A - from a whole piece of wood: 1 - sapwood part of the trunk, 2 - location of the blank; B - a blank glued from several planks into a rectangular package: 1 - mahogany or red beech; 2 - birch or maple.
Some experienced specialists glue blanks from multilayer aircraft plywood of the BS-1 brand, 10-12 mm thick, and assemble a package of the required size from it. However, we cannot recommend this method to a wide range of amateurs: veneer layers located across the screw, during processing, can form difficult-to-remove irregularities and deteriorate the quality of the product. The ends of propeller blades made of plywood are very fragile. In addition, in a high-speed propeller, a very large centrifugal force acts at the root of the blades, reaching in some cases up to a ton or more, and in plywood the transverse layers do not resist breaking. Therefore, plywood can be used only after calculating the root section area of the blade (1 cm2 of plywood can withstand about 100 kg of tearing, and 1 cm2 of pine - 320 kg). The screws have to be thickened, and this worsens the aerodynamic quality.
In some cases, the attack edge of the propeller is covered with a strip of thin brass, the so-called fitting. It is attached to the edge with small screws, the heads of which, after cleaning, are soldered with tin to prevent self-loosening.
PRODUCTION SEQUENCE
According to the propeller drawing, first of all, it is necessary to make metal or plywood templates - one top view template (Fig. 3-A), one side view template and twelve blade profile templates, which will be needed to check the propeller on the slipway.
The screw blank (block) must be carefully planed, observing the size on all four sides. Then the center lines and contours of the side view template are drawn (Fig. 3-B) and the excess wood is removed, first with a small axe, then with a plane and rasp. The next operation is processing along the contour of the top view. Having placed the blade template on the workpiece (Fig. 3-B) and temporarily secured it with a nail in the center of the sleeve, trace the template with a pencil. Then turn the template exactly 180° and trace the second blade. Excess wood is removed using a band saw; if there is none, use a hand-held fine-toothed circular saw. This work must be done very accurately, so there is no need to rush.
The product took on the shape of a screw (Fig. 3-D). Now the most important part of the work begins - giving the blades the desired aerodynamic profile. It should be remembered that one side of the blade is flat, the other is convex.
The main tool for giving the blades the desired profile is a sharpened, well-set ax. This does not mean that the work being performed is “clumsy”: with an ax you can do miracles. Just remember the famous Kizhi!
The wood is removed sequentially and slowly, first making small short cuts to avoid chipping along the layer (Fig. 3-D). It is also useful to have a small two-handed shaving. The figure shows how you can speed up and facilitate the work of trimming the profile part of the blade by making several cuts with a fine-toothed hacksaw. When performing this operation, you must be very careful not to cut deeper than required.
.
. Rice. 3. Sequence of screw manufacturing: A - templates (top view and side view); B - marking the blank block according to the side view template; B - marking the workpiece according to the top view template; G - workpiece after processing according to templates; D - processing of blades along the profile (lower, flat part); E - processing of the upper, convex part of the blade.
After rough processing of the blades, the propeller is brought to condition using planes and rasps and checked in the slipway (Fig. 4-A).
To make a slipway (Fig. 4), you need to find a board equal in length to the screw and thick enough so that transverse cuts 20 mm deep can be made in it for installing templates. The central rod of the slipway is made of hard wood, its diameter must correspond to the diameter of the hole in the propeller hub. The rod is glued strictly perpendicular to the surface of the slipway. By placing the screw on it, the amount of wood that needs to be removed is determined to match the blade to the profile templates. When doing this job for the first time, you need to be very patient and careful. The skill is not acquired immediately.
. . Rice. 4. Slipway and blade profile templates: A - installation of templates in the slipway; B - checking the blade being processed using templates and counter templates.
After the lower (flat) surface of the blade has been finalized according to the templates, finishing of the upper (convex) surface begins. The check is carried out using counter-patterns, as shown in Figure 4-B. The quality of the screw depends on the thoroughness of this operation. If it unexpectedly turns out that one blade is slightly thinner than the other - and this often happens with inexperienced craftsmen - the thickness of the opposite blade will have to be reduced accordingly, otherwise both the weight and aerodynamic balancing of the propeller will be disrupted. Minor flaws can be corrected by gluing pieces of fiberglass (“patches”) or applying fine sawdust mixed with epoxy resin (this mastic is colloquially called bread).
When cleaning the surface of a wooden screw, the direction of the wood grain should be taken into account; Planing, scraping and sanding can only be carried out “layer by layer” to avoid scuffing and the formation of rough areas. In some cases, in addition to cycles, glass shards can be a good help in finishing the screw.
Experienced carpenters, after sanding, rub the surface with a smooth, well-polished metal object, pressing firmly on it. By doing this, they compact the surface layer and “smooth out” the smallest scratches remaining on it.
BALANCING
The manufactured propeller must be carefully balanced, that is, brought to a state where the weight of its blades is exactly the same.
Otherwise, when the screw rotates, shaking occurs, which can lead to the destruction of vital components of the entire machine. Figure 5 shows a simple device for balancing screws. It allows you to perform balancing with an accuracy of 1 g - this is practically enough for amateur conditions.
Practice has shown that even with very careful manufacturing of the propeller, the weight of the blades is not the same. This happens for various reasons: sometimes due to different specific gravity of the butt and upper parts of the block from which the screw is made, or different densities of layers, local nodularity, etc.
How to be in this case? It is impossible to adjust the weight of the blades by cutting off a certain amount of wood from a heavier one. It is necessary to make the lighter blade heavier by riveting pieces of lead into it (Fig. 6). Balancing can be considered complete when the propeller remains motionless in any position of the blades relative to the balancing device.
Screw runout is no less dangerous. A scheme for checking a propeller for runout is shown in Figure 7. When rotating on an axis, each blade should pass at the same distance from the control plane or angle.
. . Rice. 5. The simplest device for checking the balancing of the screw is using two carefully aligned boards and an axial liner.
Rice. 6. Balancing the propeller by riveting pieces of lead into a lighter blade: A - determining the imbalance using coins; B - embedding a piece of lead of equal weight on an equal arm (slightly countersink the hole on both sides); B - view of the lead rod after riveting.
Rice. 7. Scheme for checking a screw for runout.
FINISHING AND COLORING OF THE SCREW
The finished and carefully balanced screw must be painted or varnished to protect it from atmospheric influences, as well as to protect it from fuels and lubricants.
To apply paint or varnish, it is best to use a spray gun powered by a compressor at a minimum pressure of 3-4 atm. This will make it possible to obtain an even and dense coating, unattainable with brush painting.
The best paints are epoxy. You can also use glyphthalic, nitro- and nitroglyphthalic or the more recently introduced alkyd coatings. They are applied to a previously primed, carefully puttied and sanded surface. Interlayer drying is required, corresponding to a particular paint.
The best varnish coating is the so-called “chemical-hardening” parquet varnish. It adheres well to both clean wood and painted surfaces, giving it an elegant look and high mechanical strength.
G. V. Makhotkin
An airplane that flies for a long time
Every child’s dream is a long-flying airplane. And now we will help you make it a reality. Using the diagram provided, you can fold a model that differs in flight duration.
Remember that flight performance is affected by the size of your aircraft.
Excess weight, which means the length of the wings, prevents the plane from flying. That is, a glider must have short, wide wings. Another friend of planning is the absolute symmetry of the model.
You need to throw it not forward, but upward. In this case, it will stay in the sky for a long time, smoothly descending from a height.
Find answers to the remaining questions and all the subtleties of folding the “Lightning Strike” paper glider in the step-by-step video tutorial.
Propeller design
Air propeller
has gained a reputation as an indispensable propulsion device for high-speed watercraft operating in shallow and overgrown waters, as well as for amphibious snowmobiles that have to operate on snow, ice and water.
Both here and abroad we have already accumulated considerable experience in the use of propellers
on high-speed small vessels and amphibians. Thus, since 1964, amphibious snowmobiles have been mass-produced and operated in our country (Fig. 1) by the Design Bureau named after. A. N. Tupolev. In the United States, several tens of thousands of airboats, as the Americans call them, are operated in Florida.
The problem of creating a high-speed shallow-draft motor boat with a propeller continues to interest our amateur shipbuilders. The most accessible power for them is 20-30 hp. With. Therefore, we will consider the main issues of designing an air propulsion device with the expectation of precisely this power.
Careful determination of the geometric dimensions of the propeller will allow full use of the engine power and obtain thrust close to the maximum for the available power. In this case, the correct choice of propeller diameter will be of particular importance, on which not only the efficiency of the propulsion system, but also the noise level, which is directly determined by the value of the peripheral speeds, largely depends.
Studies of the dependence of thrust on speed have established that to realize the capabilities of a propeller with a power of 25 hp. With. it must have a diameter of about 2 m. To ensure the lowest energy costs, the air must be thrown back in a jet with a larger cross-sectional area; in our particular case, the area swept by the propeller will be about 3 m². Reducing the diameter of the propeller to 1 m to reduce the noise level will reduce the area swept by the propeller by 4 times, and this, despite the increase in speed in the jet, will cause a drop in thrust on the moorings by 37%. Unfortunately, this reduction in thrust cannot be compensated by either the pitch, the number of blades, or their width.
As the speed increases, the loss in traction from reducing the diameter decreases; Thus, increasing speeds allows the use of smaller diameter screws. For screws with a diameter of 1 and 2 m, providing maximum thrust on the moorings, at a speed of 90 km/h the thrust values become equal. Increasing the diameter to 2.5 m, while increasing the thrust on the mooring lines, gives only a slight increase in thrust at speeds above 50 km/h. In general, each range of operating speeds (at a certain engine power) has its own optimal propeller diameter. With increasing power at a constant speed, the optimal diameter for efficiency increases.
As follows from Fig. 2 graphs, the thrust of a propeller with a diameter of 1 m is greater than the thrust of a water propeller (standard) outboard motor “Neptune-23” or “Privet-22” at speeds above 55 km/h, and a propeller with a diameter of 2 m - already at speeds above 30 -35 km/h. Calculations show that at a speed of 50 km/h, the kilometer fuel consumption of an engine with a propeller with a diameter of 2 m will be 20-25% less than the most economical outboard motor “Privet-22”.
The sequence of selecting propeller elements according to the given graphs is as follows. The diameter of the propeller is determined depending on the required thrust on the mooring lines at a given power on the propeller shaft. If the operation of a motorboat is expected in populated areas or areas where there are noise restrictions, the acceptable (for today) noise level will correspond to the peripheral speed - 160-180 m/s. Having determined, based on this conditional norm and the diameter of the propeller, the maximum number of its revolutions, we will establish the gear ratio from the engine shaft to the propeller shaft.
For a diameter of 2 m, the permissible speed in terms of noise level will be about 1500 rpm (for a diameter of 1 m - about 3000 rpm); Thus, the gear ratio at an engine speed of 4500 rpm will be about 3 (for a diameter of 1 m - about 1.5).
Using the graph in Fig. 3 you can determine the amount of propeller thrust if the propeller diameter and engine power have already been selected. For our example, the engine with the most available power was selected - 25 hp. s., and the diameter of the screw is 2 m. For this particular case, the thrust value is 110 kg.
The lack of reliable gearboxes is perhaps the most serious obstacle to be overcome. As a rule, chain and belt drives made by amateurs in handicraft conditions turn out to be unreliable and have low efficiency. Forced installation directly on the motor shaft leads to the need to reduce the diameter and, consequently, reduce the efficiency of the propulsion unit.
To determine the blade width and pitch, you should use the given nomogram in Fig. 4. On the horizontal right scale, from the point corresponding to the power on the propeller shaft, draw a vertical line until it intersects with the curve corresponding to the previously found diameter of the propeller. From the point of intersection we draw a horizontal line to the intersection with a vertical line drawn from a point lying on the left revolution scale. The resulting value determines the amount of coating of the designed propeller (aircraft manufacturers call coating the ratio of the sum of the blade widths to the diameter).
For two-blade propellers, the coverage is equal to the ratio of the blade width to the propeller radius R. Above the coverage values are the values of the optimal propeller pitches. For our example, we obtained: coverage σ=0.165 and relative pitch (ratio of pitch to diameter) h=0.52. For a screw with a diameter of 1 m σ=0.50 m and h=0.65. A propeller with a diameter of 2 m should be 2-bladed with a blade width of 16.5% R, since the amount of coverage is small; a propeller with a diameter of 1 m can be 6-bladed with a blade width of 50:3 = 16.6% R or 4-bladed with a blade width of 50:2 = 25% R. Increasing the number of blades will further reduce the noise level.
With a reasonable degree of accuracy, we can assume that the propeller pitch does not depend on the number of blades. We present the geometric dimensions of a wooden blade with a width of 16.5% R. All dimensions are in the drawing Fig. 5 are given in percent radius. For example, section D is 16.4% R, located at 60% R. The section chord is divided into 10 equal parts, i.e., 1.64% R each; the toe breaks through 0.82% R. The profile ordinates in millimeters are determined by multiplying the radius by the percentage value corresponding to each ordinate, i.e. by 1.278; 1.690; 2.046…0.548.
Many technical devices invariably require a propeller or, as it is otherwise called, a propeller. There are different goals, and for each you should choose a specific technology and strategy. If you are interested in how to make a weather vane with a propeller with your own hands, then this article is especially for you.