Greetings, friends!
Agree that many roles such as fauns/satyrs and demons require horns. How to make horns light and believable? Especially lately, many have been interested in how to make maleficent horns with their own hands, literally from improvised means and at home. Now there is an answer.
The geography of our project is expanding, and this time Ermelyn Hollerborn (Thank you very much for this wonderful tutorial, charming Ermelyn) from Germany shared her manual with us. Here is her blog //www.ermelyns-creatures.blogspot.de , there are a lot of really interesting and interesting things there.
And here is the manual itself in my free translation/retelling:
How to make goat horns with your own hands from paper?
The photographs given in the article clearly demonstrate that several options can be made:
- Cut out flat products of the appropriate shape.
- Using the same configuration, make elements from the corrugated edge of a disposable paper plate.
- Twist the volumetric parts into cones.
- Create more realistic horns from paper tape.
- Use the papier-mâché technique.
So, there are many ways. Choose for yourself how to make goat horns with your own hands. The first ones listed above are the simplest. It will take a couple of minutes to make them. The last two options will take a little more time, but the result will be much more impressive and realistic.
Video
In our video you will find step-by-step instructions for processing the skull using the example of a roe deer.
Any carnival, upcoming holiday or corporate event requires a bewitching and unusual image. The characters of foxes and squirrels currently seem too banal. Every person wants to stand out from the crowd and attract all the glances of others. For such themed parties and carnivals, the image of the sorceress Maleficent is perfect. In this article we will tell you how to make the horns of a formidable witch with your own hands.
The simplest method
Let us describe in more detail the technology of how to make goat horns with your own hands quickly and easily. Work like this:
- On a piece of paper or newspaper, draw the shape of one horn.
- Cut out the template. This will be your stencil.
- Take a disposable paper plate or sheet of the appropriate size and trace the outline of your workpiece.
- Turn the template over or just lay it next to it if the paper is double-sided and trace it again. Also cut.
All is ready. You can try the product on your paper goat.
Tags
believable deer antlers Deer antlers deer antlers Reindeer horns time deer antlers New Year's decorations Making New Year's antlers New Year's accessory deer. New Year's reindeer. New Year's deer How to make believable How to make antlers How to make antlers with your own hands with your own hands or with your own hands with your own hands. with your own hands to us with your own hands with your own hands
answerdecorationstoysthankyouboilershapesmearticlegarlandshomehomeyouryoucanphotodetailsmeusualphotographyideasballoonsaccessories
Instant voluminous cones
Below is another way to make goat horns with your own hands from paper. The photo shows the design. It is made in the form of a regular cone.
This is the easiest method for getting voluminous horns. The sequence of actions is as follows:
- Draw two identical circles on paper. Their radius will be equal to the height of the horn.
- Cut out the pieces.
- Make a cut from the outer circle to the center along the radius on either side on both workpieces. You can cut out a sector to make the horn thinner and without much overlap.
- Roll the cones and glue the seam.
- You can trim the products from the bottom side.
This is how simple three-dimensional horns are easily made in a couple of minutes.
Materials
Headband - base (smooth, without decoration), paper, glue for paper.
Actually, making paper horns is very simple. You just need to cut two squares with a side of 8 - 10 cm, depending on the desired height of the horns.
Roll the square into a cone, just as you would roll a bag of sunflower seeds. Glue the edge so that the cone does not unfold.
cone - blank for horns
Since we rolled the cone from a square, and not according to a special pattern, we ended up with a protruding corner at the base of the cone. This is exactly what we need. If the corner protrudes a lot, then we use it right away; if not enough, then we trim it so that this protruding corner wraps around the rim and sticks to the cone on the other side. This is how we secure the horns to the rim.
Instead of glue, you can secure the paper with tape.
So we answered the question of how to make horns for a goat. You can try it on and go to the matinee!
Good day to all.
I would like to bring to your attention a souvenir for the “Real Man” made with my own hands - a wine horn, which, as you will see, is quite easy to make from scrap materials.
In the Caucasus, the horn symbolizes hospitality, in other cultures it symbolizes courage. The peculiarity of such a vessel is that it cannot be placed or put down if there is wine inside, so you need to drink to the bottom. Of course, you can drink from it, but it was originally intended as a decorative element. In general, no particularly harmful materials were used - food-grade aluminum, water-based acrylic paints, if you don’t pour boiling water, it’s okay.
Complex but beautiful option
Below is a way to make your own goat horns from paper that look more realistic than the previous ones. The technique is this:
- Prepare a strip of paper, preferably thin (the length and width depend on the size of your horns).
- Make a blank in the form of a cone using the technology of the previous version or make a base from plasticine of a more complex shape. If there is an appropriately shaped object available, such as real antlers or a child's toy of the appropriate size, use it.
- Start wrapping your workpiece with paper tape in a spiral, gluing where one layer overlaps another.
- After the glue has dried, remove the horns from the base. To make this procedure easier, you should first, before pasting with paper, cover the workpiece with cling film and do not wrap the tape too tightly.
Hunting trophies and their collecting
They even came up with the term “trophy hunting.” People who hunt bears consider the skin, skull and claws of the killed animal to be trophies. Killed birds are stuffed or their claws and most beautiful feathers are preserved. Boar and elk heads are also highly prized. But the most valuable exhibit in any hunter’s collection is the horns of ungulates - elk, deer, deer or bison. Even if for some reason the animal only had one horn, it can be used to make a beautiful wall decoration. The horns of ungulates are not always the same size or shape. But this does not stop avid collectors at all.
An indicator of the success of any hunter is the collection of antlers of one animal. They are collected after the elk or deer shed their antlers. You need to monitor the ungulate, know all its habitats, and the main routes of movement. The main exhibit is a skull with horns, which the hunter obtains after the death of the animal.
The horns of ungulates are most often voluminous and heavy. A special shield or medallion is made for them. Medallions for hunting trophies can be purchased at the store or made with your own hands. Even a person without special knowledge and skills can cope with this matter.
How to fold paper horns?
You can make goat horns with your own hands using paper-plastic methods, when a blank of a certain shape is cut out with the marking of future fold lines. You will end up with a design that resembles a box, but with a rather complex shape. This same option can be easily assembled from three separate parts.
The seams are taped or the elements are connected using adhesive tape. In the second case, you will have to cover the surface with some material, for example, glued napkins, threads, or use beautiful decorative adhesive tape that matches the color, or paint.
The only drawback of this product is that it will turn out to be somewhat angular, although this can be compensated for by a decorative layer of glue and paint applied on top of the threads.
Face makeup
But further facial makeup is intended specifically for women to complete the image of the devil for Halloween.
Let's move on to eye makeup. It will be quite simple, but effective. Apply a thin layer of foundation over your eyelid and set with powder.
Using a fluffy brush, pick up brick-colored shadows and blend them into the crease of your eyelid. Don't be afraid to make the shade too intense. The main thing is that it is beautiful.
Set the direction of the arrow to the temple, and then draw it along the upper eyelid.
Papier-mâché horns
If you are still undecided on how to make goat horns with your own hands from paper, you may like this option the most. The manufacturing technology is simple, but it requires some time, so it will not be possible to build horns in a few minutes using this method. The meaning of the work is as follows:
- Take any voluminous workpiece. If you don’t have anything suitable at hand, mold it yourself from plasticine. This is convenient because you can choose the size and shape you want.
- Prepare many pieces of paper. You can only use white, although magazine or even newspaper is suitable for the first layers. Tear the pieces by hand or cut with scissors.
- Before gluing, you should wrap your workpiece in cling film to make it easier to remove the paper-adhesive “shell” later.
- Take PVA glue or prepare a paste and apply a layer to the workpiece.
- Place pieces of paper in any direction randomly.
- After the first layer has dried, repeat the steps as many times as necessary until the object is thick enough.
- Remove the manufactured “shell”. If this is very difficult to do and you are afraid of damaging the product, make a cut on one side, and then, after removing it, glue it with one or more layers of paper.
This way you can make horns of any shape. After drying, the paper mixed with glue becomes hard and quite durable. If you want to speed up the gluing process, you can mix the pieces of paper with glue before applying to the surface. Only in this case the parts should be smaller so that the paper lies neatly and evenly and does not bulge.
First way
To create original evil sorceress horns, you need to prepare the following materials:
- chain-link mesh with a minimum wire diameter so that it is pliable in the hands (it is important that it can be cut, bent in the right directions, and given a certain shape);
- glue;
- newspapers;
- textile tape;
- thick insulating tape;
- black insulating tape.
Now you can start creating Maleficent's horns. We perform the following steps in the following sequence:
- We cut out a rectangle about 15-20 cm wide from the chain-link mesh.
- We give it a rounded shape so that it looks somewhat like a hat (this is the part that will subsequently be put on the head).
- We cut out two oblong rectangles and twist them into a tube so that on one side the base is larger than on the other.
- After receiving two twisted tubes, we give them the desired shape (something similar to the English letter “S”, only so that the first rounding is large and the second much smaller).
- We attach the horns to the “cap”, twisting the wire so that the overall structure is strong and confidently retains its shape.
- At the next stage, work is carried out using papier-mâché technology.
- The glue is diluted with water, the newspaper is torn into small pieces.
- A piece of newspaper is immersed in a water-glue solution, removed and glued to the wire structure.
- This is done until the entire metal structure is closed.
- Next, the mold is left for several hours until completely dry.
- After a few hours, the steps are repeated, pieces of newspaper are glued again so that a dense second layer is formed everywhere.
- The structures are again allowed to “rest” so that the glue has time to set.
- To do the third layer or not to do it is a question that can be considered individually. It is only important to understand that a larger number of layers provides additional strength to the entire structure.
- Next, we use textile tape, wrapping it around the horns from bottom to top, placing the next turn of tape on the previous one to completely cover the paper layer and make the surface of the horns smooth.
- To make the horns look more solid, we now wrap them with thick insulating tape (for example, the kind used to cover windows with a foam rubber or rubber base);
- We wrap it with insulating tape so that the horns are much thicker at the base, and the top remains very thin.
- The final stage remains - painting the structure. You can use paints, but it is unlikely that you will be able to apply a layer of paint evenly on the window tape, so it is better to use black insulating tape, which is also used to wrap the entire structure of the horns.
Now you can try on your own created masterpiece and think about what costume will suit such wonderful horns.
How to make goat horns on your head?
If you are preparing a child for the New Year's tree and are sewing a fancy dress costume for a goat, lamb or other horned character, you can use any of the presented methods for creating horns. You only have to prepare an additional part - a rim on which the manufactured elements will be fixed. A purchased plastic version is well suited as a frame, preferably one that already has horns in its design, for example on springs made of tinsel or rain. In this case, you will only need to secure your paper products to the finished frame.
If you just have a decorative headband for your hair, you will have to create the frame elements for the horns yourself. To do this, it is better to take a strong wire and secure it in the appropriate places on the rim. Its surface will need to be decorated to match the color of the suit. You can, of course, do without a frame blank at all, and make it yourself from thick paper or cardboard.
So, you've seen how to make goat horns with your own hands. Choose the appropriate option. Use the technique to perform both crafts and masquerade costumes for goats and other horned characters.
Halloween headband in 10 minutes
Without false modesty, Halloween can be called the most unusual and most beloved holiday of the year. According to legend, it is on this day that the black curtain between the worlds (ours and the other world) opens, and “mere mortals” have the opportunity to look into the future, plunge into the mysterious world of the unknown and forbidden, and at the same time have an interesting time.
Despite the fact that celebrating Halloween began hundreds of years ago, in Russia and other CIS countries this holiday became popular relatively recently.
In recent years, it has been customary to prepare for such a particularly atmospheric, unusual and mysterious holiday as Halloween with special care. On this day, the interior is decorated with terrifying decorations (pumpkin-lanterns, bats and black cats, skulls, large decorative spiders, and of course, the most artificial web).
On Halloween, they also dress up in scary masquerade costumes of the inhabitants of the other world and complement the image with themed accessories (hats, hairpins and headbands, veils, etc.).
Today we invite you to learn how to create such a themed accessory as a bat headband for Halloween. Even a beginner in the field of handmade can create a spectacular headband for Halloween in 10 minutes with his own hands. This DIY Halloween hair decoration is perfect for completing a mystical look for girls, girls and women of any age and celebrating a party, school holidays or corporate events.
The hair hoop is made in black color and has a decor in the form of bat wings.
In addition to the fact that the master class is very easy, has step-by-step instructions, detailed videos and photographs with the actions of the master, the materials used in the work are among the affordable and common goods for creativity, pleasingly affordable, and they are easy to find in many specialized stores
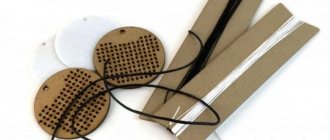
Materials for making the “Bat” headband:
And so, we have prepared all the materials necessary for the work. As you can see, there are not many of them.
The next stage is fixing the decor to the base. We get such a lovely themed headband.
The headband itself is very simple, but looks cute. If you like more generous decor, then you can attach a small bow made of black satin ribbon, a few sequins, rhinestones or decorative flowers to the bottom of the wings.