To many, the papier-mâché technique seems quite complicated and unrealistic. With its help, extremely interesting things are created, beautiful and similar to works of art. Only this technique is not at all exorbitant, but quite doable at home.
The papier-mâché technique itself, as a method of creating three-dimensional figures, involves working with hard paper mixed with plaster or glue.
A three-dimensional figure is created using the pressing technique, and this is done quite simply. A detailed master class with step-by-step instructions on how to create something unique will help you with this.
A papier-mâché dog would be an excellent start to such creative activity. After all, such a figurine will not only be a wonderful decoration for any interior, but will also help you have a great and exciting time, especially if you make this figurine with a child, developing his hand motor skills, thinking, memory and attention.
What is papier-mâché
The word papier mâché is French, which translates as “chewed paper.” Papier-mâché is one of the handicraft techniques that is characterized by the creation of a work from a mixture of softened paper and paste.
This technique is used in the manufacture of dummies, children's crafts, toys, teaching aids, dolls and much more.
bird's Nest
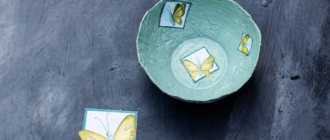
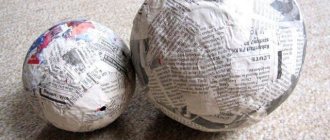
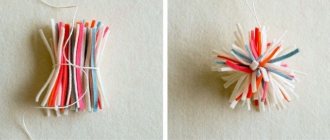
In the papier-mâché technique or sculpting crafts from paper pulp, a balloon is often used as a mold. This is exactly how you can make a “Bird’s Nest” craft:
- Inflate the balloon to the desired size;
- Wrap it in cling film;
- Cover it with layers of paper;
- Be sure to leave some space around the tail of the ball;
- When the paper is completely dry, cut the ball and pull it out through the hole at the top;
- Cut an oval hole on the side to form the entrance to the nest.
The nest can be left white or decorated to your liking. The bird must be placed in the nest so that it can be seen in the window.
History of the origin of Papier-mâché
It may seem that this type of needlework belongs to the French. However, it originated in China because paper was invented there.
- In the Middle Kingdom, this technique was used to create warrior uniforms (armor, helmets).
- Then in Japan and Persia they began to make holiday masks in this way.
- It is surprising that papier-mâché became widespread in France only in the middle of the 17th century.
- With the help of such needlework, the French made dolls that were popular at that time. Interest in papier-mâché in Russia arose thanks to Peter I.
However, the production of products began only in 1795 thanks to the Moscow merchant Korobov.
It was he who founded the first factory and invited the Germans to learn from them their skills and experience. They made visors for caps and colorful snuff boxes, which were in great demand.
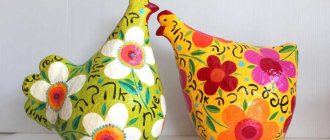
Animals
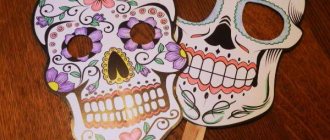
When creating these cute animal faces, you can make any shape you want! Make a cat, a hare, a dog. This is a great papier mache craft idea for beginners.
Crumple the newspaper into a ball and then glue it together. Cut two ears from recycled cardboard to fit the head.
Cover the ears with paper tape and then attach them to the head.
Repeat these steps to make different animal heads.
To prepare the paper mixture, mix 1 part flour with 2 parts water. Mix until there are no lumps left and add more water or flour until you are happy with the consistency - it should be similar to white glue.
Dip a strip of newspaper into the glue. Glue the strip onto the animal's head and repeat until the head is completely covered.
Let dry for at least 24 hours.
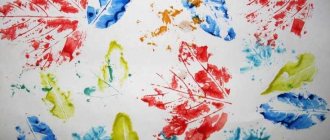
Now the fun part - drawing! Color the animal heads the way you like. Let dry completely and then place on a shelf or glue a small loop to the back to hang on the wall.
Types of Papier-mâché technique
Classical. With this method, the object is pasted over in layers. Gluing occurs using starch paste or PVA glue.
Execution order:
- Cut paper strips.
- Using a glue brush, lubricate them on both sides.
- The prepared form is covered with these strips and smoothed, getting rid of air bubbles. (2-3 layers)
- After drying, the item is glued to the desired thickness.
- Since newspapers are most often used, it is necessary to get rid of the black font. For this, emulsion paint is used.
- The last stage of work is painting the item and decorating it.
Papier-mâché from liquid mass
To do this, thin paper is boiled, and the resulting paper mixture is then squeezed out and dried. Next, proceed as in the classic version: paste over the object using paste.
Execution order:
- The paper is shredded into pieces.
- Place chopped paper into the container and pour hot water.
- Now you need to wait a day, placing the mixture in a warm place.
- It is then boiled for 30 minutes in clean water.
- The liquid is drained, and the resulting mass is kneaded so that the paper fibers are completely dissolved.
- Mix with glue until smooth.
- The following stages coincide with the classical technique.
Papier-mâché from a press made of cardboard plates
Execution order:
- The required shapes are cut out of cardboard. They also focus on the thickness of the intended product (usually about 10 layers of cardboard).
- Glue is evenly applied to the parts and, pressing, pressed against each other. This cannot be done with your hands, so they use a press. These could be books, jars of water, weights.
- The product is allowed to dry thoroughly.
- Then the surface of the future creation is primed and sanded.
- After this, they begin decorating.
Exotic Dogu with a clock
In Japan, during archaeological excavations, amazing figurines called Dogu were found. These are some of the oldest sculptures - their origin dates back to the 10th millennium BC.
To prepare such an original sculpture, you will need the following materials:
- toilet paper;
- sackcloth;
- gypsum;
- glue, preferably carpentry type;
- wire.
The tools you will need are a large basin where the paper mixture will be kneaded, and small containers for glue.
To make the mass, you will need regular toilet paper. First you need to dissolve the wood glue in a water bath and pour the paper hot. Using a mixer, mix everything thoroughly and add gypsum to the resulting mass. Under no circumstances should you use alabaster, as it sets quickly and is impossible to work with.
The resulting mass should have the consistency of a medium-thick pulp. Then it needs to be divided into bags and stored in a cold place for one day, for example in the refrigerator. After cooling, it will not stick to your hands and will be easy to sculpt with. During work, be sure to use a frame or mold, since this type of mass can crack.
Papier-mâché glue recipe
PVA glue. This recipe is the simplest - just buy glue in the store and you can use it.
On starch
- 3 tsp starch is poured into 0.5 liters of water at room temperature.
- Stir to get rid of lumps.
- The resulting mixture is heated over fire, stirring, and brought to a boil.
- Remove from heat and allow to cool.
On flour
- Pour 5 cups of water into a saucepan.
- In a separate bowl, mix 1/4 cup of sifted flour with 200-250 ml of cold water.
- Stir until lumps disappear.
- The resulting mixture is added to a saucepan with water.
- Cook the mixture for 3 minutes until thickened.
- Let the glue cool. If you want to get a thicker glue, take a full cup of flour and three cups of water.
It is necessary to pay attention to the fact that the resulting paste has a natural composition, so it should be stored in the refrigerator for no more than 2 days. Otherwise, the mass will quickly lose the properties necessary for papier-mâché.
Preparing to make it yourself
To make an original souvenir , gift or other interesting thing, you don’t have to be a great craftsman. Even a child can make papier-mâché toys with his own hands. To make a craft, a minimum of materials is required - thin pieces of paper and adhesive. Glue can be replaced with paste, which can be made at home.
Homemade paste recipe
Paste is a good replacement for regular glue, especially if a child will be doing the craft. It has its pros and cons to use. The main advantage when creating an adhesive mass for children is that it is easy to wash off the table and hands. But the paste takes longer to dry and cannot be stored for long periods of time. It is recommended to prepare a new portion of this glue before starting each job.
To make the adhesive mass you need:
- Dissolve starch or flour in warm water and mix well until it becomes thick like sour cream.
- Continue stirring and carefully add boiling water until the solution becomes clear and jelly-like.
- Allow the paste to cool.
Advantages and disadvantages of the Papier-mâché technique
The advantages of this type of needlework are many:
- The technique is quite simple, so even a child can do it;
- Financial costs are minimal (everything you need is usually already at home);
- No special tools or materials are needed;
- There are many variations in the implementation of the idea (papier-mâché is “friendly” with any colors and decor);
- The finished product is light but durable.
Disadvantages include time costs. Each layer of the product must dry well before it becomes possible to move on to the next stage of work.
Figures for children's creativity
Volcano
For work, prepare:
- a bottle of any volume (depending on the desired height);
- plywood or thick cardboard for the base;
- newspapers;
- white paper;
- PVA glue;
- scissors.
We cut off the neck of the bottle to expand the “mouth”, glue it to the base and make a frame from strips of white paper:
We strengthen the frame with horizontal strips, tear newspaper into pieces, soak them in glue and place them on the frame. Periodically drying the applied layers, glue them 5–7:
The last one will be made of white paper, leave it to dry:
We decorate the volcano: paint it with brown and black paint, draw grass, glue branches at the base:
The volcano action is caused by the reaction of vinegar and soda. To do this, put a teaspoon of soda inside, and pour a solution of vinegar, dishwashing detergent and red paint on top.
Rocket
The creation scheme is similar to making figures for the garden. A plastic bottle is also suitable for this; cardboard parts are glued onto it. Everything is covered with newspapers and reinforced with molding mass:
Craft option using papier-mâché technique
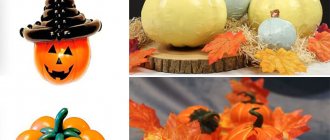
Golden autumn has arrived outside the window, which means it’s time to enjoy the harvest. Therefore, one of the options for crafts that we have known since school is “Gifts of Autumn.” It is proposed to make vegetables using the appropriate technique.
Materials
- A real vegetable or its model (for round objects you can use a regular balloon);
- Any paper;
- Oil or Vaseline;
- Water;
- PVA glue;
- Flour or starch;
- Brushes;
- Any paints and items for decoration (if necessary);
- Varnish.
Step-by-step instruction
- First, take the shape of the desired item. You can make it yourself, for example, from plasticine.
- It needs to be lubricated with Vaseline or oil to make it easier to remove the finished product later. Then they recommend choosing the technology option that suits you.
- The paste is also chosen at your own discretion, depending on the availability of ingredients. Recipes and techniques can be found earlier in this article.
- After pasting the mold, the product is allowed to dry. Usually this moment lasts about 12 hours, but the process can be speeded up by placing the product in the oven at 30-40 °C.
- At the next stage, the future vegetables are cut in half and the mold is removed. Now, using PVA glue, the two halves are glued together.
The most interesting stage begins - the creative one. Here everything depends on the author’s imagination. Of course, the vegetables need to be colored. This can be done with gouache. It is possible to impart a certain structure to the surface using a needle (porosity, roughness, etc.).
For some vegetables you also need to make twigs and leaves: they are made either using papier-mâché or sculpted from plasticine.
Combined products
Large figures are usually heavy, so craftsmen use combined methods. This is a very convenient option for personal plots when they need to be brought indoors during the cold season.
The process of creating a figure
With this technology, crumpled paper is placed inside instead of a frame. You can use foam instead of crumpled paper.
Scheme of work:
- Each sheet of paper needs to be crumpled and the lumps placed next to each other.
- You need to sculpt a figure from the lumps and secure it with tape.
- Then a mass of papier-mâché is applied. You need to use glue and torn pieces of newspaper to treat the entire surface. Apply 2 or 3 layers, as necessary. Small parts are made from toilet paper, which must first be soaked in glue.
Toilet paper is a very convenient material. If you soak it in an adhesive base, you can sculpt anything you want, like from plasticine or clay. At the final stage, the last layer of this paper is applied, which will smooth out all the unevenness on the surface of the sculpture.
Finishing the craft
You need to let all the layers dry and paint the figure. You can use acrylic paints, gouache or watercolor . After applying paint to the sculpture, it is necessary to reapply a layer of glue to fix the paint and primer. Next you need to treat the surface with yacht acrylic varnish. It must be applied in three layers.
This varnish is specially used for painting wooden surfaces of various boats and other vessels. It perfectly protects the product from moisture, so there is no need to bring the figure indoors in rainy weather.
It is advisable to use PVA glue rather than wallpaper glue, since its structure is much stronger. Before painting with varnish, you can apply a special decorative wax, which will add shine to the product.