Crafts from sponges for washing dishes are easy to make, since the material is soft, has a smooth surface, can be cut well with scissors, and perfectly takes the required shape with the help of threads or thin ribbons. Sponges come in foam rubber and in the form of sponges with large holes; they are harder and hold their shape well.
In the article we will look at options for making crafts from sponge with your own hands, which preschool children can make together with their parents, and children in the older group of kindergarten during manual labor classes. You can play with them, use them to draw and print with stamps. Photos of samples will help you understand what result should be obtained during the work process.
Paint watercolor trees
Mix up some watercolors and dip a sponge into the paint. Then simply dab the sponge where you want the leaves. The sponge texture will create the leaf details for you and all that's left to do is paint the trunk and add a light wash on top of the leaves when everything is dry.
We recommend reading:
- Crafts from isolon - a manufacturing master class, nuances of working with the material and step-by-step instructions on how to make a craft (85 photos)
- Crafts from saw cuts: stylish and beautiful options for decorating the garden and interior with your own hands (130 photos)
- Crafts from toothpicks - interesting ideas, manufacturing examples and the best crafts for children (120 photos)
bear
A rectangular sponge can be given any shape by tightening the foam rubber. For example, such a cute bear was made quickly. The upper corners were tied with golden rain to create ears. The head was marked with a wider ribbon of the same color. The remaining details of the face were simply drawn with markers.
In the article we looked in detail at how to make crafts from a sponge. This is not at all difficult, because the material lends itself to all types of processing. The sponges are sold in sets, so choosing the right color for the job is not a problem. The variety of crafts depends on your imagination, because you can create anything, from equipment to furniture. Be sure to involve children in working together, this develops motor skills of the hands and fingers, creative and mental abilities, which will later be useful for the child in school.
Using a sponge at home
Repaint your brick: If you don't like the color of your brick, you can easily paint over it using a sponge. Paint the entire wall or fireplace a base color, then cut the sponge into a brick shape and press the dark color on top.
The sponge will retain the texture of the brick and will look natural. Remove old wallpaper: Mix hot water and laundry starch to create a paste. Rub the mixture onto the wallpaper using a sponge and let it sit and dry until the wallpaper comes off.
Making pompoms
Making fluffy balls does not require much time or any special experience. There are several options for creating such items.
Option 1. Classic
Take a piece of cardboard and use a compass to draw two circles. One larger one will be the outer edge, the second smaller one will be the middle.
Cut out circles.
We wind woolen threads around the entire perimeter of the workpiece, trying to ensure that they lie evenly and neatly.
When the winding is finished, carefully cut the threads along the outer edge, and tightly rewind the middle with a piece of yarn.
Children's crafts
Make a Sponge Water Bomb: In the summer or just for fun, make an easy homemade water bomb that kids can play with.
Start by cutting the sponges into quarters, then tie the four pieces together with rubber bands and let the kids play with them (more detailed instructions in the link). They are better than water balloons because they can be used over and over again and don't create much of a mess.
Grow plants for a science project from a scouring sponge craft: Cut sponges into desired shapes (trees, leaves, etc.). Soak the sponge and squeeze out any excess water before adding the seeds on top.
Place the sponge in a sunny window and spray water daily. The sprouts will grow on the sponge and this works with lettuce, spinach and broccoli.
We recommend reading:
Crafts from natural materials - a step-by-step master class on creating original crafts for children and adults (100 photos)- Wood crafts - the best craft options, instructions for beginners and ideas for making wooden crafts (85 photos)
- Fabric crafts - the best ideas and the most practical crafts and toys made from various types of fabrics
Furniture for dolls
If you have a growing daughter, then there are always dolls in the house, and the child always asks for new toys to play with. With creative thinking and skillful hands, you can make a whole house with furnishings for dolls. It is easy to make upholstered furniture from kitchen sponges - armchairs, a sofa or a bed, placing them on a prepared base made of cardboard or plywood.
In the sample above, the sponges were joined together even without support, secured together with a furniture cover sewn from fabric. Additionally, cushions-rollers are made from hair. Such furniture will last a long time, and the costs for it are minimal, unlike purchased furniture for Barbie.
Growing Salt and Vinegar Crystals
Another easy science project for kids is to grow salt and vinegar crystals on a sponge. Mix water, salt, vinegar and boil before sponging. Use a sponge to decorate with food coloring and place the dish in a sunny, warm place where you can watch the crystals grow.
Make Kids Crafts with a Glue Sponge: For little kids, instead of letting them mess up the glue, make a glue sponge so they can just stick their projects on for an even layer of glue. The best part is that it is ready to use for over a year in any airtight container.
Sponge Crafts - DIY Bath Toys: By cutting sponges, you can glue the pieces together and make your own bath toys for your baby.
For inspiration, check out this sponge boat with cork sailors. In order to make a craft from a sponge, choose a beautiful color and size of the sponge itself.
Pack fragile items:
- wet the sponge and place it around a delicate object (for example, a figurine);
- Use several sponges if it's a larger item (like a vase) and secure everything with a rubber band;
- The sponge will conform to the fragile item and will return to its original shape after it gets wet again. Create an ice pack: Make yourself an ice pack that won't leak by freezing a damp sponge and placing it in the bag;
- Just remember to disinfect the sponge very often;
- Seal envelopes with a stamp: Instead of licking the envelopes or stamps, apply a damp sponge to them for the same effect. Make two sponges from one: Cut the sponge in half. This is a very easy way to save money.
We make a sailboat
The simplest option for a children's craft is a sailboat. Even the smallest craftsmen can master this craft. And if you apply a little imagination and creativity, the result will be even better. After finishing work, everyone will be able to play fun games with their personal sailboats.
For production we will need:
- Foam sponge;
- cocktail straw;
- scissors;
- colored paper.
To create a sailing boat, the child must use a sponge to separate the hard part from the soft part. The resulting blank will become the basis of the future boat.
Then we take the tube and stick it into the sponge in the middle, it will become the mast of our sailboat.
The next step is to make a triangular sail from a sheet of colored paper and pin a tube-mast. You can make a sail from separated fiber, but then you need to make holes at the ends for attaching to the mast.
The sailboat is ready!
Diversified Approach
Pack smaller fragile items by dampening a sponge and placing it around a delicate item (such as a figurine).
Use multiple sponges if it's a larger item (like a vase) and secure everything with a rubber band. The sponge will conform to the fragile item and return to its original shape once it gets wet again.
Create an ice pack: Make yourself an ice pack that won't leak by freezing a damp sponge and placing it in a Ziploc bag. Just remember to disinfect the sponge very often.
Seal envelopes and wet stamps: Instead of licking envelopes or stamps, apply a damp sponge to them for the same effect.
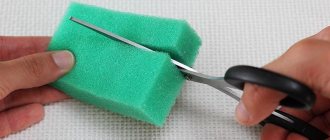
Make two sponges from one: Cut the sponge in half. This is a very easy way to save money.
bear
A rectangular sponge can be given any shape by tightening the foam rubber. For example, such a cute bear was made quickly. The upper corners were tied with golden rain to create ears. The head was marked with a wider ribbon of the same color. The remaining details of the face were simply drawn with markers.
In the article we looked in detail at how to make crafts from a sponge. This is not at all difficult, because the material lends itself to all types of processing. The sponges are sold in sets, so choosing the right color for the job is not a problem. The variety of crafts depends on your imagination, because you can create anything, from equipment to furniture. Be sure to involve children in working together, this develops motor skills of the hands and fingers, creative and mental abilities, which will later be useful for the child in school.
beauty
Get gradient or ombre nails: Cut a sponge to the size of your nail and paint your nail the lightest ombre color (or white). Then apply nail polish colors to the sponge, allowing them to overlap each other and using the polish generously. Then apply nail polish to your nail, rubbing it up and down to blend it into a gradient.
Add a glitter tip to your nail polish. After you paint the base color and let it dry, take a makeup sponge and apply glitter polish to the tips of your nails.
Apply the thicker coat to the very tip and the lighter coat towards the center of the nail to create an ombre effect.Make nail polish remover: Instead of using a million cotton balls, place a sponge in a mason jar and soak it in acetone to make your own sponge nail polish remover.
Keep it sealed in a jar when not in use and when it gets too dirty, replace the sponge and add nail polish remover.
Get an easier pedicure by placing pieces of cut up sponge between your toes to avoid staining your nail polish when painting your toenails.
It's like a salon toe separator, but cheaper. Remove lint from clothes: Just like with pet hair, a damp sponge wiped on your clothes will also remove any unwanted lint - just wipe the lint off with your fingers.
Durable shoes: Cut a round makeup sponge and insert it between the heel and back of the shoe.
If you like the placement of the sponge, you can even use a hot glue gun to secure it permanently.
Keep your earrings together:
- push pairs of earrings through a small piece of sponge, securing them at the back;
- This will keep them together as a pair and will also clean the needles after each wear.
Clean eyes: Soak makeup sponges in alcohol and water, then store in the freezer covered with plastic wrap. The rubbing alcohol will keep the sponges from freezing completely, leaving them extremely cold and pliable—perfect for putting on tired eyes in the morning.
House
You can make a house from several different colored sponges, as in the photo below. It is interesting to build any structure, it all depends on the amount of material and color. Moreover, the sponges themselves will not suffer at all from such work, and they can be used for their intended purpose even after the construction is completed. To secure the parts, use wooden toothpicks.
If you have a large supply of kitchen sponges, then if you wish, you can build an entire city, and by adding wheels from broken cars, you can make transport.
Photos of crafts made from sponge
0
1
Will become a soapbox
From the liquid that accumulates at the bottom of an ordinary plastic soap dish, the soap becomes soft, breaks up into pieces, turning into soap, and it becomes simply impossible to wash with it. We offer you an alternative - a soap dish made from a sponge for the bathroom. Take a sponge and cut a hole in it exactly for the soap.
It is important that the piece “goes” into the sponge completely, but not too deeply. By wetting a sponge with soap inside, you can wash yourself without taking it out of the improvised “soap dish”
This way, it will never slip out of your hands, and if it does, it will definitely not sink to the bottom of the bathtub.
You can do without scissors - just use a sponge as a stand for a bar of soap. And when you run out of soap, you can wipe the bathtub or sink with a sponge, wash it and use it further.
Anti-stress toy - pig
Currently, anti-stress toys - squishies - are widely used among children. When you press on these toys, they crumple, change shape, they can be kneaded in your hands in all sorts of ways, which greatly amuses children and many adults, after which the toys regain their original shape.
Just a sponge is the most suitable material for squish - piglet. To make it, you need to prepare a sponge of any color for washing dishes, a construction acrylic primer, hot glue, felt, scissors, sandpaper and acrylic paints. Step-by-step instructions for making a piglet are discussed below.
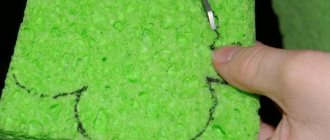
- Take a sponge and separate the coarse fiber from it. Next, an oval is drawn on the sponge and cut out according to the template. You can not draw an oval, but simply cut off the corners of the sponge, trimming it to give it an oval shape.
- After processing the edges of the sponge with scissors, you will get an uneven oval, so you need to go over the workpiece with sandpaper to completely clean the shape and remove all the unevenness.
- The next step is to apply an acrylic primer to the surface of the oval sponge, then knead it so that the sponge is saturated with primer. And dry the workpiece.
- After drying, you can start painting the sponge. Mix 2 acrylic paints: red and white to obtain a deep pink color and paint the sponge in two layers.
- Next, on the sponge we draw the pig’s face: eyes, snout. The paint will need to be dried again.
- Next, the pig's ears are cut out of white felt and glued with hot glue to the face of the pig, the squish, using a glue gun.
The anti-stress toy is ready.
Edible squishies
Anti-stress toys and food are two things that truly calm us down. What if we combined them? Try it - it's really great!
You will need gummy bears (you can use worms, or crocodiles, or cans of cola, depending on your taste). You will also need baking molds - in the form of bears, or hearts, or something else.
Pour the pack of marmalade into a bowl and put it in the microwave for a few minutes. When the bears melt and turn into a hot, viscous mass, you need to fill the molds with it. After this, the marmalade should harden at room temperature. This way, you will get marmalade squishies that will not only be delicious to eat, but also great to stretch in different directions. Double hit on stress!
You can also make an edible squish slime. First you need to melt 3-4 dozen chewing candies in the microwave. It is better if they are of different tastes and colors, but of the same brand, so that the same consistency is maintained.
Add powdered sugar, confectionery topping and a variety of goodies to the resulting viscous mass: pieces of marmalade, candied fruits, dried fruits, nuts and raisins. Then we form the slime. You can stretch it, sculpt it like plasticine, and at the same time gradually eat it.
Calm, just calm!
Squishies are a great opportunity to relax and relieve stress after a busy school or work day. You don’t have to buy them in a store at all, they can be easily made at home: from paper or sponges, large or small, with different fillings, silicone squishies, single-layer and multi-layer, in the form of soap, even edible squishies!
YouTube is replete with a huge number of ideas, master classes and life hacks on this topic. Join in, fantasize and don’t worry about trifles!
Benefits of Squishy
What else is responsible for the popularity of squishies, besides the fact that they are now in trend? Let us outline the main advantages of these grinders, and everything will become clear.
These squishies help you take your mind off things.
- To some extent, squishy really helps to calm down, distract and relieve stress. An excellent option for a five-minute break for an adult at work or for a schoolchild at recess.
- Thanks to squishies, some people's aggression becomes less pronounced. But there is no documentary evidence of this.
- Squishies are cute. They can have very different shapes, but, as a rule, they are either funny or cute and are liked by almost everyone, especially girls.
- Squishies help develop fine motor skills. And it will not be superfluous even for adults, let alone children. The development of fine motor skills allows you to develop the brain, using some of its centers and making them more active
- Kneading a squishy is a real gymnastics for your fingers. It will be useful for both a healthy person and someone who has suffered an injury; it will help to quickly restore motor activity. At the same time, the toy does not put a serious heavy load on the joints; it is soft and pleasant to the touch.
- Squishy allows you to increase the sensitivity of your fingers.
- Tactilely pleasant squishies are simply great to hold in your hands, even just like that, admire them and, to be honest, show them off to your subscribers and friends on the Internet.
- These crushers can be a nice gift for anyone; besides, they are inexpensive and won’t seriously hit your budget. Plus, they are very easy to make yourself.
- Squishies are very small and won’t take up much space. You can take them with you to work, on a trip, for a walk, and so on.
Squishies in the form of French fries. Such toys will not take up much space. Squishies in the form of sushi.
