How to make a voluminous skull mask using a template
Before you make a skull out of paper, you need to prepare a template. You can make it in several ways: draw it yourself, copy it from a picture, find an image on the Internet. It is better to take a skull with a visible jaw. Next, transfer the drawing you like onto the piece of paper twice. That is, you will need two identical blanks. Don't forget to adjust the picture to the size of your face! The thicker the paper, the more voluminous the mask will be. You can even use a shoebox as material. We cut out the drawings along the contours and glue them together. Now we make holes for the nose and pupils of the eyes.
Now let's move on to the second part. We will learn how to make a skull (upper blank) out of paper. For this template, you need to transfer the same drawing onto a piece of paper, but without the lower jaw. We cut holes for the nose and eye sockets. If the selected drawing had cracks in the skull and other additional elements, now is the time to make them.
Note! Before this, we made holes only for the pupils, now we cut out the eyes completely. It is important. This will make the mask look more voluminous.
We cut out the top blank along the contour and glue it to the first part. While the base dries, let's move on to additional elements. Draw on paper and cut out the upper jaw and nose. We glue the parts to the skull. The result should be a “sandwich”. How to make a paper skull mask, you know it's time to give it color.
Now, using a piece of foam rubber, we paint the mask. Waiting for it to dry. We outline each element with a black marker or felt-tip pen.
DIY plaster skull - Metalist's Guide
Most of us have a craving for beauty and comfort.
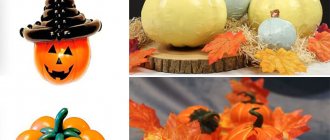
In the courtyard of our own house, in the country house and in the garden, we strive to surround ourselves with charming flower beds, lay out paths that invite us to walk, and cannot do without unusual and cheerful figures.
Gypsum is one of those materials that can be easily transformed by hardworking hands into a wonderful garden decoration. An alternative option is to make your own figures from polyurethane foam.
Features of the material
Gypsum or alabaster has a number of properties that predetermine its use in construction and medicine. It is also great for making garden figurines with your own hands. Even large sculptures are made from alabaster.
The use of forms allows you to accurately copy the most complex volumetric figures. Working with the material is not physically difficult, so many women are interested in creating art with plaster.
Professionals have already made a considerable number of alabaster crafts for the garden.
Plaster figurines for the garden for every taste
It should not be forgotten that alabaster is a rather fragile material that is afraid of moisture. It is better not to test products made of alabaster for strength. They must be protected from water with paints and varnishes. In the autumn and winter, plaster figurines are stored in a dry room.
The most interesting examples of plaster crafts
Most often, garden figurines of animals and people are cast from alabaster. Less often - objects of inanimate nature. We invite you to evaluate the photos of animals that you can make from plaster. Of course, you will have to come up with, purchase or make forms for them.
A successful composition makes a squirrel alive Another squirrel is carried away by mushrooms There are foxes, hedgehogs and mushrooms in this forest The bear is made of plaster, but is the honey real? The pig is bored alone in the pen The plaster plant pots should be well insulated from moisture Some are just getting acquainted, others already have an heir
In order not to make a mistake in choosing an alabaster figurine that you are ready to make with your own hands, it is useful to find a place in the garden for the future figurine and imagine the general plot of the composition. We recommend starting with a simpler figure.
Using this pattern you can make any figurine from alabaster
First of all, to cast a plaster craft, you will need a mold. A budget option is to use plastic bottles, old toys, dishes, etc. Of course, the list of possibilities is limited and you will have to rack your brains to find suitable material.
It is much easier to use ready-made children's molds for plaster or sand. Large silicone molds that are used in production are too expensive. If you really want, you can make a silicone mold yourself, as the following video describes.
The material has limited strength and relatively large crafts are reinforced with mesh or wire. To save material and reduce weight, plastic containers are placed inside the figure. A special plaster intended for casting sculptures is stronger than alabaster and building plaster.
To increase strength, PVA glue can be added to ordinary alabaster.
For ease of manufacturing and painting, figures are often made in the form of separate parts. The parts of the craft are fastened together with glue or alabaster solution.
To make it easier to remove the finished figure from the mold, it can be coated with a water solution of liquid soap and vegetable oil. There should be twice as much soap as oil. The resulting mixture is diluted with five portions of water.
The dry material is diluted to the state of liquid sour cream and poured into the mold. The solution hardens in a matter of minutes. A chemical reaction is accompanied by the release of heat.
During casting, air voids may form. In production conditions, the issue is resolved by using a vibration stand.
When working with your own hands, you need to carefully pour the solution, and the voids can be corrected with putty or alabaster solution.
https://www..com/watch?v=aiRqR60yZKU
You will have to work with such a figure for a long time
A small figurine will be ready for further work in half an hour.
A large casting should dry for several days in a dry place and out of the sun. You can continue working with the craft when your hand does not feel the moisture.
It is easy to make drawings on the surface of the figure. For these purposes, use a knife, awl, or needle.
To protect against moisture and improve adhesion with paint, the craft is primed. You can use construction soil or half-diluted PVA glue. Professionals cover plaster sculptures with several layers of drying oil heated in a water bath. After the surface has brightened, you can continue working.
The surface of the figure is successively decorated with paints. Water-based paints do not adhere to surfaces coated with drying oil. Oil, pentaphthalic, and alkyd enamels are suitable. Final processing is carried out with drying oil, wax or varnish. The figurine can be decorated with all kinds of decorative elements: buttons, glass, acorns, pine cones, and more.
In practice, the same technology can be used to cast figures from cement mortar. They will be durable and will not be afraid of moisture. However, cement-based mortar hardens slowly, and it will be difficult to make relief designs on the surface.
This is how a plant pot in the shape of a swan is made from plaster
Crafts from plaster can not only be cast, but also sculpted. In this case, it is necessary to make a frame onto which parts of the craft are gradually applied.
Prepare and apply the gypsum solution in small portions. It is better to do the work with gloves. It is convenient to use a plaster medical bandage. Pieces of bandage are soaked in water and applied to the figure.
It is necessary to smooth out uneven areas. The sinks are sealed with alabaster mortar.
Note that stucco figures are often made from cement mortar, including the addition of gypsum. This is a separate article.
Master class on making a charming mushroom
The mushroom seemed to me the most suitable craft for decorating the site, which can be cast from plaster. An alternative option is to make your own mushrooms from plastic bottles. Forms for it are easy to provide. The mushroom will fit perfectly in the garden. To make it you will need a very short list of tools.
Let's take a step-by-step look at the figurine making master class:
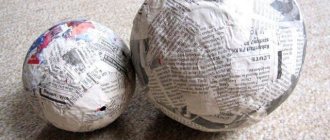
- A liter plastic bottle was optimal as a shape for the stem. You need to cut off the bottom half from it.
- To make it easier to remove the casting from the mold, I treated the top of the bottle with an aqueous solution of liquid soap and vegetable oil. There is twice as much soap as oil, plus another five parts water.
- Alabaster was added to the container in parts. Then added water and stirred.
- The result was a solution similar in consistency to liquid sour cream.
- To make the part dry faster, I prepared a liner from the neck of a plastic bottle.
- I poured the plaster and inserted the liner inside. To prevent the neck from floating up, I pressed it down with a weight.
- Half an hour later I cut the side of the mold and took out the part.
- The result is a mushroom stem.
- I selected a suitable cup as a form for the hat and covered it with thin plastic film.
- I prepared the plaster again and poured it into the mold. I placed a mushroom stem in the middle.
- Half an hour later I took the fungus out of the mold.
- For the base of the mushroom, I chose a plate as a shape. It can be lubricated with a solution or covered with a film to prevent the alabaster from sticking to the plate.
- I prepared the solution again and poured it into the mold.
- An hour later, I carefully removed the base ring. It could be made one-piece with a leg, but it is more convenient to paint them separately.
- I dried the fungus and the ring for 24 hours and coated it with primer.
- I used the remains of construction primer as primer.
- I decided to paint the fungus in pastel colors. To protect it from moisture, I coated the craft with a matte stone impregnation. Look what happened in the photo.
Upon completion of the work, I came to the conclusion: working with the material is easy and simple. The most important thing is to choose the appropriate form. I recommend that you try to build your own garden figurine. Let the video help you with your work.
Crafts from plaster: how to make sculptures with your own hands? 69 photo ideas and instructions
Gypsum is flexible and environmentally friendly, so fakes made from it are increasingly becoming fashionable among handicrafts.
The softness and flexibility of the material allows you to make realistic figures, cut out small details and patterns, which makes plaster crafts excellent decorations for your apartment, garden, and vegetable garden.
Crafts made from gypsum are attractive due to their simplicity and accessibility, and master classes on such creativity can be shown to young children.
Moreover, in the process the child improves his skills in working with bulk materials, repeats or studies colors, and develops fine motor skills.
Gypsum variety
Hardened plaster is strong and hard, so crafts made from it are practical and functional. Thus, plaster vases, flower pots, boxes, and flower pots are popular.
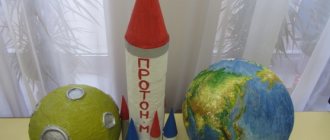
It’s easy to make DIY garden decorations from plaster, such as figurines of gnomes, mushrooms, flamingos, hares, artificial flowers, and decorative hatches.
Step 1 – Turn on your imagination
There are a great many options for gypsum crafts for the garden, vegetable garden or home interior, so you need to focus on a specific area.
How and what to make a mask mount from
If you plan to only apply the mask to your face, you can glue a stick or a long and narrow rectangle of thick cardboard. If you want to use the skull without using your hands, it is better to use another method.
You will need two pieces of ribbon or an elastic band. We glue them to the mask. For better fixation, cut out two small pieces from cardboard or paper. Lubricate them with glue and place them on the ends of an elastic band or ribbon. Place the mask under the press for several hours.
Making a wolf mask
To make a wolf mask, we suggest using the following master class.
- To do this, you need to draw a template and make small cuts on it. They are made in three places.
- To do this, triangular notches are made in the area of the crown and ears. Thanks to him, it is possible to create a three-dimensional craft.
- We carefully glue the places of the cuts. Thanks to this technique, the mask will be evenly located on the surface of the face.
- It is necessary to make round through holes in the eye area. To do this, fold the craft in half and cut out 2 semicircles.
- Let's move on to the wolf's ears. We cut them out of cardboard. We make a triangular notch in the center. We glue the elements together and get a three-dimensional figure.
- It is best to fix this part with a heat gun or thick PVA glue. We paint the inside of the ear with a light pink color.
- We make through holes in the side parts to fix the holding parts.
- Experts recommend using a thin elastic band. Unlike tape, it is convenient to attach it to the surface of the head.
- We decorate our craft with colored pencils or acrylic paints.
- Sparkling glitter around the edges of the piece will add bright details. Our craft is ready!
Making a paper mask in the shape of a skull for a child
The easiest way to make a skull out of paper is to print the photo from the article on a color printer, cut it out and glue it along the allowances, as shown in the pictures. But you can do it differently.
From white paper we cut out an oval according to the size of the face. This will be the base of the skull. On black paper we draw two large ovals-eye sockets and a triangle-nose. Don't forget to maintain proportions. Glue the parts to the skull. We make holes for the child's eyes. Now you can make a mount for the mask using the methods described above.
Making a template
The first stage of production is preparing the template. A quality product has the following advantages:
- fit in size, be comfortable;
- the cuts for visibility are in the right places;
- aesthetically meet the needs of the wearer;
the paint does not smear, does not fade, and the decor does not fall off with sudden movement; it must also be reliable - after all, children are very active and do not think about how to take care of their image.
To achieve the best possible result, it is important to take measurements of the child's head. To obtain accurate patterns, you should do the following: carefully measure the distance from the middle of one eye to the center point of the other
The line is drawn strictly straight; mark the segment that runs between the temples. This data is transferred to the sheet in sketch format; mark the lower edge - in the middle, lower than the tip of the nose. Here we are talking not only about small-sized models, but also covering half the face; The sides and eye slits are cut in any shape - from curved, almond-shaped or rounded to rectangular or square. The only point is that the cut fulfills its function of providing visibility, horizons must be ensured; fastening is done with an elastic band. There is an option on a stick - but then you have to hold it all the time; this option is not really for little ones.
Having considered the principles of making a frame, you can begin to work.
How to make a skull prop out of paper: selecting materials
Before you start, it's a good idea to have an idea of what the skull actually looks like. This is necessary so that the future props look realistic. Just look at as many pictures of real skulls as you can. Now let's take:
- Balloon.
- Vegetable oil or Vaseline.
- Marker.
- Masking tape.
- Paper or newspapers torn into small pieces. Cutting is not recommended. You just need to tear it so that the pieces of paper adhere better to each other and the transition is more invisible.
- Paste or PVA glue, diluted with water in equal proportions.
- Stationery knife or scissors.
- Putty.
- Sandpaper.
Halloween mask idea
In stores on the eve of All Saints' Day, costumes of scary characters and horror movie heroes are on sale. They look very realistic: all the skin irregularities, folds and exceptional features that indicate a specific character are visible.
Such additions are made of latex or plaster. From the mass of newspapers, they turn out no less scary. This requires a special manufacturing technology, such as papier-mâché.
It uses old books, tabloids, paste or PVA, greasy cream or film. You can buy the basis for creativity. You can form a blank on the owner’s face.
How to attach antlers to a medallion
The final stage remains - securing the trophy to the medallion. If the horns are small, then they are attached to the base using wire. Massive ones are attached with self-tapping screws. Medallions for moose antlers must be as reliable as possible, since they are subject to a large load.
There is a hole in the skull of elk and other ungulates that is best sealed with a wooden block. To do this, you need to cut out a wooden “blank” that will correspond in size to the hole in the skull, insert it into the hole and seal everything with putty. If necessary, you can sand the surface.
A hunter's trophy, decorated with your own hands, will be an ideal interior decoration; it can be sold at a high price or made into a striking exhibit at exhibitions. Hunting trophies antlers are highly valued abroad.
Medallion under the horns
The main function of the medallion is to hold the heavy weight of the trophy. Therefore, they are made from wooden boards no less than 4 cm thick. In order to hang the exhibit on the wall, 2 metal brackets are attached to the medallion.
But you shouldn’t forget about the aesthetic role of the horn medallion either. After all, too large and bright designs will distract attention from the trophy itself. The size must also be appropriate.
You can choose the shape to your liking. The main thing is that the resulting product fits perfectly into the interior of the room where it will be located.
Often a tag with information about the date of shooting and the type of animal is attached to the medallion under the horns.
Preparing the workplace and materials
If you decide to make a model of the gun yourself, you need to prepare the work site, tools and materials in advance. With all this, if you are under 12 years old, it is better for our client to do the main woodwork and put it on the shoulders of dad, as grandfathers also call him.
To carry out the work, we will need a rectangular piece of wood, the size of which depends on what dimensions, in your opinion, the model you made should be. For example, the dimensions of the finished rifle are 1220 mm in length, 230 mm in height (taking into account the sniper scope), and 88 mm in width.
The material for the model is not wood, but a large piece of broken furniture. You will like this better, for example, a wardrobe door, the bottom of an old street door, etc. In short, a wooden sniper rifle is made on your own from any wood or furniture that is nearby. You also need a steel tube.
Next, prepare your wood carving tools, sander or plane, router, plane, saw, glue, nails, hammer, vice, drill, chalk and varnish. As a place of work, you will choose a garage, as it is also called a labor office.
Material and tools
The choice of wood for the work largely depends on the size of the carved figure. So, to produce a small figure of a bear you will need huge branches and small logs. The main thing is that the material is free of damage, cracks and signs of decay. For large sculptures, thick, massive logs are chosen.
Experienced woodcarvers recommend that new woodcarvers use rectangular bars for sculptural carving. It is easier to transfer the image onto the block and the spatial perception of the future sculpture will be better. As for wood species, the most common are:
- Linden. This material cuts perfectly - simply and softly. Example of a carved linden bear
The structure of the linden tree is light and unblemished, without a pronounced pattern. The wood warps little and practically does not crack.
- Alder. More awesome carving material. Resistant to cracks, perfectly cut and processed.
- Aspen. In terms of softness and ease of processing, they are close to linden. If the aspen is not varnished, over time the product will acquire a noble silver color. But such wood is prone to chipping, so it is better to use it for large-relief sculptures.
- Birch. Wood of medium hardness. It cuts more terribly, is very warped and is simply suitable for small souvenirs and details. It has a beautiful wood texture and is easy to paint.
- Nut. An excellent option for narrow artistic carvings. The wood cuts well, is not susceptible to chipping, does not warp and has a very decorative appearance.
- Pine. Compacted wood is difficult to cut and is prone to chipping. Suitable for huge carvings.
READ Screw L on the chainsaw adjustment
Figurine of a carved bear made of walnut
Wood for carving is perfectly dried - less than 15% humidity. Products made from material with high humidity will begin to explode and warp when dry. It is better to dry the workpieces at home, in a warm place, wrapped in plastic.
Although new ones are advised to start learning with softwood, its structure is much easier to cut through with an imprecise motion than harder varieties. Therefore, from time to time it is more convenient to use wood of harder species. A successful, high-quality and well-sharpened tool is more important in carving. You will need the following set of carving tools:
A hacksaw, a hatchet, and a chainsaw can be useful for large sculptures. These tools are needed for rough initial cutting of the workpiece.
The process of carving a bear from a log
Different types of chisels for wood carving
The main stages of creating a sculpture from wood
To make a sculpture of a bear or any other three-dimensional figure, the following steps are performed:
- Creating a sketch. First, a drawing of the future carved sculpture needs to be drawn, preferably in several projections: side view, back and front.
- Transferring the sketch to the workpiece. The contours of the drawing are transferred to the workpiece. It is convenient to transfer a drawing onto a rectangular block, especially several projections of the drawing.
- Creation of a molded model. One of the rules of the designer is the preliminary creation of a hidden figure in plasticine or clay. This allows you to avoid many mistakes during carving and perfectly imagine the figure in space.
- Rough cutting. When the wood is cut down, our client leaves the excess with a saw or hatchet. Small parts are cut out with an adze. A selection of various wood sculptures
The output is made on four sides when the sculpture consists of rectangular parts.
Wood carved bear
Large sculpture is considered the most complex type of artistic wood carving. You should start making huge figures on your own only after familiarizing yourself with the rest of the techniques and methods of carving. A particularly popular theme for creating wooden sculptures is the image of a bear.
Carved Bear Wood Sculpture Design
This popular rumor about the mighty owner of the forest has inspired creativity among craftsmen since ancient times. It must be seen that no animal exists so often in carved art as the bear.
Bear sculpture
The principles for creating a carved sculpture of a bear will differ in some ways from the basic tips for creating huge compositions. The drawing is transferred to the wood, and the bear is cut out in stages - from preparatory finishing to detailing small features. The rough finishing of a large sculpture is done with a chainsaw. The space between the legs needs to be cut out with an adze. At times it makes sense not to cut down the legs of the bear until the detailed work on the top of the animal has been done. This way, the stop will be more reliable and there is no risk of breaking the legs of the workpiece.
This method is faster than lengthy rounding of parts with cutters and chisels. The only drawback is that the tool becomes dull faster on a polished surface.
Sources:
https://www.babyblog.ru/theme/kak-vyrezat-iz-dereva https://rezbaderevo.ru/cherep-cheloveka https://rezbaderevo.ru/kak-nauchitsya-vyrezat-lico https://fb .ru/article/190066/kak-sdelat-iz-dereva-snayperskuyu-vintovku-snayperskaya-vintovka-iz-dereva-svoimi-rukami https://proekt-sam.ru/rezba/medved-iz-dereva.html
How to process correctly
As an example, we will look at the features of processing elk antlers.
In order for the trophy to look good and be stored for a long time, it is necessary to process it correctly:
- Dry the trophy a little.
- Remove dirt with a soft bristle brush.
- Polish with a natural cloth using wax.
After processing, the trophies are fixed on a stand. Thus, you can easily figure out how to make deer antlers with your own hands.
Hunting trophies and their collecting
They even came up with the term “trophy hunting.” People who hunt bears consider the skin, skull and claws of the killed animal to be trophies. Killed birds are stuffed or their claws and most beautiful feathers are preserved. Boar and elk heads are also highly prized. But the most valuable exhibit in any hunter’s collection is the horns of ungulates - elk, deer, deer or bison. Even if for some reason the animal only had one horn, it can be used to make a beautiful wall decoration. The horns of ungulates are not always the same size or shape. But this does not stop avid collectors at all.
An indicator of the success of any hunter is the collection of antlers of one animal. They are collected after the elk or deer shed their antlers. You need to monitor the ungulate, know all its habitats, and the main routes of movement. The main exhibit is a skull with horns, which the hunter obtains after the death of the animal.
The horns of ungulates are most often voluminous and heavy. A special shield or medallion is made for them. Medallions for hunting trophies can be purchased at the store or made with your own hands. Even a person without special knowledge and skills can cope with this matter.