Since ancient times, our ancestors wore rings as amulets. Esotericists believe that due to their close contact with the skin and their location in the area where bioenergy lines are concentrated, rings are the most effective protectors against negativity from the entire range of jewelry. And along the way, they can also serve as talismans for good luck.
It is believed that the most effective amulets and talismans are those made by hand for yourself or very close people: they are initially saturated with the energy of the master. Perhaps this is why many people prefer to create rings with their own hands. Or do they simply want to realize their creative potential and replenish their arsenal with jewelry that meets their own ideas of beauty?
None of this matters. The main thing is that each person can make a ring on their own. The most difficult thing to work with, of course, is metals and stones. But a simple wooden ring can be carved by any man with hands growing out of their proper place.
What kind of wood can a ring be made from?
Wooden finger rings are stylish jewelry with a deep sacred meaning. In connection with the popularization of Slavic culture and Rodnoverie, they are rapidly gaining popularity among all segments of the population. And then there’s the tradition of celebrating Wooden weddings!
The fashion for natural materials is growing all over the world. So wooden rings are a sign of good taste and following global fashion trends.
However, wooden rings are still difficult to find on sale. They are presented, perhaps, in stores where they sell hand-made jewelry, and on artisan websites. But, as mentioned above, you can make wood rings yourself, even with minimal tools.
Having cutting and drilling machines for woodworking can significantly speed up and simplify the process. However, our ancestors created wonderful works of decorative and applied art exclusively by hand. Why are we worse?
Theoretically, a wooden ring can be made from any type of wood. However, you need to understand that the softer the material, the easier it is to process. But a ring made of soft wood (for example, pine or alder) will not perform well. And aesthetics, expressed in the beauty of the open natural texture of wood, will remain in question.
Therefore, it is better to use wood to make rings:
- Wild hardwood trees native to Russia. The most common and accessible are oak, hornbeam and ash. Birch also performs well, but it is a little soft for decoration. If you find a walnut, hazel, acacia or dogwood, that’s also good.
- Fruit trees. The wood of cherry, pear, apple and some other trees growing in our gardens has a very interesting texture. Even branches cut off during garden renovation can be used to make jewelry. The main thing is that they are alive and subsequently dried, that is, not rotten.
- Exotics. Eucalyptus, Karelian birch, mahogany or ebony, sandalwood, caesalpinia, Spanish cedar and other representatives of exotic flora are not found in our latitudes. Moreover: some species are on the verge of extinction. But sometimes blocks of their most valuable wood can be found in craft stores.
The wood of some exotics has not only exquisite primitive aesthetics, but also a pleasant aroma. A ring carved from sandalwood or eucalyptus will exude a natural fragrance that is beneficial for health.
The growths on trees (the so-called burls) have a very refined texture. However, they are very hard and difficult to process. In the first stages of independent creativity, you definitely shouldn’t use them.
It is better to sharpen the first ring from simpler wood in order to, so to speak, get the hang of it. You can even use thick plywood if you have it on hand. It is possible that the first product will turn out clumsy, or even break completely. There is no need to be upset: you should just take into account the mistakes and try again!
See all types of wedding rings in the SUNLIGHT catalog
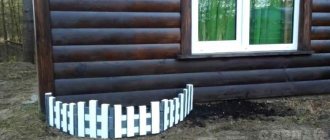
Garden interior items made from saw cuts
Cuts from durable trees look impressive when making objects and elements of garden design.
Bird feeders
A bird feeder is one of the most traditional wooden crafts.
Birch wood is well suited for work. You can make an original bird feeder from round sections of wood, supplementing them with sticks and knots. The craft can be made from plywood and slats, and wood slices and bark can be used for decoration. It is important that the design is safe for birds.
Garden paths
Paths and paths on the site, lined with saw cuts from hardwood, will not only make the landscape unique, but will also last quite a long time if the work is done correctly.
An important step is the preparation of the material. It is necessary to obtain sections of equal thickness from the log. The recommended size is about 15 cm. They must be treated with an antiseptic.
At the site of the future path, a trench of small depth is dug, a layer of film is laid on the bottom, and crushed stone is poured. The material is carefully leveled and compacted.
A layer of sand should be poured on top of the crushed stone. To shrink the materials, the trench is spilled with water. Wooden blanks are laid in random order. The voids between them are filled with sand.
It is important to place the wooden parts as close to each other as possible.
Decorative flowerpots
Such original products serve as an excellent addition to the garden plot.
They can be made from a wide cut of wood. It is important to use healthy wood. Oak cut is not suitable for work due to its high strength. It is better to use birch or beech.
You can make a flowerpot as follows.
- Step back at least 5 cm from the edge of the workpiece and mark the outline.
- Drill several holes with a drill and pour saltpeter into them. You can cut down unnecessary wood using a chainsaw.
The size and shape of the products depends on the source material. Such elements of garden design do not require additional decoration.
Methods for making wooden rings
A DIY wooden ring will most likely be made by cutting. That is, a prototype ring is cut out of a wooden blank using a cutting tool, the central part is selected (with a crown or drill) and the surfaces are processed manually (with sandpaper) or using grinding equipment.
There is an alternative way to make rings - bending. The blank for bending is a strip of wood approximately the width of the future ring. The wood is artificially softened (usually by wetting) and bent into a ring. This method allows you to obtain exquisite jewelry with an original texture, but it is quite complex and difficult to implement at home.
Wooden wedding rings made by a true craftsman are outstanding works of decorative and applied art. This is a wonderful gift for a married couple for a wooden wedding - their fifth anniversary of marriage. But some newlyweds also choose them as their main wedding rings.
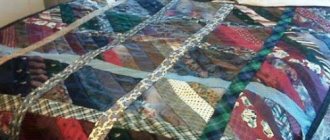
Rings are often made from different types of wood, differing in color and texture. To do this, wooden blanks are pre-glued and then worked as if they were a solid solid.
Resin Application
This master class on handmade rings will require a little more time and preparation; without a certain form, manipulation will not be possible.
To achieve maximum effect in relation to design, the resinous solution is mixed with paper soaked in high-quality glue. Then a certain pattern is formed on the final result of the work; it is difficult to recreate a certain detail, but the abstraction also looks great.
It is not recommended to take solutions that are too dark; it is impossible to notice existing additions on them, which cannot be said about light colors, such as:
- Blue.
- Yellow.
- Green.
As soon as the liquid in the mold hardens, you should remove it and begin to form the future masterpiece using sandpaper or a needle file. Excess body parts of the accessory that have formed in large quantities can be removed using more crude methods, but caution at this stage will not hurt.
Experts do not recommend making cuts; such elements look beautiful, but the fragility of the item will become much greater, and with a careless impact, the decoration will simply crack in this area.
Combinations and decor
Finished wooden rings are rarely left in their original form: delicate jewelry is sensitive to moisture and temperature changes. Therefore, they are usually varnished or at least oiled.
The following can be used as additional materials and decoration:
- epoxy resin;
- painting with paints;
- thread (surface or through);
- burning;
- natural minerals;
- organics;
- metals.
Epoxy resin is an artificial polymer, but it combines surprisingly well with wood. Moreover, natural materials (for example, dried flowers) can act as fillers, and with the help of pigments you can give the insert any color: from a matching tone to a contrasting one.
Painting on wooden rings is used relatively rarely - the attractiveness of the open texture disappears. But if you want to create a decoration in an ethnic style (for example, “a la Russe” or in an oriental style), this option has the right to life.
The most organic and classic option for creating ring decor is carving. Using an ordinary cutter, craftsmen create amazing patterns in different styles. Sets of wooden rings and bracelets made in a similar design look very elegant.
Wood carving is a rather complex craft that you cannot learn in a day, and even without a single wound on your own fingers. Burning can be a worthy alternative. Even a child can handle a burning device, which can be bought for literally pennies.
Who said that wood is not friendly with minerals? Both of them are children of nature. Therefore, all kinds of semi-precious and ornamental stones are often used in decoration. Look how natural and stylish a wooden ring with malachite looks.
As expected, wood combines harmoniously with all kinds of organic matter. Wooden rings with amber look the most interesting. And with inclusions in the form of insects - it’s absolutely fantastic!
Wood is good for everyone, but it cannot be called exemplarily durable and wear-resistant. Therefore, when making wooden rings, a metal base is often used: this provides both strength and additional aesthetics. One thing is bad: it is almost impossible to create such a decoration at home.
If you choose wooden rings as wedding rings and plan to wear them constantly, it is better to choose jewelry with a metal frame. Silver plus valuable wood looks especially attractive in this regard.
Steel ring from the SUNLIGHT catalog
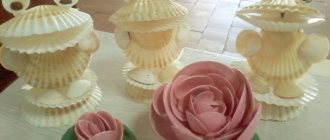
Product assembly
The further process consists of gluing the rings together. A wooden ball is placed in the middle. But if you show your imagination, you can replace it with other materials.
This is what the product looks like when half assembled.
We install the rings on top of the wooden ball in the reverse order. Don't forget to apply glue between layers.
“Creative thinking”: Rosobrnadzor assessed the possibility of transforming the Unified State Exam
Alexandra Shoua's eldest daughter grew up without him, but forgave him all his insults
The average family uses 2250 liters of water: March 22 is World Water Day
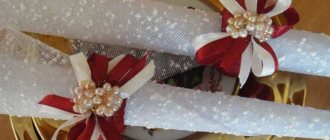
And we finish the process by placing a metal bowl on top of the future candlestick.
A pre-prepared candle will be installed in this container. For such candlesticks I select long candles.
Wood carving for beginners
In order to master the skill of turning objects from ordinary wood into works of art over time, you need to gradually go through lessons, moving from simple to complex.
To learn how to create decorative wooden elements, you need to know the technology of work and possess the necessary tools, without neglecting safety precautions.
Masters advise beginners, especially children, to first master the basics of contour carving. For it you will need:
- wooden canvas or object for decoration;
- set of chisels;
- blunt knife;
- pencils;
- sketch (drawing);
- sandpaper.
First, using a sample, you need to check how to work with each of the chisels, see what it is needed for, and practice.
Then the sketch from the paper needs to be transferred to the workpiece.
Only after studying the basic principles of working with the tool can you proceed to testing the products.
The most common are sketches with images of flora and fauna, and landscape sketches.
After applying the pattern, the wood must be sanded and varnished.
Manufacturing process
Now about the workflow itself. It’s worth saying right away that everything will take a fair amount of time, so you need to be patient, otherwise nothing may work out. Additionally, at the end there will be a video showing the entire manufacturing process.
The coin must be placed on the anvil, held with two fingers. We start hitting it with a spoon, but not very hard. The coin itself must be constantly turned so that it flattens evenly. As soon as the coin has made a full revolution, it needs to be turned the other side and continued to be flattened. This procedure will have to be done more than once until the edges of the coin are flattened to the desired width. On average, this procedure takes one and a half to two hours. If you want the ring to be wide, then you still have to flatten the coin for some time.
The next step after flattening is cutting out the middle. If you have a drill with a cutter at hand, then this will be a quick process, but if not, then a good old jigsaw will come to the rescue. You just need to punch a hole in the coin with something so that you can insert the jigsaw blade. The middle is cut out or drilled out almost completely. You should not leave excess metal, as it may cause discomfort when worn later.
Once all excess has been removed, you can begin stripping and deburring the metal. A round file will help with this. This process is also lengthy, so you will have to be patient.
The penultimate step on the way to the finish is sanding using sandpaper or an engraver with attachments. The first stage of grinding must be done with 600 grit. At the second stage, 800 grit is already used, and at the very end you can already use sandpaper with 1000 grit. Processing must be carried out both from the outside and from the inside and from the sides. Also, if desired, after processing with thousandth grain, you can grind with sandpaper 1400, 1800 and 2000 to achieve the most mirror-like and smooth surface.
And now, the very last step is polishing. For polishing, you can use any paste that you have at home. The most common polish option is goi paste, a time-tested product. If you don’t have such a paste at home, you can buy any polish in a tube or jar at the store.
We apply a little paste to the ring, after which we begin to rub it thoroughly with a soft cloth, thereby polishing. Those who have an engraver at home can use a special polishing attachment, which will significantly speed up the process. Polishing should be carried out until the entire ring has a perfect mirror surface. And here is the promised video on making the ring.
Their varieties
The screw ring closes tightly enough. Varieties of hardware are associated with this element. The ring screw can be:
- With an unwelded ring.
- With a welded ring. Ring screws serve as a reliable fastening for scaffolding. The design feature in the form of a welded end ensures reliable fixation of suspended materials. Due to the fact that the welded screw cannot unbend, it is able to withstand quite large loads. The diameter of such products can reach 16 mm.
Screws with a welded ring are used for fastening scaffolding to the facades or walls of buildings. This type of screws is also used for fixing supporting structures on brick walls, concrete bases and natural stone. As with an unwelded screw, a plastic dowel is used during installation.
After the scaffolding is dismantled, the drilled hole is plugged with a special plug. This plug helps protect the hole and the inserted dowel from moisture.
For very heavy loads, a screw with a round plate under the ring is provided. It is thanks to this that a fairly reliable fixation occurs.
Depending on the type of coating, a ring screw can be:
- Plated with white zinc.
- Plated with yellow zinc.
Some manufacturers produce these screws in different colors. The ring screw can be blue, brown, yellow, purple, gray, orange and red.
Read below about the sizes of ring screws according to GOST.
The video below will tell you what a ring screw for scaffolding is:
Materials and tools
The basis of everything is rings for curtains with a diameter of 5–6 cm. For the proposed rectangular basket you will need 28 pieces. If you choose a different shape, draw a sketch in advance and calculate how many rings you will need.
For tying, use a skein of jute (if you prefer eco style) or other yarn of similar thickness and a suitable hook.
Also useful for this work are small scissors, fishing line or monofilament (for sewing knitted elements) and a needle.
Features of the selection and use of ring screws
The ring screw got its name due to its design features.
- One side of the screw (the head side) is presented in the form of a ring. Moreover, this geometric figure is a continuation of the screw itself.
- Its other part, which enters the material and carries out fastening, is presented in the form of a screw thread. It is the same as the threaded part of other hardware.
The ring screw has a horizontal working position. It is usually mounted on walls and other vertical surfaces. Horizontal installation allows the screw to be loaded to the values for which they are designed.
The principle of holding objects with a screw is as follows. The threaded part of the ring screw expands in the material, and the screwed part is in the drilled hole. The screw is not subject to alignment or pulling forces.
The material used to make the ring screw is hardened carbon steel. The top of the product is coated with zinc to protect it from corrosion. Bend a screw from steel wire. Moreover, the bend itself has a regular geometric shape in the form of a closed ring.
The ring screw is used when working with light-weight rigging devices. It is also used when laying cables and attaching lamps. In the construction industry, such a screw is often used to secure scaffolding to the facade of a building.
A ring screw is not suitable for fastening large objects with the ring facing down. In this case, the load acts on the thread. As a result, suspended objects may simply fall down. Therefore, the ring screw is not suitable for hanging chandeliers and other objects.
Such screws are selected depending on the type of material being fastened, the expected load and the design. The dowel is selected depending on the depth of screwing in; the diameter should be equal to the cross-section of the screw.
Ring screw (photo)