At all times, not excluding modern times, one of the most popular items among jewelry was the chain. Almost every person has it and more than one copy. Jewelry is made in various ways, both manually and on a machine. In this article we will look at how to weave a chain with your own hands and what types are feasible for a novice craftsman.
Diamond shape
The armored type of weaving has polished links located in the same plane. Interlocking loops have a rhombic shape and can be connected with one, two or even three links at a time. There are various combinations of armor weave. For example, small links are woven into large ones or sequentially alternate with each other. The first species is called "Nonna", the second - "Figaro". Another weaving method, which can have a square, oval or round cross-section, is called “Snake” or “Cobra”. Indeed, the cord in appearance resembles a snake’s shell and is slightly curved. Rope chain weaving also belongs to the armored type. When connecting the links, the chain rotates slightly in a certain direction, resembling a rope in appearance.
sea anchor
With the anchor method, the connected links interlock with each other at an angle of 90 0. The loops of a classic chain are oval shaped. This is the simplest weaving method that you can use to make a chain with your own hands. If there is a crossbar between the links, then the weaving is called “Sea Anchor”. There is a coupling of not only narrow, but also wide rings - rollo or chopard. Venetian weaving differs from classical weaving by links that can take the shape of a square or rectangle. One block can contain several elements.
Hand knitting chains
Handmade chains are considered the most reliable. Of course, if we are talking about the high professionalism of jewelers, because it is their skill that affects the durability and beauty of the product. For example, the correct selection of the diameter of the crossbar (a tool for leveling the shape of the ring) and the thickness of the wire determine whether the chain links will break or bend poorly. Such defects cannot be corrected. Hand weaving is used not only in small workshops, but also in large industries. In this way, chains weighing from six grams .
Weaving method "link to link"
To make a chain with your own hands using this method, you need to prepare links of the desired shape. The main parameter for any weaving is the correspondence of the diameters of the rings and the wire. The thinner the material and the wider the link, the more unreliable the chain becomes. The opposite option creates difficulties in weaving. The rings are made by wrapping wire around the bolt, so it shouldn't be too small either.
The loops threaded alternately into each other should have the same direction. You can solder the ends of the loops both during weaving and after it. When heated, the melting metal should fill the gap at the bite site. In this way, a possible chain break will be eliminated and the rings will be continuous.
Weaving a double diamond chain
This type of clutch has flat loops shaped like a diamond or an elongated square. Weaving is considered quite durable and popular. The links can be connected one by one, or in groups of two or three pieces together. Women's chains, as a rule, have a flat shape. Men, in turn, prefer massive products with double or triple weave.
The prepared links are stretched, bent and compressed to achieve the required shape. Then weave a chain by inserting the next loop into the previous one. There is a hitch option in which the third link is threaded into the first and passed through the second, then the fourth is threaded into the second and pulled through the third, and so on. After soldering the loops, the finished chain is flattened using rollers. At the end of the work, the hand-woven chain must be polished.
Bismarck chain weaving technology
The main tools for making jewelry are various crossbars, vices, pliers, files and additional materials. At home, knitting needles or any other needles, for example from an umbrella or a bicycle wheel, can be used as crossbars to weave a chain around the neck. A wire is wound around it, forming a spiral. One end needs to be bent in two places, forming a handle, and a cut must be made on the other to secure the wire.
Next, the spiral must be cut into links so that each loop contains two turns. Then the second is screwed into one element using pliers until a characteristic click is heard. In this way, the product is extended to the required length. When weaving a chain, two turns of each link must be compressed to secure it.
How to choose a chain for needlework?
If you like the chain, take it! It'll be good for something. Such a postulate of experienced needlewomen can forever disappoint a beginner in chains as a creative material. After all, the chain is one of the most capricious types of accessories. It has too many parameters and characteristics. It fits into a creative project only if all of them exactly correspond to the assigned tasks. To understand what exactly should correspond, let’s first understand the tasks, that is, clarify what exactly we need the chain for.
Where are chains used for needlework?
- An independent decoration - in this simplest case, the chain is a decoration in itself.
But the case is not so simple. More precisely, such cases do not gravitate at all to simple chains. Thick links and complex weaving are all designed to emphasize the self-sufficiency of the chain. And these catchy delights, frankly speaking, reject everything from the outside. But a thin and inconspicuous chain, unencumbered by anything, risks simply getting lost in the image. If you want minimal thickness and extreme simplicity, then it would be better to place the chain on your neck, wrist or ankle in several rows and then the thinnest and simplest one will become clearly noticeable.
- The base for a necklace or bracelet is another common use for a chain.
The chain is ideal for hanging pendants, charms, etc. Chains of neutral colors and simple weaves are suitable for such official purposes. If the chain is needed only for demonstration and convenient fixation in the proper place of a catchy jewelry accent, then in no case should it distract attention from it.
A win-win option is simple anchor chains of suitable thickness and color. By the way, about color! Chains, like all accessories for jewelry, can have a coating - a protective or color layer applied over the alloy. For pendants and pendants that move freely along the chain, such chains are not the best option. Paint and any other coating will come off very quickly from constant friction, and perhaps its unsightly interior will show through the shining gloss of the chain.
Pearls look impressive as a basis for jewelry. However, we remember that the larger the decorative elements on the pearl links, the more self-sufficient the chain. And yet, perlina does not like kinks, so it is not suitable for a heavy suspension: it will break instantly. It's the same with nailed chains. Round and flat with discreet weaving, they can be used as bases for pendants, but with the same condition, the pendant should not pull the chain to a break.
A simple chain is simple because it can be decorated with more than just a pendant. You can hang miniature pendants, even from ordinary beads, along its entire length and it will be gratefully transformed. But then, in addition to the simplest chain and beads, you will also need simple fastening fittings: connecting rings, pins, etc.
With the help of connecting fittings, it is also possible to alternate chain fragments with other extended fragments, for example, like this:
- An element of decor - chains, along with leather cords, truncals, ribbons and other yardage materials, lay out spectacular paths in embroidery, become movable pendants, fringe and even belts.
But again, each type of chain needlework has its own nuances. So for embroidery, chains with rounded (not faceted, so as not to fray the thread) links are desirable. Even pinned chains are suitable, but you will have to sew them on, intercepting them across with a transparent thread, otherwise the stitches will be visible. And we remember that dense chains, especially those with a flat cross-section, although they are completely adjacent to the base and look luxurious, but noticeably reduce its elasticity. Such decor sewn onto a hard bag would be appropriate, but not on a chiffon blouse.
Anchor weave chains, like champions of mobility, easily fit into the most graceful curls. And one more chain bonus for embroiderers! In embroidery, which is not usually subject to mechanical friction, the most inexpensive chains with the most unstable coatings are easily used. But this is if other factors harmful to coatings are excluded: sun and water. That is, it is not forbidden to embroider the bodice of a swimsuit with chains, but a chain with an unstable coating will soon become a noticeable defect on it, and not an adornment.
For movable decorative elements, such as fringe, it is recommended to use chains that have full or at least partial mobility in all planes.
Miniature pearls and all types of anchor ones are suitable. And, by the way, a pendant made from a chain in most cases also leaves a simple opportunity to hang a crystal, bead or even a small pendant on the free edge.
- Load-bearing structure - in these cases, in addition to decoration, the chain is also entrusted with solid fastening or holding functionality.
This means that when choosing a chain, they are guided, first of all, by its strength: it is selected depending on the load. Thus, a large chain effectively replaces the shoulder strap of a handbag. But we remember that large ones are often inflated, that is, they are hollow inside and quite fragile, although you can’t tell by their appearance.
Weaving chains with your own hands
A product woven using the Viking Knit method is made of soft wire and does not require soldering. When weaving a chain around the neck, the material used is increased.
Before work, you need to prepare a pencil that will serve as a support, thin copper wire, scissors and a ruler. Weaving begins with preparing the base for the chain. Cut about 40 cm of copper thread and wrap it around the ruler, making 6 turns. Remove the resulting loops from the tool and secure them by wrapping them with the short end of the wire. Move the petals in different directions and place them on the blunt side of the pencil, bending them along the support. Start weaving with a new piece of copper thread 80 cm long. Make a loop by threading the wire through one of the warp petals. Then, turning the pencil, insert the upper end of the thread inside the next petal, bringing it out on the left side. In this way, tie loops around the entire base.
The new row begins with the girth of the loop of the previous circle. Then weaving continues in the same way until the working wire runs out. Twist the tip of the new piece of thread with the previous remainder and continue weaving to the required length. Subsequently, this tip will be hidden in the work. Please note that at the end of the work the chain must be stretched. Its length will almost double.
Using the methods discussed above, both men's and women's chains can be woven. By learning to make jewelry, you will gain good experience with metal and learn basic jewelry making skills.
Share on social media networks:
If you want to wear an exclusive and original version of jewelry, then you don’t have to buy it. It is quite possible to create such decorations with your own hands. So, if you set out to make a chain yourself, then you will have to apply some skill and use some skills to create a beautiful and original thing. In this article we will look at how to make a chain of wire with your own hands.
Viking knit technique
Viking knit is an ancient method of weaving a chain that does not require soldering of the links. In this case, the chain is made from a long piece of gimp, which can always be extended as needed.
Important! This name is translated into Russian as “Viking knots” or “Viking weaving”. This weaving technique got its name because the first piece of jewelry of this type was found in archaeological burials, which belonged to the ancient Vikings. After this discovery there were others that turned out to be even more ancient. However, it is now believed that this weaving technique was originally mastered in the city of Trichipoli, which is located in India.
Such a chain can be made as an antique-style decoration. In this case, to create an antique decoration, you need to prepare the following items:
- thin wire, as a rule, it is best to use copper;
- pencil;
- scissors;
- ruler.
How to make a chain at home using the Viking knit technique:
- First of all, it is necessary to prepare a base on which the very beginning of weaving the chain will be applied. To do this, you need to cut a piece of copper wire about 40 cm long and wrap it around a ruler 5-6 times.
- After this, you need to remove the skein from the ruler, fix the loops, while wrapping the free end of the gimp around them.
- Next, open the fixed loops into a “flower”. This procedure must be carried out very carefully so as not to accidentally crush our loops.
- Then such a “flower” needs to be bent around a pencil.
- Cut another piece of wire with a length of about 65-70 cm, and you can begin the weaving process. To do this, you need to leave a small free end of the wire and make a loop around one of the “petals”.
- Then you need to make a second loop, stepping back one “petal” to the right. We continue in exactly the same way from top to bottom.
- Next you need to make 4 more loops and return again to the first “petal”.
- Now let's move on to the next row. In this case, you need to make the next loop, catching on the first loop of the previous row.
- We continue to knit, each time clinging to the loops of the previous row. We carry out this process until the remaining tip of the wire is about 10-15 cm.
- Now you need to complete the procedure of increasing the gimp so that you can knit further. To do this, you need to cut off another piece and place it under a vertical row of loops.
Important! When, during the knitting process, we reach the area where the wire is built up, we need to grab the new wire along with the loop of the previous row for tight fixation.
- We knit another circle and again approach the area with new wire. Now you need to carry out the correct procedure: to do this, a new piece of wire must be brought up from the left side of the loop, and hooked with the old working wire on the right side of the loop and taken to the bottom direction.
- We knit the old copper thread on several knitting circles together with the loop of the previous row for fixation, after that we cut it off and continue weaving the wire chain with our own hands.
- We continue to knit according to this principle. When, in your opinion, the thread seems to be of sufficient length, the knitted product should be removed from the pencil.
Important! To determine the length of the finished jewelry, you must remember that a knitted product can stretch approximately twice as much.
- And now the most crucial moment: you need to grab the ends with your fingers, stretch the weave and see how it changes.
How are chains made?
Historically, chain fishing developed where the weapons industry had developed even earlier. And to be even more precise, the same craftsmen who were skilled in weaving chain mail began to weave jewelry chains. By and large, a chain is one row of chain mail. Put several rows together and you have metal armor. The demand for jewelry in peacetime exceeds the demand for military uniforms, which is why chainmail masters earned extra money in handicraft jewelry production, adapting to their needs all the skills and abilities passed down from generation to generation. This is exactly how many now famous jewelry productions were born.
Weaving a chain occurs in several stages that remain unchanged for centuries:
- Preparation of a metal alloy . The source material, which can be based on both noble metals (gold, silver, platinum group metals) with alloying additives (improving ductility, strength, appearance) and less expensive metals, but also suitable for weaving.
- Wire drawing is a complex process even now when it is done not by hand, but by machine. The final thickness of the chain depends on the diameter of this workpiece.
- Viteika is the name given to a wire twisted into a spring. Nowadays, the twisting of the coils is also entrusted to a machine, which allows the coils to be laid quickly and evenly.
- Links - they are obtained by simply cutting the twist into small ones: into one or several, if required by the method of further weaving, fragments of coils.
- Assembly - a chain is assembled from individual links, connecting them in a certain sequence dictated by the type of weaving (we will talk about the variety of weaving chains separately).
- Soldering - solder is applied to the joints of each link and, under the influence of temperature, the initially separated links are soldered, becoming solid, continuous, without beginning or end.
- Cleaving - smoothing out all the unavoidable irregularities and deformations during assembly, giving the chain its final shape: the cross-section of the already assembled chain is made round, oval, square or flat. Now this operation is also successfully carried out by machines.
- Cutting is already an optional tuning. For additional shine, it is possible to apply light-refracting edges to the chain links with a cutter. Now this jewelry process is also fully or partially mechanized.
Chains, such as complete necklaces or bracelets, are cut to the required length and equipped with a suitable clasp. Meter - those that are made only to become a creative material, can be subjected to additional cosmetic procedures, such as painting or applying protective coatings, but these are nuances.
The overall picture is clear. The basis of chain weaving is still the same, invented by ancient shipbuilders and gunsmiths, and later only improved techniques. But, as is already clear from the mention of all kinds of machines, the technology for manufacturing chains, and with them the speed, did not stand still. This made chains, even platinum or gold, accessible to the masses. But not all chains. Hand-made and only hand-made designer exclusives are still incredibly expensive.
So, chains are now made in three ways:
- Hand weaving;
- Machine knitting;
- Stamping.
Let us immediately note that hand-woven chains are, even if not exclusive, still a type of jewelry art. Such expensive jewelry is made mainly in small private workshops. Masters of hand-weaving chains can also be found in the serial production of jewelry, but they are not involved in the mass stamping workshop, but in the production of individual branded products. Therefore, searching for a hand-woven chain among inexpensive hobby goods is a pointless exercise. They are not and cannot be among our assortment. Therefore, we will dwell in more detail on only two other methods of weaving chains, which are relevant not only for jewelry making, but also for the production of inexpensive costume jewelry and accessories for it.
Machine knitting chains
It means making a chain using chain knitting machines. There are currently many specialized machines that weave chains of a certain type and size, and this set is constantly being replenished with new ones. For a general idea, let’s just say that one more or less large jewelry factory can have more than a hundred machines. But, at the same time, there are still types of weaving that are done only by hand (for example, complex versions of Bismarck), that is, machines that could replace the painstaking manual work of a virtuoso craftsman have never been invented for them.
Some people still argue that machine-knitted chains are certainly inferior in strength to those woven by hand. Once upon a time this was indeed the case, but with the improvement of machines, the quality of the chains they produced also changed for the better. Now, machine-knitted chains from reputable manufacturers are inferior to hand-knitted ones in beauty, but not in strength.
Moreover, they also have a number of advantages. Thus, the thinnest and lightest chains that are currently on the market cannot be woven by hand by any Lefty. But a high-tech machine performs microscopic operations easily and simply. Modern chain knitting machines weave from wire with a thickness of 0.15 mm! The simplest anchor weaving chain, thanks to this machine, grows 600 links in a minute! We owe such speeds not only to diverse and high-quality, but also affordable materials.
Stamping chains
The fastest and easiest modern method of making jewelry and costume jewelry chains. The links of such chains are not cut from wire, but are obtained using special cutting dies from sheet metal. And then these links are assembled manually or mechanically, like a designer whose parts are strung on top of each other, without additionally securing the joints by soldering. This method of making a chain is the least energy-consuming, but it is also the least reliable. Stamped chains, even those assembled from fairly thick links, are just as easy to disassemble, that is, they lose integrity if turned incorrectly, accidentally pressed, etc. Repairing them without knowing the connection diagram (what a puzzle!) is problematic.
Recommendations on how to make a chain with your own hands
Consider the recommendations below for making antique jewelry with your own hands.
Tip 1
If you purchase an ordinary metal crochet hook and soft wire, then with certain skills and dexterity, you can knit a decent chain of the required length. It is important that the thickness of the hook matches the thickness of the gimp.
The technique for knitting a wire chain is very simple:
- When the first loop is made, the next one needs to be picked up with a hook and pulled through the previous loop.
- Pull the threaded loop to the required length.
- We repeat this procedure of pulling a loop out of a loop so many times until the product is the desired length.
Important! The thickness of the hook must correspond to the thickness of the wire. Otherwise:
- If the hook turns out to be much thicker than the wire used, you will get huge holes.
- If the hook is thinner than the wire used, the knitting process becomes more complicated, since the hook will not be able to properly grip the loops.
Tip 2
How to make a chain with your own hands? If you want to make a chain from brass, steel or copper, then the wire must first be annealed so that the metal becomes soft and pliable. For this:
- Make a template in advance and use a wooden plank with four nails driven into it, with the points facing outward.
- The nails, which are arranged in a diamond shape, determine the shape of the chain links.
- When using the template, you need to bend the S-shaped links in a sequential order, since the tips of the loops should have an elongated shape.
- The links of the chain are connected both directly to each other and using rings, which are made like winding the wire of a pencil, and each turn must be bitten off with wire cutters.
Important! Before connecting the chain links, they should be sanded and filed for safe use, as the burrs can scratch the skin or leave puffs on clothing.
Tip 3
You can also make your own chain from silver wire. The manufacturing technique is exactly the same as when creating jewelry from ordinary wire.
Recommendations
To weave a wire chain, you can use one of the traditional twisting techniques. For example, this could be an anchor method, which requires connecting the links to each other at an angle of 90 degrees. In this case, individual links should have an oval shape. If a crossbar is added between the individual links, the weaving can be called a “sea anchor.”
For information on the Viking weaving technique for creating a chain of wire with your own hands, see below.
Source
Weaving from individual rings
How to make a chain from wire:
- First you need to cut the prepared wire into several small pieces that are about 5 cm long.
- Then bend the ends and press them firmly with the flat part of the pliers. You should end up with a piece of wire whose round ends are bent.
- Then we take the resulting piece of gimp with pliers at the middle point, bend it in half, while pressing one loop to the other.
Important! The pliers must be exactly in the center, otherwise the two loops will not be able to meet. The result is uneven links and the chain looks ugly.
- After the two loops came together and the flat part of the pliers was pressed, one link was ready.
- After this, you need to thread a piece of wire into the loops of the first link and repeat this procedure.
Important! The number of links determines the length of the finished product. Therefore, it is necessary to calculate the length in advance and thus decide how many links you need for this decoration.
If you want to surprise with a decoration made by yourself, you need to do something truly original. Such a thing could be a chain made from ordinary copper wire. To make such an accessory, you need to try hard: the process requires skill, accuracy and patience. But the result is worth all the effort, because the decoration will be truly unique!
Wire crafts. What do you need to know?
Before you start making your own wire products, it is recommended to study photos of DIY wire crafts on the Internet. This will make sure that such products look quite original and can become an excellent interior decoration.
Wire is a material characterized by a high level of flexibility, as a result of which it practically does not break, which means you can turn even the most complex ideas into reality, giving the craft one shape or another.
From wire you can create crafts not only for the home, but also for the garden. For example, it could be flowers, trees.
Tools and materials
Viking knit or “Viking Knot” is one of the oldest techniques for creating chains. It owes its poetic name to archaeological research in the Scandinavian countries, during which similar jewelry was found.
This weaving does not require soldering at all, which makes the task much easier. In addition, the gimp can be constantly lengthened, creating a product of the desired size.
To create the Viking Knot chain you will need the following:
- A coil of thin copper wire;
- Scissors;
- Pencil;
- Ruler.
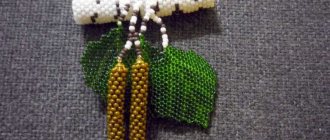
Pendant made of copper wire – master class.
We use a round bead with a hole made of natural stone 10-12 mm. Copper wire 1 mm and 0.4 mm thick. I rarely repeat myself in my jewelry and therefore I don’t know exactly how much wire I will need (God knows what will be born in my head) and therefore I usually take large pieces of thick copper wire for the base, about 50 cm each. The excess can always be cut off later. What if it's not enough?
We weave together 5 pieces of wire in any way.
Next, look at the photo and make it.
A frequent question I hear is why it’s nice and most important to bend braids evenly? To be honest, I do this mostly with my hands. It won’t work out right away - slowly gain experience with practice.
Master class: How to make a wire chain with your own hands.
Making a chain in the Viking style is not difficult, you just need to follow these steps step by step: First, you need to prepare the base on which the first loops of the future decoration will be placed.
This is done like this:
- cut a piece of copper wire about 40 cm in size and wrap it around the ruler 6–7 times.
- Carefully remove the resulting winding and, to secure it, twist it with the free end of the thread.
- After this, you need to move apart, literally open the “flower” of the attached loops. We do this as carefully as possible so as not to bend the wire and spoil the appearance of the product.
- After this, the resulting “flower” needs to go around the edge of the pencil.
- Next, we take another piece of material (about 80 cm) and begin the main process - weaving.
- First of all, we make a loop around one of the so-called “petals”. It is important to remember to leave a small piece of free material.
- For the next loop, we retreat to the right to the adjacent “petal”. To complete this row, you need to knit 4 wire loops and return to the first.
- Then we move on to a new level. To do this, we make another loop, catching on the first from the previous row.
Important! You need to act slowly and carefully so as not to accidentally damage the gimp. Otherwise you'll have to start over.
- In this way we continue to weave a new row. We do this until the free segment is shortened to 12–15 cm.
- To continue knitting, you need to lengthen the gimp. To do this, we take a new piece of material (70–80 cm), which we place under the vertical row. While weaving, you should carefully grab the new wire along with the loop from the previous row for a strong fixation.
- Then, using the new segment, you need to make another loop. At this stage it is important to act as accurately as possible. We bring out the new piece to the left of it, pointing upward, and with the old working wire we cling to the right, leading down.
- We weave the old wire together with the loop of the previous row several times to ensure thorough fixation, then cut off all excess.
- Next, we continue weaving according to the above scheme to the required size - for a bracelet, necklace or something else. When determining the length, it is worth considering that the finished chain is usually stretched twice.
- To complete the work, remove the finished product from the pencil. Carefully take the ends, stretch the resulting weave without sudden movements and look at the result.
Hollow chains - how are they produced?
The technological process of manufacturing hollow chains (some people habitually call them “blown”), which are now experiencing the peak of their popularity, is quite complex technologically. To obtain a high-quality product that can be worn every day without risking deformation, special equipment and careful adherence to technology are required.
The main advantage of hollow chains is that they look very large (and large jewelry is now in fashion!), but they are noticeably lighter in weight than their solid counterparts, which leads to their quite affordable cost.
The “empty body” inside such a chain is achieved thanks to a core of base metal (for example, iron). The core (the middle of iron) is wrapped with a plate of precious metal, and then etched with acid (read more about metal etching technology). By the way, if the technology is not followed, then iron residues inside the gold wire can significantly “lower” the declared quality of the product. After etching the core on hollow chains, a barely noticeable seam remains, but with high-quality production, jewelers will ensure that it is always on the inside of the chain link.
The process of producing hollow jewelry is similar to a conventional machine or manual one. The wire is rolled (thinned) and annealed to align the structure of the metal grains. The chain links are soldered. If necessary, hollow chains are diamond cut and hammered (see chapter below). And at the very last stage, the core is etched.
Hollow chains should be worn as carefully as possible - if a link becomes deformed, it is usually impossible to restore or repair the chain.
Useful tips for making a wire chain
There is another way to make a Viking Knot. It consists of using the most ordinary crochet hook and soft thin wire.
Important! The thickness of the gimp must necessarily correspond to the thickness of the instrument. Otherwise, the process will become significantly more complicated, and you won’t get a beautiful, even weave!
Crocheting a chain is quite easy and does not require special skills. This is done like this: when the first loop is ready, you need to carefully hook the next one and pull it through the previous one. It just sounds complicated, but in fact, a person can figure out the technology even without such experience. Next, carefully pull out the threaded loop to the required length. The process of pulling out the loops is repeated until the decoration reaches the desired size. That's all!
- If desired, the decoration can be made not from copper wire, but from brass, silver or steel.
- But don't choose one that's too thick.
- And in order for the metal used to become soft and pliable, it must be annealed. This can be done over an ordinary gas burner.
- The main thing to remember is safety precautions!
This chain, handmade from wire, is a unique accessory. It can be stylized as antique, creating a themed decoration as if from the Viking era. And if you add original beads and stones, you get something truly unique. This decoration will definitely not go unnoticed!
Chain bracelets, fashionable in 2019
One of the popular trends in jewelry today is the bracelet ring. The decoration consists of chains and consists of a ring and a bracelet connected to each other. The product looks stylish, sophisticated and harmonizes with almost all looks.
The ring can be made entirely of a chain, the bracelet can be made of the same material, and the connecting part should be decorated. Since it is the most decorative part. You can make this element from beads, beads and fishing line or connector.
Everyone knows how to make a bracelet from a chain, but not many will come up with such an unusual idea. And all you need is nothing! But what is the result?
Another option is to add more rings to one design, combining them all with one bracelet. That is, make 2 or 3 finger rings and 1 bracelet, decorating the jewelry with a connecting chain.
To avoid the question of how to make a lock on a bracelet chain, you also need to have all the necessary tools and materials. First of all, this is the clasp itself. It is better to use special locks (magnetic, screw or carabiners). Options 2 and 3 will be more reliable. To easily attach and secure fasteners, you will need pliers.
If you decide to create several jewelry from chains at once, do not try to combine them with each other later, uniqueizing your image. It will not look entirely aesthetically pleasing, rather even ridiculous. But alternately wearing earrings, a necklace and a bracelet will be an excellent opportunity to improve each of the looks.