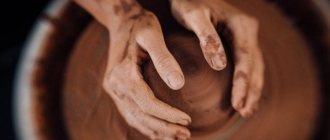
Clay is removed from the ground in already known places. In central Russia, this natural fossil material can be found almost everywhere. The clay must first sit for several months in a large container. It is necessary to periodically add water to it and cover it with film on top for relative tightness.
Take the soaked clay, spread it on a piece of cloth and dry it. Then break the pieces with a hammer until sand flows, having first placed them in burlap. Sift the clay sand through a sieve.
Fill with water again in a ratio of 1:2 for one day. Take out the clay and, placing it on a flat surface, dry it until it is workable.
Whistle bird
In order to make a craft, you will need:
- prepared clay;
- bake;
- sticks, stacks.
Our ancestors in every village knew how to make a clay whistle to please the children. The technology has not been lost, but the craft is being revived, and today you can buy popular clay toys in many stores. You can make this Gorodets whistle yourself.
- Roll into a ball the size of a chicken egg. Make a dent in the center with your thumb.
- Wrap a clay pancake around your finger. Without removing, form the head of our craft.
- Remove the blank from your finger and carefully connect the edges of the hole, keeping the cavity inside the toy.
- Smooth the sides of the whistle with wet fingers.
- Cut a hole at the bottom of the tail.
- Place the stick along the hole and place the clay patch over it.
- Check the whistle for musical quality. They can be adjusted by increasing or decreasing the size of the holes.
- Now begins the sculpting of the decorative parts of the toy, using water as glue. Sculpt the paws for better stability, the comb, beak and eyes. Apply a pattern on the wings in a stack.
- Make two small through holes on the sides to be able to change the key of the melody and extract not only sound, but also music.
- Smooth out any rough edges with a damp sponge, leave to dry for 3-4 hours, and then bake in an oven at 800°C for 8 hours.
- After firing, the whistle may slightly change its pitch.
INTERESTING: Salt dough modeling for beginners
Making a clay whistle “Cockerel”
The shape of the cockerel is interesting because at the master class there is an introduction to different techniques for working with clay: modeling the shape, gluing parts, working with tools for decorating and punching holes for sound, plus coloring the product, but this is after drying and firing, that is separate master class.
What is necessary:
The workplace is a small table on which you can place a bowl of water and 2-3 boards for plasticine.
Clothing - any comfortable, according to the season. It is better if the sleeves are easy to roll up or pull up. Clay is wiped off from your hands in a flash, but from fabric you will have to rub it off or wash it off. An apron is recommended for children.
Materials: pottery clay, industrial water (tap).
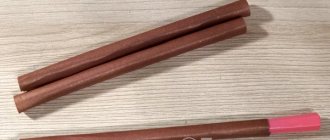
Tool - a board for working with plasticine; a round wooden profile 1-2 cm in diameter (like an awl handle); wooden birdie (narrow flat stick, tapering towards the end); toothpick or stick of small diameter; body or pen charge; a narrow spatula for mixing clay slip (can be dental or something flat); a plastic bag or lid from cosmetics (if you need to store the slip for a long time); water container; kitchen sponge; rag-towel.
Main stages:
Briefly, the manufacturing scheme looks like this: we roll a ball out of clay, put it on a stick (mushroom), roll out the body (cup) a little and lift the bird’s head. Next, remove the blank from the stick, tighten the open edge and glue the tuft. Then we punch holes to form sound, decorate and sign the product.
So, let's roll up our sleeves and get started.
1. Cut off a small piece of clay and roll it into a ball. Slight irregularities are acceptable, but the overall shape should be round.
2. Place the ball in your palm and press it in the middle with a stick. You need to feel through the clay that the stick is already close, that is, the wall thickness will be up to 1 cm.
3. Roll out the edge of the clay along the stick to make a cup out of the mushroom. It is important to obtain a more or less even wall thickness. To do this, just roll out just a little clay, extending the edge by 1-2 cm.
4. Stroke the clay with slight pressure in the direction of one point. First, it is better to move your thumb in the direction of your index finger, fixed around the selected place. As soon as the clay rises as a tubercle, you can gently squeeze it with two fingers - the thumb and forefinger. The task is to give the general outline of the neck and head.
Nuances: We moisten the working finger with a washcloth as soon as the clay stops ironing and begins to break off or pull on the finger. If you dip it in water, there will be dirt on the surface, and the wall will be saturated with moisture and will be more difficult to penetrate for whistling. The other extreme is too dry clay. If the area of contact of the hand (palm) with the clay is large, then the mass heats up and quickly releases moisture. To avoid this, it is better to touch the surface of the product with your fingertips, dipping them into a damp sponge from time to time.
5. Take out the stick. If it sticks, you need to cover the workpiece with one hand so that there is a maximum contact area, and take the stick with the other and rotate your hands in different directions - this way there is less chance of deforming the overall shape.
6. Close the camera and attach the crest.
To close the camera, an untrained person can first train their fingers. Place one palm on the edge of the other so that your fingers point straight away from you. The palms form a cup, you can put a sponge in it and press it with your thumbs, holding them together (see the video at the end on how to do this).
Close the edges of the cup using exactly the same movements. We place it in our hands with the bottom facing us and the hole facing away from us. We begin to gradually squeeze the walls from the middle of the glass, turning it smoothly. After the first circle, the fingers move closer to the far edge and the force increases. On the third or fourth circle, the walls should come together and they need to be pressed tightly and smoothed.
Nuances: Use the natural geometry of the surface of your thumbs. If you direct them away from you, the line of transition from the bird’s body to the tail will be smooth. If the fingers point at each other, the transition will be more gradual.
To glue the tuft, you need to prepare a slip. This is a special glue made from the same type of clay with the addition of water. It's very easy to make. Roll out some clay into a pancake, press the relief into it and squeeze out a few drops of water from the sponge. Take a spatula and mix until smooth, resembling thick sour cream in consistency. If necessary, add water or a little clay.
Making the tuft itself is very simple. Roll out a small sausage from clay and cut it into three pieces of different sizes. We roll each ball into a ball, and then squeeze its edges to make a droplet. We make the narrow part a little flat to increase the area of contact with the cockerel’s head - this way the crest will stick better.
Apply a little slip to the bottom of the prepared droplets and spread it evenly, like butter on bread. We apply them one by one to the surface of the product, starting with the largest (green in the figure). We press a little so that the contact is tight. Next, smooth the edges of the joints with a rounded stick or knife, ideally with a metal spatula. This instrument is commonly used by dentists and can be found in pharmacies that sell medical equipment.
If you are sure that the shape will not be damaged, you can glue the tuft after the hole for the sound has been made.
7-8. We break through the air divider. This is a narrow edge that separates the flow of air blown into the chamber. To make it, we use a birdie - a narrow, tapering stick.
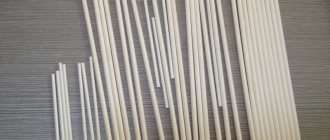
To make a birdie, you can use sushi chopsticks. The long stick is uncomfortable in the hand, so we cut it in half and trim one edge with a stationery knife. We level the surface with sandpaper, first coarser, 240 grit, then 500-800. If the sushi chopsticks were made from bamboo, even a thin chopstick will be durable, although the bamboo will wear out over time.
We place the birdie at an angle of 45 degrees to the bottom of the cockerel, on the line where the solid clay mass of the tail passes into the chamber of the internal void. We break through the wall and level the birdie so that it can be removed at an angle of 90 degrees. At the same time, it is extremely important to maintain the air cutting line, so we forcefully pull the birdie from it to the tail. You can pull the birdie away from you or towards you, but apply the force in such a way as to maintain the sharpness of the cutting edge when leveling.
9. We use the same birdie to make a tunnel in the direction of the air cutting line. Having estimated by eye where it should come out, we move the stick with a smooth movement from the tail to the cherished point. There is no need to pump the stick if it comes out in the wrong direction. This will create a wide tunnel from which no sound will come.
If the birdie rests on the clay slightly below the air cutting line, we continue moving to cut off the excess. If it comes out higher, you can turn the entire tail without removing the birdie so that it touches the cherished line. If the stick goes into the stomach, you need to leave it in the tail, holding it so that it does not wobble, and press the clay against it from above at an acute angle. That is, this is how the air cutting line descends to meet the air flow from the tunnel.
Carefully and smoothly remove the birdie and use a toothpick to punch two holes on the sides of the birdie. By closing and opening them, you can play different melodies on a clay whistle.
The final stage is decorating the cockerel. The best option is relief embossing. In order to draw eyes, it is enough to lightly press the charge or body from a pen into the surface. By pressing the stacks at different angles, you can achieve the most bizarre patterns. And here it is better not to restrain your imagination with strict instructions, because that’s what creativity is for, to enjoy your own discoveries.
Next comes drying and firing. For the product to dry, 2-3 days at room temperature are usually sufficient. Then we send it to the pottery kiln to fry it at 900-1000C. If this is not done, the cockerel will sing and you can even paint it, but the product will be more fragile than a fired one, and if it gets into water it will get wet and become a lump of clay.
* * *
Then, after firing, you can paint the cockerel in any colorful patterns. For painting you need acrylic on ceramics and glass. These paints sometimes require heating to fuse the colorant and surface, but this procedure requires only 100-150 degrees of heat and can be done at home. Or we use paints that do not require sintering.
Master class video.
With respect and wishes for pleasant creative discoveries,
Anatoly Filozof
Kostroma cockerel
The manufacturing principle is the same, with the exception of a few nuances:
- fine lines of drawing, characteristic patterns and elegance of processing;
- raw materials – red clay;
- applying glaze.
To decorate a clay toy with glaze, double firing is required. The first preliminary lasts 1 hour at a temperature of 200°C. Next, a layer of glaze is applied to the clay, and the craft is again placed in the oven for several hours.
Glaze is a glass alloy (expanded clay), which is best purchased in a store. By the way, it is not necessary to apply it to the entire surface. You can get creative and make a design on the whistle with icing.
Modeling whistle toys
Modeling whistle toys can be done in different ways.
Methods for sculpting from a piece:
1. Modeling “from a reel”
Animals are sculpted in this way: a dog, a bear, a cow, a horse and a male figure.
Sequence of operations:
1. prepare a piece of clay of such a size that it fits in an almost closed palm; 2. roll into an egg-shaped ball; 3. visually divide the egg into three parts and, grasping the upper part of the egg with two fingers of the right hand (thumb and index), stretch the head (the head is not molded, but is formed by lightly kneading, i.e., with circular movements of the fingers); 4. The lower part of the egg is also kneaded; 5. if the paws (legs) are spread apart, then the edge of the palm marks a dividing line on the body; 6. Next, by pinching and pulling, we continue to sculpt first the head, then the upper and lower paws (legs).
2. Modeling “from the egg”
In this way they sculpt a cockerel, a chicken, a ram.
Sequence of operations:
1. prepare a piece of clay of such a size that it fits in an almost closed palm; 2. roll into an egg-shaped ball; 3. visually divide the egg into three parts and, grasping the upper part of the egg with two fingers of the right hand (thumb and index), shape the head by kneading, i.e. circular movements of the fingers. When making a ram, the first part to be separated (including the horns) must be larger; 4. lift the comb by smoothing the clay (sliding movements of your fingers in an upward direction). At the same time, a sufficient amount of clay is “collected” for a comb or horns and ears; 5. on the front part of the head, mark the eyes symmetrically by pressing the inner and outer sides of the first phalanx of the index finger; 6. shape the breast so that it is convex and wide; 7. “pick up” the paws so that the toy’s fulcrum is the tummy and tail (we make it in the form of a short cylinder); 8. Then, by pinching and pulling, we continue to sculpt small parts.
3. Proportional division of the egg
Horses, dogs, cats, deer, elk, bears and male figures are sculpted in this way.
Sequence of operations:
1. prepare a piece of clay of such a size that it fits in an almost closed palm; 2. roll into an egg-shaped ball; 3. visually divide the egg into three parts and, grasping the upper part of the egg with two fingers of the right hand (thumb and index), shape the head by kneading, i.e. circular movements of the fingers. When sculpting an elk, a horse or a man's head, it is necessary to take into account that the upper part is separated in size larger than one third of the egg. 4. divide the remaining part (two-thirds of the egg) with the edge of the palm or the index finger of the right hand crosswise into 4 parts; 5. Then, by pinching and pulling, we continue to sculpt all parts of the toy.
4. Technique of sculpting with sticking
Toys are molded using this technique: Polkan, Polyanitsa, Sirin Bird.
Modeling is carried out in a sculptural way. We start sculpting with large parts, i.e. First we form the body from the egg, then the head and subsequent smaller parts. All joints of the parts are aligned using a stack and compacted as necessary with a slip.
Method of making a whistle “from your finger”:
1. prepare a piece of clay of such a size that it fits in an almost closed palm; 2. roll into an egg-shaped ball; 3. Using a round moistened stack, make a puncture in depth (slightly less than the height of the piece) and pierce the clay ball with light rotational movements; 4. spread, “falling apart” the sides at the base of the stack, rotating the stack clockwise or counterclockwise until a glass-shaped shape is obtained; 5. turn the work with the glass up and close the seam with an overlap. The narrowest part is for the tail, the thickest part is for the tummy, and the upper part is for the head; 6. we decorate the head, stretch out the paws (paws on the sides, the toy - a whistle - lies on the abdomen); 7. make a whistle.
Method for making a whistle “from a cake”:
1. prepare a piece of clay of such a size that it fits in an almost closed palm; 2. roll into a ball, then roll into a flat cake with a rolling pin; 3. Wrap the index finger of your right hand with an overlap and smooth the seam. This formed a narrow part for the tail; 4. take out your finger and carefully, without squeezing the sides, overlap the middle, which forms the tummy; 5. We connect the lower part of the cake and form a head, lifting it; 6. we decorate all the parts, stretch the legs to the sides; 7. make a whistle.
In this section there is no article with the manufacture of specific toys - various birds and animals using the listed methods, and there is no point in this, because No matter how many people simultaneously sculpt one toy according to a model, it will be different for everyone. The initial shape of the figurine is the same, but the resulting animals are very different. The main thing is to be able to sculpt characteristic details and preserve the folk style. Therefore, one should adhere to classical models in teaching, and here printed publications can serve their purpose, at the initial stage, for example, such popular ones as albums for children's artistic creativity on various types of clay toys or illustrations from books, posters, photos from exhibitions, etc. .d. What is important is the image itself, the proportions of the main parts and, of course, the characteristic details.
All that remains is to work hard to make the whistle toy whistle, and for this you need to learn how to make a whistle.
Source: glina.teploruk.ru
4.1 / 5 ( 51 voice )
Dymkovo toys
These clay crafts are known all over the world. Whistles are made in the same way as others, but they differ in cheerful colors. Traditionally, baked clay in the village of Dymkovo was painted with tempera and natural dyes, made with milk and eggs. Now you can easily replace them with acrylic paints. After sculpting and firing are completed, pick up a brush and paint the Dymkovo whistle, not forgetting that the main background should be white.
Technology for making clay whistles
The main detail in a clay whistle
- this is a whistle. There are three methods of placing a whistle in a ceramic toy - a whistle. The first is when the whistle is made directly in the body of the figure (Abashevskaya, Kozhlyanskaya, modern toys). The second is when the whistle is sculpted separately and then attached to the main figure (Filimonovskaya, Vyrkovskaya toys). The third is when the whistle is molded in the form of a specific image of a bird, and then connected to the main figure. (This technique is used everywhere in figures where other options are not possible).
The whistle device was also made in various ways. Any whistle consists of three elements: an air chamber, an air channel (through which air is blown) and a splitter tongue. An air chamber (internal void) is obtained either by pressing a finger or a “punch” into a lump of clay, or is formed by modeling a layer of clay (like dumplings). Flat, oval or semi-oval sticks are used to pierce the air channel and form a tongue-divider.
Let's look at two main methods of making a whistle device. First, the master places the air channel in the very body of the whistle toy. He does it using a stick tool shaped like a carrot. The master “pulls out” the open end of the chamber, turning it into a tail. Then, with a knife, he evenly cuts off the end of it and with a spear-shaped stick pierces this very tail somewhat from top to bottom so that it almost comes out under the animal’s abdomen. This is the future air flow channel. Then with his finger he removes the “extra” clay, exposing the end of the stick and immediately makes a hole into the air chamber. In terms of the structure of the whistle, Lipetsk, Kursk and Kaluga are similar to Abashev’s toy.” (Figure No. 1)
The second method is typical for the Filimonov toy: “a piece of clay the size of a walnut is rolled into a plate and wrapped around a finger. The end of the cylinder is flattened to form a jug with a thick bottom. The bottom of the jug is pierced with a thin wooden stick “birdie” so that its tip rests on the nail. A wedge-shaped cut is made above the nail. First, the clay is cut at a right angle to the tip of the nail with a stack or a knife, then a second cut is made at an acute angle and the cut clay is removed. The edges of the open side of the jug are gradually squeezed until they come together. The bird’s head is molded from this protrusion.” (Figure No. 2)
The innovation of the modern method of sculpting a whistle toy is that the entire figure is molded from a whole piece of plastic clay (by stretching), excluding small and protruding parts. Then, using a special loop, the internal cavity is selected, and with the loop you can easily select a void that repeats the external configuration of the product, that is, obtain a uniform thickness of the walls of the product (from 4 to 6 mm). The uniform thickness of the walls of the figurine gives a higher quality sound and a greater guarantee against cracking during subsequent drying and firing.
At the next stage, a rectangular air channel is punched with a special punch. It is designed to shape the air blown into the whistle. Next, a sharp protrusion - a dissector - is smeared on the path of the air flow. It is a plate 2.5-3 mm thick, reminiscent of a chisel blade, that is, with a pointed end. It should be larger in size than the hole created when removing the cavity. The plate is carefully smeared in place so that its sharp end deviates from the outlet of the air channel by 5-6 mm.
Now you need to achieve the highest quality sound. This is achieved by the optimal location of the divider relative to the air channel. The incoming air flow should be cut in half - half of the air goes into the cavity of the figure, half - out. The optimal position is established by lightly pressing the cutter cavity with a punch, bending it inward or lifting it. When you have achieved the clearest and loudest sound, you can begin to pierce holes for your fingers in the walls of the figurine with a round, pointed stick (5mm). By closing or opening these holes with your fingers, you will easily notice that the tonality of the sound changes. If you have an ear for music, tuning the instrument will not be difficult for you. The change in sound tone depends on the location and size of the holes. Clay that has not yet hardened makes it easy to cover up unsuccessful holes and punch new ones, that is, the search is carried out by trial and error. The number of finger holes can be from 3 to 7, it depends on the quality of the whistle device, the size of the figure and the proportions of the internal cavity.
You need to remember about the artistic side of the matter - it is better to place the holes on the figurine on the back side, although they can also play a decorative character. For example, on a good soldier, the finger holes can be located on the chest - in one or two rows, in which case they will harmoniously imitate buttons. The last stage of work is smearing small and protruding parts onto the figure (nose, eyes, ears, buttons, etc.) and applying decorative lines, dents, textures with a stack or stamps. (Figure No. 3, 4, 5).
Necessary tool And now more about the tool. (Figure No. 6). The loop is made of steel (spring wire) with a diameter of 0.8 to 1 mm; and one end is rectangular, the other is rounded. First, the cavity in the figurine is selected with a rectangular loop, then a rounded loop is inserted into the resulting rectangular hole and clay is selected from the sides, achieving a uniform thickness of the walls of the product.
Another necessary tool is a punch. It can be made on a grinding wheel from a piece of hacksaw blade. One end of it is rectangular and slightly sharpened (like a chisel), and the other is a knife. The air channel of the whistle device is punched with the rectangular end of the punch. By rocking the punch, it is necessary to achieve a height of the air channel that is 3–4 times greater than the thickness of the punch. Ideally, the air channel at the inlet has a height of 2.5 - 3 mm, and at the outlet 1.2 - 1.5 mm. It should be clean, free of clay crumbs and have clear, rectangular inlet and outlet openings.
To begin with, it is useful to work out the technology for manufacturing and setting up a whistle on simple geometric shapes - a cylinder or parallelepiped. When starting to sculpt this or that figure, you should think about where the whistle device will be located. For example, for a fish it is advantageous to make an air channel in the mouth and, accordingly, select the cavity from the side of the abdomen, while for a soldier the channel is made on the back side of the shako, and the cavity is selected from the back. Only after the technology for making a whistle on a parallelepiped or cylinder has been worked out can you begin to sculpt artistic images.
It should be remembered that baked clay is a very fragile material. Therefore, a whistle toy should not have thin and far protruding parts. The main feature of the sculpture is its volumetric-plastic three-dimensional form, and it is created using sculpting. Any modeling work is done with fingers and palms: they roll up a shapeless mass of clay, flatten it, squeeze it, pull it back, smooth out the volumetric shape. For fine and accurate finishing and decoration of the surface of the product, special tools are used - boxwood or beech stacks and sticks of various profiles. (Figure No. 7). Stacks and sticks are needed for cutting off excess layers of clay, leveling surfaces, making indentations, working in places where the shape is bent, applying texture, etc.
Rice. Tools.
