Original snowflake made of plasticine
You can draw any applications and paintings with plasticine flagella. And considering that New Year is coming soon, I want to create something especially festive and beautiful. A snowflake made of plasticine on cardboard is the best option; not only children in the senior and middle groups of kindergarten can make it with their own hands, this craft is also suitable for the youngest children.
In this master class you will see step by step how to make a snowflake from plasticine with your own hands. It won’t be at all difficult to make such a craft with your children. You will definitely like this kind of creativity. Traditional colors for creating all kinds of snowflakes are white, blue, blue, silver. But no one forbids you to fantasize and make snowflakes brighter, for example, like those shown in the final photo.
Snowflakes are a unique creation of nature. Of course, it is unlikely that you will be able to examine a live image under a microscope with your children, unless you have a microscope and take it outside. But you can easily find drawings and photographs of snowflakes to look at and make sure that they are all unique, have a unique pattern, but the number of rays is the same - 6 pieces. Take our tips as a basis and create your own incredible New Year's masterpieces with your children.
How to make a snowflake from plasticine on cardboard: step-by-step instructions
- Plasticine with a stack (you can use a plastic knife separately if the stacks are not included in the kit).
- Rectangular sheet of cardboard of any format.
Prepare thick paper - the basis of a three-dimensional drawing. The background color does not have to be white; any expressive shade will do. You should also buy plasticine; for very young children it is better to choose very soft one, and also make sure that there is a plastic tool in the box.
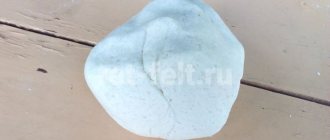
Choose 2 bright shades of plasticine and knead the pieces in your hands separately. It is necessary to achieve absolute softness and pliability of the mass.
Next, you need to stretch the plasticine into very thin threads of uniform thickness. It is more convenient to use a regular syringe for this (fill the mass inside and squeeze it out through the spout). But it will be difficult for children to independently push the plunger inside a syringe filled with plasticine, even soft ones. Therefore, just pull out the soft mass with your fingers. This is useful for fine motor skills of children's hands. Place thin threads on the board and press down on top, rolling out the sausage.
To make it easier to work with thin plasticine threads, cut them in a stack into separate segments.
To create the center of a snowflake, take one piece of plasticine and start twisting it into a flagellum.
Glue the resulting spiral into the center of the paper. Starting from this part, attach all other elements.
Make 6 branches using threads of a contrasting color.
Advantages and disadvantages of plasticine
Before you sculpt food for dolls, you need to make sure that the material is suitable. The advantages of sculpting are ease of use, bright colors, beautiful results and a variety of objects that can be sculpted. Disadvantages include the flexibility of the material and its disposability.
Plasticine crumbles if it dries, therefore, when choosing this material to create toy food, you need to prepare small containers or containers in advance in which you need to put it away immediately after playing.
An alternative option for creating food for toys is polymer clay. This material will last longer; crafts made from it can be baked in the oven, resulting in solid objects. They do not crumble even with great impact on the material. However, plasticine is a material that can be modified during play, using the same piece several times. With polymer clay it’s the other way around – you won’t be able to change an already baked figure.
However, the choice of material will not change the joy of the game. Little children love to sculpt figures from plasticine. And if they are also useful in their favorite game, then the child’s joy and happiness will know no bounds.
Master class on creating snowflakes from plasticine
Marina Nasonova
Master class on creating snowflakes from plasticine
Children and adults like to sculpt from plasticine On the eve of the New Year, this is a great reason to get together with the whole family. But in order to make it as interesting as possible for your child to create decorations with his own hands, it is recommended to try making a snowflake from plasticine . This is not only an unusual and original decoration - working with plasticine helps develop fine motor skills of the baby’s hands, which, in turn, develops his brain activity. So such leisure is not only exciting, fun and interesting, but also as useful as possible. Today we will show you how to make a snowflake from plasticine with your own hands step by step. This is certainly one of the most beautiful and unique creations of nature. Everyone will have their own. Let's get started.
To create a toy, we need plasticine of only one color : white and a circle of blue cardboard.
Divide the plasticine into several pieces.
some of the plasticine into thin sausages, 4 thin and long, and attach them to a circle.
We attach short sausages to the long sausages and get small rays.
the remaining plasticine into 7 identical pieces and roll out balls.
We attach the balls along the edge of the circle.
Now your snowflake is ready . This decoration can be placed on a shelf or placed under the Christmas tree. Or you can make a hole in the cardboard and hang it like a toy on the Christmas tree or decorate the door of the room.
Also, don't forget to use your own ideas for sculpting beautiful snowflakes with your little crafters and don't be afraid to experiment and use different decor.
Master class “Colored snowflakes” Winter is a wonderful time! The snow-white beauty of winter has arrived - the favorite season of children. Sledding, skiing, skating, snow battles. Master class on making snowflakes Prepare a snowflake for the Christmas tree from pasta. We will need: - rolled and straight pasta with an oblique cut, - glue gun, - acrylic paint.
Snowflake using quilling technique
Before you make a voluminous snowflake from white paper strips - using the quilling technique - you need to master the skill of making dense curls - rolls. To do this, the child must learn to wind the ribbon onto a rough wooden stick or a special quilling fork, and then, fixing its tip with glue, carefully remove it from the base. When making a snowflake, each curl will need to be given a special shape, simultaneously squeezing it on both sides with your fingers. You should get a boat pointed at both ends.
Droplets
Next, we will connect six of these paper droplets to each other, fixing the figure with glue. This will form the basis of a snowflake.
The basis
We make hearts from short paper strips. To do this, bend the strip in half and twist both ends onto the stick, directing the twist inward.
heart
We make six hearts and paste them around the base of the snowflake along the periphery.
Glue six hearts
Take blue paper strips.
Blue stripes
We form them into boats.
Blue pumps
Connecting two blue droplets to each other, glue them between the hearts.
Glue the boats
We get an original openwork snowflake!
Openwork snowflake
Modeling snowflakes from plasticine
Unique snowflakes are the most popular decoration for the winter holidays. Children enjoy cutting out unusual paper products before the New Year, Christmas, and during the winter holidays. Everyone is waiting for a fairy tale, and it certainly comes in the form of beautiful snowy weather, a decorated Christmas tree and Santa Claus with gifts. We invite you to fantasize about snowflakes with plasticine and create your own unique patterns. Naturally, first of all, you will have a question: how to make a snowflake strong, because it should be weightless, and with plasticine this is not so easy to achieve. We suggest that you make applications on cardboard, then you will not have any problems with the strength of the product.
To make a snowflake you will need:
- plasticine;
- bead or rhinestone;
- cardboard and scissors.
1. The generally accepted color for creating snowflakes from paper or plasticine is white, but it can be replaced with brighter colors, because snowflakes can be fun and colorful. For example, choose orange and blue for work.
2. Cut out a square of cardboard and prepare the mass for work by kneading it in your hands.
3. Select the color of the middle of the snowflake. For example, it could be a blue cake. Attach it to the center and decorate with a bead.
4. To sculpt patterns and rays, pull the plasticine into thin threads. To do this, pinch off small portions from the soft mass and roll them out with your fingers, resting on a hard surface. Move along the sausage, evenly distributing the plates.
Ready-made doll dishes
Having learned how to make food from plasticine, you can begin more complex lessons. You can make a real masterpiece from polymer clay or high-quality plasticine. And the sculpting process itself will definitely appeal to both adults and children.
Goodies made from plastic can be useful not only for a doll table. Burgers, pizza and other dishes can be used as a refrigerator magnet. To do this, before drying, a special magnet is attached to the back of the product, which can also be purchased in the creativity department.
Eggs and omelet
To make an egg from plasticine, just roll a yellow ball, which will act as a yolk. It must be wrapped in a white layer and this structure must be rolled well in the palms of your hands.
When all the irregularities on the surface of the egg are smoothed out, it is given an elliptical shape. Next, the egg can be cut. When cut, the yolk will be visible, just like in a real egg.
To make an omelette, you will need the same plate of white plasticine. It should be of any shape, so as to exactly resemble a broken egg. Place a small orange ball on top of the white layer and flatten it slightly. Scrambled eggs are ready!
Salami sausage
Making sausages from polymer clay is a simple and interesting activity that even a preschooler can handle.
Making sausage step by step:
- To get a plasticine sausage that cannot be distinguished from the real thing, you will need only two colors - red and white.
- Start modeling with white while the board and hands are clean.
- Thin ropes of any length should be rolled out from white and red flowers.
- Next, you need to fold all the ropes into a bundle, like folding spaghetti.
- The resulting bundle begins to roll out.
- When the future sausage reaches the required thickness, the edges of the product are cut off with a knife.
- When cut, the sausage will have white streaks, making the product look like real salami.
Pizza and pie
Salami and plasticine sausages are perfect for making doll pizza. To make pizza or pie you will need:
- The base is coffee or brown;
- Polymer sausage;
- Red plasticine for sauce.
Roll out the layer several centimeters thick. Cut out a circle from it, which will be the basis for the pie or pizza. Next you should put the filling on the dough. If it is a sweet pie, then the berries are made separately from miniature balls of the desired color.
To decorate the pie, a thin layer of dough is cut into equal strips and laid out on the filling in a grid. The edges of the pie are decorated with a braid of dough. To prepare it, two thin ropes of dough are woven into a braid and secured around the perimeter of the pie.

