Types of stands
You can make a stand for any flowers yourself. The products differ in functionality and method of application. Before starting work, you should decide on the type of stand.
Floor-standing
Designed for large flowerpots and pots. Typically made from durable materials. Such structures can be used as an original screen for zoning a room.
The design can be multi-tiered or intended for one flower.
Wall mounted
The optimal solution to free up space. Small or medium-sized flower pots are usually placed on such a stand. The designs allow you to hide wall defects. For manufacturing, metal or wire is most often used. Can be placed in a corner to utilize extra space.
Mounted
They are a variation of the previous option. The flowerpot looks impressive and stylish. The main drawback is that it is difficult to move the stand from place to place; holes are made in the wall for mounting.
Most often the design is used on a balcony or terrace.
The structures are presented in the form of slides, shelves and racks; they are stationary. Used for hanging flowers with large, hanging leaves. They can be used in an apartment, but more often they serve as a garden decoration. With the help of such a stand you can create additional shadow or compensate for the small area of the flowerbed.
Non-standard designs
Such coasters are made only by hand. Outwardly they may resemble some interior items, vehicles, benches and much more. Decorated with shiny paints of gold, copper, silver. Forged products or stands made of welding wire look very impressive and expensive.
Can be installed both indoors and in the garden. Typically, stands are used for small pots.
Outdoor stands must meet specific requirements. The material must be strong, durable and wear-resistant. Typically, original forms or multi-tiered structures made of metal, wire, and forging are used. Home coasters can be of any type. Usually used when growing light-loving plants. Such designs are designed for small and medium pots. Install home stands on a windowsill, balcony or hang on the wall. If the size of the room allows, then you can use floor types.
Tools and materials
The stand can be made of completely different materials. They use metal and wire, wood, glass, plaster, plastic bottles and much more. Metal structures are durable and can withstand heavy loads. The stand requires special care, otherwise it may start to rust.
Wooden products are very popular. It is better to varnish the stand. Frequent exposure to water when watering plants can lead to swelling and rotting. Working with glass at home is quite difficult, so it is often used as an additional material.
Glass shelves on a metal or wooden frame look great.
A combination of materials is used to combine practicality and beauty. The frame and shelves for large flowers are made from the most durable materials. Shelves for large pots can be made from the same material. Places for small, lightweight pots can be made from finer glass or wire.
The required set of tools directly depends on the selected material. For metal or wire products you will need cold welding. When working with plywood, take a screwdriver, drill and saw. If you use available materials (plastic bottles), then construction tools will not be needed at all.
When making any stand, it is recommended to use a building level.
Requirements for supports
Every gardener wants a plant tied to a support to develop well and please the eye. For this purpose, the supporting structure must be chosen correctly. There are a number of requirements that the support must meet.
Support for indoor and garden flowers should:
- Be reliable and durable. Support the weight of the plant and hold onto the pot well, standing firmly in the ground. For exotic crops, light peat and moss are often used as a substrate. The support will not be able to stand in loose soil. Therefore, it is attached to the pot, and the flowerpot is attached to the windowsill or wall using available materials.
- Allow the plant to spread out completely, evenly.
- Be practical. Stores sometimes sell bulky, pretentious, unstable versions of flower supports. Therefore, it is advisable to create the product yourself. The essence of practicality is that the plant looks beautiful when supported, all branches are well selected.
- Be safe. Therefore, it is better to choose a product from environmentally friendly, natural materials.
- Be attractive in appearance.
DIY flower stands
The most affordable material for making a flower stand at home is wood. For work, you can use old shelves and unnecessary parts of home furniture.
Classic wall flower stand
In order to make such a design, you will need very little available material, tools and a little patience.
You need to prepare in advance:
- shelf or board made of wood or chipboard,
- a decorative element for connecting the structure (in this case, a strong tree branch of a suitable configuration),
- drill,
- saw or jigsaw,
- screws,
- paint,
- varnish,
- pencil,
- brush,
- roulette
The choice of material and fasteners depends on the future load on the stand. It is clear that the larger the dimensions of the product, the more reliable the fasteners are needed.
Master class on making a stand for indoor plants
- Take measurements of all overall dimensions of the future product, taking into account its location and flower pots.
- Cut out all parts of the product in accordance with the drawing and measurements, drill holes for fastenings.
- Process the parts, cut edges, and the base knot for the stand.
- Connect the parts together in accordance with the product sketch.
- Paint the finished product and varnish the surface.
Stands, racks, shelves or racks for indoor plants made of wood require additional surface treatment to prevent moisture. With a high-quality approach, they will last a long time and perfectly decorate the interior of the room.
Hanging structure for flowers
The hanging structure for pots with hanging plants looks original. It is convenient and easy to make.
To implement your plan, you will need several pre-prepared shelves, a strong rope and a drill.
- In the shelves you need to drill two holes on each side. Their diameter must correspond to the diameter of the rope.
- The rope is passed through the prepared holes and fixed at the desired level using knots.
- The original stand is secured with ropes.
This option for placing flowers is ideal for a window sill or loggia. This design is not massive, so it will not greatly shade the room.
A variety of shelving can be made from wood. Their shape can be classic, in the form of a ladder, asymmetrical, and so on. The design can be straight or angular. The main requirement for the product is its aesthetics and durability.
Manufacturing methods
You can make a functional and attractive stand for your favorite flowers with your own hands. Using the design you can decorate a window or wall. If your homemade stand will stand on a windowsill, be sure to take preliminary measurements. Manufacturing options depend on the selected material. Some stands will require scrap materials and a little time. To manufacture complex structures you will need special skills in working with tools.
Made of metal
A simple and convenient option looks like several parallelepipeds with 2 common faces. The work is labor-intensive and requires special skills. It is better if a man does the manufacturing. Pre-draw a drawing and mark all dimensions. For vertical supports you need to make 4 equal segments, and for horizontal edges - 8. From short parts you need to make squares or rhombuses using welding. It is important that they are the same, otherwise the stand will warp. Long posts must be used to connect geometric shapes. Then proceed like this.
- Weld a metal crossbar between the vertical posts. It should be at the same height as the next shelf.
- Make a rectangle out of metal. Dimensions are easy to calculate. The width should correspond to the distance between the vertical parts of the high stand, and the length is calculated according to the previous measurement.
- Cut 8 more small and 4 large pieces. Repeat the procedure. Connect the 2 tiers together by welding.
- Depending on your needs, you can make as many blanks as you want.
We recommend reading: Decoupage of bottles for a wedding: how to paint and decorate wedding champagne with your own hands
From plastic pipes
The flower stand is quite attractive and easy to make. You can craft with your children. The product is suitable not only in the apartment, but also in the garden. You need to take plastic pipes, trim pieces, 2 pieces of regular hose, self-tapping screws (6 pcs.) and a screwdriver. Act like this.
- You need to make rings. Twist the pipe in a spiral so that 2 hoops are formed. To make the task easier, you can use an empty barrel.
- Remove the spiral from the mold and cut. You should get 2 rings.
- Connect the edges using a hose.
- On one ring, make 3 marks at an angle of 120°. Insert self-tapping screws into the holes.
- Make similar marks on the other ring.
- The legs are made of pipes. Cut it into 3 pieces of 40 cm in length.
- Make 3 plugs from the scraps and insert them into the legs.
- At the final stage you need to collect all the parts. Fold the first ring under the legs and screw it to each of them with a screwdriver. Place a second ring on the back of the pipes and screw it to the legs with self-tapping screws.
From plywood
The classic stand is well suited for apartments and houses. You need to take a shelf made of chipboard or PVC, plywood, thick rope, screws, plugs, paints and varnish for decoration, a screwdriver, drill, saw, hammer and screwdriver. For comfortable work you will need a level, tape measure, ruler and pencil. Make the product like this.
- Prepare the material. Calculate the size based on the free space. The width should match the size of the pot. Additional bars in the middle will help make the distance between the shelves the same.
- Drill 2 holes in each shelf with a drill. They need to be placed in parallel. The size of the hole should be such that a thick rope can pass freely.
- Pass the rope through all the holes. Form a loop at the top for hanging, and make a secure knot at the bottom.
- Install the stand. Drill a hole in the wall in the desired location and install the mount. Fix the stand firmly. The wall design is ideal for indoor plants.
From wire
Even a woman can make a structure, the main thing is to have experience in handling cold welding. For work, use welding wire with a diameter of 1 cm. Stock up on cold forging tools and a hammer (800 g). Make a stand like this.
- Draw a sketch, divide it into simple parts. Calculate all sizes. Be sure to consider the diameter of the round blanks for the pots.
- First of all, make a stand and stands. Duplicate the drawn parts with wire and secure with cold welding.
- Make decorative items. These can be various curls, spirals, leaves and flowers. If desired, you can use ready-made metal molds to create these parts. Simply drive the wire into the template with a hammer and remove the desired element.
- Attach all the decorative parts to the main homemade structure using cold welding.
From driftwood
Lovers of natural materials can make a stand from wood. You can use a cut trunk or branch, depending on the desired size. Act like this.
- Cut off any excess knots from the driftwood to create a cylinder. It is convenient to perform the procedure with a grinder.
- Set aside about ¼ of the total diameter of the deck from the ends. Make deep cuts to the depth of the flower pot.
- Cut or hollow out part of the wood between the cuts. Place the pot. This floor stand looks great in the interior.
From plaster
It’s easy to make a product from such material and it won’t take much time. Gypsum is durable and versatile. The main thing is to purchase or make a mold for the stand. It is better to place the product indoors and handle it with care. You can use a suitable flower pot as a mold. You need to pour the gypsum mixture into the container and place another pot on top. There will be a hole inside into which you can insert a flower. Work with the solution like this.
- Pour water into the container and add gypsum in a ratio of 10: 6, respectively.
- Add 1 part slaked lime to all ingredients. The mixture will be more elastic in a liquid state and more durable after drying. The component can be found at any hardware store.
- Pour the solution into the mold and wait until it dries. The exact time is indicated in the instructions; on average, this will take 24-48 hours.
- Decorate the stand. If desired, you can make the plaster already colored. To do this, add gouache to the water while mixing.
From bottles
This stand can even be placed in the garden; it is not afraid of bad weather. A product from scrap materials can be made together with children. Take tape, PVA glue, a roll of toilet paper and a pack of paper napkins, 14 plastic milk bottles, and a roll of medium-thick twisted lace. You will also need some thick cardboard, gold-plated spray paint, and beads or seed beads. Make a stand like this.
- Use tape to wrap 12 bottles into 6 pairs.
- Use 3 pairs to make the bottom. Fold the bottles into a flower shape and secure with tape. Place 1 bottle in the middle so that the neck is 5 cm higher than all the bottles.
- Make another flower from 3 pairs of bottles, but without filling the middle.
- Place the second flower on the bottom of the neck of the bottle so that the middle wide part acts as a rod.
- Wrap the structure with toilet paper, pre-coating it with PVA.
- Lay several layers of napkins in the same way. After each layer you need to wait for the glue to dry.
- Leave the structure for 24 hours.
- Make a pattern on the surface in the form of flowers or something similar.
- Make leaves from a sheet of cardboard and glue them to the product.
- Decorate the flower stand to suit your taste. Finally, coat everything with a coat of gold paint.
Creating a support from PVC pipes
The easiest way is to create a support structure for fruit bushes from PVC pipes, although you will have to spend money on consumables, such supports are the safest and most durable. They do not rust, do not break, and withstand mechanical damage and bad weather, guaranteeing reliable protection of fruit bushes from contact with the ground. To make a beautiful and durable support you will need fiberglass reinforcement, thick wires, and plastic pipes.
First of all, you need to cut long PVC pipes into small pieces about 70 cm long. After this, improvised pegs are driven into the ground, serving as bush supports. Through holes are made in each pipe on the top of the stakes. Through the holes made, reinforcing fiberglass or prepared stranded wires are threaded, performing the function of a frame edging.
The finished structure looks aesthetically pleasing and neat, and in terms of service life it is not inferior to metal supports. At the same time, making a support for a fruit bush or low-growing tree will not take much time - approximately 1-1.5 hours. Garden lanterns that have failed will be an original alternative to plastic pipes, because they are designed to be dug into the ground and look beautiful.
Summarizing all of the above, it is not surprising that many summer residents prefer to make supports with their own hands, because it does not take much time and requires minimal investment. In return, the gardener receives a neat and well-groomed garden plot with saved space where other cultivated plants can be planted. The size and design of the support structures can be constantly changed, while maintaining almost 100% of the harvest.
DIY floor stands
Flower shops offer a huge range of gardening products, including floor stands for flowers and jardinieres. But it can be difficult to choose a design for placing flower pots so that it looks harmonious with the existing design. In addition, a gardener is a creative person and it is more interesting for him to make things with his own hands.
The simplest version of a floor stand is a round shelf on a vertical holder. To make it you will need:
- Material that can be processed (wood, chipboard);
- Drill;
- Edge, iron and PVA glue;
- Screwdriver.
There are three parts: base, leg and shelf. For the stability of the structure, the base must have a diameter of at least 20 cm. The leg is inserted into the grooves of the base, and the shelf is attached. Special glue is applied to the joints of the parts. Finally, the stand is polished and varnished. The flower stand is ready!
Pros of using bush stands
A fence installed for bushes helps solve the following problems:
- The branches of bushes do not lie on the ground. The support prevents plants propagated by liners from growing uncontrollably.
- Berries and fruits do not touch the soil. The harvest will not rot and will always be clean.
- It is more convenient to collect fruits from raised branches.
In addition, the designs of fencing for bushes are simple and can be done with your own hands.
Tabletop flower stands
Cute table stands are widely used in apartments with limited space. They are placed on tables, cabinets, shelves near a source of daylight. They also come in a wide range of forms.
The compactness and small dimensions of such racks provide more scope for creativity. They are made mainly from wood, plastic, twisted metal profile, chipboard, and also woven from any flexible material that is at hand (wicker, rattan, bamboo).
We recommend reading: DIY photo album: design ideas and tips for beginners
Fencing for currant bushes
To maintain bushes in a summer cottage, special fences are used. They are intended for plants such as currants, raspberries, viburnum, blackberries, gooseberries, as well as bushy flowers - roses or peonies. Thanks to this fencing, the bushes have a more compact, neat appearance, and the crown of the plants is formed correctly.
An example of a homemade fence stand for currant bushes
Making such a stand with your own hands
You can make a simple and elegant flower stand with your own hands at home; it will take just over 30 minutes. To work, you will need parts from a laminated board in such quantities as you need to make shelves for pots, the size of the plates for the shelves is 100 x 150 mm, two long plates measuring 50 x 700 mm and one element 150 x 300 mm. To give the future stand a beautiful look, you need to glue it with an edge using an iron and PVA glue.
To connect the parts together, you will need tools - a drill, a screwdriver, confirmations. Next, the shelves are mounted on a long holder plate and the entire structure is installed on the base. The result is a tabletop, attractive flower stand with four, six or eight shelves (depending on the wishes of the gardener) for flower pots.
Features of fencing front gardens and flower beds
A front garden is a local area enclosed by a low fence. As a rule, a front garden is arranged in front of the house and the road for planting ornamental plants.
The open front garden has no fencing and consists of flower beds, low bushes and a lawn. The closed palisade is fenced around the perimeter of the site with a fence, the height and design of which is selected according to the exterior of the building.
In most cases, the following materials are used to make front garden fencing:
- tree - picket fence. The width and height of the board depends on the personal preferences of the owner. Usually a board of 1–1.5 m is used, which is mounted on transverse guides fixed to a concreted metal pole;
- metal - forged fence with patterns. It consists of ready-made sections that are attached to brickwork or metal poles. It has a high cost due to the high labor costs for their production.
Stone and metal fences without gaps are used quite rarely, as they do not provide plants with enough sunlight, blocking its penetration through the fence.
In some cases, it is possible to install a hedge. These are plants with a dense crown that are planted close to each other. As they grow, they are pruned to form the desired density and shape of the crown. The result is a beautiful hedge of living plants.
The same rules apply for fencing separately located flower beds. The fence should be visually attractive and allow sufficient light to pass through without shading plants and flowers. For flower beds located in fenced areas, it is not necessary to use additional fencing. It is enough to equip a low supporting structure for tall flowers. Small flower beds are fenced with a box made from scrap materials or finished products like decorative borders.
Nuances of fencing grapes
In the central zone, where the average summer temperature is noticeably lower, trellises are used for comfortable growth and fruiting. These are vertical support structures made of various materials. The shape of the trellis is selected depending on the planting pattern and grape variety.
When making trellises yourself, it is better to use high-quality materials, since this is a massive structure, which is not rational to change every season. Especially if a person is engaged in growing grapes on an ongoing basis.
Metal flower stands
Forged products look solid and perfectly complement the interior, adding charm and nobility. To create forged decorative items, square rods and strips are used. Their distinctive feature is their smooth, clear edges. The decorative elements are very massive, strict and suitable for a classic interior with a claim to luxury.
A more pliable material is a round rod. Products made from it are elegant, attractive, with an abundance of curved elements. Such decorative elements visually look airy, light, and add romanticism to the interior.
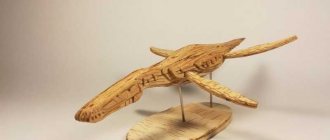
Flower stands made of metal with an abundance of twisted elements look especially interesting. Bicycles, sleds, cars, carriages in the form of a small copy - this is just a small part of what can be made from metal rods and adapted as a flower stand.
DIY metal stand
Making metal flower stands with your own hands is not easy. You will need professional tools for working with metal - a welding machine, an angle grinder, metal profiles 8-10 mm. Without the appropriate skills and equipment, it is better not to create a flower stand yourself. It is enough to make a sketch and take it to the master.
A stand in the shape of a cat is popular among gardeners. To create it, take two profiles of the same length and make several cuts at the bend point. Thanks to the cuts, the profile bends easily. Metal profiles are bent - these are the cat's paws; using a welding machine, they are welded to the third tube - the back. The muzzle is represented by two flat metal triangles welded at a common vertex. Next, a short piece of profile is used to make the cat's whiskers, welding them to the triangle cheeks. Ears, tail, claws are done in the same way. A holder in the form of a lattice for several flower pots is attached to the back. It turns out an original, positive cat-stand. Large flowers on a cat stand, with leaves and stems tending downwards, will look especially good.
An attentive owner always wants to improve his home, add comfort, light, prosperity, and “zest.” Indoor plants are great for these purposes. Only in a house where there are flowers does a good aura and positive mood reign. In order for flowers to be grateful, healthy and delightful with their beauty, they need to be placed in beautiful flower stands.
Wooden for bathroom flowers
A wooden shelf is suitable for a bathroom, but in order for it to last longer and not become a breeding ground for harmful bacteria in the room, you need to coat it with varnish.
From the stairs
In its usual form, it would be awkward to install a staircase shelf; in no case would the solution fit into the design of the home.
But if the staircase is refined, it can become a stylish stand for several pots of flowers.
First you need to sand it, and then remove the boards intended for walking. They are fixed inside the structure.
Sliding rack
It is quite difficult to create a sliding rack with your own hands. To do this, you will need to cut out various square elements and connect them in the form of a snake. It is important that the structure does not settle after assembly (this happens when using wooden elements).
Corner semicircle
A corner stand in a semicircle, which is mounted on the wall, will save useful space in the room. You will need several meters of MDF and a milling machine. Three elements are cut out: two sides and a bottom, and the shelves after. If you stick tape on the ends of the product, the stand will become more beautiful.
On belts
A wall shelf with straps does not have much durability. But it can become a stylish decoration for the interior of a room. To make it you only need two boards and two belts. The shelf is simply placed on the belts, and they are secured with self-tapping screws on the wall.
Glass
The glass shelf will fit into the interior of any room. Glass strips are attached with wooden blocks; you can make a flying version.
Combined
The combinations can be very different. Often made from driftwood and metal, wood and pipes. There are even options made from glass bottles and popsicle sticks. The main thing is to take into account the requirements for sustainability.
driftwood theme
With the help of a stand, real works of art are made from driftwood. The driftwood is secured with four supports and wooden shelves are used.
Why do you need a support for flowers and for what crops is it needed?
Support is required for many plants. For indoor types, it is a decorative and practical detail. Support is required for species with leaves that are not elastic enough to support weight, as well as with fragile and climbing shoots.
Important! Support ensures proper and healthy growth. Her core allows her to do this.
Support is required for:
- plants that form aerial roots (philodendron, monstera);
- plants with long shoots (stephanotis, dipladenia, jasmine);
- for tall plants (Araliaceae);
- for those plants in which all their beauty is shown only when they are tied up (ivy, cissus).
Only with support will these plants grow correctly.
What can you do yourself?
A do-it-yourself flower stand made from scrap material is an operation that can be completed in a few hours. The main condition is the availability of tools and emergency supplies, where something useful for such activities can be found. There are completely simple designs, for the manufacture of which you do not have to empty your wallet or card.
Drawer construction
In this case, you won’t have to tinker with anything. Several boxes of any size (same or different) are painted in a suitable color. After the composition has dried, the objects are placed on top of each other in random order (large ones on the bottom, smaller ones on top).
For greater reliability, all elements are fastened with self-tapping screws. Flower pots are placed in the resulting niches and at the very top of the structure. Such a wall-floor stand will take a minimum of time, but will look quite interesting.
Pallet flower stand
This version of the stand is more suitable for a summer house, but after careful processing of the pallets it can be “fit” for an apartment. Even one pallet is suitable here, which is placed vertically, with the help of self-tapping screws, crossbars and shelves for flowers are screwed to it.
The wood is treated with antiseptic impregnation, sanded with sandpaper, covered with stain or paint, and several layers of varnish are applied. Such structures can not only be placed on the floor, but also hung on the wall.
Elementary wooden stand
This is the easiest way to get a single stand for indoor plants. To make it you will need a drill, a screwdriver, and a chisel. And materials:
- wood (timber, boards, chipboard);
- PVA glue;
- edge.
First, three parts are cut out - the base of the structure, the leg and the shelf for the flower pot. In order for the stand to stand securely on the floor, the minimum diameter of the base of the stand must be at least 30 cm.
A groove is made in it and the shelf for the vertical element. The leg and hole are coated with glue, connected, and the bottom of the product is fixed with self-tapping screws. The shelf is attached in the same way. The final steps are sanding, gluing the edge and applying several layers of varnish, each of which must be completely dry.
Stand-well or woodpile
The simplest option, for its manufacture you need the following materials:
- tubes left over from paper towels (12-16 pieces);
- PVA glue;
- paint: acrylic or oil.
A “woodpile” is made from the bushings: the rows of elements are alternated, each of them is attached to each other using glue. After the composition has dried, the resulting well is coated with paint.
We recommend reading: How to make a dog out of paper - DIY manufacturing diagram
Tree trunk for the benefit of flowers
Those who have become adherents of eco-style will love this natural stand made from a tree trunk. Its length is 100-150 cm, but the final decision is up to the owners of the future model.
- All branches are cut from the trunk with a grinder, obtaining a cylinder.
- 15-20 cm are retreated from its ends, then cuts are made to half the diameter of the tree.
- A hole is hollowed out between them. After processing the wood, pots with indoor flowers are placed in the resulting stand.
Such a “blooming tree” will look spectacular in any room - both in the country and in a city apartment.
Large wooden candlestick
In this case, you will have to look for two blanks - one wide for the cuts, the other for the candlestick itself. For a stand, the ideal section (or several) of the tree where the branching begins.
- The bottom of the second workpiece is cut down so that a smooth and stable surface is obtained.
- Several cuts are made from a wide log - according to the number of branches, the width of these disks is 2, 3 or 4 cm.
- The top of the branches is cut down parallel to the base of the candlestick, then discs are attached to it with self-tapping screws.
For a longer service life, the wood is pre-treated with an antiseptic. The finished product can be painted, varnished, or left without any protective or decorative coating.
Simple flower stands
It may be hard to believe, but stands for indoor flowers can be made without spending on expensive materials. We bring to your attention the lightest and most cost-effective design options.
Stand in the form of a woodpile
Original coasters are made from simple paper towel rolls. Alternate them, coat them with PVA glue, and fold the “woodpile”. Paint it with acrylic or oil paint. If desired, decorate the design with colored yarn, which seems to entangle the “logs”.
Flower model for window installation
A stand for flowers on the windowsill should not only be comfortable, but also light. You can cut identical pieces of plywood of any configuration to your liking, make holes with a drill, string them onto a pipe, and secure them with special fasteners at the required distance. After that, put everything on the window and decorate it with beautiful flowers in designer flower pots. We wrote earlier about how to make flowerpots with your own hands.
Stylish forging
Forged jewelry always looks appropriate and elegant. They can decorate both the interior and emphasize the features of landscape design. The only problem is that not every person can make such strong and durable stands on their own.
Floor flower stands made from tree trunk
For lovers of eco-style, wood options will be interesting, which would look as natural as possible and fit perfectly into the interior or landscape design. For example, a wooden floor stand made from a felled solid trunk will look beautiful. For this:
- Using a grinder, cut off the excess branches to make a cylinder about 1-1.5 m long.
- Step back 20-25 cm from the ends and make deep cuts to the middle of the diameter.
- Hollow out the area between the cuts to create a place where small indoor plants will later be installed.
After finishing the work, when looking at the structure, you will get the feeling of a flowering log, which looks more than impressive.
Wooden candlestick
This is another option from a tree trunk, but in this case the section of the trunk where the branching occurs is taken.
- The bottom is cut down in such a way as to create a comfortable and stable platform.
- In addition, from the thickest part of the log, discs about 3-4 cm thick are cut according to the number of branches.
- Each cut is secured with a self-tapping screw on its branch parallel to the floor.
- After this, the structure can be painted, and if you are a supporter of eco-style, then leave the stump in its original form.
- As a result, you will get a floor stand for flowers that resembles a large candlestick.
Chair flower stand
A great idea to breathe new life into an old chair. In order to make such an original design and install large flowers on it, you need to:
- remove the upholstery from the seat;
- cut a blank from plywood according to its shape;
- make small sides by gluing wooden strips along the contour 4-6 cm wide;
- reinforce this box instead of a seat.
In such a niche you can either pour soil and plant flowers, or put ready-made pots with plants. Keep in mind that the more vintage and older the chair is, the more interesting the improvised bookcase will be.
Interesting! Cut a hole in the seat that is 3-4 cm smaller than the top edge of the flower pot. Insert the pot into the hole and, if necessary, strengthen it with foam. If you don’t need a high stand, then a high chair or stool will make an equally interesting low design.
Creative model of a two- or three-wheeled bicycle
A flower stand in the shape of a bicycle will become a real decoration of your garden. For this:
- Flowers are placed on a bicycle in the front basket or rear trunk.
- Attach the box to the front and rear fenders with wire or clamps.
- You will need white or any colored metal paint. Paint the entire structure and place flower pots in the boxes.
Such a bicycle is either attached to buried pipes, or placed and screwed to a stump.
Stands made of plastic bottles
Stylish products can be made from the garbage that people throw into landfills every day. As you can see in the photo, outdoor coasters that are resistant to rain and snow can be made from simple plastic bottles. The following materials will be required:
- scotch;
- PVA glue;
- a skein of thin twisted cord;
- roll of toilet paper;
- 1 pack of paper napkins;
- 13 plastic milk bottles;
- lentils or beads, beads;
- thick cardboard;
- gold plated paint.
Algorithm of actions:
- Tie 12 bottles in pairs with tape to make 6 pairs.
- Using the same tape, form the lower part of the product from 3 pairs of bottles into a “flower” shape, and strengthen one of the 2 remaining unpaired bottles in the middle so that its neck rises 4-5 cm above the others.
- Knit another similar part, but without the bottle in the middle. This part will be the top.
- “Push” the top onto the bottom with the necks so that the protruding central bottle acts as a stem.
- Wrap the device in toilet paper, covering it with glue.
- Place another 2-3 napkin layers, covering each one with glue and allowing it to dry.
- Leave the workpiece to dry at room temperature for a day.
- Apply a design you like to the surface, for example, a floral one.
- Cut out leaves from cardboard and glue them to the surface of the stand.
- Lay out the flowers from beads and seed beads, and the stems and cuttings of the floral decoration can be imitated with cord.
- Paint the finished structure with gold and let it dry.
Decorative design of wires
Another interesting idea for decorating a living room or bedroom is decorating wires from electrical appliances that cannot be hidden in the wall. We will not violate fire safety rules; no one forbids disguising the wires and making them an independent decorative element. The wire can be laid so that it forms a pattern or composition on the wall, wrapped with decorative tape or braid, or decorated as a climbing plant.
Using adhesive tape or paper, you can cut out bird shapes, leaves, and flowers that can be placed along the wire attached to the wall.
In order to decorate walls with your own hands, you do not need to have special skills or use expensive materials. Any ideas on how to beautifully decorate surfaces in an apartment can be implemented by anyone. Any person can handle wall decoration using the proposed methods without the help of professional designers. The main thing in this matter is imagination and creative spirit.