Despite the huge selection of backpacks and bags in modern stores, it is not always possible to find the perfect accessory even in Moscow. The question of how to sew a backpack yourself is asked by many experienced and novice seamstresses. In this article we will look at how backpacks are sewn.
Sewing a backpack is a simple task, easy to implement even for novice dressmakers (unless, of course, you are sewing a tactical or assault backpack).
Backpacks vary in shape, material and purpose: from women’s handbags and children’s “Bunny” backpacks to huge-sized “backpack bag” products.
Backpack patterns
You can sew a transformable women's backpack bag with your own hands from leather and fabric using the pattern below.
We suggest sewing backpacks for children using the following pattern.
A backpack in the style of women's handbags with an interesting finish is sewn using the patterns suggested below.
The following backpack pattern is almost universal. You can use it to sew a children's backpack from fabric or use these patterns to sew a beach-style bag.
Next, we’ll look step by step at how backpacks are sewn.
We paint and protect.
I tried different methods of applying paint to leather and came to the conclusion that the most convenient and fastest are Mototow markers. They sell a 250ml bottle that can be attached with a 50mm wide applicator. This marker paints very well, it cannot be compared with a brush or a fluffy brush - from which the paint splatters in all directions.
Whichever method you choose, painting such a large piece of leather will take a fair amount of time. In addition, you need to give several layers. I tried dividing a large piece into sections and painting one at a time. Unlike fluffy, you can't paint with a marker in a circular motion. They need to be moved back and forth, up and down, or diagonally.
As you can see, there is a big difference in paint shade between the main piece and the side piece. I think once the paint dries the colors will even out, although that doesn't matter to me. All I have to do is add a second coat of paint to the main piece. Keep in mind that even if you use the same dye, the end result will not necessarily be the same on different skin types. It took me about 500 ml of paint to paint. I know that many people prefer to paint with fieblings professional dye, but after trying both, I prefer “ROC leather dye”. It turned out very fortunately that in my country it is impossible to buy professional leather paint (I had to order it from the USA, which was very expensive).
After the leather has dried, I remove excess paint from it with a piece of rag, and at the same time rub it, adding shine. This process takes me about 5 minutes per main piece. Then I apply a protective compound. It consists of Vaseline, bone oil, beeswax and resin. I apply it with a cloth and leave it to soak for several hours. The skin will absorb most of the composition. I wipe off the remains with a clean rag.
I also paint the inner part of leather straps, since sometimes it will be visible. I do not use a protective composition.
While painting and drying the leather, the edges of the piece curl up a little. To avoid this, I take a slightly larger piece of leather. Also, the leather can stretch or shrink while painting, so I paint first and then cut out the pieces. On small pieces this is not so noticeable, but the size of a large one may change.
I paint with a combination of colors: 80% ROC Yellow brown, 15% ROC Red brown, 5% ROC Tan.
DIY backpack made from old jeans
To sew a backpack from old jeans we will need to take:
- old jeans;
- fabric for lining;
- threads, sewing tools.
Master class: how to sew a backpack from jeans with your own hands
We start sewing a backpack from old jeans by unpicking the instep and back seams.
We rip the front seam along the pants to the codpiece (see photo), fold the parts as shown in the photo, and sew them together with a basting stitch.
We make the front seam.
Along the inside out side, cut off the excess fabric and sew down the back seam.
We connect the parts of the front and back, stitching them along the bottom.
We fold the parts on the sides with corners, forming the bottom. We do machine stitching.
For the straps, cut out strips of fabric and two triangles. We fold the strips in half, stitch them, and turn them inside out.
We fold the straps at the ends with a triangle as shown in the photo, sew along the line indicated by the yellow dotted line.
We insert straps with triangles at the bottom of the side seams and sew along the inside with one seam.
We turn it inside out. We sew the second strap in the same way.
We cut out the lining, repeating the dimensions of the bag. We perform the side and bottom seam. We decorate the bottom by stitching the corners.
Insert the lining inside and turn in the top edges. We machine stitch the belt stitching seam (shown by red arrows).
We cut out the valve. We sew a pocket onto it. You can use a ready-made pocket from jeans for a backpack or cut out a new one.
For the valve, we cut out a piece from the lining and sew a magnetic button onto it.
We fold the outer and inner parts of the valve and cover the sections with tape. If your machine sews leather, then you can use thin leather strips to process the cuts.
Cut out the wide parts of the shoulder straps.
We put a seal in the shoulder area of the straps. Sew it together (see photo), folding it right side inward. We sew on buckles to adjust the length.
Turn it inside out.
To connect the shoulder strap with flap to the backpack, cut off the back part of the trousers (see photo).
We sew up, focusing on the photo.
We make a lace from the lining fabric.
We stretch it along the drawstring of the belt, cutting the entrance holes as in the photo (yellow dotted line).
We sew denim stoppers onto the ends of the cord.
We sew similar limiters at the bottom of the straps.
We complete the sewing by sewing on the second part of the fastener.
Tools and materials.
►►Tools for leatherworking◄◄
Materials:
- 3-3.2mm saddle cloth of vegetable tanned leather for the main part
- 1-1.2mm vegetable tanned leather collar for side panel
- lock,
- three 25mm buckles,
- 4 20mm half rings,
- two 25mm carbines,
- 4 belt screws 10mm,
- brass rivets 8*2mm,
- metal strip,
- leather paint,
- threads,
- protective skin cream,
- glue.
Tools:
- 4mm line punch,
- mallet,
- awl,
- needles,
- pliers,
- small nails,
- saddler,
- scissors,
- beeswax,
- knife,
- round knife,
- sanding knife,
- edge cutter,
- strip cutter,
- ruler 1m,
- square,
- clamp,
- stationery clips,
- wax paper,
- compass,
- sandpaper(80,180,400,1000,3000),
- dremel,
- polishing paste and disc,
- hammer,
- tweezers.
Children's backpack with zipper
Product dimensions: 24 by 30 cm.
To sew a children's backpack with our own hands we will need:
- fabric for external parts;
- a small piece of fabric in a contrasting color for decoration;
- thick or quilted fabric to seal the main parts;
- a thin plastic plate to stiffen the back;
- accessories for straps – 2 pcs.;
- threads, sewing accessories.
Master class: how to sew a backpack with your own hands
The pattern of the bag is made directly on the fabric. We cut out two identical parts for the front and back.
Then we cut out the blanks for the side and top.
We also need rectangular parts for the handle and loops (we need two of them, for convenience, on both sides of the zipper).
This is the set of parts we have prepared. There are no straps here, they will be discussed below.
We seal the front, side parts and back with thick fabric, stitching them along the perimeter. For the back, we insert a plastic plate between the layers of fabric.
Please note that its size should be 7 mm smaller than the external parts.
We continue according to the photo instructions.
We sew a loop from a rectangle 6 by 8 cm. We turn its sections inward, then we bend the strip in half and stitch it. We insert the strip into the fittings. We tuck both ends of the loop into the strap and sew several lines for strength.
The result is neat straps.
For thin adjustment straps, we cut out strips 6 by 35 cm. Using the technology indicated above, we bend them and stitch them.
The complete set for the straps is ready.
Attach the straps to the back. We sew wide straps on top, and thin ones on the sides below. We tuck the narrow straps into the constriction.
Let's now work on the side of the backpack. Let's cut out small strips of 4 by 7 cm and make loops for the edges of the zipper.
Fold the edges inside, fold them in half and stitch.
Sew loops onto both edges of the zipper.
Ready-made sidewall strips - see photo below.
Let's stitch them together into a ring, checking that the length of the sides matches the size of the back. If necessary, we make adjustments.
Attach the side panel to the back.
A summer children's handbag is decorated with a bright bow.
We prepare the details for the pocket and bow.
We sew the blank for the bow into a pipe and turn it inside out. Place it on the pocket, seam side down. We attach one side to the side of the pocket.
For the jumper, sew a small strip on the larger side and stitch it into a ring.
Let's continue with the photo.
Sidewall.
The good news about the sidewall is that making it is much easier than it seems. Don't worry about creases. They don't have to be super neat; damp skin is quite forgiving.
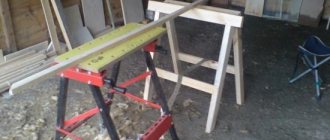
I cut a piece of leather for the sides a little larger. The piece was a little warped after painting, so I had to trim a little to get the sides even. My ruler is 1 meter long and it’s not enough to cut it in one pass. The trick I used is quite simple - I moved the ruler along the corner, see photo.
When I made the side panel on the previous bag, I cut grooves in the side panel to make them easier to fold. But this time I won’t make grooves, the skin is quite thin, there won’t be any problems with bending.
I pre-bend along all the necessary lines, this way it will be easier to get the final shape. Now I bend the edges at an angle of 90 degrees and press out the folds at the bottom of the bag. It's not an exact science, so try it your way and it will work out.
I decided not to wet the folds with water. This is necessary if you want to make tight folds. I only wet the triangles. This makes it easier to bend the skin.
The corners around the folds should be such that the sidewall can be stitched around the perimeter. I leave some loose skin for the seam.
When the leather is dry, I cut the side to the required length, bend the narrow ends and sew it together. Before bending, I moisten the skin with water, this makes bending easier.
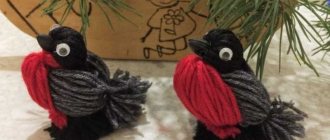
Children's backpack "Denim puppy"
To sew a backpack for a child we will need:
- denim;
- checkered fabric for the outer pocket and ears;
- lining fabric;
- scraps of felt, leather, fabric for decorating the muzzle;
- buttons for eyes – 2 pcs.;
- zippers – 2 pcs.;
- padding polyester or quilted lining fabric for the side of the backpack and front pocket.
How to sew a children's backpack
We make patterns with our own hands and cut out parts according to the required dimensions.
We fold the pocket parts made of checkered fabric and denim with their right sides facing each other, grind them down, leaving a free area.
Turn it right side out.
We sew up the open area by hand using hidden stitches.
Attach one zipper strip to the top edge of the pocket. The second braid needs to be sewn to the front part.
We sew the bottom edge of the pocket by hand with blind stitches to the front part of the backpack.
Above the pocket we decorate the puppy’s face - sew on a spot, eyes, nose. The nose can be made from a leather insert. We embroider the mouth and the circle near the second eye.
We sew ears from two fabrics. To do this, fold the parts with the right sides inward, sew along the contour and turn them inside out.
We sew a zipper between the denim strips at the top of the bag. We sew the lining underneath.
We complete the sewing based on the photo.
The denim backpack with trim is ready!
Backpack - bag on ropes in 10 minutes: video mk
I sew the partition to the side panel.
In all projects there are moments that you don’t want to do. Sewing the partition to the sidewall is one of these moments. The last time I did this, things didn't go as planned. It was very difficult to keep the baffle in the right place on the sidewall. In some places the partition was not sewn on and I had to rip it out and sew it again.
Learning from my mistakes, I invented a bulletproof method. Probably... The ingredients for success are a lot of glue, two strips of wax paper and 4 paper clips.
I think I was greedy with the glue last time. This time I poured the glue from my heart. I rubbed a strip of leather with sandpaper at a distance of about 7mm from the edge. I also coated the folds of the sidewall with glue.
To prevent the sides of the partition from sticking to the side panel prematurely, I covered them with wax paper. Now I insert the partition into the sidewall and it fits neatly into place.
Then I remove the clamps on one side and pull out the paper a few centimeters. Immediately I press the sidewall against the partition. And so on until I remove all the paper.
I leave the glue to dry for several hours so that it no longer sticks. Best for a day. I draw lines under the seam and start sewing, starting from the bottom of the briefcase. So, as it turned out, I had no reason to worry about sewing on the septum.
Types of portfolios
Modern manufacturers divide this accessory according to several parameters . The main difference is their affiliation: male and female . Men's are distinguished by a clear, strict silhouette, restrained tones and spaciousness. Women's ones have a rich range of colors and greater volume.
The next point is the type of stiffness. There are 3 main directions. Hard is most often used when sewing men's accessories. The semi-rigid type is used for sewing both male and female versions. Soft, as a manufacturing technology, is used for women's products.
The final section in the types of briefcases is the method of their manufacture . Manufacturers use stitching, adhesive method and a combined option in manufacturing.
Help: the variety of products can also include the types of locks used.
Polishing the ends.
This briefcase has so many ends that need polishing. So I decided to show you how I do it.
- I wet the end with water
- polish with a piece of cloth
- I apply a ligature (hardener) for the skin
- dries in a couple of hours
- sand with 80 or 180 grit sandpaper
- I paint the end
- I wet the end
- I polish with a cloth.
I repeat the last three steps until the end is smooth. To get a super smooth finish, you can use 400 or 1000 grit sandpaper.
Sometimes I treat the ends with beeswax and polish with a cloth. This method gives the ends a “fat” feel to the touch. It happens that I soak a rag with hardener and run it over the end (this is for a very smooth end).
I polish the same way as many other masters. I use a Dremel with a homemade hardwood attachment. You can use a bone stick or even a pen. An inquisitive reader will ask why you don’t polish before painting? Good question. If the end is polished first and then painted, it will be difficult for the paint to penetrate the leather. This is why I always sand the ends with sandpaper.
And the last point I want to mention. I sand with sandpaper after polishing with a cloth. This is not common practice. I just like to do it that way. I believe that after this treatment the end is smoother.
I sew on the belt holders.
Before sewing on the belt holders, you need to determine where to sew them. To do this, I put the belts on the front panel and mark where their center line is. Then I place the belt holders along this line so that they are located 4 cm from the bottom and 6 cm from the edge.
To make sewing easier, I secure the holders with nails. I sew on one side first, then insert the belt and mark where to sew on the other side.
I sew on the top strip.
Before sewing on the handle fastenings, you need to paint the lower part of the leather, so it will be visible. I poke holes in the cork backing. Sewing the top strips of leather is similar to sewing belts.
The leather covering the metal strip is a simple piece of leather with processed unpainted ends. Once the handle holders have been sewn on, you can sew on the strip of leather covering the metal strip. Don't forget to put it back in place and seal the screws with Loctite. I glued the metal strip and sewed it up.
Top.
Before making the handle, you should make the upper fastenings, because the size of the handle depends on them. I couldn't find a 20mm half ring, but I had the appropriate buckle and wire cutters and the problem was solved.
Using an iron strip, I marked the top holes on the leather strip. And then, using a compass, I marked the “bottom” holes. When punching holes, make sure they go through the center of the leather strip, otherwise the edges won't line up. To avoid cracking of the leather on the folds, they must first be moistened with water and then folded.
To prevent the strip of leather from unbending during drying, it can be secured with a screw.
I additionally polish the belt screws, since their appearance from the factory leaves much to be desired.
Afterword.
Looking back at the process of making the briefcase, I can say that it was not as difficult as you might think. The secret is simple: spend enough time working, don’t forget about the little things, measure seven times, cut once - and everything will be fine.
As I already wrote, I do not recommend taking this portfolio as your first project. First you need to do something smaller, gain the necessary experience, and gain skills in working with leather. I would suggest starting with a phone case, this project has all the steps I used to make my briefcase.
As for the amount of time spent on making the portfolio. It took me about 60-100 hours over two months. Although, if you ask my wife, she will say that it was much longer.
Author of the master class Andersenleather
Translation: LeatherThoughts