How to achieve information content when creating a stand?
It is better to make do-it-yourself stands for a kindergarten according to a strictly defined plan:
- At the top is a heading, written or printed large, in a straight line or with a curved base;
- Below the title are images. They should be placed across the entire width of the poster or a space should be made for words (depending on the volume of text);
- Below the pictures are direct congratulations and wishes, in prose or poetic form;
- Below is the signature (“kindergarten administration”, “Your teachers”, “Your parents”, etc.).
How to choose the right material
Among the large assortment of modern stands, more and more consumers are choosing cork boards. They are easy to use, reliable, durable, and affordable.
Natural material - cork oak bark - meets general safety requirements for children's products and has a number of positive qualities:
- ecologically pure;
- easy to clean, does not attract dust;
- moisture resistant;
- refractory;
- chemical resistant;
- not damaged by fungus or insects;
- not electrified;
- shockproof;
- wear-resistant.
Cork stands will be a win-win option for both home and kindergarten.
Visibility and its implementation
For a stand to be perceived as an interior decoration, it must be in harmony with it. You should not focus only on the informative part. Pictures, images, photographs are required next to the inscriptions on the stand.
If the stand is dedicated to the New Year celebration, it must have a decorated Christmas tree. If March 8 - mimosa or a bouquet of other flowers. If it's Mother's Day - an image of a woman's face with a smile.
A bright background created by completely covering the surface with colored paper or painting it with paints will help provide clarity.
Stand with family photos
Set up a stand with photographs for the birthday of a close relative - what could be a more original gift? Plus, you don't have to spend a lot of time creating such a work of art. It will be enough to purchase several beautiful photo frames of various shapes and print your family photos. You can also order a sign with the inscription “Family” or Family to make it clearer to your guests how much you value blood ties. Such a gift will be most appreciated by grandparents who value attention and care rather than expensive modern gadgets.
We insert the photos into the frames and create the future composition on a sheet of paper so that the photos are arranged beautifully. In the central part it is best to place a photo of the birthday boy, as well as a photo of you all together. After that, we drive several nails into the wall and hang the frames. Be extremely careful during installation so that the photographs are at the optimal distance from each other.
Clarity and its personification
Do not forget that the stand is made, first of all, for the audience. Both adults and small children can act as them. They understand vivid images - Father Frost, Snow Maiden, a fireman in uniform, etc., numbers that carry meaning (31, 23, 8). Symbols and branding are best left for other purposes.
The title should be as accurate and succinct as possible. There is no need to make it poetic or burden it with epithets: it is more important for children what kind of holiday they are preparing to celebrate.
Club room stand
Have you decided to set up a stand with photographs in the club? If you are the owner of any premises where you gather people based on their interests, then this is a pretty good idea, since you will be able to create a cozy and pleasant atmosphere in your club. This is especially necessary for creatively oriented clubs so that people can get inspired by looking at your work.
You can place photographs of visitors on your stand or simply find unusual pictures on the Internet and then print them on matte paper. The most important rule that you must adhere to in this case is no monotony and perfectionism. Frames should have different sizes and shapes, they should be placed in a completely chaotic sequence, and you should completely forget about the color palette. Only in this case will you be able to create a truly cozy atmosphere.
The principle of accessibility: “let me touch it!”
If the stand is placed in a kindergarten or school classroom, children will inevitably become overly curious. Some people will want to take a closer look, and some will want to touch it. So that the result of creativity does not go to waste in the very first minutes of public viewing, you need to make it tangible.
For example:
- Attach felt leaves in yellow and orange tones to the stand for Autumn Day,
- For a stand in honor of Easter, attach a wicker surface that imitates a basket, or an eggshell, painted in different shades,
- Decorate the stand dedicated to May 9 with real St. George ribbons and carnations cut out of red corrugated paper.
A DIY children's educational stand is a prime example of accessibility. Its design depends on the age of the children for whom it is intended.
Such a busy board will help develop curiosity and promote exploration of the world around us.
For children 2-3 years old, felt flowers and trees of different shades and shapes will do.
The middle group can enjoy the following attached to the stand:
- Cubes,
- Pyramids,
- For an hour.
For members of the preparatory group - letters and road signs, tiny tools or any other gizmos from everyday life:
- Landline phone dial,
- Mixer valve,
- Door knob,
- Espagnolette,
- Chain,
- Old calculator,
- Wheel,
- Compass,
- Klaxon, etc.
Anniversary gift for wife
Have you thought about how to set up a photo stand for your loved one’s anniversary? Keep one more original gift idea that your significant other will love. In this case, it is recommended to use only those photographs in which you are alone with your loved one. For example, it's a pretty good idea to frame your black and white wedding photos in white frames. It looks quite beautiful and unusual.
You can also place a black frame at the bottom, which will serve a purely decorative function for a harmonious combination with white tones. By the way, it’s best to do it all yourself, so that your other half will appreciate your efforts. There's nothing complicated about it. It will be enough to purchase several wooden blanks, make frames of the desired shape from them, then paint and glaze them.
Unusual solutions for ordinary stands
A collage is the best option if you have to prepare a stand with your child as an assignment for a group celebration or to participate in a competition.
Unlimited creative freedom:
- You can include any newspaper cutouts in your collage,
- Magazines,
- Advertising pictures,
- Suitable for the topic.
The following can be glued to the stand sheet:
- Natural materials (dried leaves, small pebbles),
- Applications made of paper (snowflakes or flowers) or fabric (felt, knitted fabric),
- Handicraft small items (bugle beads, beads, beads, threads of yarn, pompoms);
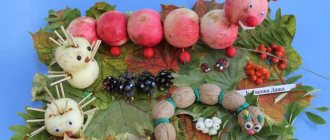
You can also make stands for children's crafts with your own hands. It can be called “Our Vernissage” or “Exhibition of Crafts”.
- To attach drawings to the stand, you can use pins or magnets. To demonstrate three-dimensional crafts (made of plasticine, cardboard, corrugation, etc.) - paper or knitted “pockets”;
- temporary stand, or stand-template. This will be convenient when you need to impromptu prepare for a celebration or when there is absolutely no time to decorate the group.
- For it you will need: self-adhesive letters (the entire alphabet) and numbers, button magnets, double-sided tape, a sponge (to give volume to the inscriptions), universal pictures (flowers, leaves, candles, stars, etc.);
- DIY information stands for kindergarten differ from all others by the presence of plastic frames or “pockets” for placing official information concerning parents.
- In all other respects, they should serve as decoration for a children's group: have a bright design with expressive characters - Leopold the cat, Carlson, a train, a hedgehog, a daisy, etc.
Such boards can be made in an unusual shape - in the form of a cloud or a light, a star or a sun - this way they will quickly attract the attention of parents.
DIY making
To create a stand board at home, you do not need any special skills or tools. It is enough to be responsible and attentive to the work. There are several most common options for “home” stands.
From ceiling slabs
Inexpensive ceiling tiles are perfect for creating custom designs. The simplest option is to attach them to the wall using special glue or self-tapping screws with decorative plugs.
The necessary information is recorded using stationery pins with colored caps. A volumetric frame can be made from strips. They can be cut with a stationery knife from the remains of the panels.
From cork backing
Cork boards have become widespread when creating information boards at home. This is due to the high aesthetic characteristics, strength, ease of processing and durability of the material.
In addition, the cork substrate does not emit toxic substances and does not cause allergic reactions in humans and pets.
To make an information or decorative board, you will need a cork backing for laminate or parquet with a thickness of 1 to 4 mm. All work includes several stages:
- Create working drawings and procure the necessary components.
- Select the material for making the base. It can be plywood, fiberboard, chipboard or PVC sheet.
- Using a hacksaw, cut out pieces of the required size.
- Glue the cork veneer onto the base and carefully trim the protruding edges with a stationery knife.
- The finished board is varnished or a special mastic is applied.
- Select a profile for the frame and secure it to the board. An attractive appearance of the finished product will be provided by frames made of wooden baguette, metal or plastic profiles. It is recommended to use a frame whose width is slightly greater than the thickness of the board.
- On the finished surface, according to the working drawings, pockets for sheets of information are placed. To make them, you can use plexiglass or transparent plastic.
- Select the type of fastening. The panel can be permanently attached to the wall with self-tapping screws or provided with hinged mounting using hinges.
The advantages of a cork front panel include durability, attractive appearance and ease of maintenance.
From a gymnastics mat
For the front side, instead of balsa wood, you can use a gymnastics mat. This accessory is sold in any sports store at an affordable price.
The main advantage of this solution is the variety of color options. In the online store you can choose a color that fully matches the theme of the future design.
The material is easily processed and attached to the plywood base with glue. Otherwise, the manufacturing technology is no different from working with a cork substrate.
Made from PVC sheet
A special feature of such products is that the PVC sheet can serve as both the base and the front side. A large selection of colors and ease of processing make this material one of the most popular in the manufacture of stand panels. For work you may need:
- PVC sheet 3 mm thick;
- stationery files or corners for photo albums;
- PVC profile for making edging.
The work is carried out in the following sequence:
- After developing a sketch, a blank of the required shape is cut out of a PVC sheet. This can be done with a jigsaw or hacksaw.
- Letters for the name of the stand are cut out from the remains of the PVC panel using a jigsaw. They are glued to the front side of the board with special glue.
- Mark the locations of the pockets. Stationery files or pre-made pockets are glued according to the markings.
- Frames are made from a PVC profile or other available material and attached to the front side of the stand. After this, the notice board can be attached to the wall using self-tapping screws or hanging hinges.
If necessary, the front side can be painted with acrylic paint. For greater durability, it is recommended to use façade paint.
Photo stand for school or kindergarten
Stand with hanging pictures
One of the cheapest and most classic ideas on how you can set up a photo stand at home. To do this, you will only need to use a strong metal curtain rod that will be able to withstand the weight of pictures with frames, as well as several strong ropes. It is worth hammering several nails into the edges of the frames in advance in order to then tie ropes to them, as shown in the photo below.
You can use an old curtain rod after painting it in the desired color. Such interior items have the necessary fasteners, so you don’t have to worry about how to hang it on the wall. Installation is carried out in literally five minutes using a screwdriver and several screws of the required size.
Making a stand from cardboard
If you try, you will get an original DIY note board made of cardboard. Take a thick cardboard sheet of appropriate parameters, and then prepare the following materials:
- acrylic paint of the desired shade (in our case, purple), as well as brushes with evenly spaced bristles;
- a frame with a strong base or a regular base, which will serve as an additional support for the structure;
- grout for seams;
- disposable glass and plastic spoon.
This DIY note board is made according to the following principle:
- Mix paint and grout in equal proportions using a prepared glass.
- We paint the cardboard base with the prepared composition, doing this procedure 2-3 times to form a beautiful, opaque surface.
- We also paint the frame, only using a different shade of dye.
- We assemble the structure. We place the cardboard base under the prepared frame.
Cardboard note board
An unusual DIY note board will serve as a creative addition to a modern interior or apartment, and will also help organize the working atmosphere in the room.
How to properly design a corner
First, you need to remember the uniform requirements for the design of corners in the classroom. We should also not forget about the differences in the presentation of information, its distinctive features in elementary school, middle and high school.
Here are a few basic requirements on how to decorate a cool corner with your own hands. This:
- aesthetics;
- creativity;
- reflection of the maximum number of areas of student interest;
- careful selection and preparation of information taking into account its relevance and significance;
- availability of educational information.
From the above, it is clear that the classroom corner should contain not just some pictures and articles, but necessary and useful information. Photos of self-made stands are presented later in this article.
Make or buy?
The simplest information boards will cost the buyer a minimal amount, while the price of the most expensive models can be frightening. Therefore, before making a final decision, you need to evaluate all the advantages of self-production.
- This is a good opportunity to create an unusual stand of the size that fits perfectly into the space.
- DIY school stands are a chance to choose materials that suit the interior of the room.
- Possibility to choose colors, sizes, number and location of pockets and fields.
The downside will be the time it takes to create the stand, but the savings should outweigh this disadvantage. The work of making a stand will not take up much time. The simplest small design can be made in a maximum of an hour. Large stands can create some difficulties for the master.
