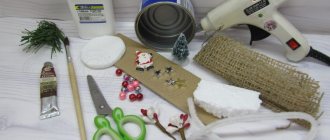
You can make a simple light alcohol lamp with your own hands from ordinary beer cans. If you don't like beer, then Coca-Cola cans or any other cans are quite suitable. The main thing is that they are aluminum! To make such a burner you will need a couple of cans, a stationery needle, glass wool (ordinary wool is fine, but with glass wool it will last forever), scissors and a book. You can make a stand for a saucepan from wire or an old metal hanger, but on a hike it’s easier to use improvised objects - a couple of stones or just make a small trench for an alcohol lamp.
However, let's return to how to make a homemade alcohol burner.
After all the tools have been collected, you can begin the process of making a spirit lamp.
To begin with, mark a straight line around the circumference of the jar. The easiest way to do this is to place the marker on the book and press it with one hand, while rotating the jar with the other.
This is how we mark both banks.
Now carefully cut around the circumference. You can use ordinary stationery scissors; the sheet metal is soft and can be easily cut with any scissors.
The result is two bottoms.
The lower part can be processed using a multitool, this will allow you to easily insert the upper cover over the lower one.
We put glass wool in the lower part, place it with a small “slide”, so that it tightly fills the entire cavity of the homemade alcohol lamp. Glass wool is preferable because it is not subject to combustion and does not deteriorate from heat. Glass is very refractory, and glass wool is just a lump of thin glass threads.
We close our homemade alcohol lamp and use a needle to make holes.
The more holes and the wider the holes, the higher the combustion temperature will be. In the center you can make 5 holes for filling flammable liquid without disassembling the burner.
The entire process of making a homemade alcohol lamp can be seen in the video below.
In terms of “power,” a homemade alcohol burner is comparable to purchased multi-fuel burners.
Half a liter of water in the pot boils in 8 minutes. 40 ml of alcohol is enough for 25 minutes of burning. Half a liter of flammable liquid is enough for a week-long hike for 2 people, provided they have 3 meals a day.
Before starting, you don’t have to preheat the burner - just splash a little on the karaya and set it on fire, the alcohol burner will immediately warm up and the alcohol vapor will begin to actively evaporate and burn. Such a burner operates on the fact of expansion and evaporation of a flammable liquid at an elevated temperature.
As you can see, the burner turned out to be small and very efficient. It differs from purchased mixed fuel burners primarily in its small dimensions and, accordingly, light weight. In addition, it is easy to build from improvised means using only a multitool.
School of survival
Tags: “fire”, “alcohol lamp”
Tiger comments:
It turned out to be an interesting burner, small and light. It’s true that carrying denatured alcohol or white spirit with you in a bottle is inconvenient; it’s easier to just collect dry fuel.
01/13/2014
Ivan
comments:
Simple, cheap, practical... This burner will come in handy when fishing. Lightweight, doesn't take up a lot of space.
08/09/2015
BERKUT
comments:
ACCEPT
11/15/2015
Vitaly
comments:
Very useful article! Would this https://[smamm deleted]/product alcohol be suitable as fuel?
01/21/2016
Artem
comments:
Yes, any alcohol that burns will do.
22.01.2016
Equipment required for operation:
- tin can (it should have a large volume of about a liter);
- block of wood;
- steel tube (diameter from 11 to 12 mm, and length 50 mm);
- a pair of steel corners;
- several wood screws (6 or 7 cm);
- several small screws and nuts, they are needed to secure the can to the corners;
- sand and building plaster;
- gas-burner;
- glasses to protect the eyes;
- fire extinguisher (it is prepared for safety reasons).
Step-by-step instructions for making a jet alcohol burner
For the body we will need several small pieces of aluminum cans.
All you need is the lower part with the bottom, which we cut off at a distance of 4-5 cm from the edge of the embossed bottom of the cans. The bottom of one of the cans will be the working part of the burner, so it must be sanded to remove varnish and paint. Otherwise, they will burn when heated and leave unpleasant marks behind. Next, you need to bend the copper tube, making two small brackets out of it that fit the diameter of the bottom of the jar. To do this neatly and without breaking, pour fine sand into the inside of the tube and bend it, using a larger diameter pipe as a template. We cut off the neck of one of the cans and also clean it with sandpaper. We check that the neck fits the size of the bottom of our burner. Then we mark the edges of the copper tube staples at the bottom of the jar. They need to be positioned perpendicular to each other so that they overlap and form a cross. We drill holes for the tube outlets with drills, starting from the smallest. The final drill will be a drill corresponding to the diameter of the copper tubes. This way the holes will be as neat as possible. We insert a piece of twine inside the copper brackets as a wick, and place a cross made of tubes in the bottom of our burner. Each aluminum can has an inclined edge separating the straight walls and the concave topography of the bottom. We make a hole in it for screw filling of our burner. Let's make it from a Euro nut with a wide collar at the base, and a bolt with a rubber gasket that protects against fuel evaporation. It's time to fix all the elements using a specialized high-temperature two-component epoxy adhesive. This glue can rightfully be considered unique, since it can withstand heating up to 316 degrees Celsius without loss of strength and glues almost any material! We glue the base of the staples, the neck and the euro nut with diluted epoxy glue. We coat their connections with the bottom so that they are completely sealed. Using a thin drill, we drill holes in the bottom of the jar between the bracket arms. Now you can assemble the burner body from two scraps of aluminum cans. Our homemade product is completely ready to go! You can refuel it using a regular syringe, and the screw cap on the neck will not allow fuel to spill out of the burner. Surely many have already seen an alcohol burner made from an aluminum can. One author suggested how it could be improved to make it safer and more convenient. Now the burner will never explode when heated, as it has a special safety valve. In addition, the flame became more beautiful and even, which increased the efficiency of the burner. As a result, the burner now looks like a regular kitchen burner.
Materials and tools for assembly: - aluminum can from beer and other drinks (the author uses narrow cans from Mio, as he makes a small Primus stove); - cotton pads, cotton cloth or sponge; - a jar of larger diameter (used for olives); - coin; - raw food and a frying pan (you can fry an egg to check).
To work you will need the following tools: scissors, a lighter, a needle with an awl (a sharp nail will do instead of an awl), pliers, a bolt with nuts or a self-tapping screw. Let's start assembling the alcohol burner:
Step one. Cut out the first burner element
The first element of the burner needs to be cut out of the can; to do this, you need to move 17 mm away from the bottom.
After this, a circular line is drawn with a marker. To keep the line even, the marker can be fixed at the desired height, and then rotate the can. Now this part needs to be carefully cut out along the drawn line. A total of two such spare parts are needed, one should be 17 mm high, and the second 25 mm. Next, you need to make holes in the cut bottom, maintaining a distance of 4-5 mm between them. It is important that the distances in diameter are approximately the same. For these purposes, you can use an awl or a nail. It is most convenient to punch holes on a board. In the end, everything should be as seen in the photo. If you make larger holes, the flame will be higher. You also need to make one large hole in the center of the bottom. It should be smaller in size than a coin. Step two.
We connect the two elements together. You need to put cotton fabric in the bottom, which is 25 mm.
This could be cotton wool or cotton pads. Next, the bottom with holes needs to be put on top of the bottom with cotton wool. They need to be connected so that there is no distortion. The edges can be filled with a piece from the same jar. Step three.
Testing the burner Through the large hole, you need to pour alcohol or other liquid fuel, such as gasoline, into the burner. Next, the hole is closed at the top with a coin. The coin is needed to prevent the burner from exploding under excess pressure. If there is excess pressure in the burner, the coin will simply move and excess gases will escape from the burner without bursting it.
To start, you need to heat the bottom of the burner with a lighter or matches, and then ignite the vapors that will come out of it.
Well, then the burner will heat itself and burn as long as there is fuel in it. Step four.
Making a Burner Cover In addition to extinguishing the burner, the cover also prevents fuel from evaporating from the burner when it is not burning.
To make the lid, you will need another jar, the bottom of which needs to be cut off. You then need to drill a small hole in the center of the bottom and screw in a self-tapping screw. Step five.
How to make a stand for dishes To turn a burner into a primus, you need to make a stand for dishes. For these purposes, you will need a jar with a slightly larger diameter. To determine the height of the stand, you first need to make a mark on the can at the height of the burner. Next, you need to double this length and add the desired centimeters at which the cookware will be located from the burner. Then the jar needs to be divided into 12 parts with a marker, the excess is cut off along the circular line. Each line must be cut to the bottom ring. Then the resulting strips are cut off one at a time, resulting in a design like the one in the photo.
You need to cut a hole in the stand; it is needed to heat the burner when starting. The strips need to be bent so that they rest against the bottom, thereby increasing the rigidity of the stand. That's all, then the burner is inserted into the stand and you can start cooking.
Today, many men are interested in blacksmithing. Indeed, the beauty of hot metal, which before our eyes becomes a beautiful forged product, is simply mesmerizing. A homemade forge can be either a large stationary or a compact desktop one. Craftsmen with extensive experience work with traditional designs. And among amateurs, the most popular are compact homemade forges, which are very easy to make with your own hands.
A compact and simple forge for forging metal products can be made from an ordinary tin can and plaster. Such a homemade device is simply an irreplaceable thing in the workshop. After all, every amateur craftsman has to heat and forge various parts and tools. A mini-forge at home will help out at any time, plus it’s not difficult to make a forge with your own hands. Assembly will require materials that are always on hand.
Beer can butterflies and other figures
To make a craft of this type you will need a lot of patience. So, you need to remove two bottoms from an empty tin can. The result will be a rectangular sheet of tin.
Next, find the required drawing of a butterfly, bird, or bee on paper and cut it out. After this, transfer the cut out pattern with a pen onto the prepared sheet from the jar.
Carefully cut out the finished shape with scissors along the contour of a design, such as a butterfly.
When the shape of the butterfly is already ready, you can give it a more natural look, slightly give the wings a lively look and slightly decorate the butterfly in a bright color.
Thus, before you throw away an empty aluminum can of beer or drink, think that if you only turn on your fantasy and imagination, you can make useful crafts from tin cans, many beautiful and useful things that your loved ones will be able to appreciate.
Closed alcohol burners
These burners are characterized by the fact that after filling with flammable material, there is no access to the surface of the alcohol. This makes them a little safer because there is no way to completely empty the fuel when they tip over. Fuel burns more evenly.
Now about the cons.
First, this burner will not light without preheating. As soon as people don’t go out of their way to make this alcohol lamp light up. There are two proven options. Or heat the bottom of the burner with a lighter, and then many people get burned before getting into the practice of starting it. Or make a tray on which you light alcohol and place a manufactured burner on it. In any case, this increases the fire hazard when igniting. There are home-made people who couldn’t even figure out how to preheat this alcohol lamp, remade them several times and gave up trying, thinking that their hands were growing in the wrong place.
Secondly, in order to reduce the chance of fuel spillage and ensure more optimal steam formation, it is necessary to place a wick inside the burner. Its role can be played by cotton pads, as shown in the vast majority of Russian videos on making a simple alcohol burner. But, having analyzed foreign experience and reviews of Russian home-made workers, after several uses of this technology, I make a choice in favor of mineral wool as a filler (wick). It consistently creates a capillary effect and holds high temperatures well.
Thirdly, for such a simple burner it is necessary to use a stand (taganok). If you try to place the cookware directly on the burner, the flame loses its stability and may go out. So, it is best to use all kinds of stands for dry fuel. You can use a common tourist option and install an alcohol burner between tent pegs dug into the ground.
DIY lighting fixtures from cans
Almost any jar can be used usefully, for example, it is possible to make a very stylish and original lampshade for a lamp. Therefore, the first step is to remove the upper part of the bottom of the can, using ordinary scissors or a stationery knife.
Next, make special markings on the walls of the jar with patterns that will have to be cut out with a stationery knife. This must be done very carefully so as not to get hurt.
If you have a penchant for drawing, then you can paint the jar colorfully or simply paint it on the inside and outside. After that, you need to install a socket with a light bulb into the jar. That's it, the bright and unique lamp is ready for use.
You can also make an interesting and beautiful table lamp from beer cans, which can decorate the room with its unusual appearance.
So, to make a lampshade, you only need to use pull tabs from cans, but for the lamp stand, you can use the tin can itself. To connect all the tongues from the cans into a solid and unified structure, a small cut must be made on each tongue, after which all the tongues must be connected to each other, and then the cut site must be connected again.
Next, you need to mount the socket with the light bulb. That's it, the beautiful lamp is ready.

