All and a little more about gas tanks for motorboats
A continuous supply of fuel for the movement of a motor boat is provided by the gas tank for the outboard motor, which is an integral part of the fuel system.
They come in different types and configurations, and also vary in volume. This article will tell you more about this and whether it is possible to make a fuel tank with your own hands.
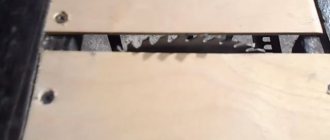
Repairing a plastic gas tank using a special plastic soldering iron
Buy or rent plastic welding.
Remove the plastic gas tank from the vehicle and place it in a safe location for welding. Drain the gasoline from the tank and let it dry both inside and out. Wear safety glasses, a welding helmet, and welding gloves.
Use a plastic welding rod made specifically for this purpose and fill the crack or hole with liquefied plastic. Start at the edge and work your way all the way down the length of the crack or hole. Fill it with a little extra plastic and then sand it down.
Let the weld cool, sand it and, if desired, paint it with plastic paint.
If your hole is really huge, then it’s easier to replace the plastic fuel tank on your car with a new one.
Design and types of fuel tank for a motor boat
A standard fuel tank for outboard motors usually consists of several components, namely:
This equipment is inherent in all types of gas tanks. The fuel is poured into a container, which is closed with a special lid equipped with a vent valve or fitting. This is due to the fact that when exposed to sunlight and elevated temperatures, the gasoline in the tank begins to evaporate and its vapors create excess pressure, which poses a danger of ignition of gasoline vapors. Excess pressure is released using a device mounted in the gas tank cap.
Using a connecting hose, fuel is supplied from the tank directly to the outboard motor. The volume of the tank is determined based on the power of the motor installed on the boat.
Varieties and classification
There is a division of tanks for outboard motors according to design features into the following categories:
- built-in: non-removable tanks that are installed on motors up to 6 horsepower of small boats; they are mounted directly under the protective cover of the motor;
- removable or portable: used on inflatable boats and small boats, this type is preferred by fishermen and tourists traveling long distances;
- stationary: such tanks are installed on more powerful engines, they have a larger capacity and are used on large boats and yachts.
There is also a division of gas tanks into soft and hard.
Soft fuel tanks are made from special impermeable materials with increased elasticity, ensuring the tightness of the tank container. When the tank is filled, they stretch, and as gasoline is used, their size decreases. The advantage of this type of gas tank is the fact that gasoline vapors do not accumulate in them. Small dimensions and the ability to change shape allow them to be installed in places where a conventional rigid tank simply will not fit. The main disadvantage of such a tank for a motor boat is its high price.
As for the shape of the fuel tank, they are usually made either in the form of a canister or as a rectangular tank.
Based on the material used, gas tanks are divided into the following types:
All materials must be petrol resistant. Fabric (soft) gas tanks are made from multi-layer polymer fabrics that provide the containers with tightness and chemical resistance to the aggressive effects of gasoline.
Features of choice
The volume of the fuel tank is determined based on the power of the outboard motor installed on the boat. Very often, people who make long trips on motor boats (fishermen, tourists) are faced with the question of increasing the capacity of the gas tank.
There are several options to solve the problem. You can install an additional fuel tank of greater capacity, take with you a supply of gasoline in cans, etc. But such a solution to the problem implies an irrational use of free space, of which there is already little on a boat or boat.
The best option is to install an additional gas tank on the transom of the boat; this saves space and prevents the tank from moving on the wave. On inflatable boats, such a tank is mounted on a suspended transom, on PVC boats - on a stationary one, and on boats and rigid boats - on the stern. Some craftsmen install several flat containers connected to each other by tubes under the flooring on the bottom.
It should be remembered that when choosing a fuel tank, you need to pay attention to the following points:
- equipment (all fittings and fasteners must correspond to the equipment declared by the manufacturer);
- quality of the material (the tank container must be sealed, resistant to gasoline vapors, durable and resistant to temperature changes);
- The bottom of the gas tank must be equipped with compartments to collect condensate to prevent water from entering the gas line.
Fuel tanks made of various types of plastics and flexible fuel tanks are becoming increasingly popular, despite their higher cost.
How to make a gas tank yourself?
Experienced fishermen and tourists, who have extensive experience in finishing and altering equipment in accordance with their needs, make gas tanks with their own hands. Various containers and reservoirs are used. There is a lot of useful information on the forums on how to make a gas tank yourself.
A fitting for adjusting the pressure, equipped with a valve, is cut into a regular canister, as well as a gas-resistant hose, mostly transparent, for supplying gasoline to the outboard motor.
In addition to canister tanks and containers of various kinds, they also remake car fuel tanks with their own hands for installation on a motor boat. And they even manage to install a fuel level monitoring system, also taken from a car. Anyone can learn from experience and make a gas tank with their own hands that meets their personal needs.
Fuel level control systems
An important point is the need to control the level of gasoline in the fuel tank, because... When traveling by water, there will be nowhere to refuel. There are various methods for controlling the amount of fuel, for example:
- visually – there are marks on the plastic tank and the gasoline level is visible;
- using a fuel level monitoring system.
Level sensors are mechanical and electronic. By analogy with automobile systems, boats are equipped with special fuel level monitoring systems that display data on the fullness of the gas tank on its lid or on the dashboard of the boat.
Expansion tank for heating from a plastic canister
Over the weekend I redid the heating and moved the expansion tank into the attic. The old one was made from a plastic canister into which a special brass adapter was screwed so that a pipe could be connected, I don’t know what it’s called correctly, in order to screw the brass adapter into the canister I had to cut a hole like this (see photo below), at first the heating was imperfect and somewhat since my system boiled, so the canister from under the primer began to leak a little, this is clearly noticeable, but nevertheless, for two winters the canister faithfully served as an expansion tank.
Communities › Boats and Motors › Blog › Fuel tank for PLM from a metal canister.
The canister was purchased at Yulmart, capacity 10 liters. I ordered connectors, fittings, a hose with a bulb in 1000 sizes. There are plans to add a level sensor, there are already ideas.
Comments 17
10 liters won't be enough? In my practice, it happens 12-15 liters in both directions, engine 9.5
Fine! My transitions are small.
It's clear! well done and neat! I am currently preparing a 24 liter tank from aluminum. I measured that on a glider, 500 grams per kilometer are consumed at a speed of 28-33 km/h, depending on the current if it is a river. But when well loaded, it’s 8-12 km at full throttle, and the consumption is 2 liters per 1 km! There is no infection on the glider) And sometimes you have to swim 15 km in one direction, our lake is large and spilling!
I rarely get more than 10 km during my entire fishing trip.
Now I’ll get around to it, I’ll put in an email. I hope the ignition consumption will decrease! I already bought the kit) The season closed yesterday for the rides) In the winter I’ll be picking out the plm!
I also plan to install an EZ. The circuit has already been tested on Rusfish, all that remains is to repeat it.
Do they write about consumption? Any improvements?
The engine's consumption is minimal, so it's difficult to judge. It takes time, but the blocks have only just been made. But they write about more stable operation of the engine. Most likely, consumption should decrease. If interested, check out www.rusfishing.ru/forum/s...?p=7906083&postcount=5071
Thank you! I'll take a look! Yes, they say that it will even start better! Well, I can judge by my UAZ, when I had the original engine installed, I installed the BZ and the engine even began to run quieter! And pick up speed sharply, and the consumption dropped a little!
Exhaust pipe with cooling. Tank ventilation head. The engine is powered by two gas tanks.
Exhaust pipe with cooling.
You can avoid thermal insulation of the exhaust pipe if you cool it with water injected from the engine cooling system.
Water is injected at a distance of 0.5-0.6 m from the flange of the exhaust manifold 1 of the engine (Fig. 198) after the exhaust pipe 4 is slightly bent upward, which prevents water from entering the engine when idling at low speeds.
Cooling water from the manifold jacket is introduced through tube 3 into the exhaust pipe in one of two ways shown in the figure. Supplying water through a cylindrical water jacket 6, which has 20-25 holes with a diameter of 2 mm, better atomizes and cools the exhaust gases. Pipe section 2 is insulated with asbestos before water is introduced; then the pipe can even be made of rubber (durite) hose 5.
Injecting water into the exhaust pipe also reduces noise, especially on two-stroke engines.
Kingston filter.
The water intake of the engine cooling system and the filter can be combined in one device
(Fig. 199) .
Housing 2 has a flange at one end for fastening to the casing, and at the other - a thread for cover 4. A thin-walled tube is inserted inside, into which holes with a diameter of 2.5-3 mm are drilled. The number of holes and the length of this filter tube 3 are easy to calculate: the total area of the holes should be 1.5-2 times greater than the area of the hole in the pipe 6. Instead of a tube, you can use a metal mesh with a corresponding cell.
Valve 5 is installed on the pipe; The hole in pillow 1 must be made smaller than the diameter of filter 3.
Tank ventilation head.
To reliably protect the gas tank from water ingress, a deck head is placed at the outlet of the air tube (it can also be installed on vertical walls).
Housing 6 (Fig. 200) with an air tube 7 inserted into it from the gas tank is attached to deck 3 with a nut 5 with gaskets 4.
One central (pos. a) and four external (pos. b) air holes are drilled in the body, closed with a package 2 of six to eight layers of thin copper mesh, pressed with a mushroom-shaped cap 1 on the thread. The mesh pack protects the device from sparks and water.
Additional gas tanks for Kazanka.
Gas tanks shown in
Fig. 201 , are conveniently placed between the first and second (counting from the transom) frames along the sides of the Kazanka.
The capacity of each tank is 35 l; they can be welded from 1.5mm thick aluminum alloy sheets or made from galvanized iron roofing. The tank is bent from one sheet of 750x890 mm in such a way as to create one longitudinal seam located on the top side. All connection locks on iron tanks must be soldered and their tightness checked.
The filler plug is used to secure the intake tube and place the air hole.
Gas tank for Progress.
Under the front seat of the Progress it is advisable to place a permanent gas tank with a capacity of up to 100 liters
(Fig. 202). To prevent fuel from overflowing from one side to the other when heeling (the boat may end up with a dangerous heel as a result), the gas tank is divided by several baffle partitions 3. Small holes must be made in the corners of these partitions so that the fuel flows to the intake tube 4. Air tube 2 is better bring up and onto the deck of the boat; Plug 1 can be taken from a standard outboard motor tank.
Making an expansion tank with your own hands
It is quite possible to make an expansion tank yourself. To do this, you only need a set of certain tools and materials, diligence and care.
List of required materials and tools
To create an expansion tank, the following tools and working materials are required:
- welding machine;
- locksmith tools;
- electrodes;
- Oil paint;
- metal to create a tank capacity;
- brass stopper;
- welding mask;
- rubber gaskets;
- pipes with a cross section of 200-300 mm.
Design creation process
First of all, it is worth mentioning one point. At home, it is advisable to manufacture an expansion tank only for an open-type heating system. This is due, first of all, to the fact that for a tank with a membrane, just choosing the optimally suitable membrane and inserting a nipple will take a lot of effort, time and money.
So, to create the structure we need sheet metal and pipe cuttings. Then we cook a regular rectangular/square box.
First you need to decide on the volume of the future expansion tank. The standard indicator is 10% of the total amount of coolant in the heating system.
Let's get to work. Using a grinder, we make five steel blanks for the future container. Then we weld them vertically to each other with a continuous seam. Then all that remains is to cut a hole in the bottom of the tank and the rough structure is ready.
Advice. A varnish/paint container or a truck fuel tank is also perfect for making a tank (do not consider a tank from a car, as it is usually too thin.
Let's start cleaning the inner surface of any remaining flammable mixture: hot water and a brush are suitable for this purpose. After cleaning is complete, leave the container to dry. We prepare a lid for the tank and fasten it with bolts or make a hatch.
After completing work with the lid, we make a steel blank for the fitting and weld it into the tank. Be sure to use a brass plug (do not forget to line it with a rubber gasket about 0.5 cm thick). Be sure to lubricate the fitting thread with a layer of fat or oil to facilitate the process of unscrewing it in the future.
We cover the finished tank with oil paint on all sides (inside if possible).
Since the expansion tank will be located in the attic of the house, it must be properly insulated to prevent the possibility of freezing of the liquid inside it.