Forged rose: It’s unusual, but nice to write a review about an item that will not bring you any practical use. There are many websites dedicated to welding and forging; these are popular “male” topics in RuNet. The craftsmen tell and show from the heart - some about forged chairs, others about welding seams.
But everyone has and makes their own forged roses; no one is alien to the desire for beauty and artistic creativity. Forged flowers can be made to suit every taste, but the preparation and technology for making them are the same. We read, we understand.
Preparation of materials and equipment
What materials will you need:
- Sheet metal is usually used for the petals and leaves The thickness and type of metal is a matter of taste and choice of the craftsman, but most often a sheet with an average thickness of 0.5 mm is taken. It can be cold-rolled black metal, or it can take metal from the hood or fenders of a car - it is quite thin there - up to 0.8 mm.
- For stems you need to find a suitable wire with a diameter of 5 mm or more; for options with spikes, a knitting wire with a diameter of 6 mm is more suitable - this work is more difficult. You can use rods with a diameter of 8 to 12 mm.
Forging process - drawing.
Hot forged metal roses.
Shaping the stem.
Making a flower.
The tools you will need are the simplest:
- Welding machine: better semi-automatic or inverter with 2 mm electrodes at a current of no more than 70 A.
- Grinder or grinder, metal scissors, pliers.
- Gas-burner.
- Drill with drill bits for metal from 0.5 to 1.0 cm.
- Unrefined or motor oil for finishing rose bluing.
- Metal paints, if the rose needs to be painted.
Master class on creating a rose from thin sheet steel
Friends, if you have already decided to create such beauty, but still don’t know what use to find it, I offer two options. You can give a rose as a gift to a loved one or use it as a decorative item to decorate the interior.
For work, prepare:
- thin-sheet steel - 1 sheet with parameters 350 * 170 mm and a width of 0.8 mm;
- 40 cm steel wire with a diameter of 6 mm;
- 2 nuts with M5 thread;
- metal scissors;
- punch - with its help you can mark all future holes, the center of the workpiece;
- die for cutting external thread M5;
- round nose pliers;
- compass;
- ruler;
- hammer with a striker and a wedge-shaped part;
- burner;
- drill with M6 drill (can be replaced with a screwdriver);
- medium-grain sandpaper;
- file (emery).
Progress
It should be said right away that making such a flower is quite an exciting activity, but it will require a lot of time and effort. In addition, you will need to prepare a sufficient amount of professional tools, learn how to use them, or look for an assistant.
- At the first stage, take a sheet of steel and use a compass to draw a circle with a diameter of 60, 55, 50, 45 mm onto the surface.
- Take metal scissors and cut out circles, moving clearly along the contour. If you are afraid of getting hurt on the sharp edges of the workpiece, go over them with sandpaper.
- Take a punch and a hammer and mark future holes for the center on the blanks. Work carefully, there is a risk of damaging your hands.
- Take the wire that will become the stem of the rose and sand it with sandpaper. You can use other tools if you wish. The surface should be smooth and aesthetically attractive.
- One end of the wire needs to be stripped more thoroughly. It is necessary to remove a layer of approximately 15 mm in length. The future carving of the bud will be located in this area. An inexperienced master may encounter a problem when the die becomes inconvenient to work with. To prevent this from happening, you just need to bevel the edges of the wire.
- Carefully secure the wire in a vice. Screw on the M5 thread on one side. For this work you will need a die, which is mentioned in the list of materials required for the work.
- In the next step, return to the steel blanks. Take the circles and in those places where the center punch left marks, you need to make holes with a drill. A drill with a diameter of 6 mm is suitable for these purposes.
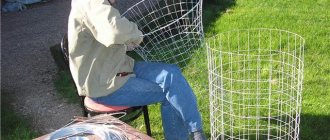
- Make a separate steel blank with parameters 50*50 mm. Cut out a star from it using metal scissors. You can use the same shape as shown in the photo or experiment. Use a hammer to give the blank the desired shape; it will become the sepal of the future rose. Don't forget to make a hole in the middle with a drill.
- Now it’s time to start shaping and decorating the flower petals themselves. Using metal scissors, divide the circle into equal slits (petals), you should have approximately 5 equal parts, there may be more. Be sure to round the edges. All the nuances are shown in the photo.
- Now you need to use a hammer to give each petal the desired shape. This stage of work is quite lengthy and labor-intensive, but here you need to pay maximum attention to detail, the appearance of the future rose depends on this.
- Now the petals need to be collected on the base. Here, carefully place all the elements so that the resulting bud looks realistic. First screw the nut onto the stud, then attach the petals and then screw the second nut. This way everything will be securely fixed to the base and the flower will not fall apart.
- At the next stage you will need to work with round pliers. This tool provides the perfect opportunity to bend rose petals exactly the way you want. You need to move from the center to the edge.
When the bud is formed, the work is finished. In this composition, some people lack leaves; they can also be created from thin steel, but to attach them to the base, you need to use a welding machine. Such equipment is not always available at home, so rely on your capabilities.
Cutting without sewing, technical stages of work
The process of creating a rose:
Making a solid forged rose.
- From sheet metal we cut out four or five, if we want a larger rose, square templates with a side length of 10 cm. In each square we draw a schematic flower with four petals, try to draw them symmetrical, but precision to the millimeter is not needed here. On the last square we draw a sepal that looks like a compass rose; exact symmetry is not necessary here either.
- If you want to make a tea rose - wide open, with numerous petals, it is better not to be lazy and prepare the templates in the following order:
- The sepal is a five-pointed star with a diameter of 7–8 cm.
- The first outer blank consists of five petals with a diameter of 11 - 12 cm.
- The second and third blanks each have four petals with a diameter of 10–11 cm.
- The fourth blank is made of three petals with a diameter of 10 cm.
- The fifth is made of four narrow petals with a diameter of 9 cm.
- We cut out the blanks with metal scissors or, if available, with an angle grinder. We do not cut to the center of the figure.
- We draw on the metal a couple or three blanks for green leaves on the stem. The size must be different. We cut out the leaves with scissors or a grinder.
- Let's take the stem. If it is a rod, shorten it to 40 - 50 cm.
- We drill holes in the blanks to attach them to the stem. The diameters of the holes and the stem blank must match. The rod or wire should fit tightly into the petals.
- Welding stage: weld the workpieces to the stem. The optimal thickness of the electrode is 3 mm, the current strength is from 70 to 100 A. The holes in the petals do not have to be made round, the main thing is that the stem touches them with at least half of its circumference. In this case, the seam and the structure itself will be strong. You need to melt more rods than petals - it’s easy to burn through thin metal.
You need to plant the workpiece on the stem, starting with the sepals. The petals should be placed crosswise, two centimeters below the upper tip of the stem. Each layer must be secured by welding - similar to a puff pastry.
Table with roses.
Roses in a jug.
Metal structure with roses.
Bouquet of roses.
Forged rose.
Metal rose.
- Now comes the most exciting and artistic part of the work: forming the rose petals! We bend the leaves of the sepals of the lower workpiece down. Turn on the gas burner and begin to gradually heat the flat petals. At this stage, moderate heating is sufficient - there is no need to heat it red-hot. We use pliers to wrap the two petals as if we were wrapping them into each other. We wrap the remaining two petals around the first two. We work like this with each layer. At the same time, bend the tips of each petal outward - in the opposite direction. At this stage, it is important to have a “free” hand: the petals should be crooked, their bends in the opposite direction should be unequal, the serifs and marks should be asymmetrical. This is the only way the flower will turn out alive and real: there are no strict geometric shapes in nature.
- Let's start with the leaves on the stem. We make small notches on each edge of the leaves. The leaves should not be flat; it is enough to bend them with your hands. We weld it to the stem carefully at the weld points.
- In principle, the rose is ready. But only in principle!
https://www.youtube.com/watch?v=MbQ8wjkkzPw
Equipment and tools necessary for making roses from metal:
- welding machine (in fact, if you are smart, you can do without a welding machine, but that will be another story.);
- Bulgarian;
- metal scissors;
- needle nose pliers;
- pliers;
- felt-tip pen / scriber.
You, as a DIY master, can completely do without one tool or another: an angle grinder can replace scissors, pliers can replace thin-nosed pliers. The only difference will be in the labor intensity of some processes.
And since we have discussed the instrument and I touched on the topic of improvisation, I will add that in fact this article is not a panacea, not strict instructions. This is a motivation letter describing technological features! The most important thing when working with a metal rose flower is not to try to replicate me or yourself. Be more relaxed. Let your movements in your work be even slightly careless, the petals crooked, and the bends of different widths. It is these movements that will breathe life into your flower!
My rosebuds consist of the following number of plates with petals:
- outer first leaf - 5 rose petals, circle diameter about 12 cm;
- second leaf - 4 rose petals, slightly smaller in diameter, about 11 -11.5 cm;
- third leaf - 4 rose petals, diameter 11-11.5 cm;
- fourth leaf - 3 rose petals, diameter 10.5 cm;
- fifth leaf - 4 rose petals, narrow like a propeller and about 9-10 cm in diameter;
- five-leaf star - it will serve as a leaf on the outside. Diameter 8-9 cm.
Metal rose leaves look like this:
- For one flower I prepare 2-4 branches of leaves, 2-4 leaves on each. Most often I use 2 branches of 3 leaves. Some average number so that the flower is not empty and does not seem like a whole bush. Again, decide for yourself, try it on, try it.
Forged metal rose stem:
- On average, I take the stem length to be about 50 cm. This makes the flower quite large and beautiful in the end with the size of the bud that I wrote above.
I also made flowers of 30 cm and 60 cm. This is the beauty of working with metal. We have a lot of options for you.
Let's start making a rose from metal.
- First of all, I usually mark out squares for future rosebud petals. I make 3 squares 12x12 cm and 3 squares 10x10 cm. To make it easier to drill a pack of similar shapes later.
- After cutting out these squares, I stack them and mark the center. Then I drill all the workpieces at once with a 6-7 mm drill. Ok, drilled. Since I make quite a lot of flowers, I have ready-made templates so that I don’t have to mark the sides of the petals every time; this is especially tedious when working with cinquefoil.
- I trace the outline and start cutting. I don’t particularly try to get into the line; in the finishing process, all the curvature of the rose petals will turn into their beauty. From personal experience I can say that it is most convenient to first cut out a circle along the outlined outline, then you should cut out one side of the rose petals from the outside to the center. Then turn the workpiece over and cut the remaining sides in the same position. You will immediately understand what I mean when you try to cut the blank along the contour without turning the sheet over. At first it will be inconvenient, because there is no marked outline on the back side. But your hand will get used to it. Mine is used to it.
- Well, the rose petals are cut out. Now let's take on the leaves. I always draw them by hand, since symmetry is not needed there, and I also cut them along the contour with scissors. I will also note here that do not be afraid to bend the metal in your hands when you follow the cut contour with scissors; later we will straighten everything out before further work.
I like to get everything ready first and then start assembling and welding as the final step. Therefore, I also cut the stem to the required length and heat it in different ways: welding, a forge, just a torch. I've tried it all. Everything is working. And I give texture to the rose stem. I crush him mercilessly! After this processing, the rose stem turns out to be of any shape with an interesting pattern. If you continue to bother, you can weld spikes by simply fusing small bumps and processing them with a grinder. I use petal circles for this job. I clamp the grinder in a vice and rotate the stem with my hands. In this way it is possible to sharpen the spikes to a sharp state.
To add texture to the metal rosebud, I use a makeshift anvil, which I scored with the sharp end of a hammer. So I just put the petal on the anvil and tap the back side with a rounded hammer. The texture is perfectly transferred from the anvil to the petals.
I make a notch on the leaves with a chisel and use thin-nose pliers to twist the rose stems into a tube. Many blacksmiths make welded leaves in their practice. The version that we make with you turns out to be more sophisticated and prettier, more lively.
Time to assemble the finished metal rose!
I clamp the rose stem in a vice so that the tip barely rises. And, following the sequence, I assemble the bud, welding each layer through a drilled hole to the stem and the previous layer of petals:
- first I lay out the star-leaf;
- then cinquefoil;
- large quatrefoil;
- large quatrefoil;
- trefoil;
- propeller leaf.
Do you feel like you've almost made a flower? Yes it is! All you have to do is play with the shape of the bud and everything will be finished.
One by one, roll the first leaf on top into a tube and use thin-nose pliers to bend the edges. Then we bend the trefoil and also bend the edges with thin-nosed pliers. And so on... Don't get hung up on one form. Try it, even if you like the rose flower in the form that is in front of you now. Believe me, there are a lot of interesting shapes. They suit different colors and occasions differently.
Metal rose bud on a stem. All that remains is to add the leaves. Add to taste; it’s impossible to overdo it or not. Are you an artist. You know better =)
Often I am asked to paint flowers in classic colors: red bud and green stem. We should not forget that in an attempt to catch up with nature, we can only show the shortcomings of a flower in front of the uniqueness of a living one. It's up to you, but now I've finally given up on painting. I try to highlight the graceful appearance of the metal by displaying it. Sometimes I brass the protruding parts. It turns out to be a very beautiful expensive vintage flower. And if it is practically impossible to give a living flower any shape, then look what you can do with our metal roses, which we made with our own hands! (only a small part of my options for performing work)
Artistic floriculture: design stage
The fact that it is necessary to clean up welding marks and take measures to protect against corrosion is clear - it is not subject to discussion. But further design processing raises many questions. The fact is that blacksmiths and welding masters are happy to make metal roses and post videos with master classes and their photographs on the RuNet. Everyone has their own technical discoveries and style of execution - roses with buds, fully opened, with and without thorns - excellent tips and step-by-step guides, choose any.
But the finishing coat is simply a problem: our craftsmen only have enough imagination for bluing - treating the product with motor oil and then heating it until a varnish film forms. Varnishing or spraying is used less often. For some reason, our craftsmen talk about painting a forged rose with colored paints in a whisper and with fear - after all, artistic stereotypes are still strong.
Meanwhile, modern design fashion for eclecticism in all applied directions gives freedom and enormous possibilities in the color and texture design of metal flowers. But in any case, the forged rose will remain special and unique - the main flower of a huge army of blacksmith and welding masters. Join us and make your own rose.
Bouquet of copper roses
I made a copper rosette as a gift. I think I liked it...:))
Let's try to rock a small bouquet of roses. It will lie on the shelf, whether in the apartment or on the street, and does not require changing the water. Copper is a worthy material that will last for decades.....
-Where is the bouquet from?
- And this was given to my great-grandmother, when she was 20....by her beloved! :)))
We will make a small one, from five roses. If you make more roses, it becomes heavier. The girl can't handle it...
…So…
We will make large, open roses, the bud diameter is about 100mm, the stem length is 700mm.
We cut the copper sheet into squares, mark the center......
Next, relative to the center, using metal scissors, we cut out four-petal blanks. There is no point in trying geometrically. We'll see how it goes. Ultimately, a little frustration in geometry will only add to the charm......J
Next, the noisiest operation in progress (hello neighbors!).
We knock out the volume. You can do it as you please, I hammer it out on a birch stump using a car straightening hammer. It should turn out something like this... 
Next, draw the stalk (or whatever it is called in flowers? J)
It's very easy to draw. We draw a five-pointed star, like in childhood, and cut it out.....
Again, without geometric fanaticism, as it turns out. ...:))
Next, we try to depict the stalks from the cut “stars”.
Do not forget to anneal the copper after each operation. Otherwise it hardens and becomes harder to work with. I anneal, for lack of opportunities, just on the kitchen stove.
Ultimately, what is planned should look something like this... :)
Let's start collecting roses. On the stem we take a tube from the air conditioner, diameter 6 mm.
We put the stalk and four petals on the tube. You can do 5-6, but it will be “thick and heavy”....:)))
At the same time, from the scraps remaining from the bud, in order to save money, we cut out and emboss the leaves. Solder them onto branches... :))
Solder the leaves onto the stem.
And we chemically treat the copper, giving it a patina color.
Drying on newspaper... :)))
It turned out to be a good patina. The chemicals are just very harmful, I could barely clear my throat and spit it out.
Basically, I should have left it that way...
But I polished it a little and “wrapped” the bouquet in copper “paper”.
This is what happened....:)))
Somehow like this…
The bouquet turned out to be about 4 kilograms, the height of the roses is 800mm, the diameter of the bud is approximately 100mm.
Thank you for your attention.;))
PS I will answer the questions of those interested... :)))