How to make wooden dishes with your own hands?
join the discussion
Share with your friends
- Pros and cons of wooden utensils
- Material for production
- How and from what the ancient Slavs made dishes
- Required Tools
- Features of the technology
Not only the original appearance and pleasant natural aroma of homemade wooden utensils make it valuable and preferable - it is equally important that it can carry a positive charge of energy, make food more tasty and healthy, and in some cases change a person’s attitude towards many things.
Caring for kitchen wooden plates
Unlike glass and plastic dishes, which do not have pores and do not absorb moisture, wooden plates require more careful and labor-intensive care :
- Treatment before use. To ensure that wooden dishes retain their beautiful appearance and serve you for a long time, it is advisable to treat them with linseed oil and place them in a preheated oven for a while.
- Washing. Wood utensils can be washed with ordinary household products using sponges and brushes. It is possible to use traditional effective remedies: soda, salt, alkali.
- Drying. Wooden utensils must be thoroughly wiped after each wash and dried in a well-ventilated place. Do not dry wooden utensils near open fire sources to avoid cracking of the products.
- Elimination of corrosive odors. The smell of mold on wood is easily removed by a solution of vinegar and water. The smell of onions, garlic, and spices can be neutralized by pouring boiling water over the dishes and rubbing with salt or sand (along the wood fibers), and then rinsing with water.
Despite the difficulty in cleaning, wooden plates are a favorite tableware among advocates of a healthy lifestyle and admirers of unpretentious simplicity.
at home. Naturally, wooden plates cannot be used for cooking over a fire, in the oven or in the microwave, but the aesthetics and natural beauty of wood in tandem with its environmental friendliness encourages many to abandon high-tech modern utensils in favor of wood.
Regardless of whether you decide to decorate your home with wooden plates or prefer to use them for table setting, such dishes will organically complement
rustic, ethnic or eco design. You can learn more about wood products as decorative accessories for interior design in Westwing publications. On the pages of our shopping club you will also find many beautiful things made of wood that will successfully complement the interior of your home.
Pros and cons of wooden utensils
Plates, bowls and cups made of wood have a number of advantages that cannot be ignored:
- they are useful for consumption simply because they are created from environmentally friendly natural material;
- wood has high mechanical strength and at the same time is light in weight, in addition, such material is able to keep food fresh for a long time;
- the wood itself is distinguished by its aesthetic appearance, and, depending on the species, has an original natural ornament - such dishes become a real decoration of the table, and it is pleasant to eat from it, but even as a decorative element such an unusual attribute looks great;
- Due to the fact that wood does not conduct heat, it is impossible to get burned on it, and food remains hot for a long time.
Another advantage of hand-made wooden utensils is the ability to create any conceived shapes according to the most unusual sketches. At the same time, the material itself is not too expensive, so making it yourself is considered financially profitable.
The disadvantages of wooden products are that they have a shorter service life compared to dishes made of glass and polymer fiber; wood can darken and crack if it is not used and stored correctly. In order for a piece to last as long as possible, it needs proper care and periodic restoration.
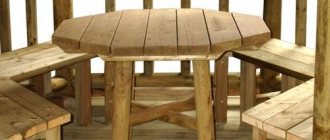
Wooden decorative plates in the interior
Wooden plates can play both a major and a supporting role in the interior, depending on their shape, color and location. Where can decorative wooden plates be placed indoors? There are several options :
- A horizontal row of plates above a door or window. Decorative dishes are hung on the wall or placed on a special open shelf on stands.
- Vertical row of round wooden plates. An excellent option for filling a wall or a narrow and long vertical plane. In this case, the dishes are rigidly fixed to the wall surface.
- Group of wall-mounted wooden plates. Placed on an accent wall
: above the head of the bed or sofa, fireplace or chest of drawers. - Single wall plate. As a rule, a large-format round wooden dish that claims to be the center of the interior composition
. - Collection of plates in a buffet, showcase. Dishes can be of different styles, similar to museum exhibits or souvenirs.
Although the plate is a dining accessory, it harmoniously fits into the design of all rooms : living rooms, bedrooms, kitchens, hallways. It is only important to correctly find the scale of the decorative spot from a set of plates and the place for its placement.
Material for production
Basic requirements for material for the production of wooden utensils:
- high-quality and ductile wood with high strength characteristics, and it is such when it is harvested recently, that is, it still retains freshness;
- the tree must be of the first or second grade, it must have a minimum number of knots;
- the presence of cracks, chips, rot and blue discoloration is considered unacceptable defects;
- in the production of food utensils, only living wood is used, and dead wood is not suitable for this, especially since they can be infected with bark beetles;
- For the craftsman making the products, the large diameter of the tree is also important, since it makes it possible to produce a large number of table accessories.
Soft varieties are more flexible and ductile; they cut well during processing, but are not used due to the lack of sufficient hardness and strength.
The most common species used for production are elm, oak, birch, maple, rowan, juniper, cedar, larch or aspen; olive and bamboo are considered suitable materials.
How and from what the ancient Slavs made dishes
In the distant past, our ancestors made different types of dishes - cut, turned, hollowed or cooper's, which were assembled from rivets and then fastened with hoops. The most popular in Rus' was turned wooden utensils - plates, mugs, mortars and glasses, as well as cutlery (pestles, spoons, ladles) were produced using this method. In addition, ancient craftsmen attached considerable importance to the healing and magical properties of certain tree species, which is why they took for their work:
- birch, dishes from which were intended mainly for women, as they could cure infertility;
- a nut that helps to make loyal friends and give vital energy in return for wasted energy;
- olive helped eliminate migraines and opened up new opportunities;
- oak, symbolizing a strong masculine principle, helped relieve ailments of the genitourinary organs and liver;
- girls who wanted to get married quickly tried to eat from dishes made from the trunk of an apple tree - there was an opinion that the female tree would help find the other half.
Perhaps modern craftsmen should use the methods of the Russians and create products that can not only serve as tableware, but also cure diseases and change a person’s destiny for the better.
DIY wooden utensils for the kitchen: all stages of processing and manufacturing
When eating, people are accustomed to using utensils made from modern materials, most often ceramics and various metal alloys. But in the old days, the majority of the population did not have the opportunity to purchase expensive utensils, so they used simple utensils made of wood and clay. Wooden utensils were made with their own hands, and many craftsmen were very successful in this matter.
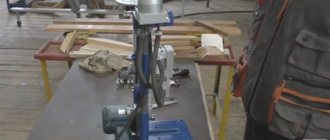
Required Tools
If you plan to produce a large batch of wooden utensils, it is best to make them on a lathe. However, before this, preparatory work will be necessary, including the preparation of material, preferably of high quality, and therefore you will need:
- inspect lumber;
- remove excess knots and minor defects;
- cross-cut the wood - divide the cross-cleaned logs into multiple parts, in accordance with the required length of the workpieces.
After turning on a grinding or turning device, the products will need to be coated with varnish (if desired, with a pattern).
But if you plan to produce a small number of products or a one-piece item, when performing manual work you can get by with a minimum of tools:
- planing device for processing a wooden surface - a plane;
- to cut the workpiece you will need a jigsaw;
- a set of hacksaws of different sizes with different teeth;
- several chisels (cutting hand tools);
- a set of cutters necessary for slotting and planing work;
- emery cloth for sanding wood.
The material chosen is full timber or boards, but waste materials that are suitable in size can also be used. Far fewer tools can be used to complete the job if the craftsman is familiar with the manual manufacturing process.
Necessary equipment
Before purchasing equipment, you need to decide on the location where the workshop will be. The equipment takes up a lot of space. A barn, garage or spacious room will do. Room temperature must be maintained at 18-22°C.
The set of necessary equipment includes: grinding device; drilling machine; lathe; a circular saw; electric plane; set of cutters; chisels; needle files; files; jigsaws; carpenter's plane.
This is a professional set that involves in-house production. Such a device will cost about 40,000 rubles.
Features of the technology
For those who are just starting to master the production of wooden utensils, it is better to start with products of simple shape.
Stages of work.
- First, they make the required blank, cutting off the unnecessary part from the lumber, but leaving a reserve, since the wood still has to be processed. If this is a plate, then it is better to take a cut of wood of the required diameter.
- Markings of the future item are applied to the blank with a marker.
- After this, the workpiece is secured using a vice and excess parts are cut off, including recesses and special relief.
- After marking the side contours, they begin a more subtle process, using a chisel or curly cutters.
- It is advisable for inexperienced craftsmen to securely fasten the workpiece and work carefully, since any inaccurate movement can lead to the removal of an excess layer.
As a result, the plate takes on its originally intended shape, but it still needs to be properly sanded using an emery stone and paper (the cloth is used for processing curved and internal surfaces).
If a design is intended (ornament, dot painting), then it should be done immediately before impregnation and coating with varnish or coloring composition.
The protective layer is necessary because the dishes are intended for food, which means the food can be hot or liquid. This can have a negative effect on the wood. But antiseptic agents, usually used for this in construction, are toxic, so linseed oil is used for these purposes. They need to saturate the product and wait at least 24 hours until it completely penetrates its structure. This is done simply - the finished accessory is immersed in boiling oil for a few seconds, twice in a row.
Another coating option is a special food varnish that is not exposed to ultraviolet radiation , water, fungal microorganisms and insects. This is a durable product that will help protect wooden utensils from low and high temperatures; its range of use is from -30 to +60 degrees. If paints such as acrylic or gouache were used for painting, varnish is applied on top and perfectly preserves the ornament. The tree can also be coated with a special glue, which is an impregnation of vegetable oil and beeswax.
Caring for plates: nothing complicated
A competent approach to caring for wooden utensils will significantly extend its life.
- Before first use, wooden plates should be coated with linseed oil and placed in a preheated oven for a few minutes.
- It is not recommended to wash wooden dishes in the dishwasher; traditional sponges and detergents are sufficient.
- Unpleasant food smells and stubborn stains can be easily removed with an aqueous solution of vinegar and hydrogen peroxide.
These rules apply not only to food plates, but also to decorative plates. Special mention should be made about them, because one cannot remain indifferent to the natural beauty of wood.
Homemade wooden plate from a multi-layer blank
Most likely, every craftsman has had a question about where to put a considerable number of pieces of boards of various types of wood that you don’t want to throw away, but where to use them is also not so easy to figure out.
We will study the technique of creating a wooden dish; it can just be made from these scraps that you can’t attach anywhere, but it’s a pity to throw away. A homemade wooden plate will be created from a multi-layer blank, have an oval shape, and its diameter will be 320 mm. You can serve dishes in it, use it as a decorative decoration, etc.
Preparing a prefabricated panel from boards.
First we will make a shield, which will become a preparation for the dish. It contains more than one type of wood glued together. There are hazelnut, beech, acacia, oak, cherry, pear. To select the species that will appear in your workpiece, use your imagination and the scraps of boards that you have in your workshop. Of course, for some, wooden dishes will not be a product that should be made from recycled materials. Then you can create masterpieces of carpentry, based on the highest standards of design. But even from waste planks you can make an excellent product, which, with a successful combination of the types of wood underlying it, will become a wonderful decoration for any, even sophisticated, kitchen.
Some of the bars in the presented workpiece are glued vertically, the rest are assembled from separate packages and then driven through a thicknesser and glued into a common package. As for the diversity of the resulting product, it’s not for everyone. In this video tutorial, a more or less homogeneous dish will be made from two species - acacia and oak.
First you need to run the boards through a thicknesser to ensure parallelism of the planes. After this, you will need to cut the blanks to the required length and glue them into one package.
After one edge is planed on each board, you need to saw each of them in width. Then you will need to glue it together.
Let's immediately mark the bottom side. We will glue the shield onto a sheet of laminated chipboard. This is necessary so that the entire package does not accidentally stick to the workbench. Next, we lay out all the blocks on one side in order.
Now apply glue to each block. Now we begin to fold the bars and press them. We tighten the package with clamps. At first, the force should not be very large, during which time the glue will have time to spread. After the clamps are installed, tighten them.
When the bars are already pulled together, remove the remaining glue. Now we just have to wait for it to dry completely. While the bag is drying, there is time to work on another piece that was glued earlier. It has dried well and is ready for processing.
It should be noted that a dish that has greater depth looks more impressive. The dish may have a hemispherical surface curved at the base. But there may be a simpler option. The most important thing is to ensure the stability of the dish on the table.
Let's start processing the workpiece.
Let's start by milling a concave spherical surface. We will mill using a simple device. It consists of a bottom template with a round neckline. A device is inserted into it. This is a disk with two racks, in which a pendulum is suspended on two axes. A router is installed in this pendulum. To mill, we perform reciprocating movements of the pendulum and gradually rotate the base. The result is a hemispherical concave surface. More details about the pendulum here.
The radius of curvature is adjusted by moving the axis to the lower position. The lower the axis is located, the smaller the radius of curvature. First, the template must be attached to the bag with self-tapping screws. Now let’s install the Fraser in the pendulum.
Milling the inside of the workpiece.
We install a straight cutter into the router. Next, place the router in the hole. We insert the rods and fix them with screws. Now let's install the pendulum into the base. For the maximum radius of curvature, we will start milling from the maximum radius of curvature, so we install the axis in the uppermost hole. Lower the router until it touches the surface and fix it.
Milling the outer part of the workpiece.
First you need to cut out the future bowl around the perimeter. It doesn't matter at all how smooth the outer edge is. The main thing is that there is an even edging. Therefore, there can be no doubt here.
Variety of plates: always relevant!
Wooden plates are widely used not only among housewives, but also among owners of pizzerias, cafes, and restaurants. And this is no coincidence, because wood is an extremely plastic material from which you can make the right product for literally all occasions. Soups are served in traditional deep plates, even “pancakes” are indispensable for chops and steaks, and the display of fish will look very impressive on elongated “boats.” There are also unusual types of cymbals, such as spinning cymbals. They put pizza on them or break them into small compartments, each of which contains something unique, for example, pieces of different cakes or pastries. By rotating the plate, the cafe visitor moves the desired element of the dish towards him, and the eating process becomes not only pleasant, but also as comfortable as possible.
Wood retains heat perfectly, so dishes that need to be kept warm are not only served in wooden plates, but also stored. Just pour the soup into a deep wooden container and cover it with a lid - and it will remain hot and tasty for several hours. In order for wooden plates to continue to delight with variety and serve for a long time, you need to follow some simple rules.
Master Class. Wood carving plates.
Today I will show you how I do wood carving. This is my first master class, I hope for your understanding and your support. Many people are interested in the process and I will briefly outline it in my publication.
1. wooden blank,
5. non-aqueous stain “Oak”
6.varnish for wood,
My assistants are the incisors.
non-water stain “Oak”, airbrush, sandpaper of 2 types (zero and coarser)
To cut a plate, we need a wooden blank. Nowadays, many craftsmen offer blanks for sale. A master I knew made a blank from cedar. Then we think about the sketch, I have a Ural nature and a capercaillie.
1. Make a drawing with a pencil.
2. And then we take the incisors and start cutting. I usually start the plates with the edging, here I have cedar branches and pine cones. I try to cut cleanly right away, so that sandpaper is practically not needed. Only at the end, to give a clean look to the product, remove the remaining pencil from the wood. You will also need sandpaper when painting the work, but more on that later. Be careful when carving, protect your fingers. Even when you cut out different products, note that cutting out a plate is more convenient in terms of cleaning.
Basically all the shavings will be inside the work
3. I check the drawing that I printed for clarity. First I work on the branches and then move on to the pine cones. Although the sequence is not so important here, you can do it as you wish.
4. Then I move on to carving the capercaillie, cutting out the outline and removing the background.
5. I am working on the plumage of a bird. The result is a plate like this.
6. I lightly sand and get ready for painting. Although lately I’ve been liking more untinted, clean wood. So there is more natural beauty in it. But the tree must be protected from many factors, dust, moisture. That's why I do the coating. I would like to try waxing my work in the near future.
At the moment I am tinting the oak with a non-aqueous stain and covering it with wood varnish. It can be either glossy or matte to suit your taste. Then I brush off the wood dust and prepare it for painting. I tint with an airbrush. Since I haven’t purchased it yet, I had it tinted from a friend, I don’t have these photos. But the tinting process is like this:
1.I cover it with a general tone from an airbrush.
photo of the compressor to which we attach the airbrush and paint.
2. I sand the plate, the paint remains only in the carving.
3. Then I coat the product with varnish on one side, it should dry. The time depends on the varnish you choose, it can dry in a day, but nitra generally dries in 1.2 hours.
4. Then I coat the back of the plate. I'm waiting for it to dry.
5. Once the product is completely dry, I sand it. Since the wood bulges a little after varnish, it becomes rough in places; it will need to be sanded and varnished again. If there are smudges, remove them with sandpaper.
A simple way to make wooden utensils yourself
When eating, people are accustomed to using utensils made from modern materials, most often ceramics and various metal alloys. But in the old days, the majority of the population did not have the opportunity to purchase expensive utensils, so they used simple utensils made of wood and clay. Wooden utensils were made with their own hands, and many craftsmen were very successful in this matter.
To understand how to work with wood correctly and how to use your skills in making tableware, you should understand the characteristics of its different varieties.
Features of wooden utensils
No material can be compared with wood. Skeptics may argue that these are relics of the past. But a number of advantages of wooden utensils say the opposite.
Advantages
The benefits include:
- Impact resistance. Does not break like ceramics or glass.
- It has no sharp corners or edges and does not cause wounds while eating.
- Does not absorb food odors.
- Gives off a pleasant smell. The aromas of pine drown out everything else.
- When exposed to high temperatures, the material does not release toxic chemical elements.
- Retains heat and food stays hot for a long time. A good help for metal thermoses.
- Convenient to carry. The birch bark cup does not heat up from the hot contents and does not burn your hands.
- Has an aesthetically attractive appearance.
- Economical in terms of cleaning.
It is strictly prohibited to place in the dishwasher. Also, do not wash with chemical detergents.
On the other hand, it is enough to spend money on alcohol, vodka or vinegar (mix with water) and disinfect it once a month. As for daily washing, the best remedy is also natural - water.
Flaws
However, there are a number of minor drawbacks. They are related to operation and care rules.
What disadvantages should you pay attention to?
- Over time it starts to get dark. Hydrogen peroxide and water will correct the situation. First, treat with a cloth moistened with hydrogen peroxide. Then rinse with water.
- Doesn't like humidity. When exposed to moisture, cracks appear. To avoid such effects, it is wiped daily with vegetable oil. And wipe dry with a towel after washing.
- Cutting boards, for example, can become warped. Sanding will help restore the surface smoothness.
What kind of wood are utensils made from?
In modern life, the role of wood has been superseded by other materials; they have largely occupied the niches of the construction and furniture industry; they have replaced kitchen utensils much more strongly. Although its production does not require the highest quality characteristics, it is nevertheless not recommended to use soft varieties of trees.
The healing properties of wood remain an important factor; each variety has its own characteristics:
- The apple tree is a feminine tree; it is believed that it helps girls in search of their betrothed;
- Olive - dishes made from olive wood promote new beginnings and relieve headaches and migraines;
- Walnut - restores lost strength and helps to find true friends;
- Linden - helps restore the energy shell; people suffering from stomach diseases are recommended to eat from linden dishes;
- Oak is a masculine tree, characterizes the strength of the masculine principle; oak dishes help in the treatment of diseases of the liver and genitourinary system. The condition of your teeth will also improve if you eat with an oak spoon;
- Birch - this wood is good for making dishes for women, it helps fight infertility;
- Apricot - dishes made from this tree will save you from energy losses and help you avoid betrayal.
A simple technology for making wooden plates
Wooden dishes still remain popular and in demand. And in this review we’ll look at how to make wooden plates with your own hands.
What material to choose for making plates? The best option is birch, linden or fruit trees (apricot, apple, cherry).
You can also use oak, hornbeam or walnut. Naturally, we immediately refuse coniferous wood - this material is not suitable for making dishes.
What equipment will you need?
In the case of serial or mass production of wooden utensils, you will need a carpentry workshop with a large number of machines that will help in performing procurement operations.
- But for the process of wood carving and other manual operations, you can get by with a small set of tools. Here is the required minimum:
- A set of saws - hacksaws should be of different sizes and with distinguishable tooth sizes;
- Chisels – it is desirable to have several chisels, both with a flat working part and with a figured one, there are 12 types in total;
- Cutters – for high-quality wood carving you need to have several cutters that differ in size and shape of the cutting element;
- Planer – ideally there should also be several of them;
- Jigsaw.
Although simpler wood products such as an olive wood cutting board can be made using half of the tools listed.
That's all that can be useful, because in ancient times there were masters who carved dishes from wood, having 1-2 tools, but their works were considered masterpieces. Today such craftsmen can also be found.
What are the benefits of wooden plates as tableware?
In a household, when many preparations in the kitchen take place in a hurry, it is easy to drop and break dishes - such a nuisance will not happen with a wooden plate. When it comes to the practicality of dishes for the garden or feeding children, durability is an important factor - wooden plates cannot be broken
– this is a fundamental point. Those who want to surround themselves with natural, environmentally friendly household items are skeptical about unbreakable plastic dishes and definitely opt for wooden plates.
Wooden plates are often made from fruit or coniferous
wood species, thanks to which food is saturated with useful substances: phytoncides and antiseptics, and acquires an additional, subtle and pleasant aroma.
Any dish eaten from wooden utensils will taste better. Food made from linden plates will become a little sweeter, while wooden plates made from cedar will give the food a subtle taste
of pine nuts and pine needles. It is convenient to store food in cedar dishes - it does not spoil for a long time. Plates are also made from wood species that do not have a special smell and do not change the taste of food - these include beech and oak.
Wooden dishes retain heat well
– if you need to keep the preparations hot for a long period, then it is best to place the food in a deep wooden bowl and cover with a lid. It’s not for nothing that Italians use flat wooden pizza plates – this way their traditional dish stays hot for a long time, and it also looks more aesthetically impressive. Quite often they use wooden plates to serve steaks - fried meat goes well with wood and looks more appetizing.
Wooden plates are beautiful with their naturalness and textured pattern.
, which does not require any other decoration. Pleasant transitions of brownish-red or honey-golden tones, alternating wavy lines of growth rings - plates made of wood are unique, even with a completely laconic round shape, without decorative frills. But if you want something original for serving food, then you can buy wooden plates decorated with carvings or a burnt motif.
Wooden plates create an exceptional atmosphere at the table, filled with comfort, tranquility and warmth. Complete with wooden cups, sugar bowls, cutlery and other tableware items, wooden dishes will look just wonderful.
Technological features
Wooden utensils can be varied, but the example given considers making a plate or spoon from wood blanks.
- The first thing you need to do is select or cut a workpiece of the required size; for spoons it will be a block measuring 300x50x50 mm, and for a plate a cut of wood of the required diameter will be suitable;
- Depending on the available tool, the workpiece is given its original shape and a recess is made where necessary. To do this, first use a flat and then a figured chisel.
Advice! If you have not worked with wood before, or your experience is limited, then it is best to clamp the workpiece in a vice during processing, this will deprive it of mobility and will help you use your strength more correctly.
- Drawing a design - it can also be cut out using a cutter, if you have never done this, then you should start with a simple pattern consisting of straight lines;
- Applying a protective layer - the dishes are in constant contact with liquid and hot dishes, they have a negative effect on the wood; in order to moderate it, protective coatings are used.
Advice! Before starting the procedure of cutting a pattern, you need to draw its outline on the cutting site with a pencil; professional carvers do not do this, but for a beginner such an outline will be of great help.
It is important to know! It is strictly prohibited to use conventional antiseptics for wooden utensils as protective materials; they will cause chemical poisoning.
- Natural oil, most often linseed, is used as a material for opening. After the oil is absorbed, and at least a day must pass, you can proceed to the next step;
- For maximum deep soaking, dip a spoon or plate into boiling oil for a few seconds; it is better to repeat this procedure twice.
Already finished wooden utensils are called “linen,” which means that all rough operations have been completed and you can begin painting. Painting is a creative process that should be performed by people with artistic talents, but no one forbids you to practice this art on wooden utensils made with your own hands. To fully immerse yourself in the painting process, you need to study the main styles with which kitchen utensils were painted in the old days.
The basic principles of working with wooden utensils are outlined above; having studied them, you will be able to take the first steps towards acquiring new skills, and perhaps find a new hobby for yourself.
Prepare material for dishes and their bases
Using a band saw, cut out round blanks for each dish and base, adding an allowance of about 6 mm (see “List of Materials”).
On one side of each piece, make a pilot hole for the lathe's threaded center.
Note. The 22mm deep hole, corresponding to the length of the threaded center of our four-jaw chuck machine, almost reaches the bottom of the small dish. So we only drilled 16mm deep into this piece and added a 6mm thick plywood washer to the threaded center before installing it.
Make copies of the profile templates, glue them onto thick cardboard using spray adhesive, and carefully cut along the contour lines. The turning technique for all dishes and bases is the same, only the dimensions change. The templates indicate sizes corresponding to the letters indicated in the figures and text.
Grind the base from the outside
Tools: 10 mm wide groove cutter, cutting cutter.
Rotation speed: 600-1000 rpm.
Secure the threaded center in the lathe chuck and install the base blank, screwing it into the central hole. Rotating the workpiece, mark on it the radius A indicated on the corresponding template. Using a groove cutter, reduce the diameter of the workpiece to the marking line. Place the tool rest perpendicular to the turning axis and align the end side of the workpiece. Mark the 5mm projection, the height of the base (dimension B ) and the diameter of the projection (dimension C ).
Place the tool rest parallel to the turning axis again. Use a cutter to form a lip, starting from the edge. To make flat shoulders, press the side edge of the cutter against the part you just cut, moving it towards the center. Turn off the machine and make sure that the shoulders of the projection are flat (see “Tipmaster” below). After turning on the machine, mark the width of the hangers (6 mm). Moving the cutter from the bottom to the protrusion, grind the side surface of the base. As you work, control the shape of the base using a template. Once you've finished turning, sand the curved surface with varying grits of sandpaper, ranging from 150-grit to 320-grit. Do not sand the lip.
Master's advice
Check flatness and depth with a ruler
A small steel ruler will help you control your work when leveling a flat area and removing a cavity. Press the edge of the ruler against the end of the workpiece to check its flatness. If it is not cut straight, the straight edge will either wobble at the highest point near the lip, or you will see a gap underneath it at that point.
And when making recesses in the dish and base, a template helps to check the depth and correctness of the shape, but it is better to use it at the end of the operation. To control as you work, apply straight-edged scraps to the part. Measure from its bottom edge to the bottom of the recess to find out the depth and compare it with the final depth (dimensions D or H) indicated on the template.
Select the cavity in the base
Tools: 10mm wide groove cutter
Rotation speed: 800-1200 rpm
Remove the base from the threaded center and remove the threaded center. Clamp the base tab into the chuck jaws. Level the bottom of the base, giving the piece its final height. Mark a 6 mm wide rim around the edge and begin to select a recess, working with the cutter from the edge to the center. Turn off the machine from time to time and check the result by comparing the D and the shape of the recess with the template. Once the cavity is finished, sand the surfaces with 320-grit sandpaper. Turn off the machine and apply a finish coat inside and out. (We coated the piece generously with linseed oil using a brush, then ran the machine at low speed and wiped off the excess with paper towels. Then we stopped the rotation and buffed the surfaces with a soft cloth, repeating this procedure four times.) Remove the base from the machine and set it aside .
Grind the bottom of the dish
Tools: 10 mm wide groove cutter, parting cutter, meisel bevel cutter
Rotation speed: 600-1000 rpm
Re-attach the threaded center in the machine chuck and place the dish blank on it. Find the center of the workpiece and use the appropriate template to mark the outer diameter (radius E ). Grind the perimeter of the workpiece to this line, then level the end side. Mark the recess (radius F ). Start forming the indentation with a cutter, not reaching the marking line, to make an indentation of a slightly smaller diameter. Take a slanting cutter and level the bottom of the recess. Check to see if the lip of the finished base fits into it. Borrow the edges of the recess little by little until the lip fits snugly.
Quick tip! Work to tolerances no larger than the thickness of the paper. Apply two layers of masking tape to the top of the lip and use the lip as a template to guide the depth. When the shoulders of the lip almost touch the underside of the dish, the required depth has been achieved. Remove the tape after turning is complete.
Mark the shape of the underside of the dish by placing marks 6 mm from the edge of the recess, indicating the beginning of the rounding. Set aside dimension G of the arc, and mark the thickness of the rim 5 mm next to dimension G. Grind the bottom side to the shape, first processing the area between the first two marks and checking the result with a template. Sand the underside with 320-grit sandpaper and apply the finish as you did on the base. Do not apply coating into a recess.
Dish cavity turning
Tools: 10mm wide groove cutter
Rotation speed: 800-1200 rpm
Turn the workpiece over, removing the threaded center, and secure it with the chuck jaws from inside the recess. Level the top side and give the dish its final height. (You marked the thickness of the rim in the previous step.) Start cutting out the cavity by working from the edges to the center, gradually increasing the inner diameter until you reach the outer diameter line. Continue removing material from the edges toward the center until the profile of the cavity matches the contour of the template. (The Craftsman's Tip below describes how to make a large dish cavity.) Sand the inside of the piece with 1-50 sandpaper; 220 and 320. Apply the same finish as before. Once the coating is dry, glue the corresponding base to each dish, placing a weight (such as a small plastic bucket of water) in the dish to compress the glue tightly. Once the glue is dry, brush on a final coat of oil coating, wipe off excess and dry thoroughly before adding food to the dish.
Master's advice
How to add stability to a large dish? Turning and polishing the largest dish requires attention, and it is best to do these operations in stages, working from the edges to the center. If you try to grind the walls straight to final thickness, they may start to bend as you sand the rim.
To avoid this, first grind only the outer third of the diameter, giving the walls the required thickness. Then give this part of the dish a final sanding, holding the rim with your left hand to give the thin edges support. Finish turning the cavity by removing the thinnest chips towards the center, and bring the wall thickness to the required thickness, ensuring a smooth transition so that the outer part merges with the inner. Then give the center part of the cavity a final sanding.